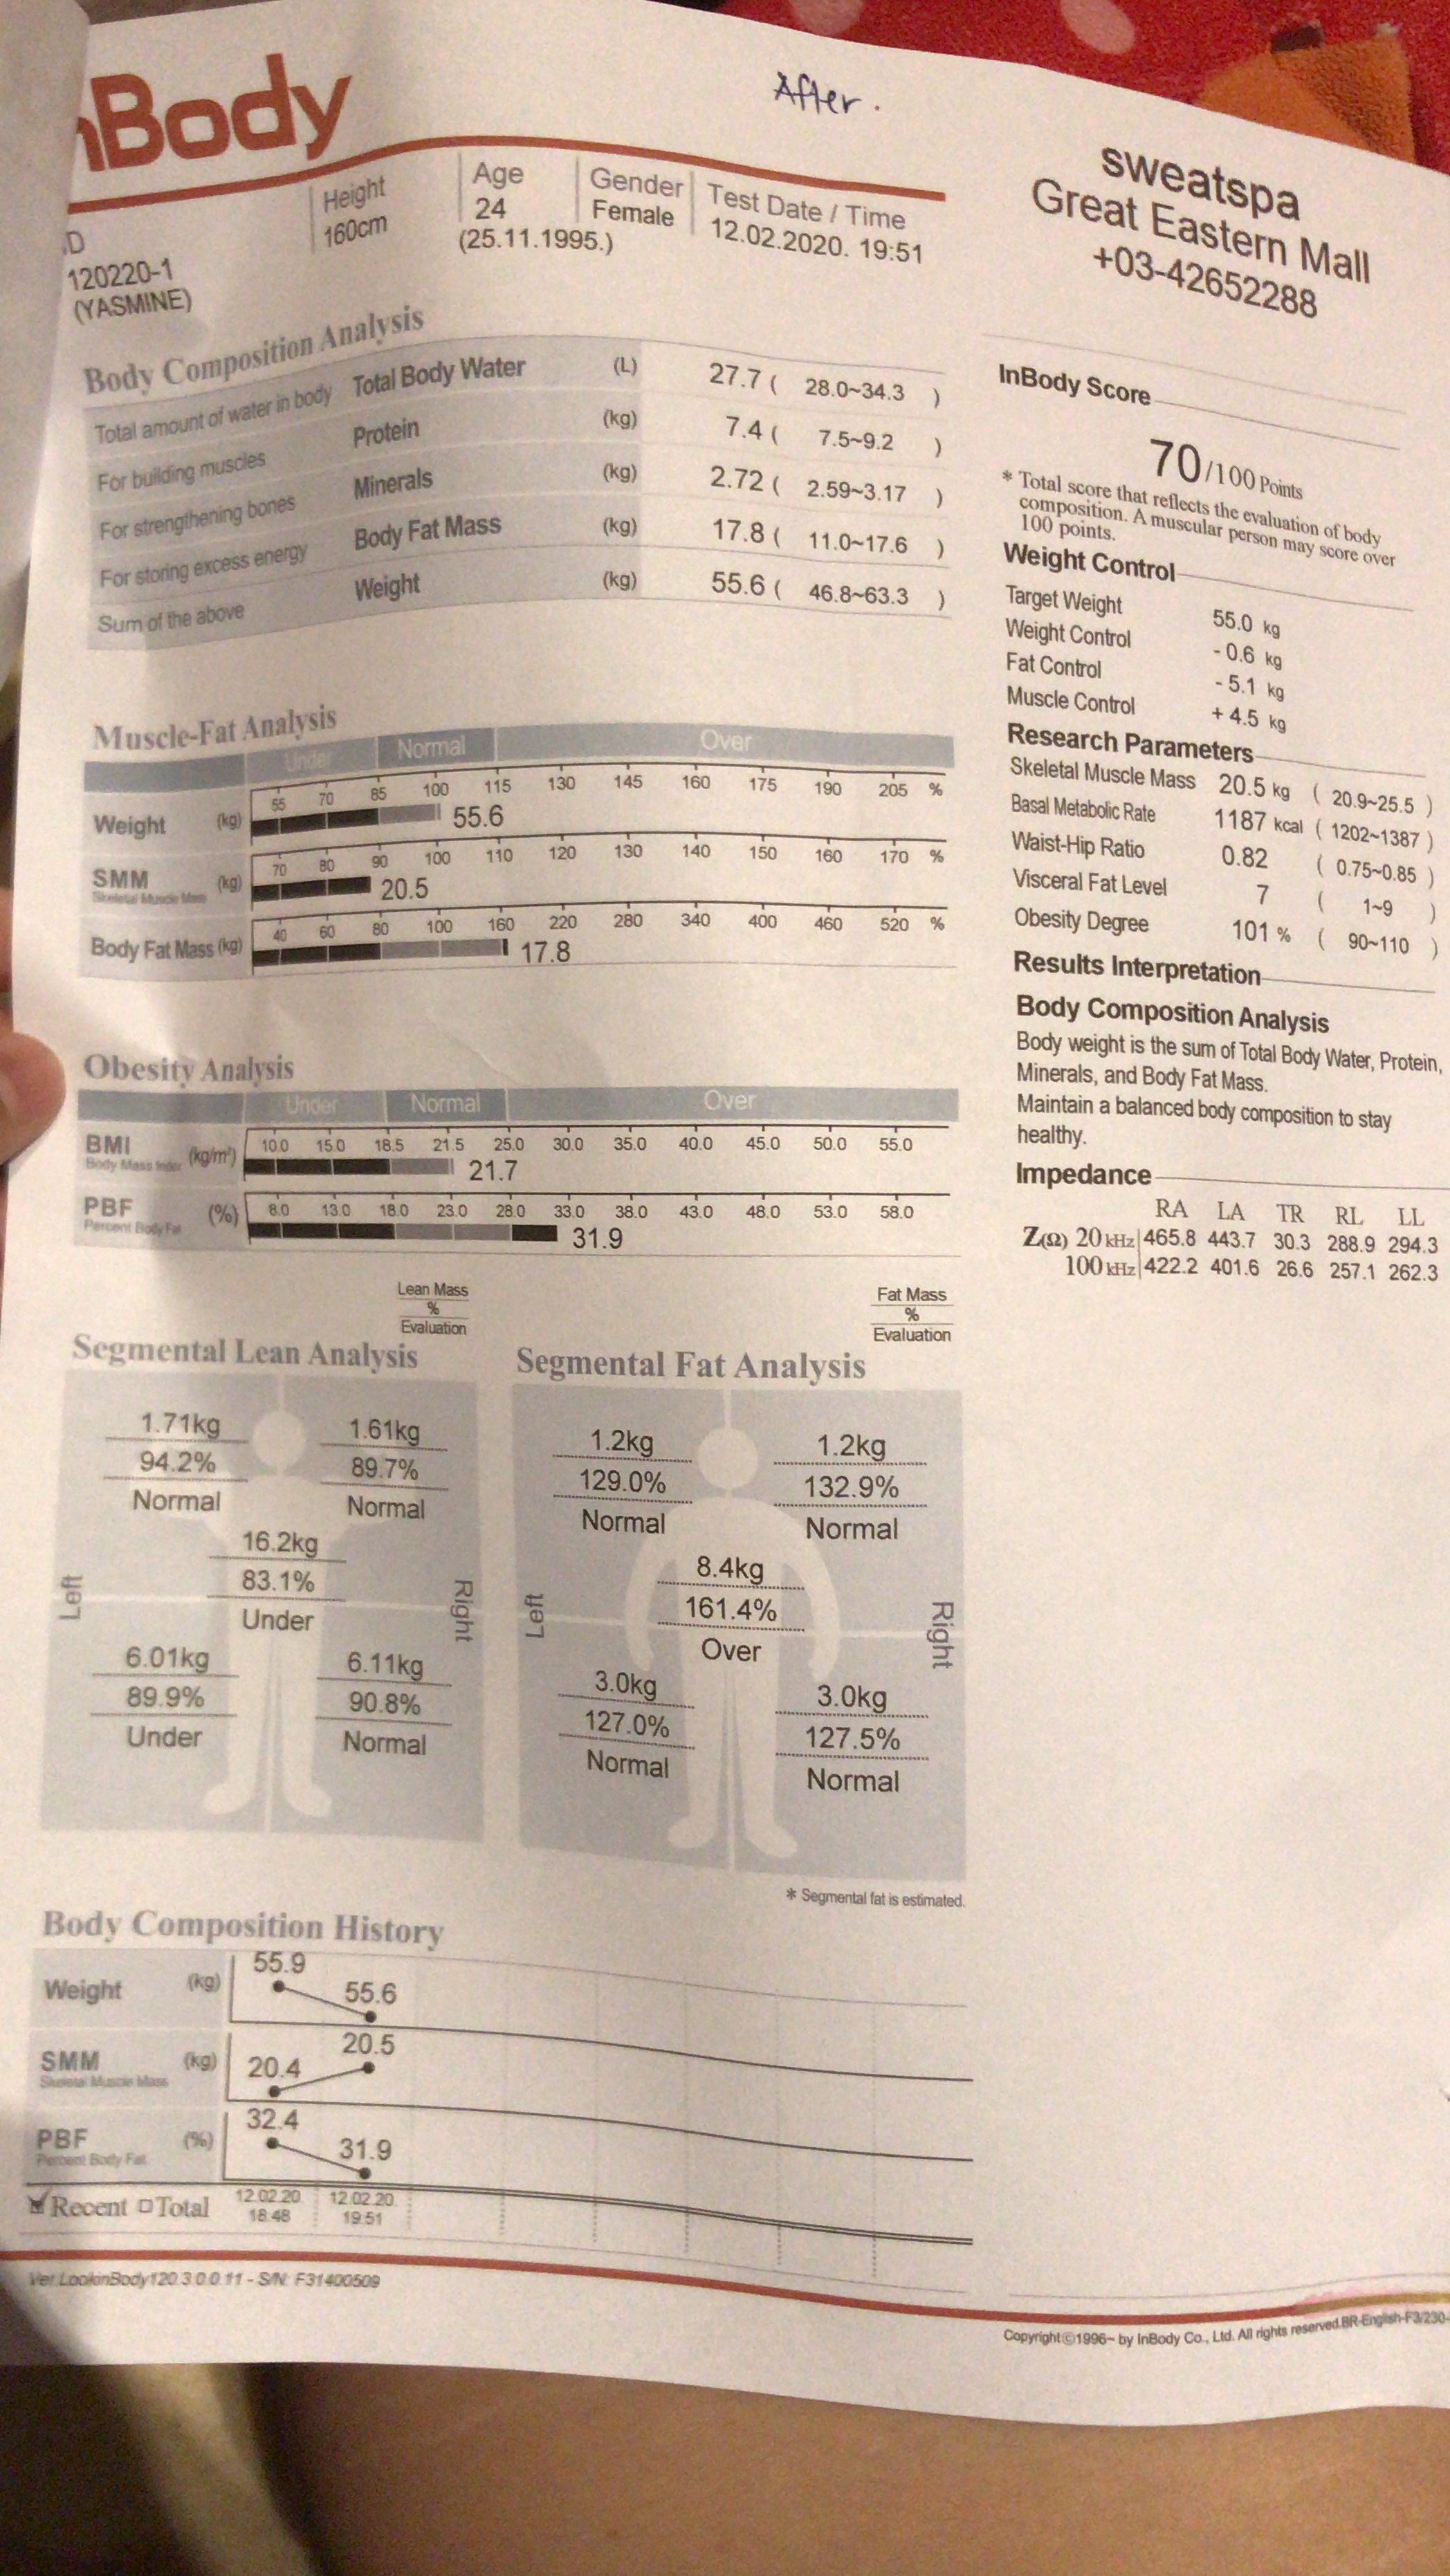
Mt Kinabalu: highest point of Malaysia

Hello folks!

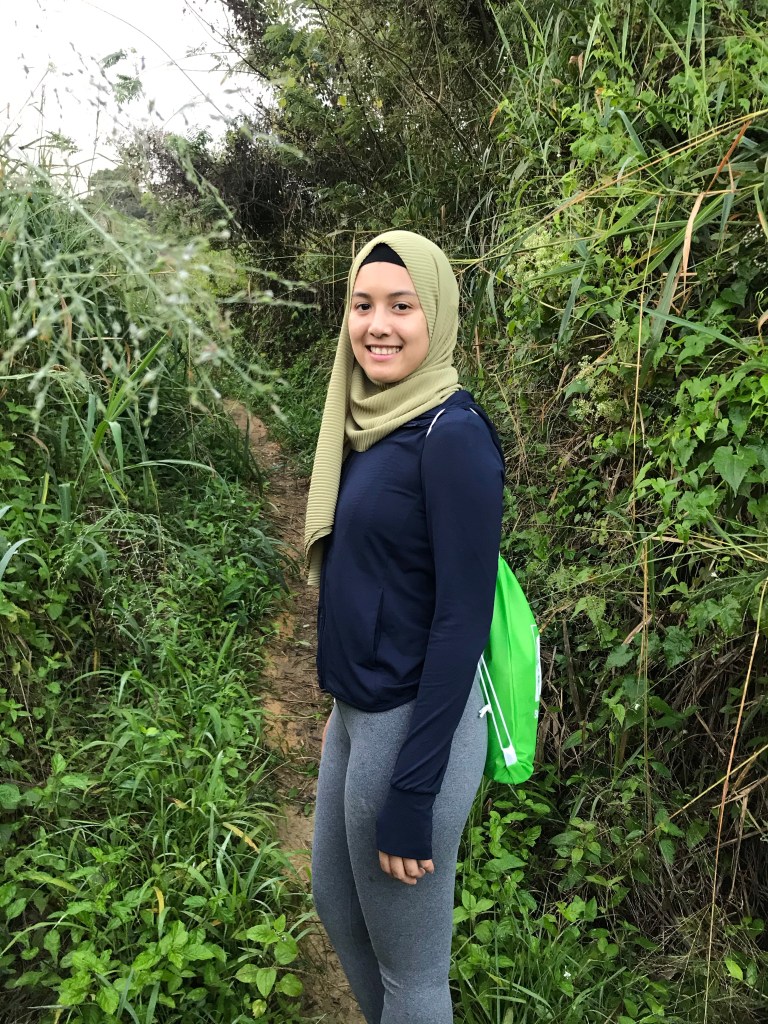
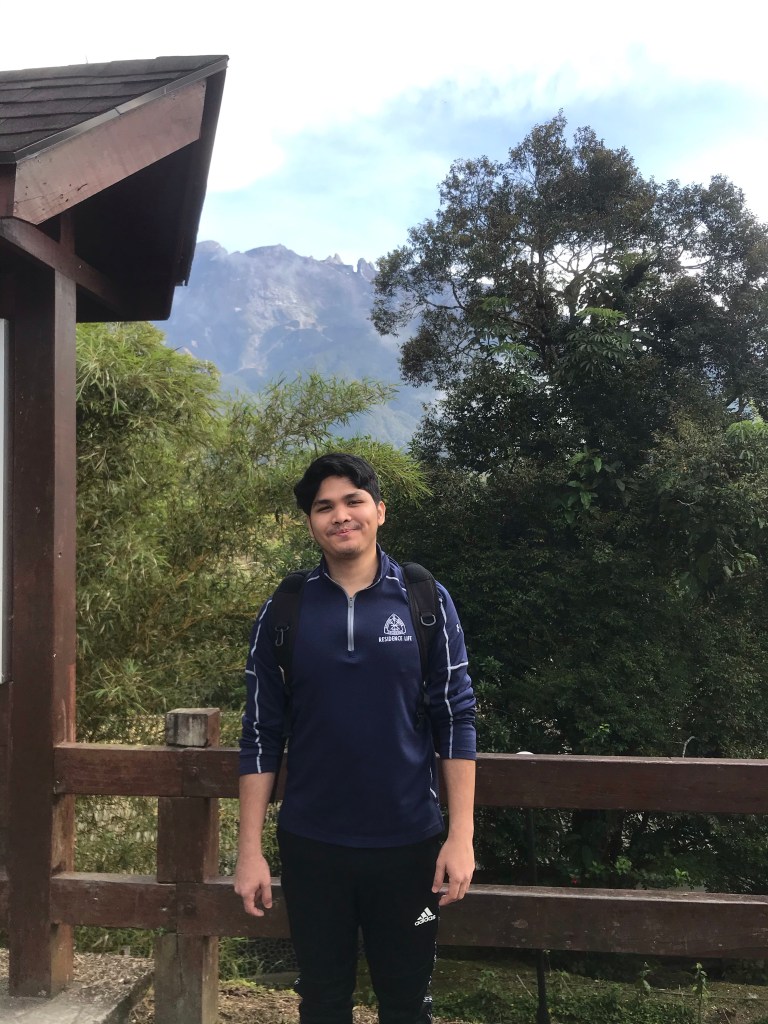
Today’s post will be interesting because Fahim and I are going to talk about our 2 day/ 1 night hike on the highest peak of Malaysia, Mt. Kinabalu. This trip is very dear to our hearts because we have been talking about scaling it ever since our college days, and that dragged on until sometime in October of last year, when we decided to finally give it a go. The trip became possible when a friend of mine told me that she was planning to hike too, and that she found a guided trip at an affordable price. Safe to say, we were both hooked, registered both our names and bought flight tickets right away!

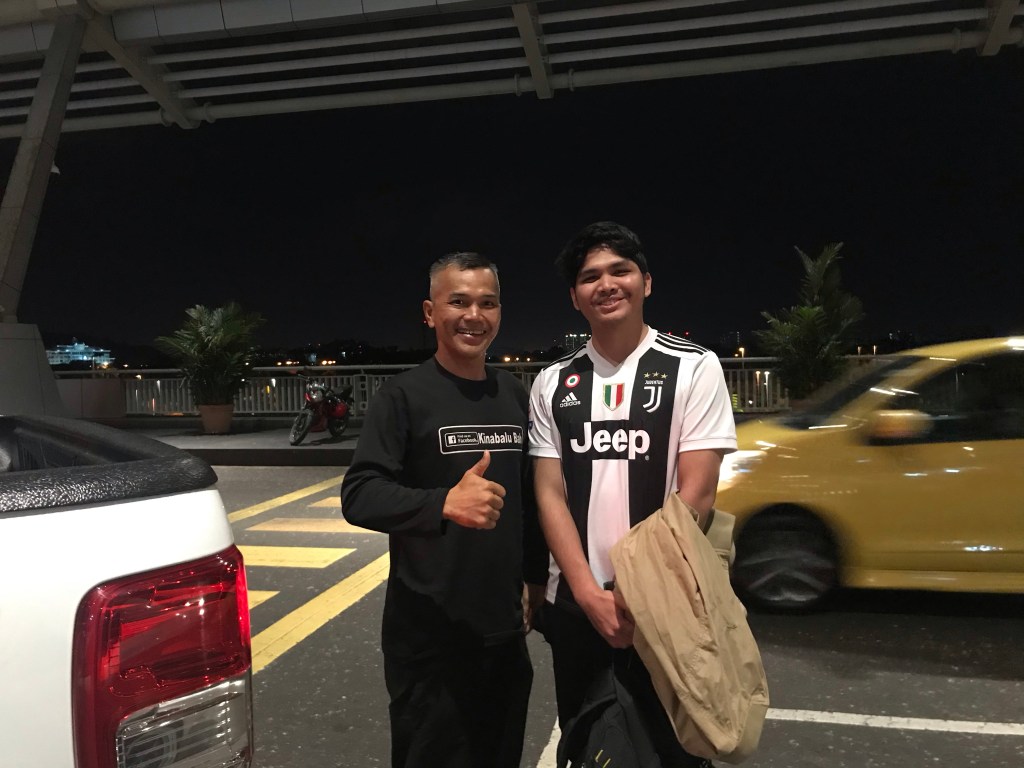
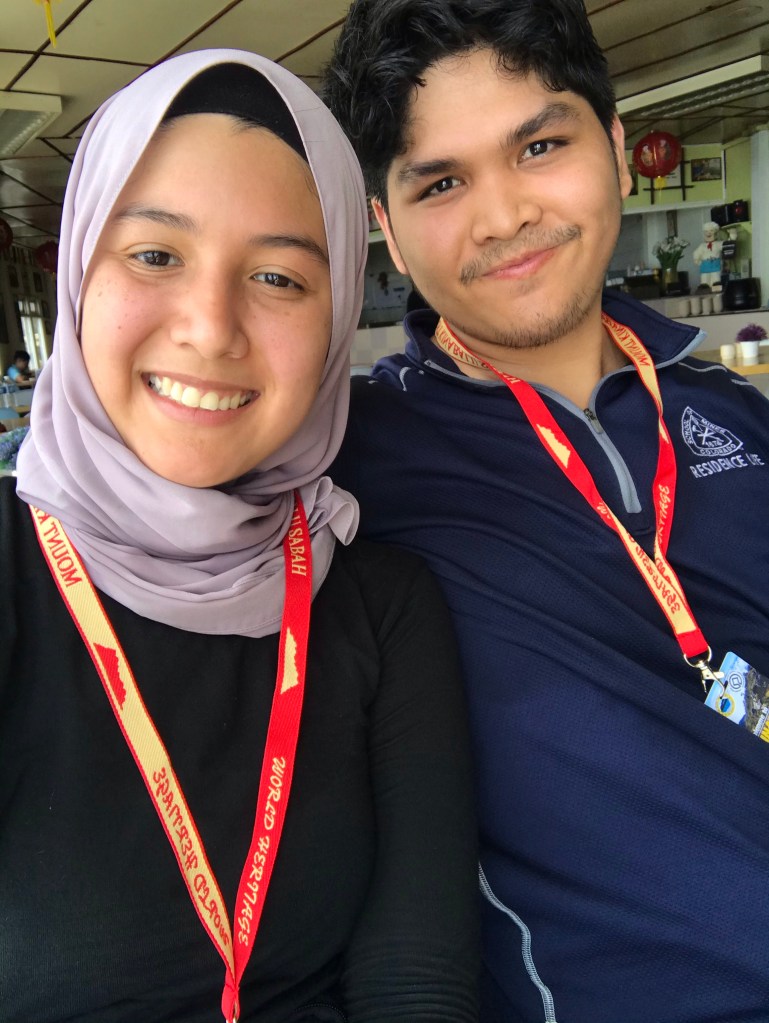
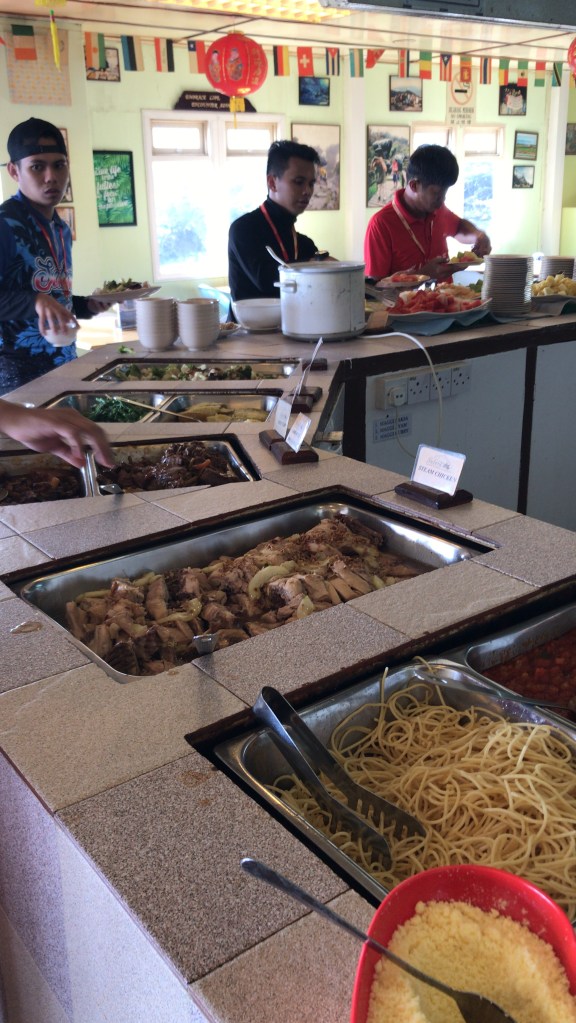
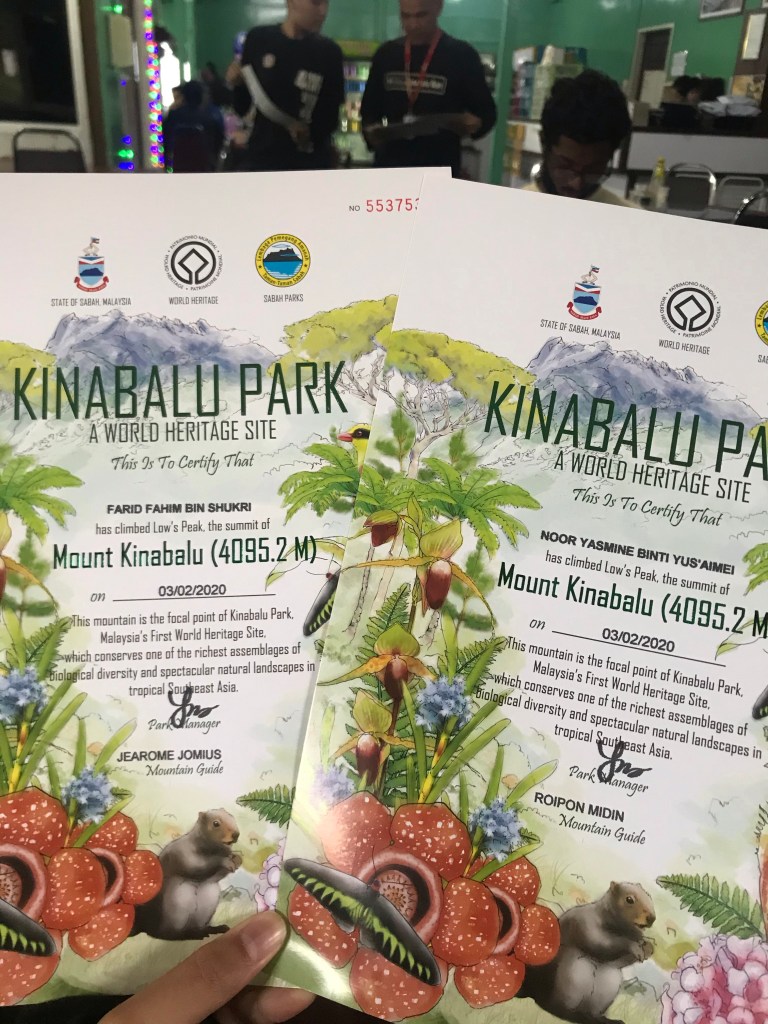
Firstly, we would like to introduce our extremely skilled yet generous guide, Jaffri from KinabaluBah. We would recommend many others to choose KinabaluBah (ain’t a sponsored post, by the way) because our trip was only RM700 per person! The expenses include your overnight stay at Laban Rata, permit, certificate, buffet meals for the entire 2 days/ 1 night stay (breakfast, lunch, dinner, supper, breakfast next day and late lunch the day after), three local yet expert guides and a ton worth of pictures the whole way. Also, Jaffri is extremely friendly and kind, and would ensure that you get to the peak and back safely no matter what! He would wait for you if you need some time to recover from AMS, or would carry you if you injure yourself, and he has all the supplies needed to help you get back on your feet and to get that colored certificate everyone have been dreaming of!

Click on this link to redirect to Kinabalu Bah facebook page.

With En Jaffri of Kinabalu Bah
En Jaffri, his daughter, Alisya and us.

First of all, here are some important info on our Kinabalu hike:

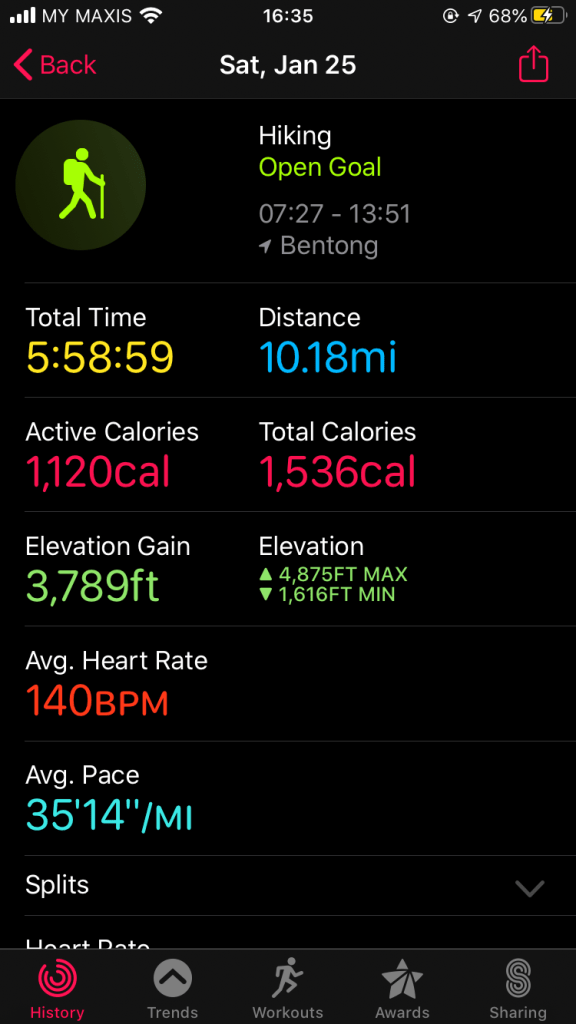
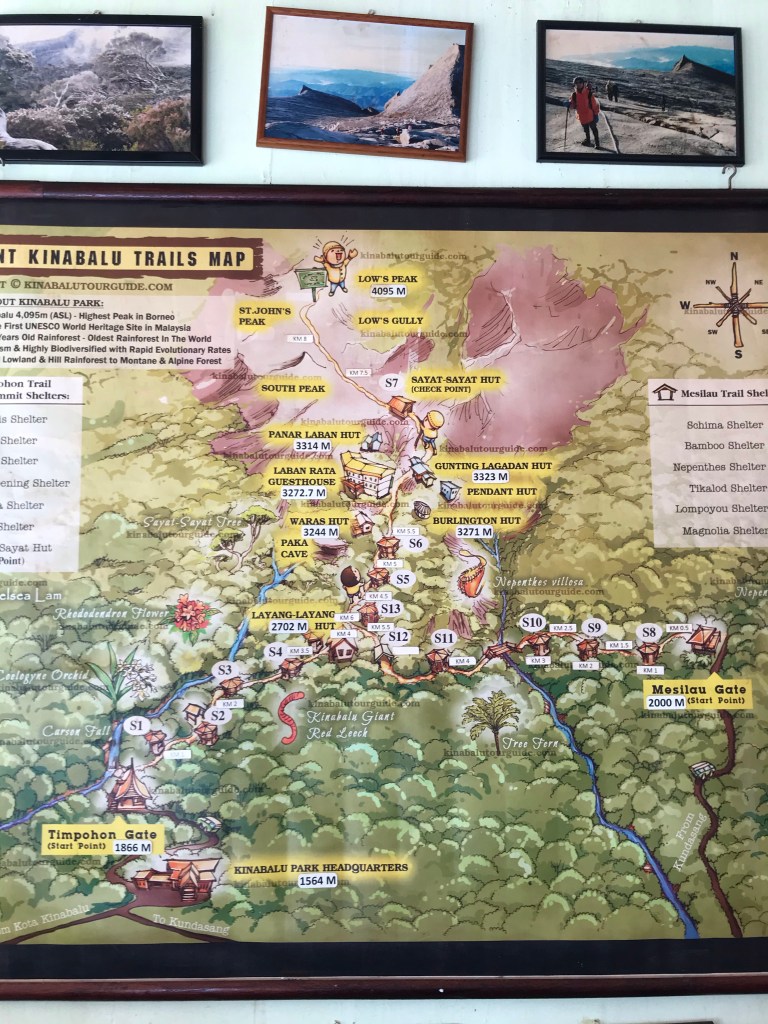
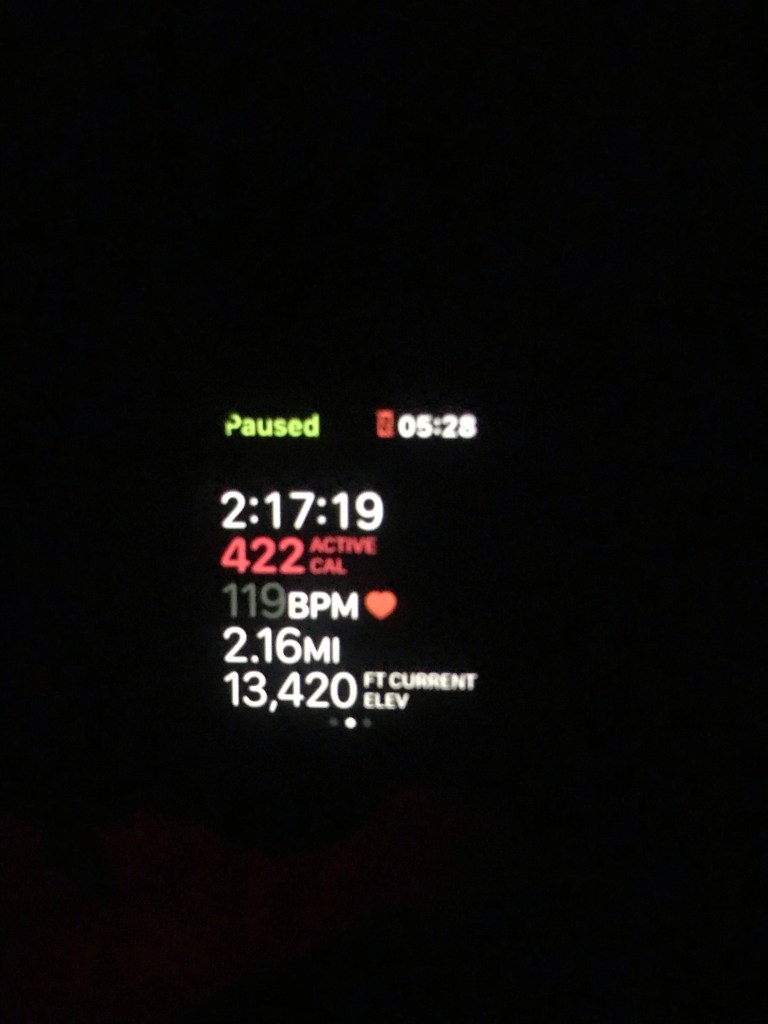
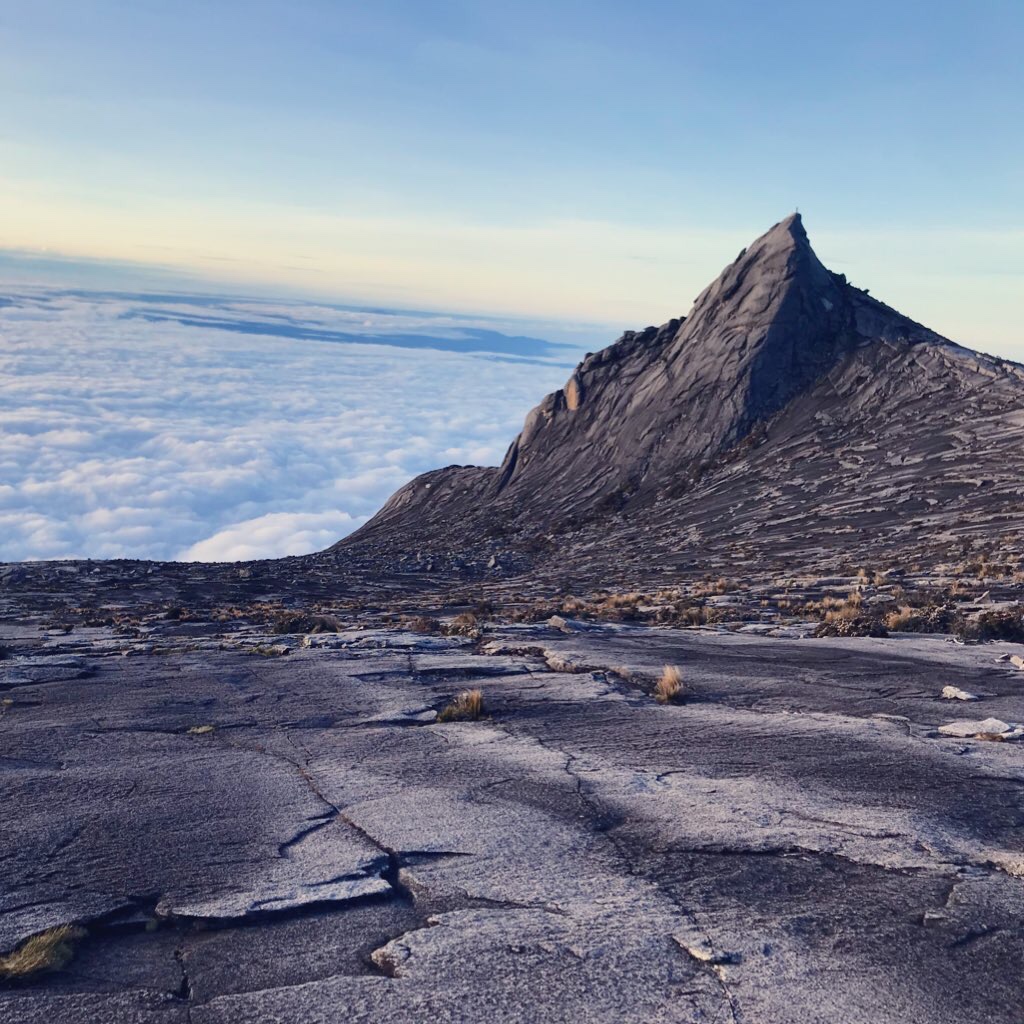
1. Summit elevation: 4095 m/ 13, 435 ft

2. Route: Timpohon trail

3. Distance: 8.7 KM each way

4. Duration: 2D/1N

Anyway, this was our itinerary of the whole trip:

First day (2nd Feb 2020)

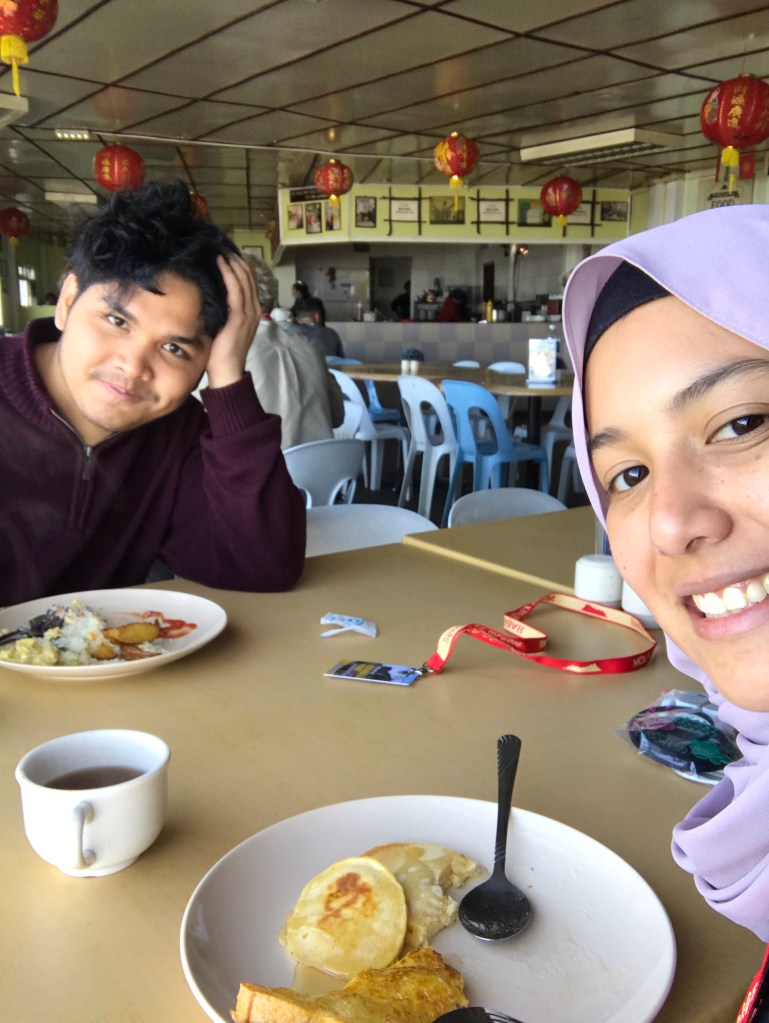
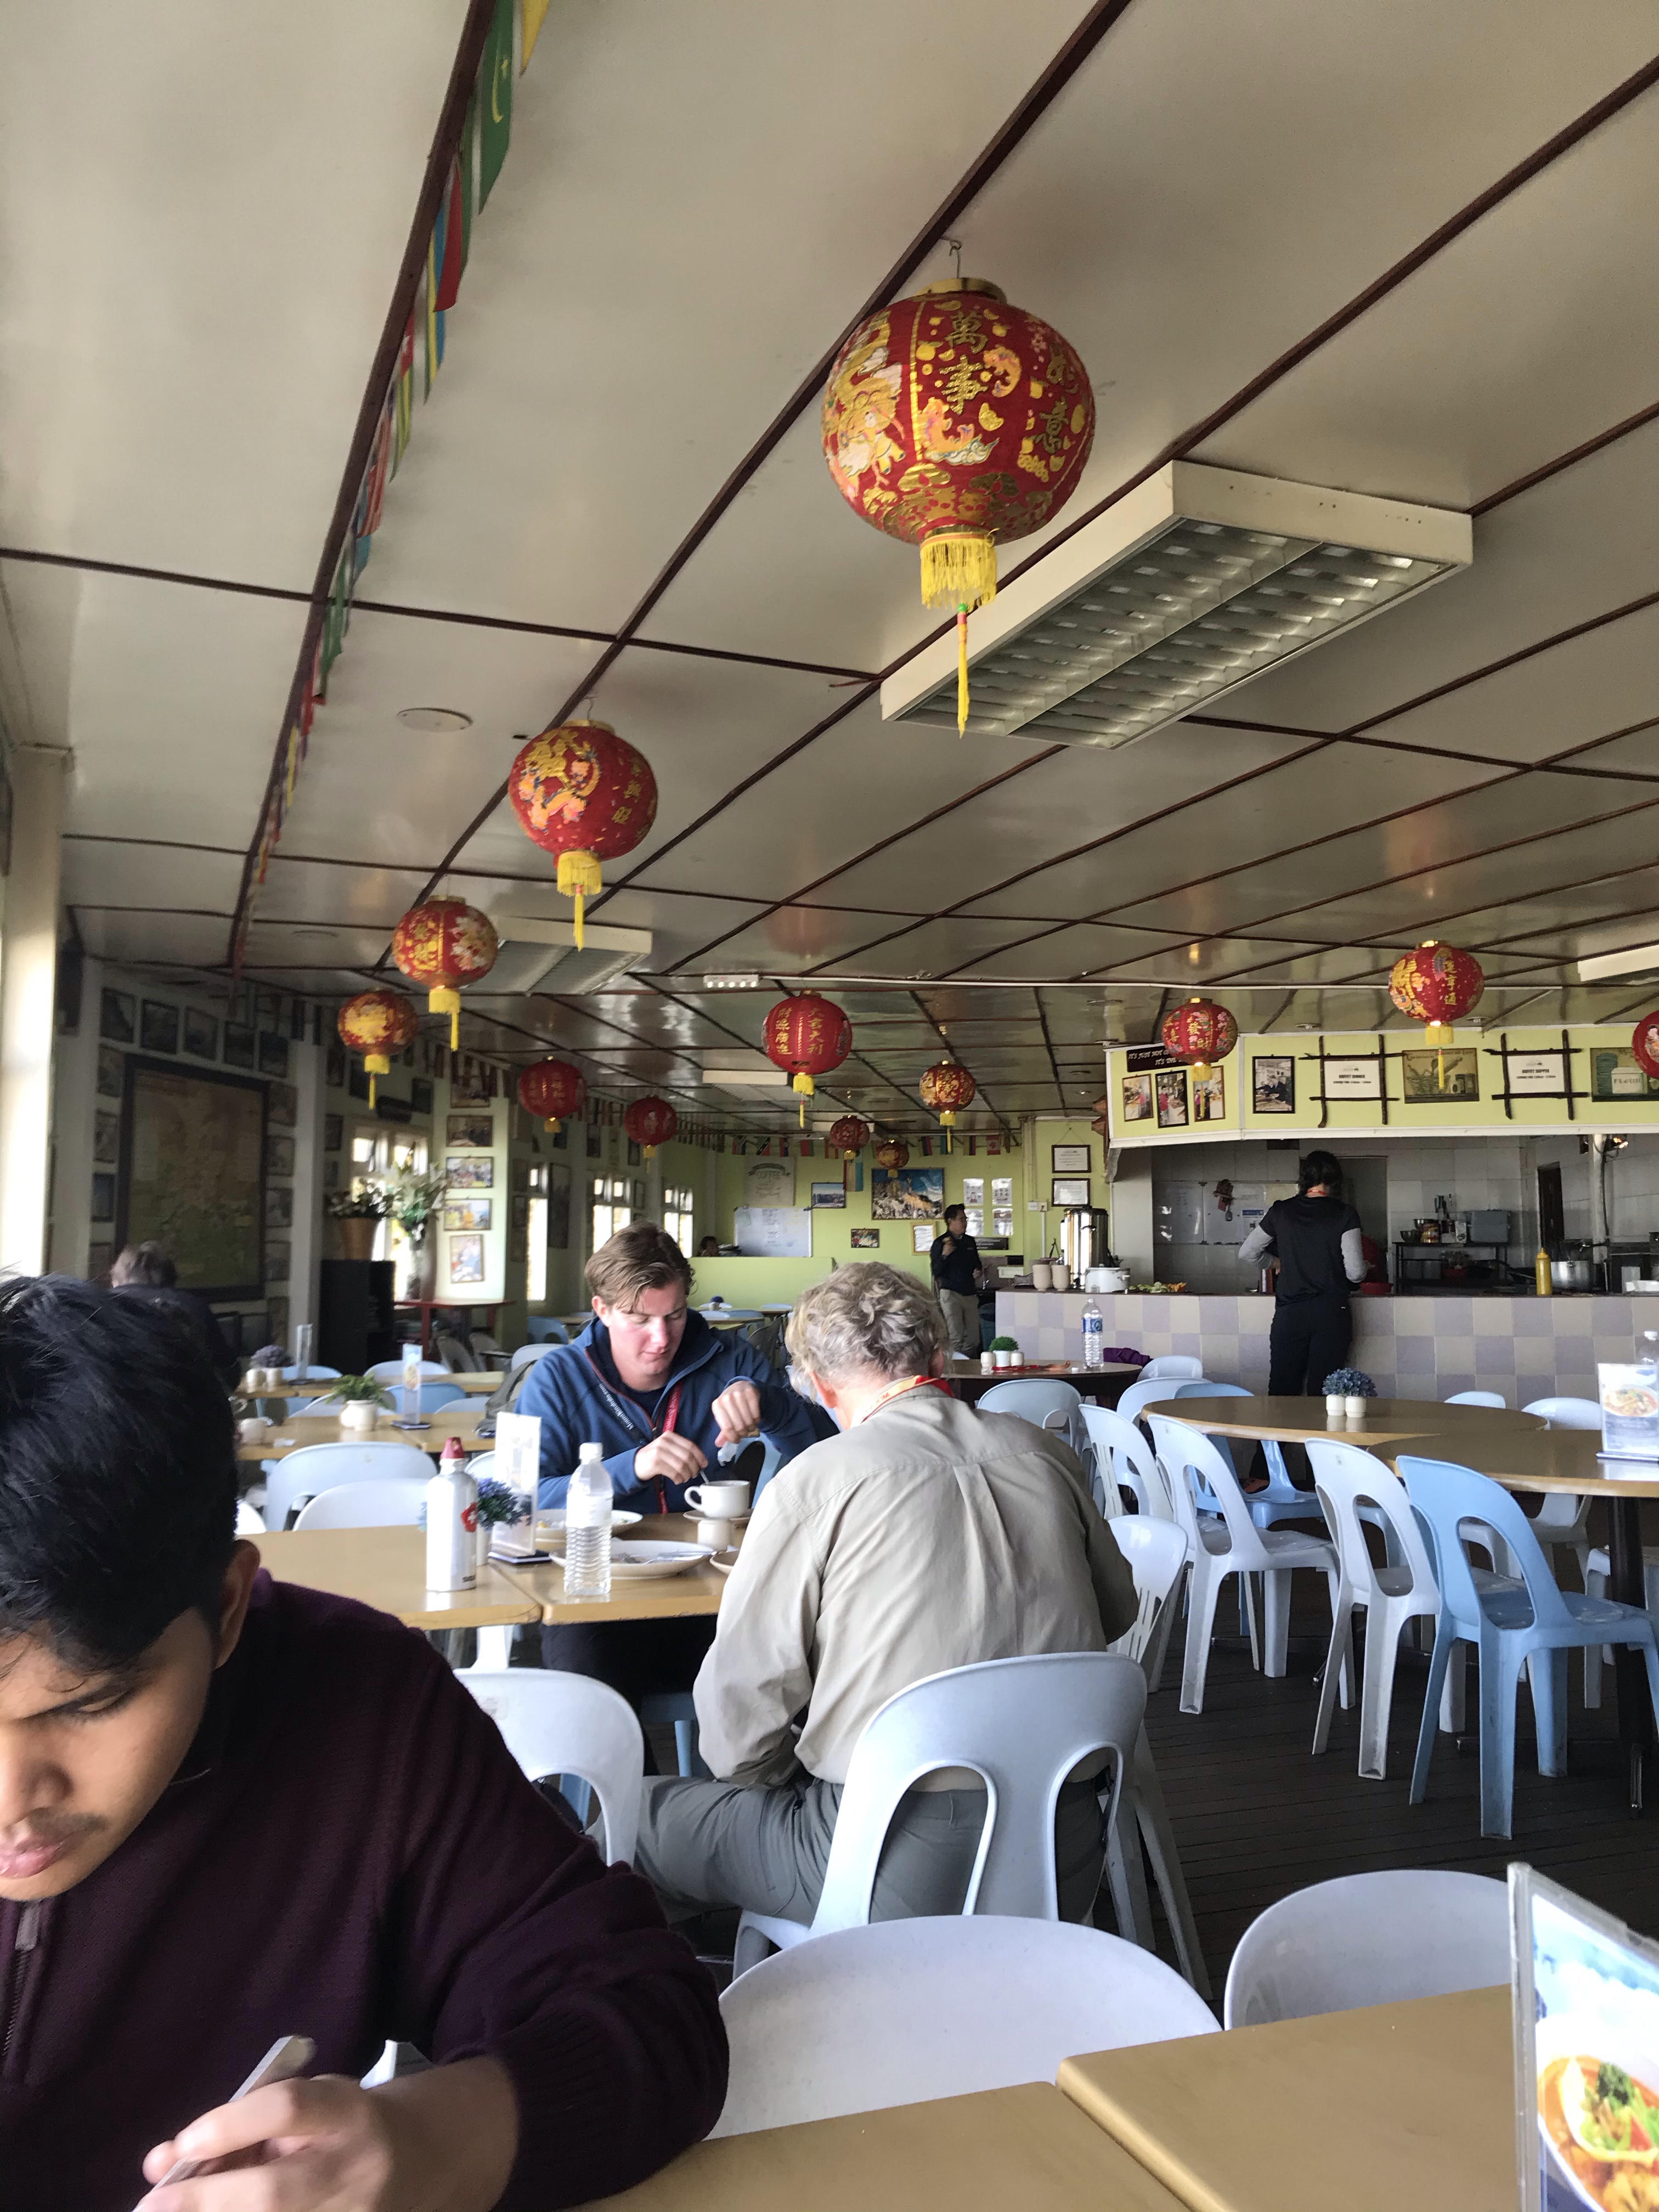
7am: Breakfast at Restoran Panataran

This restaurant sits literally outside of the Kinabalu Park, and the main dining spot for hikers alike. The breakfast was also included in the trip expenses.

Breakfast 🍳 menu. Pretty decent too, don’t you think?

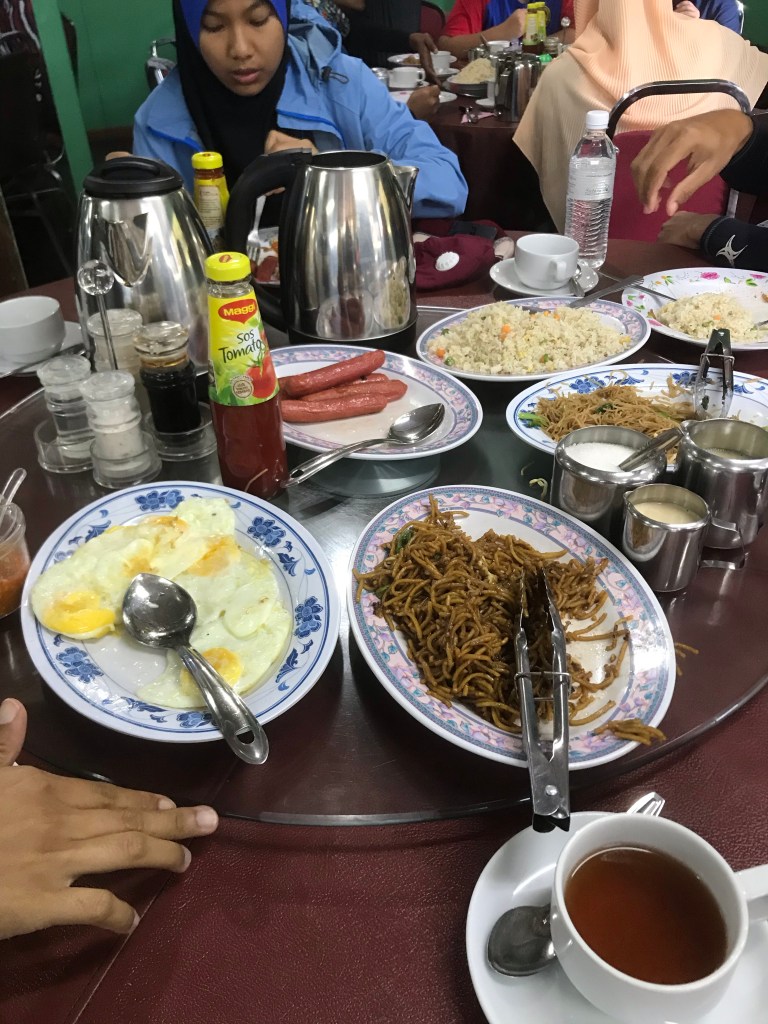
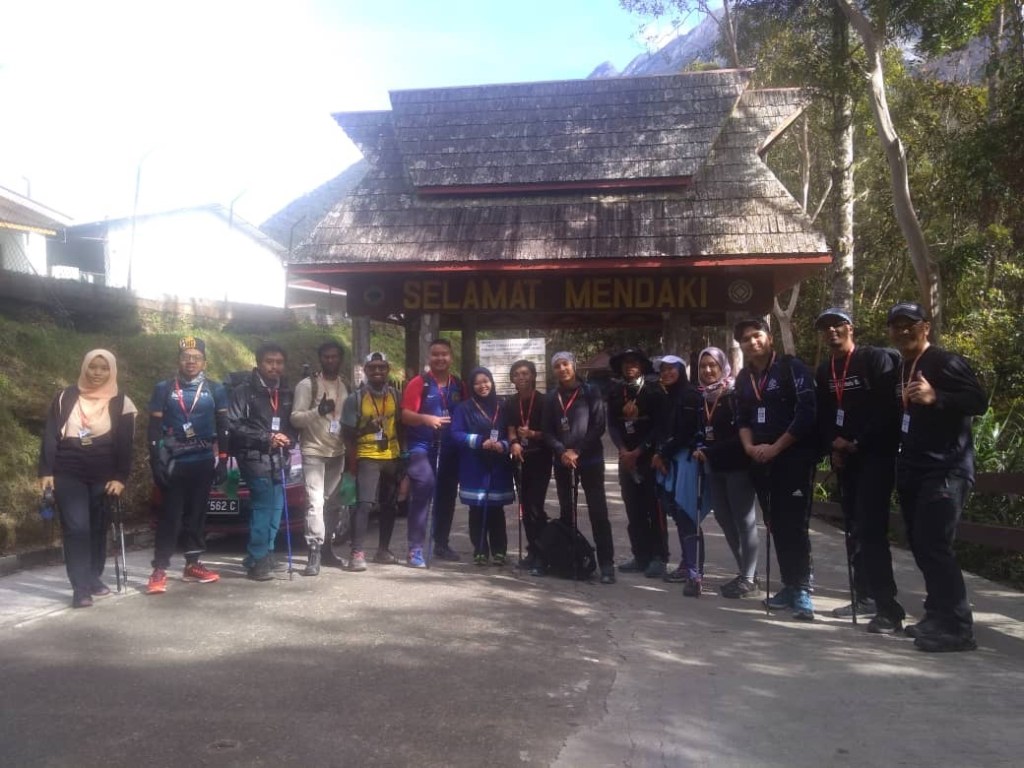
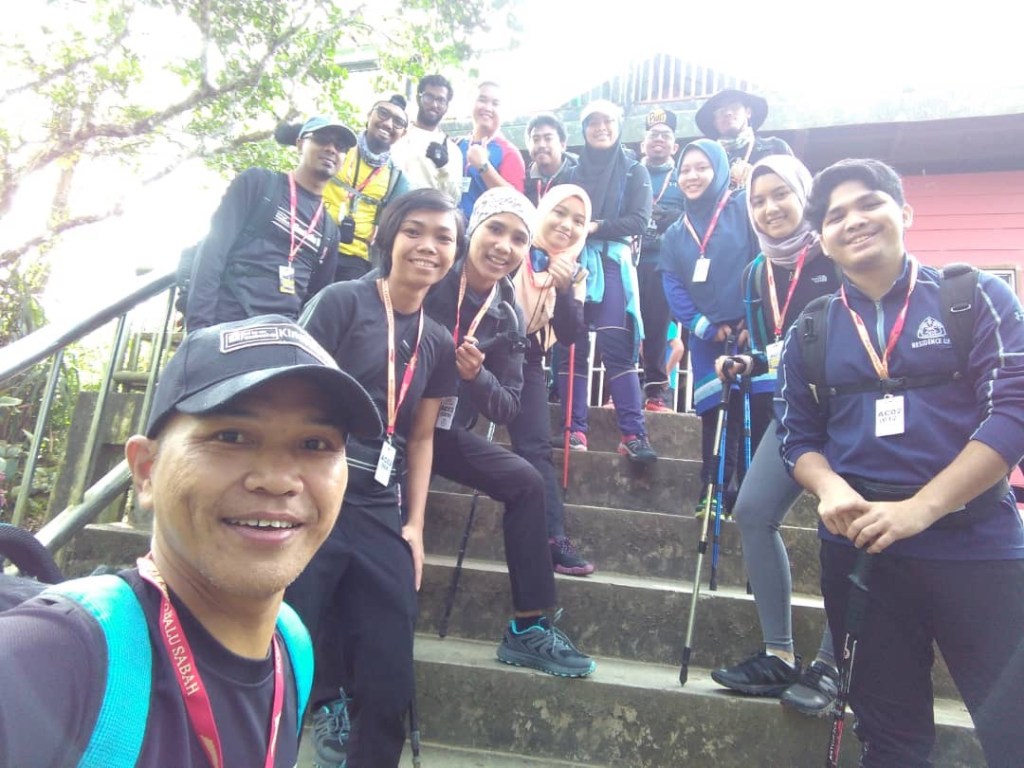
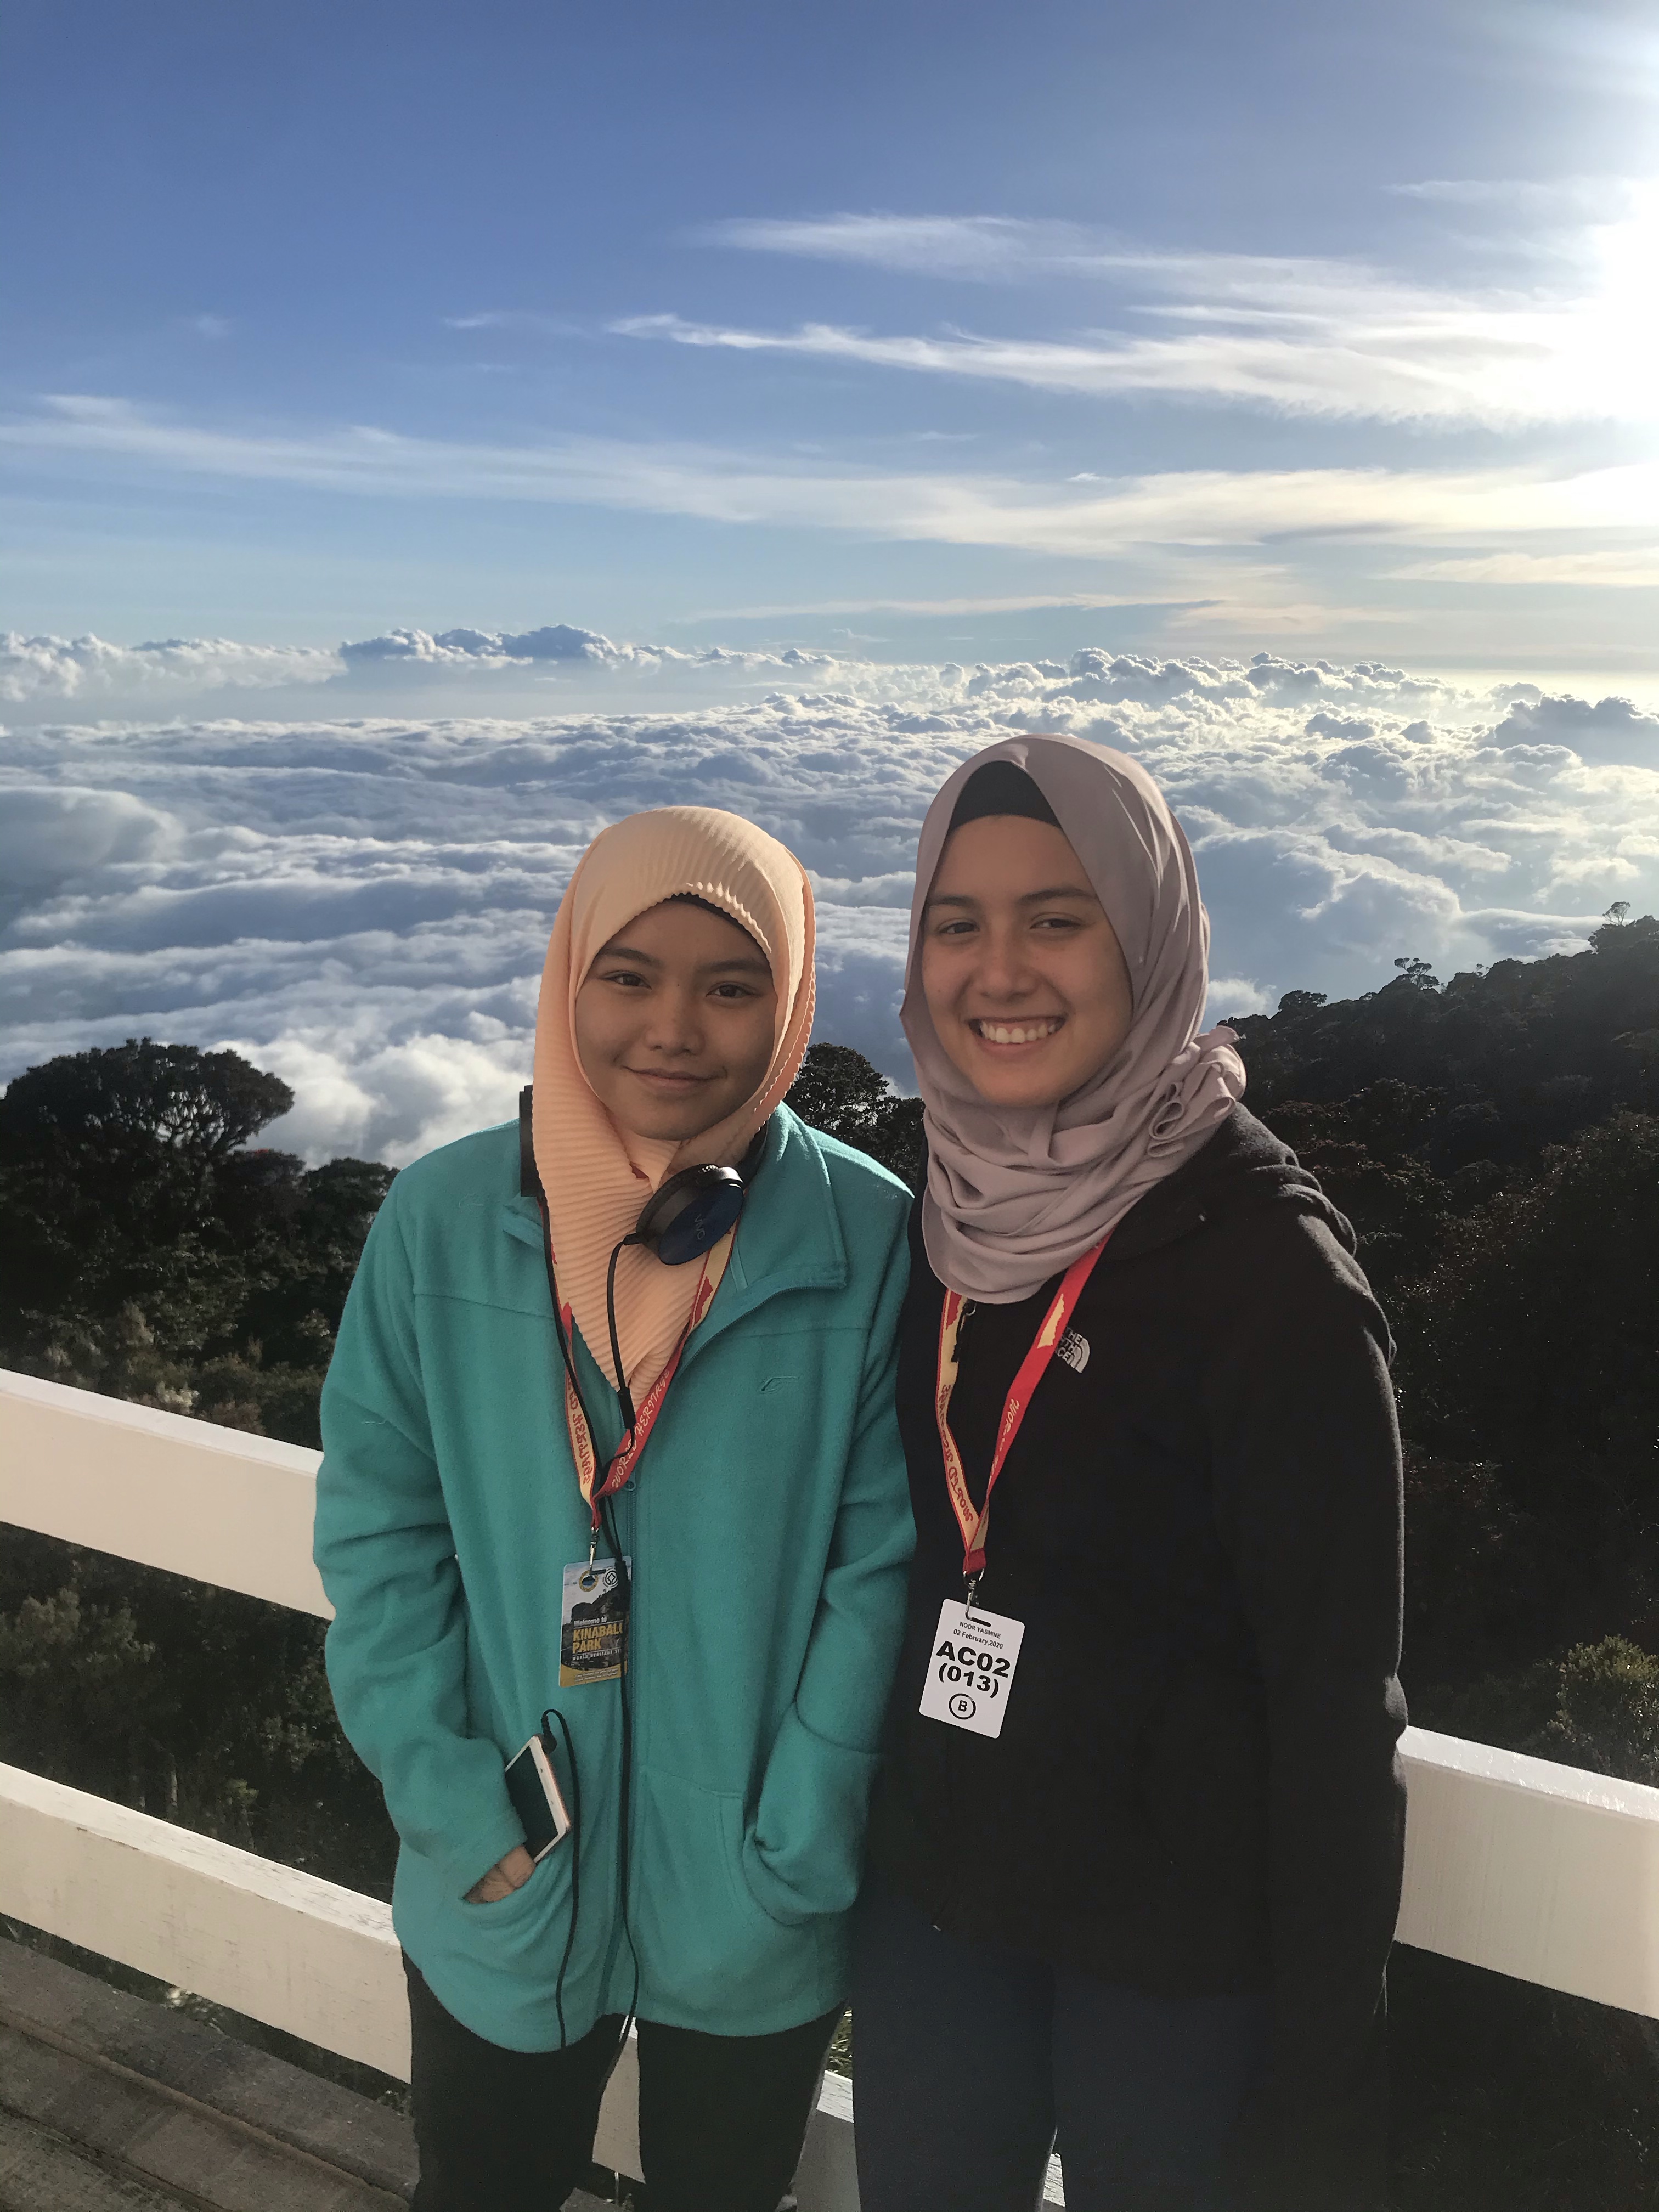
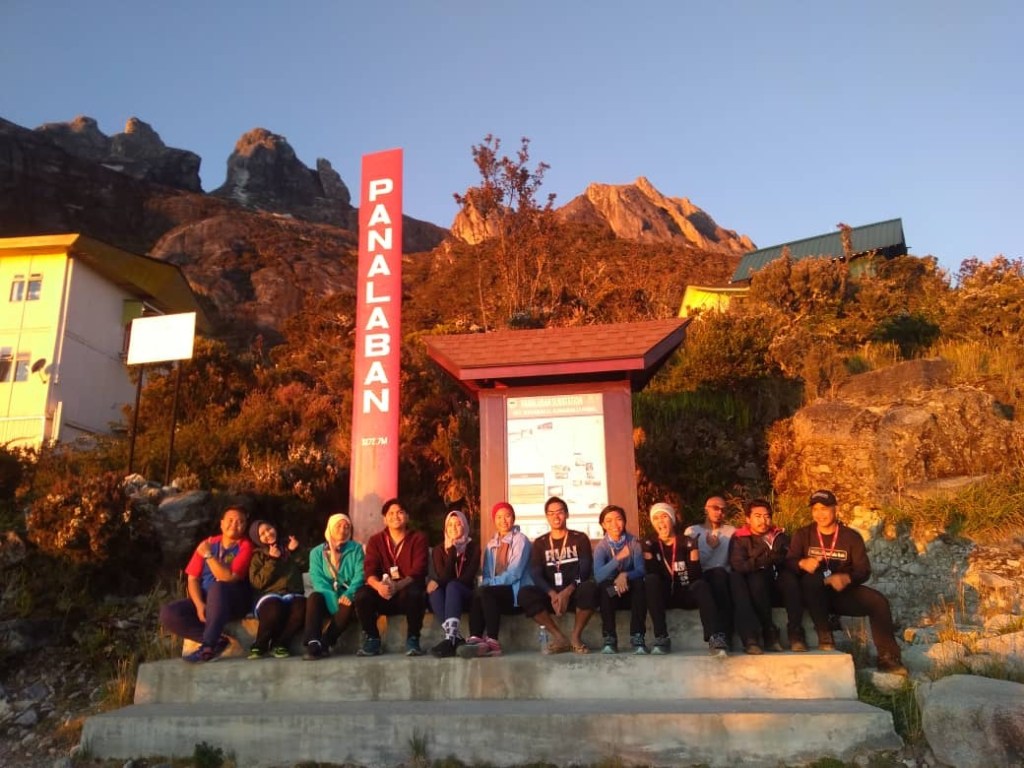
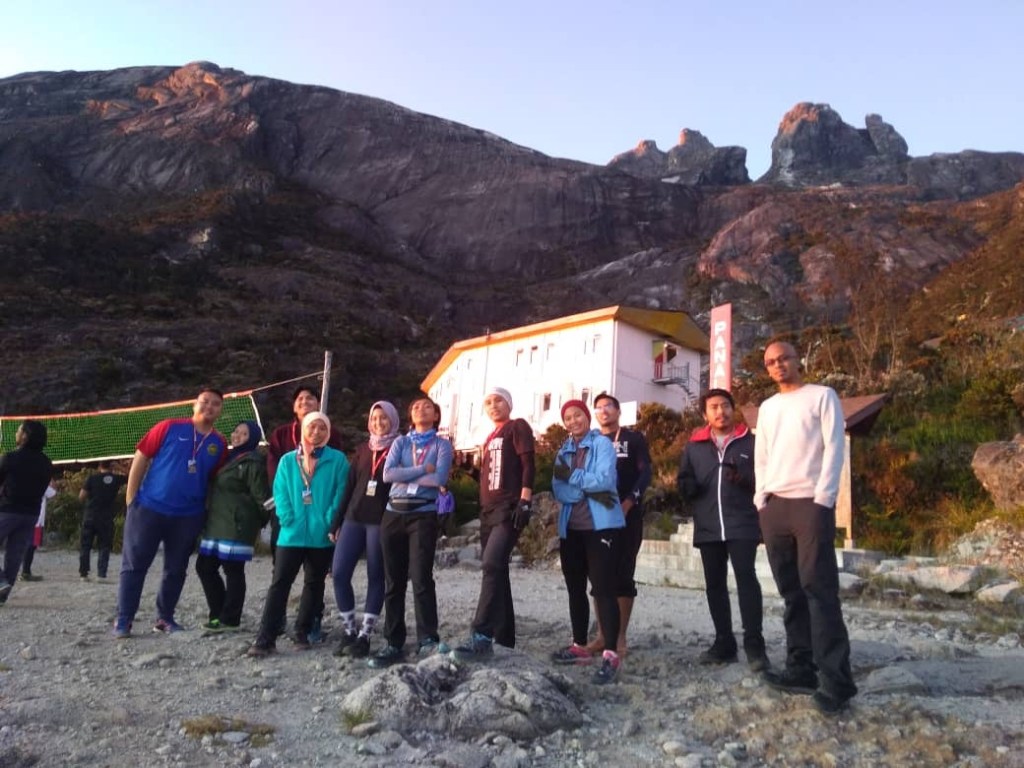
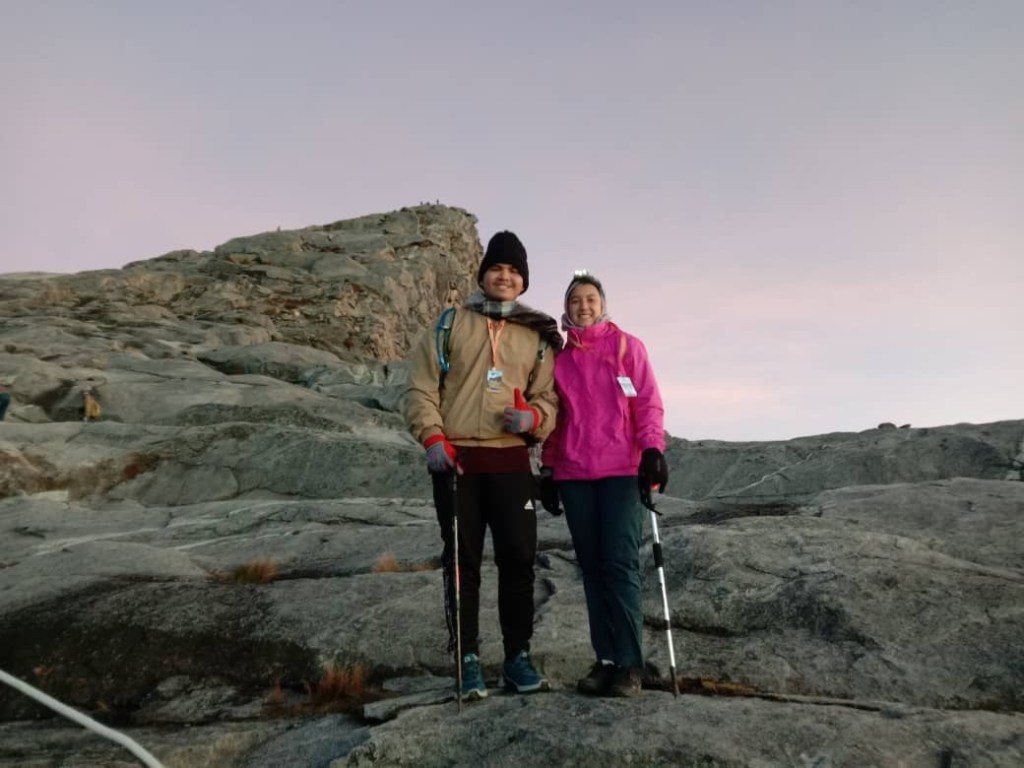
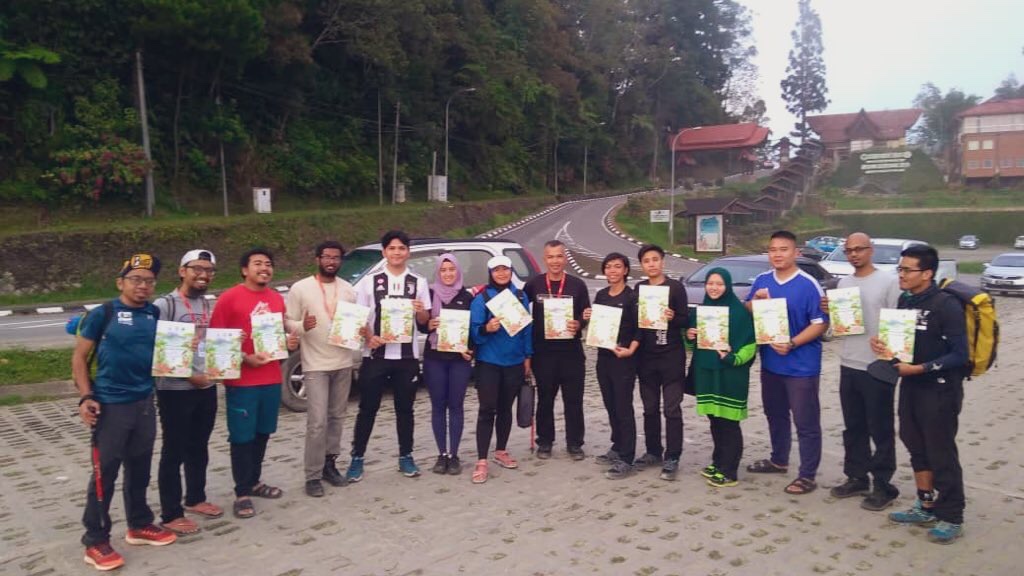
We also met up with the rest of our group members at this restaurant. There were 15 of us altogether.

Group of 15 before hiking 🥾

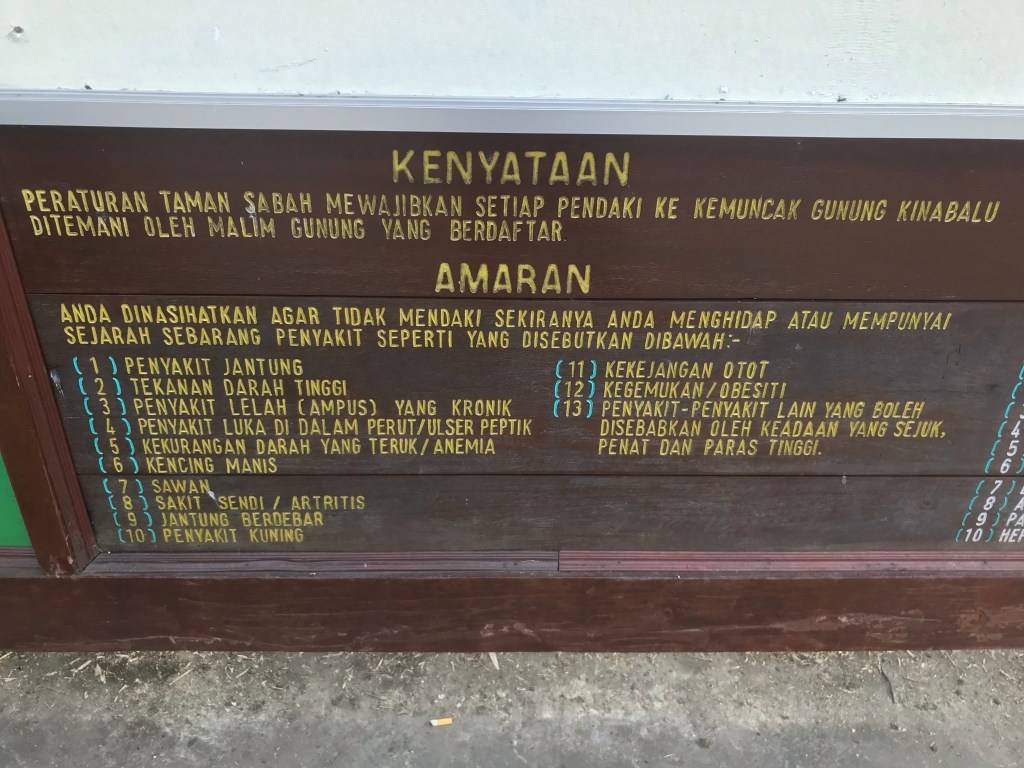
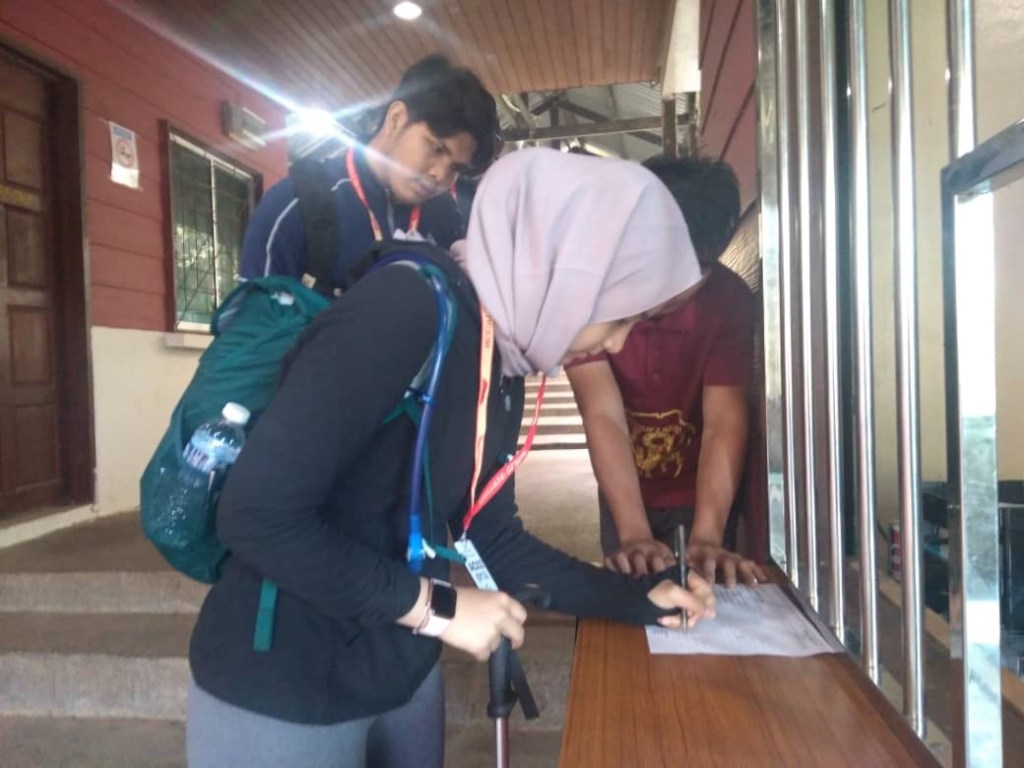
8 am: Registration in Kinabalu Park

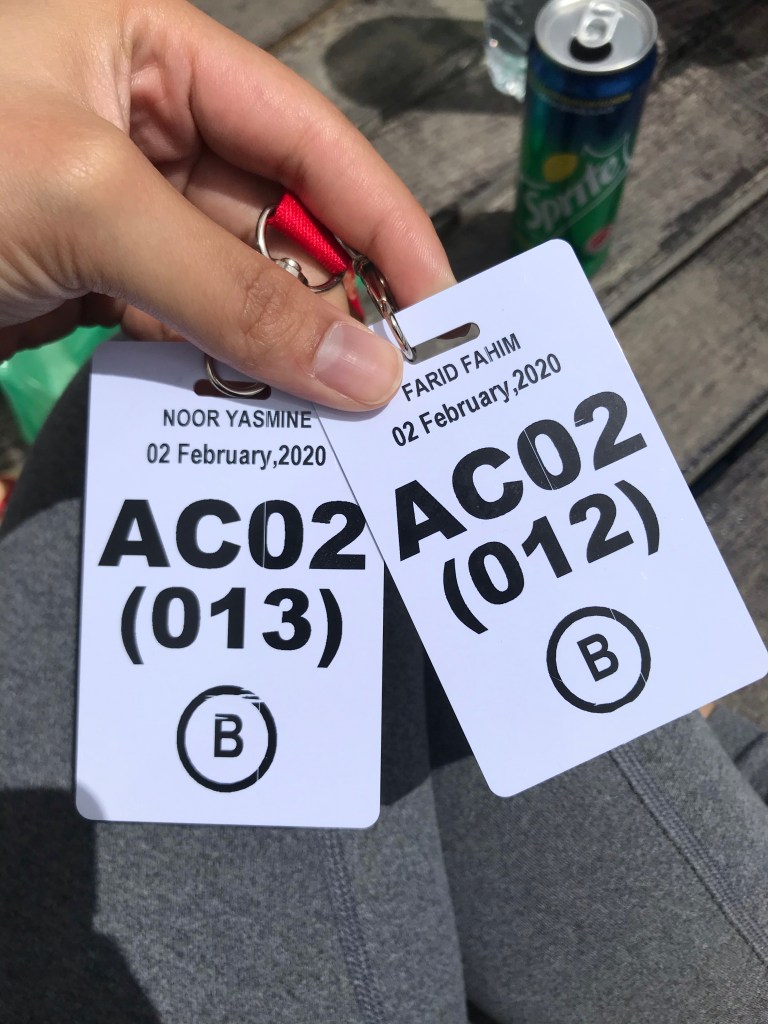
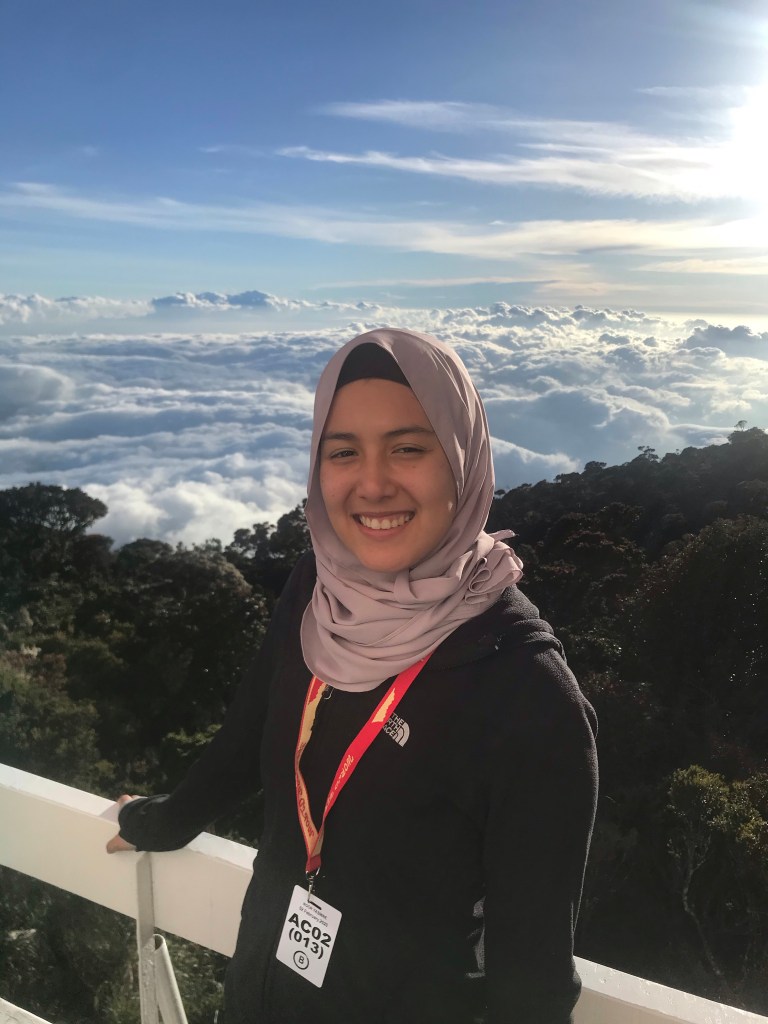
After our breakfast, we walked to the main office in Kinabalu park for registration. This is where we fill up forms containing our details, as well as getting our tags which is a very essential piece for the hike. You will be expected to have your tags with you at all times during the hike (especially at the following checkpoints: Timpohon Gate, Laban Rata, Sayat-Sayat hut).

Inside Kinabalu Park, overlooking the peak.
All smiles before the sweat and tears.
Snapped this in case it would be useful for anyone
Got our tags!

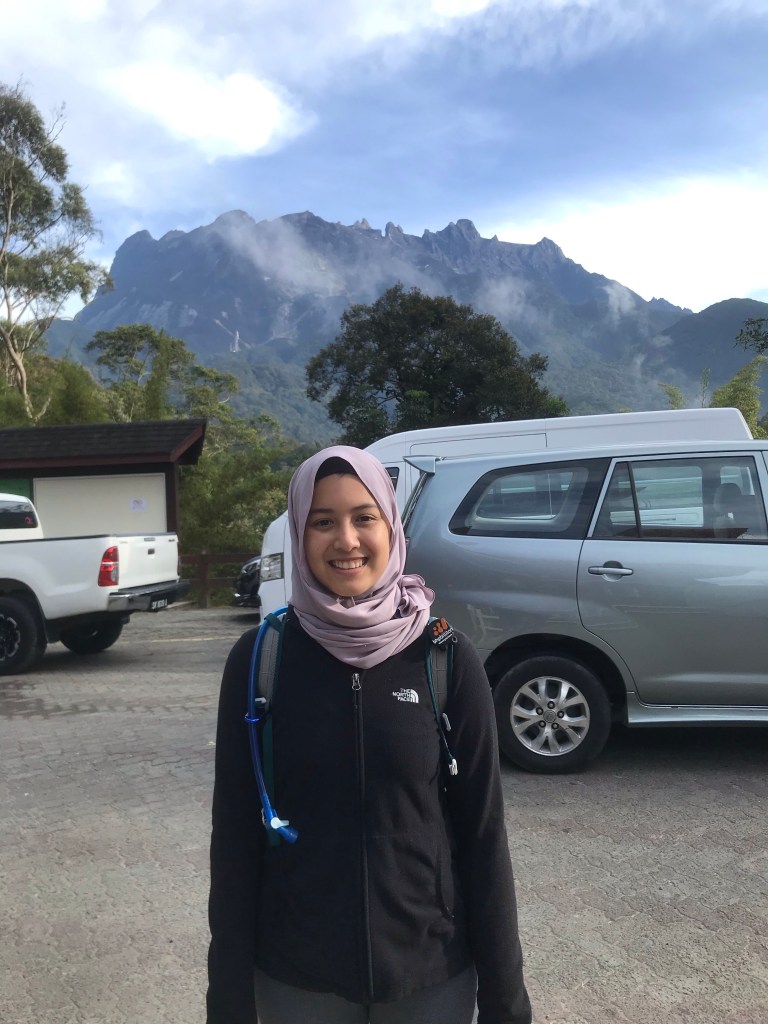
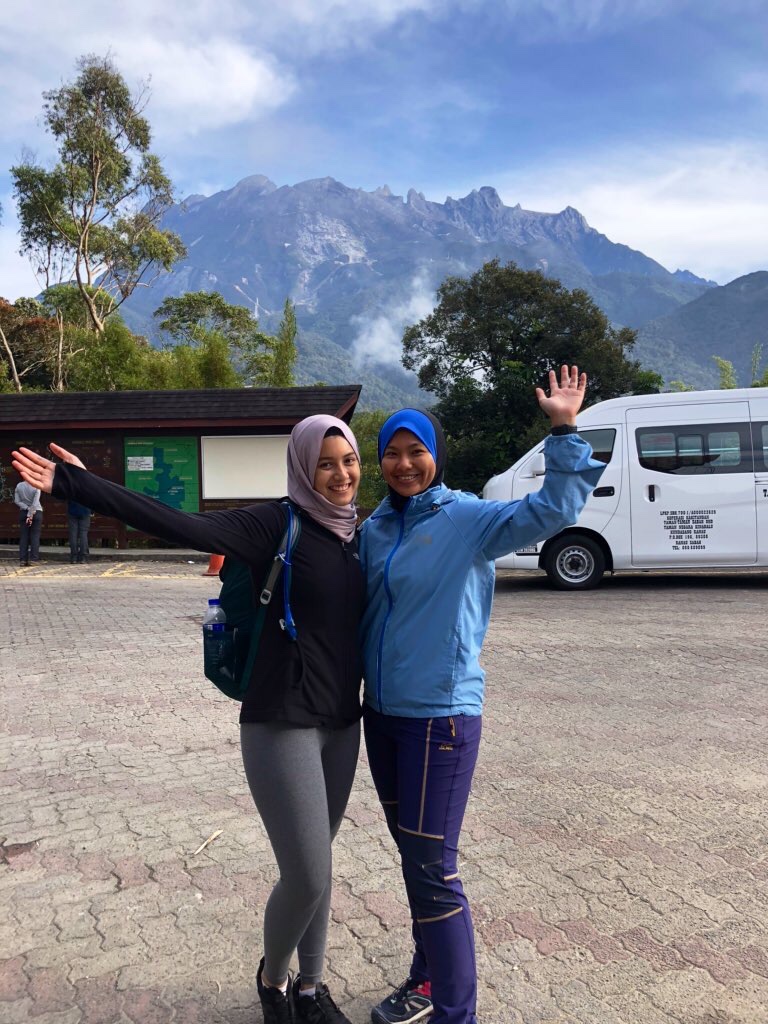
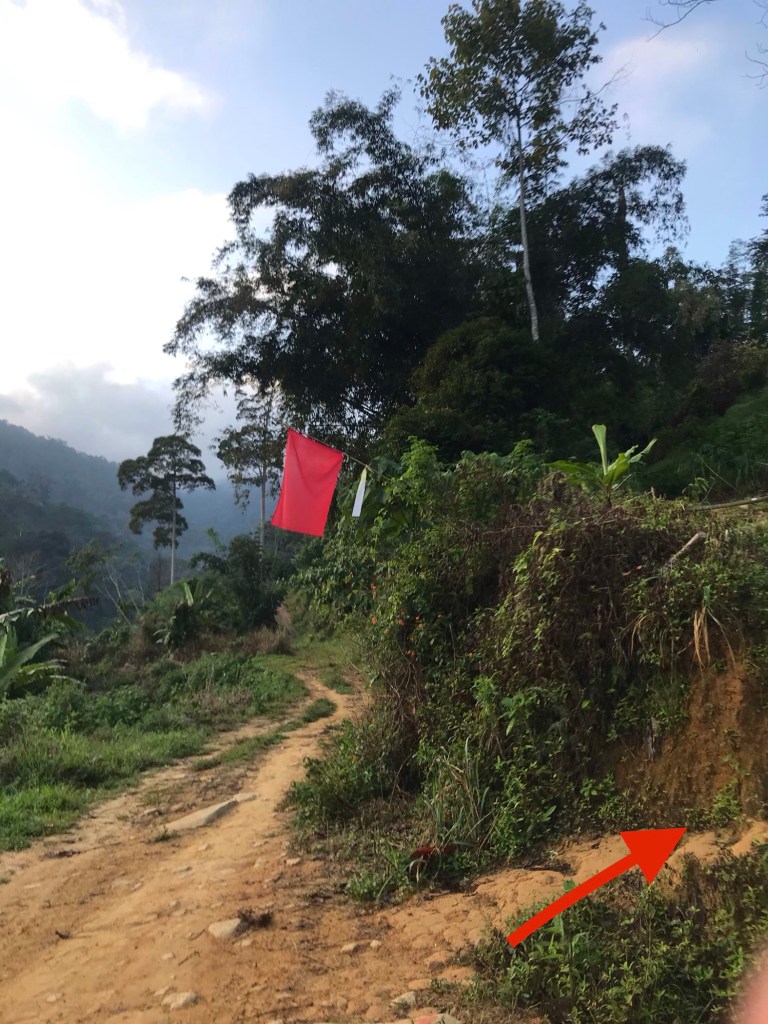
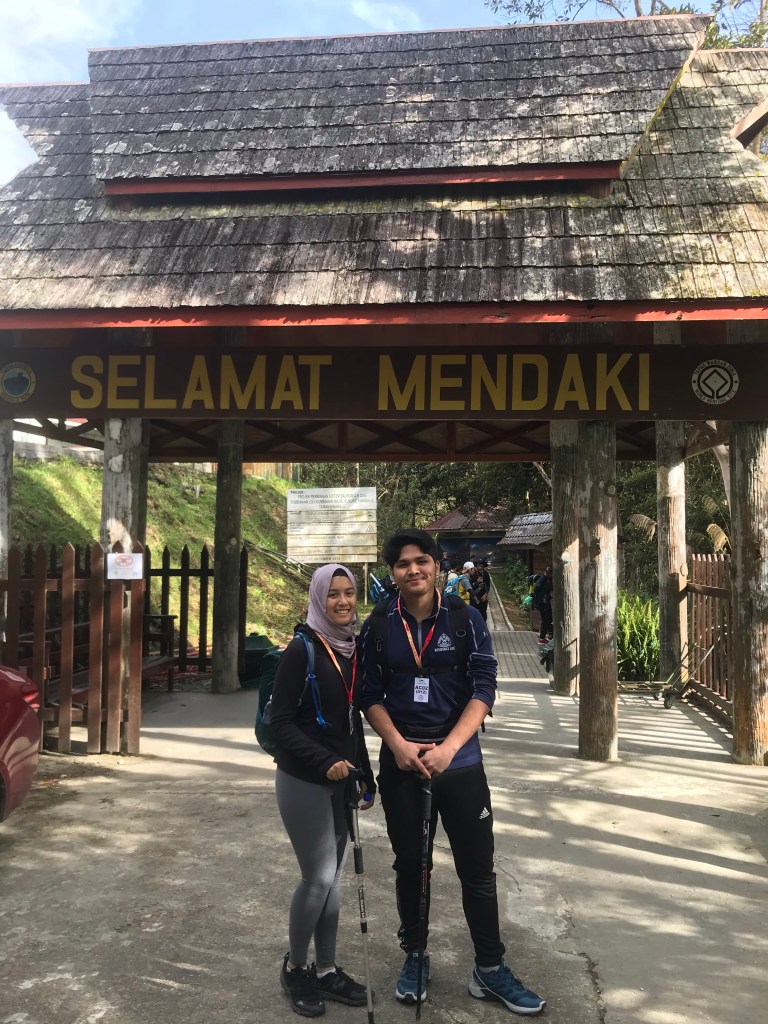
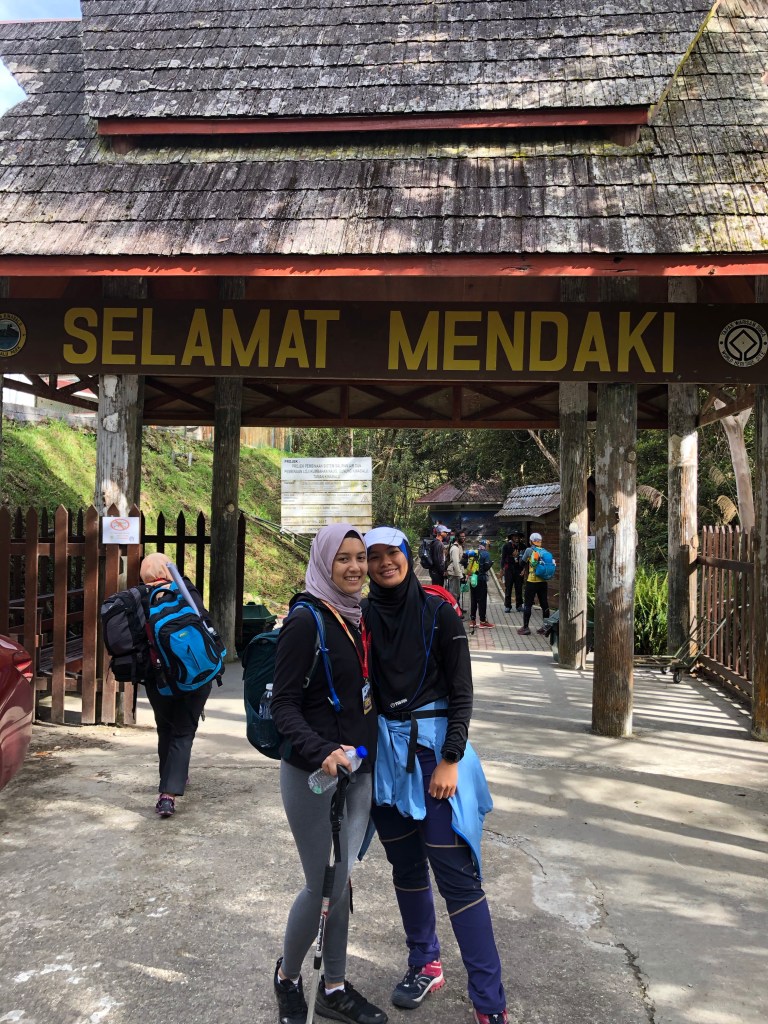
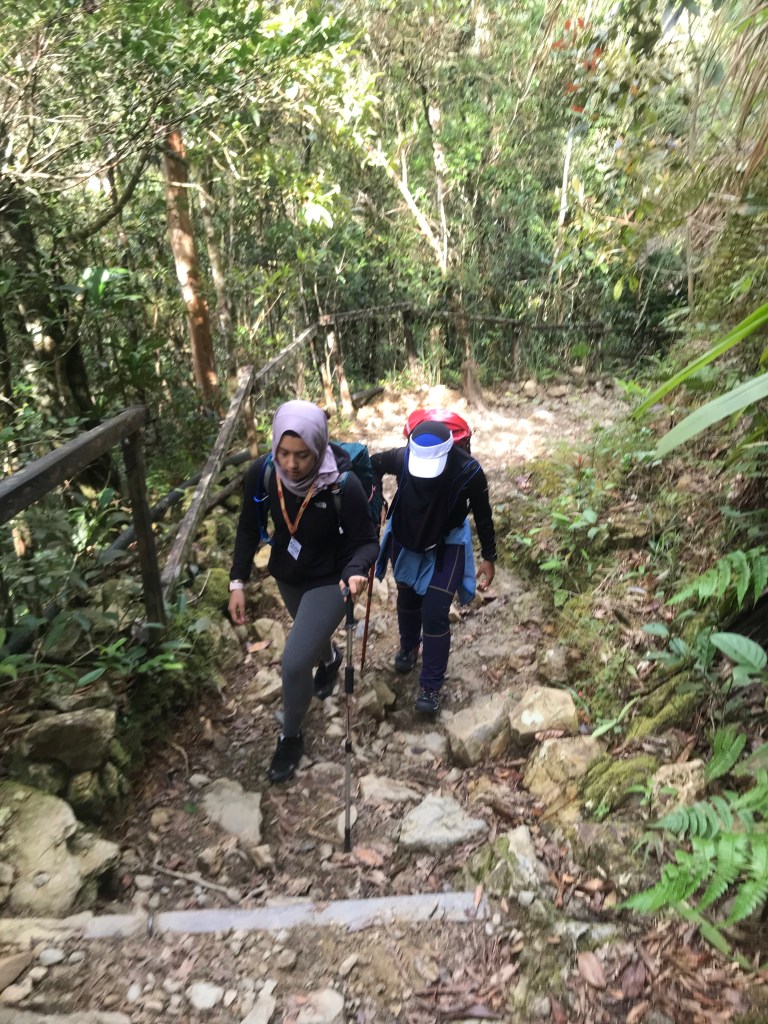
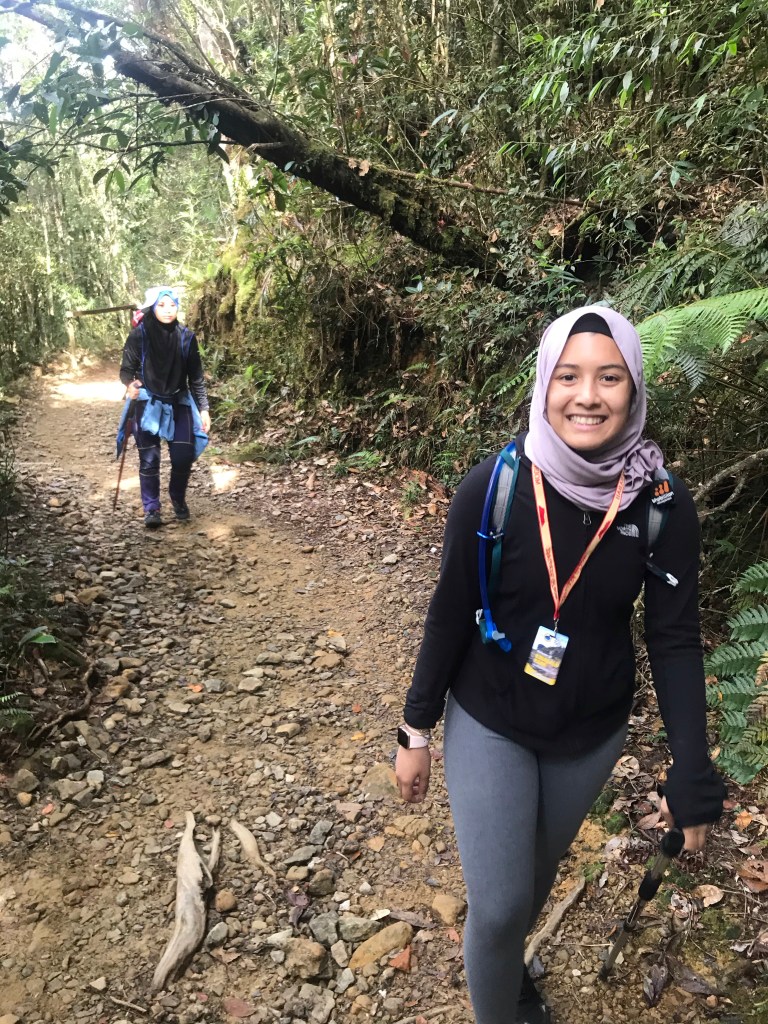
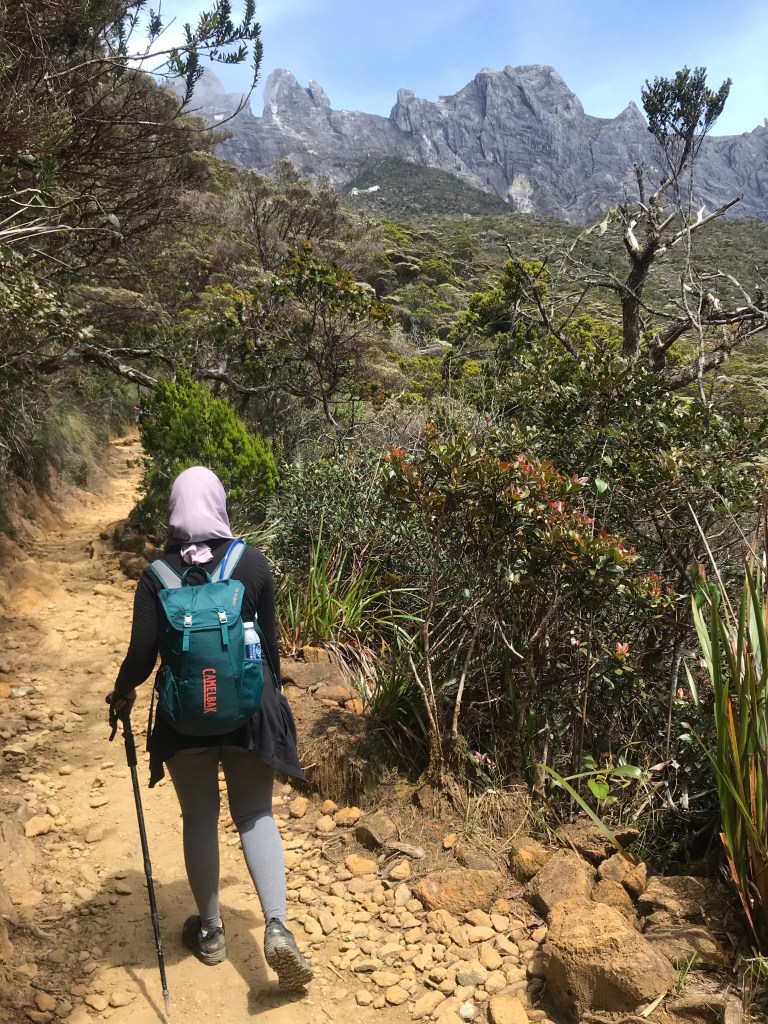
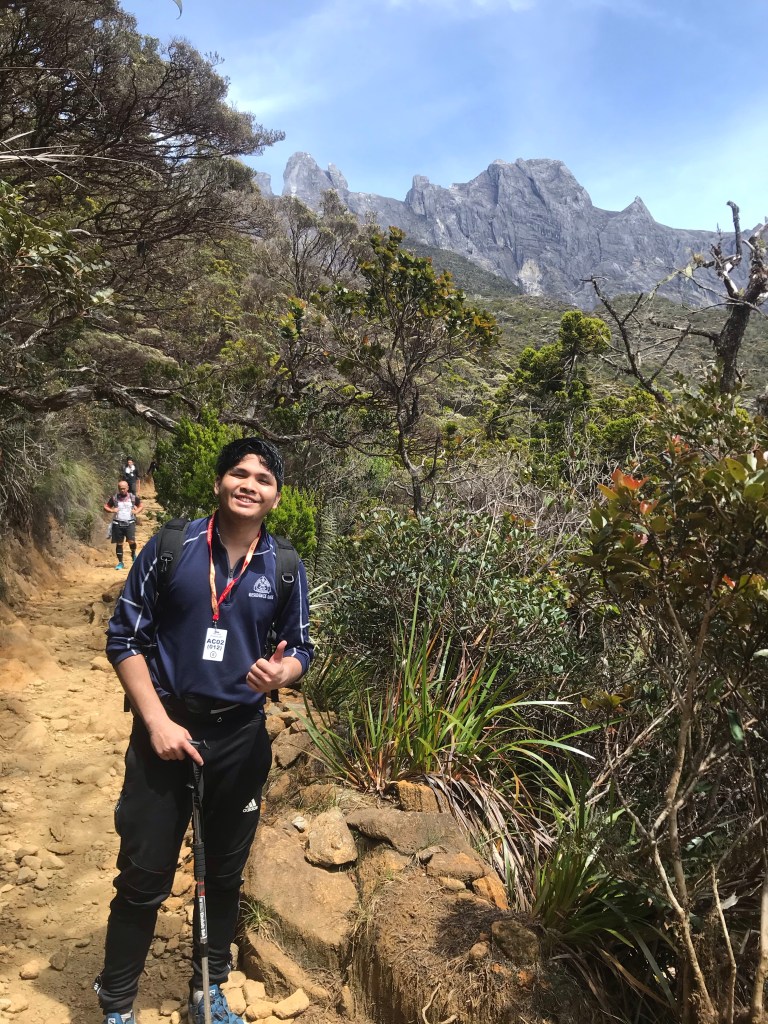
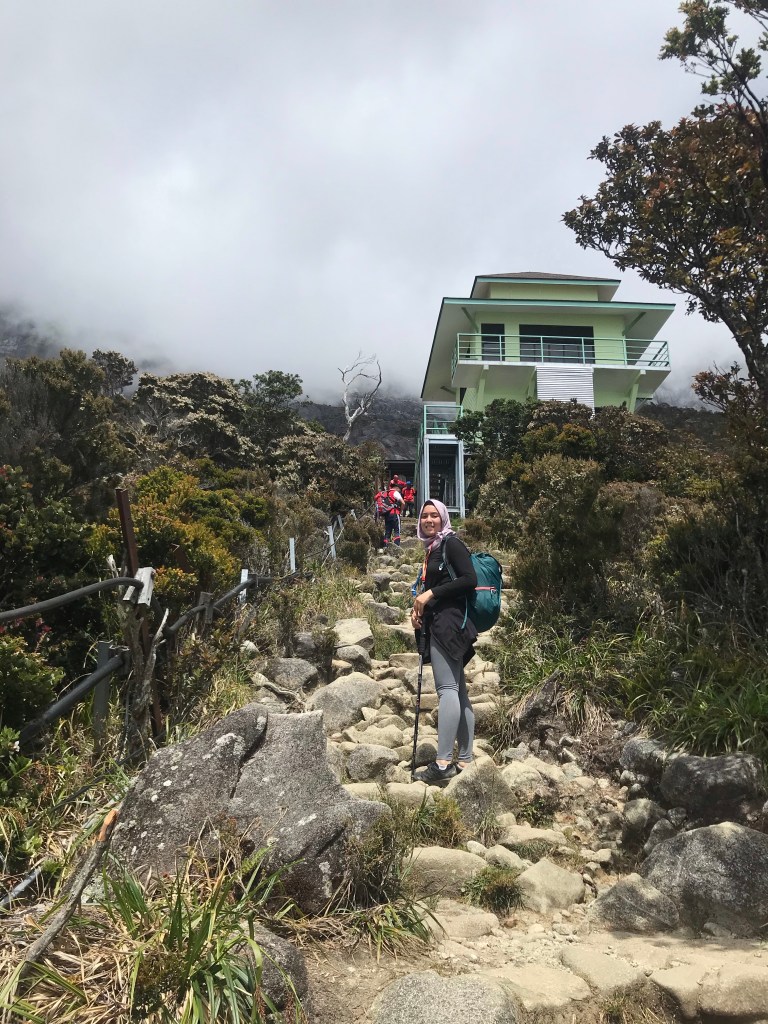
9am: Start hiking via Timpohon trail

After registration, all 15 of us carpooled to Timpohon Gate, which is our very first checkpoint. Here is also where we have to double check our names and our tag numbers prior to the hike.

Double checking on names — making sure they’re correct!
My high school buddy, Syaabah, who’s also on this trip with me.
Group photo
Map of the trails, checkpoints and shelters going towards the peak. The shelters are at every 1km, and there are signboards at every 0.5 km to sort of motivate/demotivate you.
Syaabah and I, at KM0.5.
Pack light! The ideal weight to carry is usually 10% of your body weight. I brought 4kg with me, which is pretty light, considering 2kg of those are water.
This is somewhere between KM 1.5 – KM 2 checkpoint. Stunning view. Getting steeper at this point.
The trail is mostly “staircase” steep, but there are flatter areas which helps you to recover yourselves. Thank goodness.
Gorgeous landscapes throughout the hike. This is what we miss the most.
This shot was taken around 11:30 am. Even during this hour, clouds have started enveloping the peak making it less visible.
This was around KM 4.5. Another 1.5 to go!

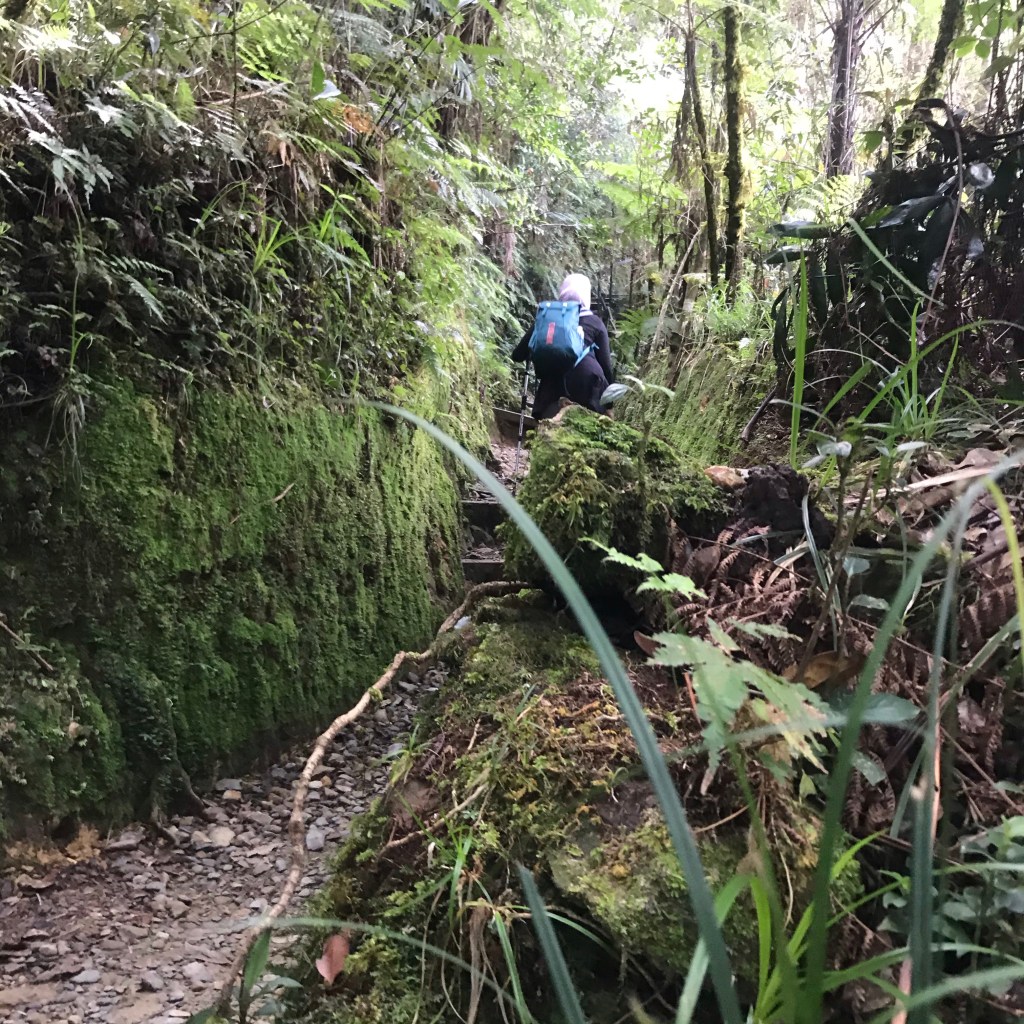
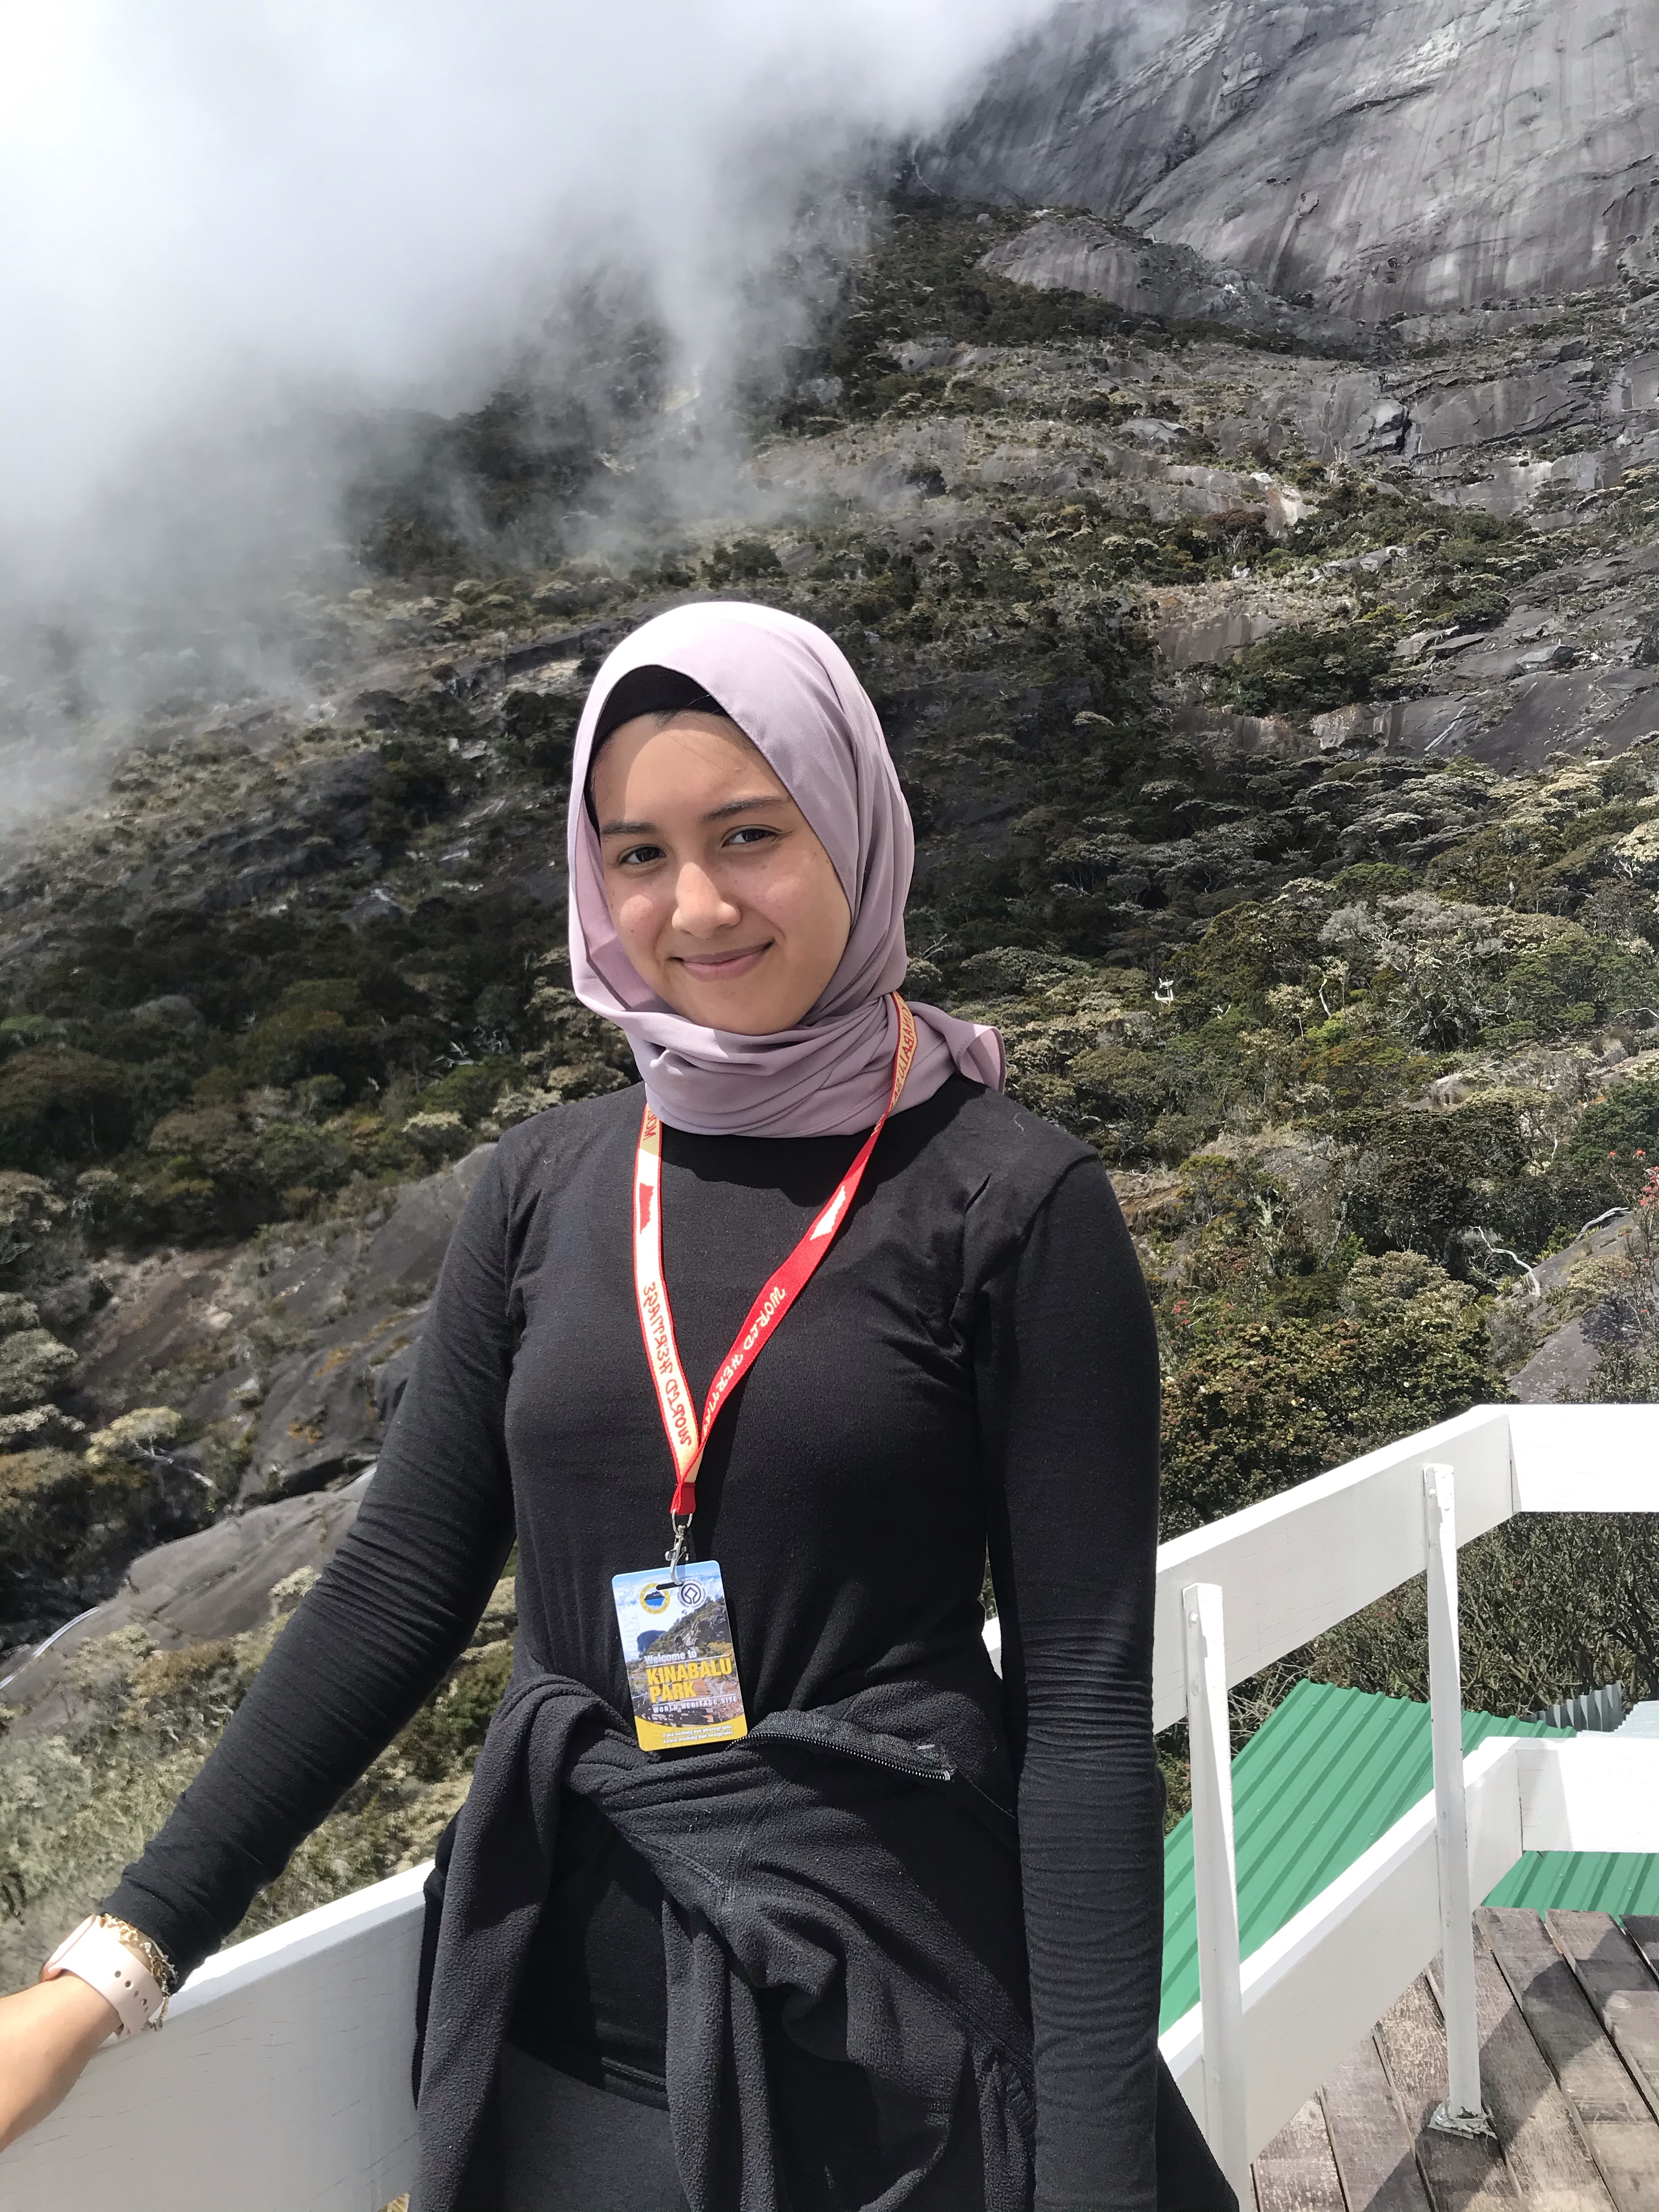
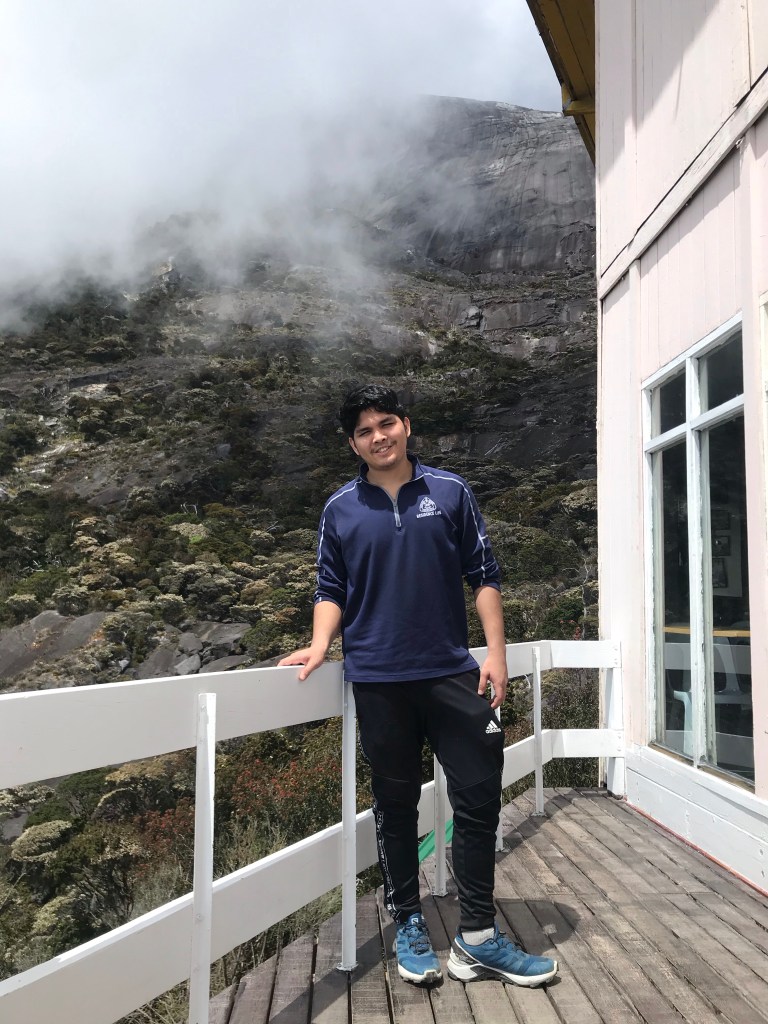
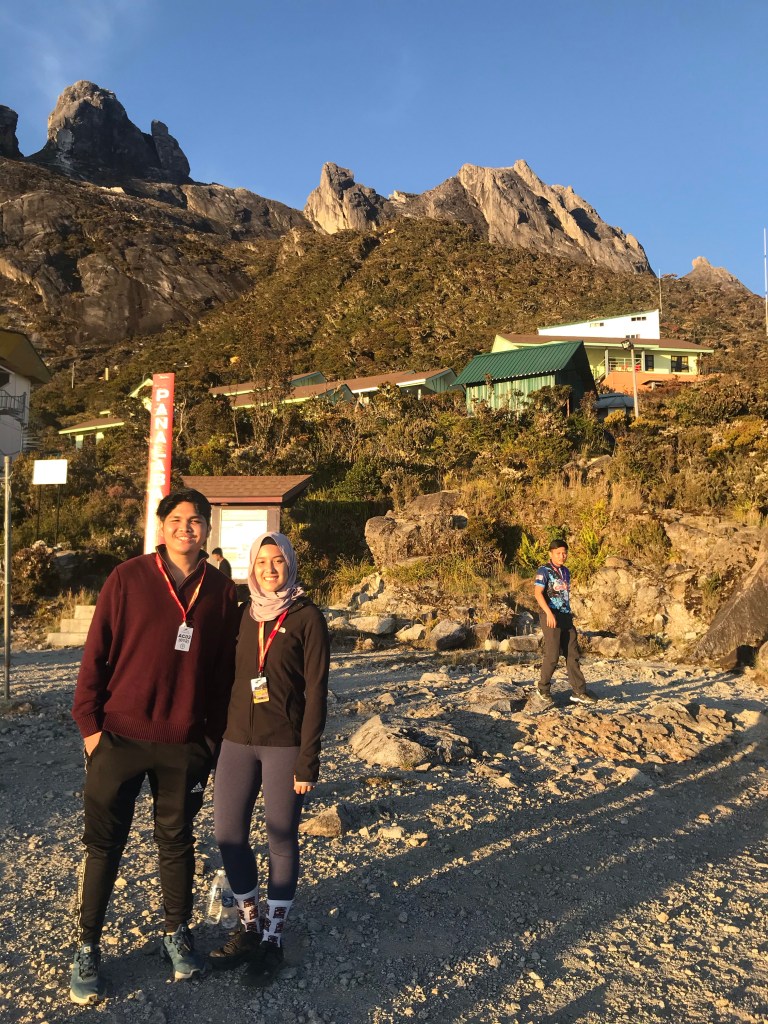
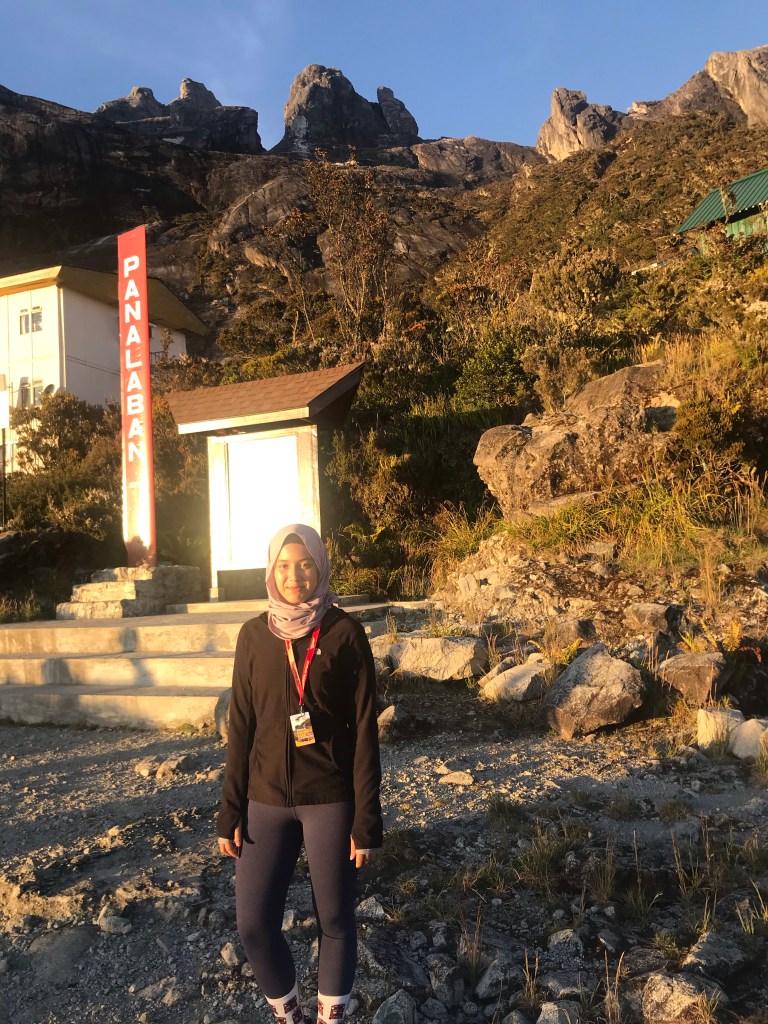
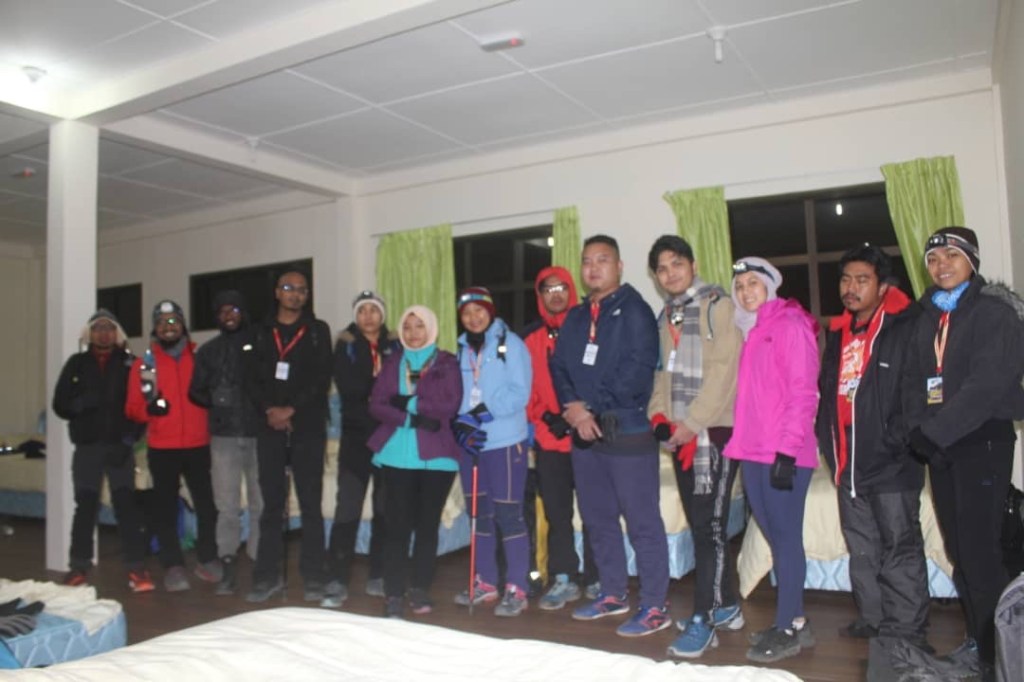
12:30 pm: Reached Panalaban

YES! We can see civilization! We have reached Panalaban /Laban Rata, where we shall rest for the night.
We were one of the earliest to reach. Still managed to smile but dead tired inside, if we’re being honest.
Not forgetting — stats! This was the statistics going up from Timpohon Gate to Panalaban.
Selfie-ing at 10,700 ft in the air.
Above the clouds

5:00 pm: Dinner

We had our dinner at around 5pm. Prior to that, we showered and rested for a bit while waiting for the others to reach Panalaban. There was no water heater, of course, but showering really helps to cool down blood vessels and ultimately making us feel more relaxed and refreshed.

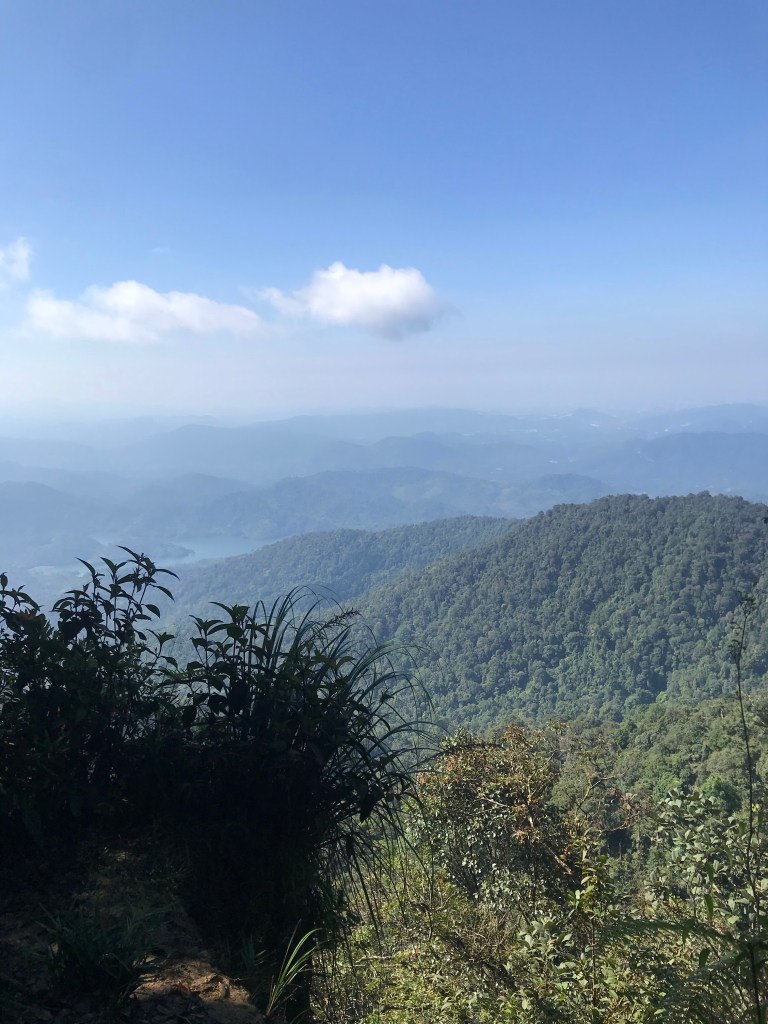
Afterwards, we went down to the dining area to have our dinner and to enjoy the pretty view that Kinabalu has to offer.
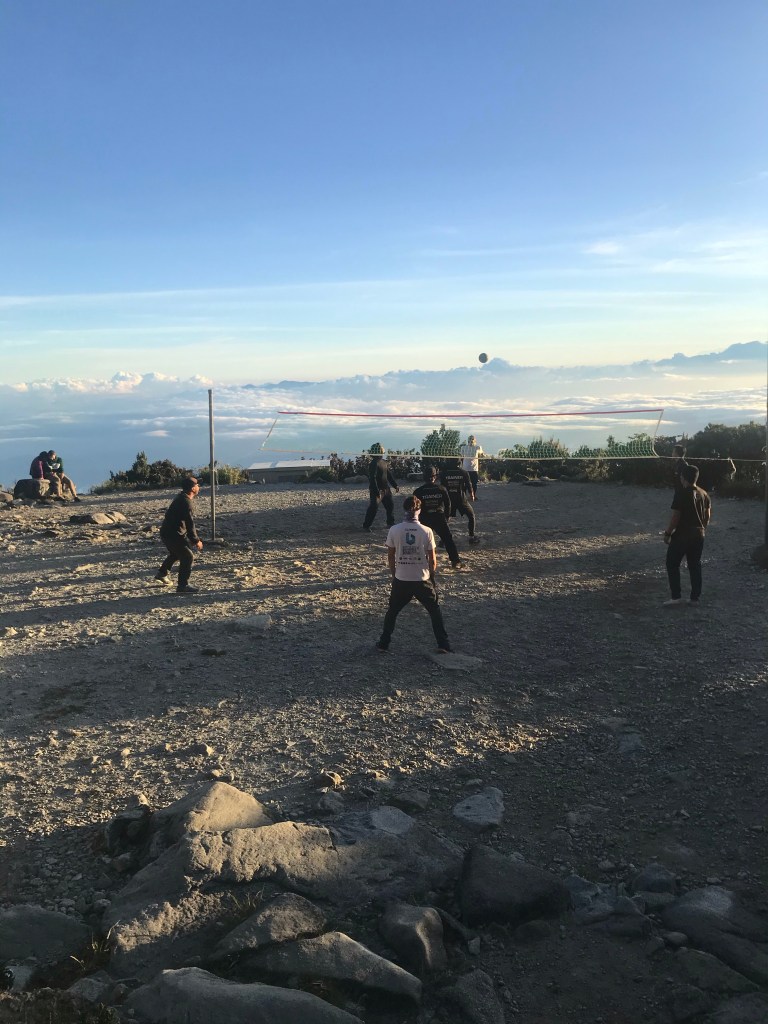
This is how the buffet menu looks like. Pretty decent, and amazing as to how they can prepare variety of food up here. Shout out to the strong porters carrying heavy bulky items every single day! Even gas!
Waiting for sunset. The picture makes it seem like it’s still bright, but in reality, it was freezing cold.
With Alisya.
Teams of porters and guides playing volleyball above the clouds. Simply stunning.
With the KinabaluBah group members

8:00 pm: Rest

Second day (3rd Feb 2020)

2:00 am: Supper at Panalaban

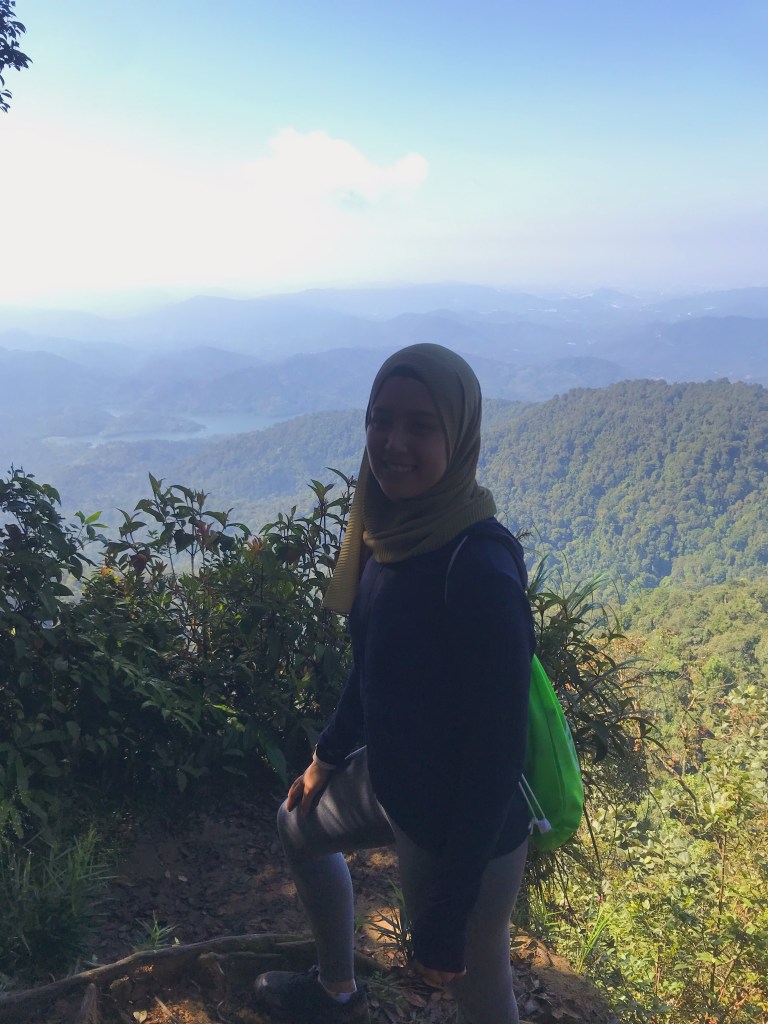
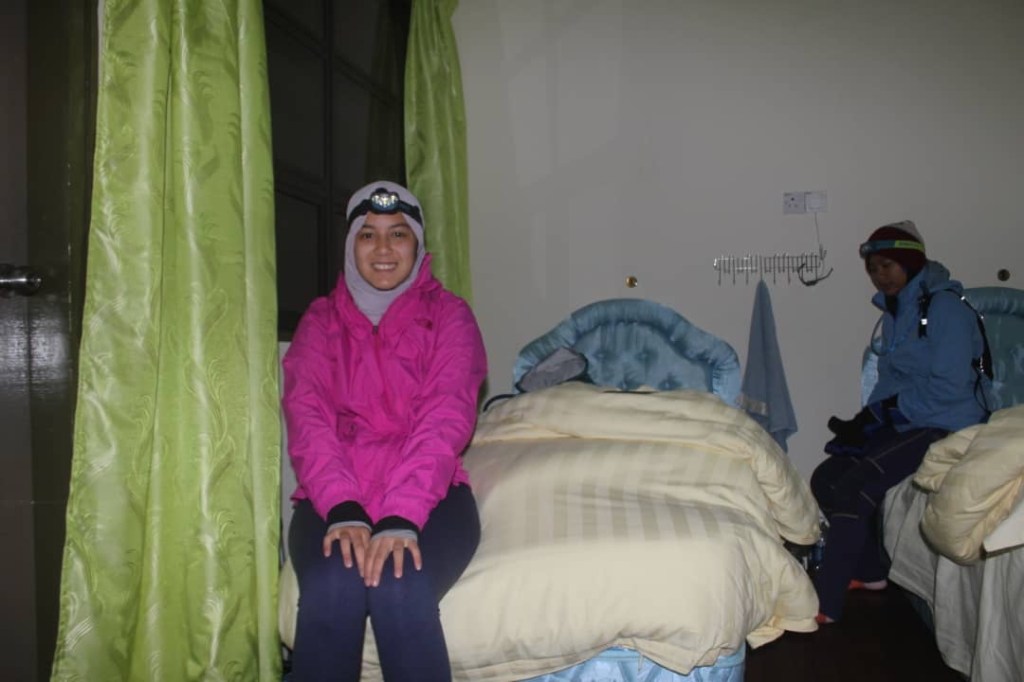
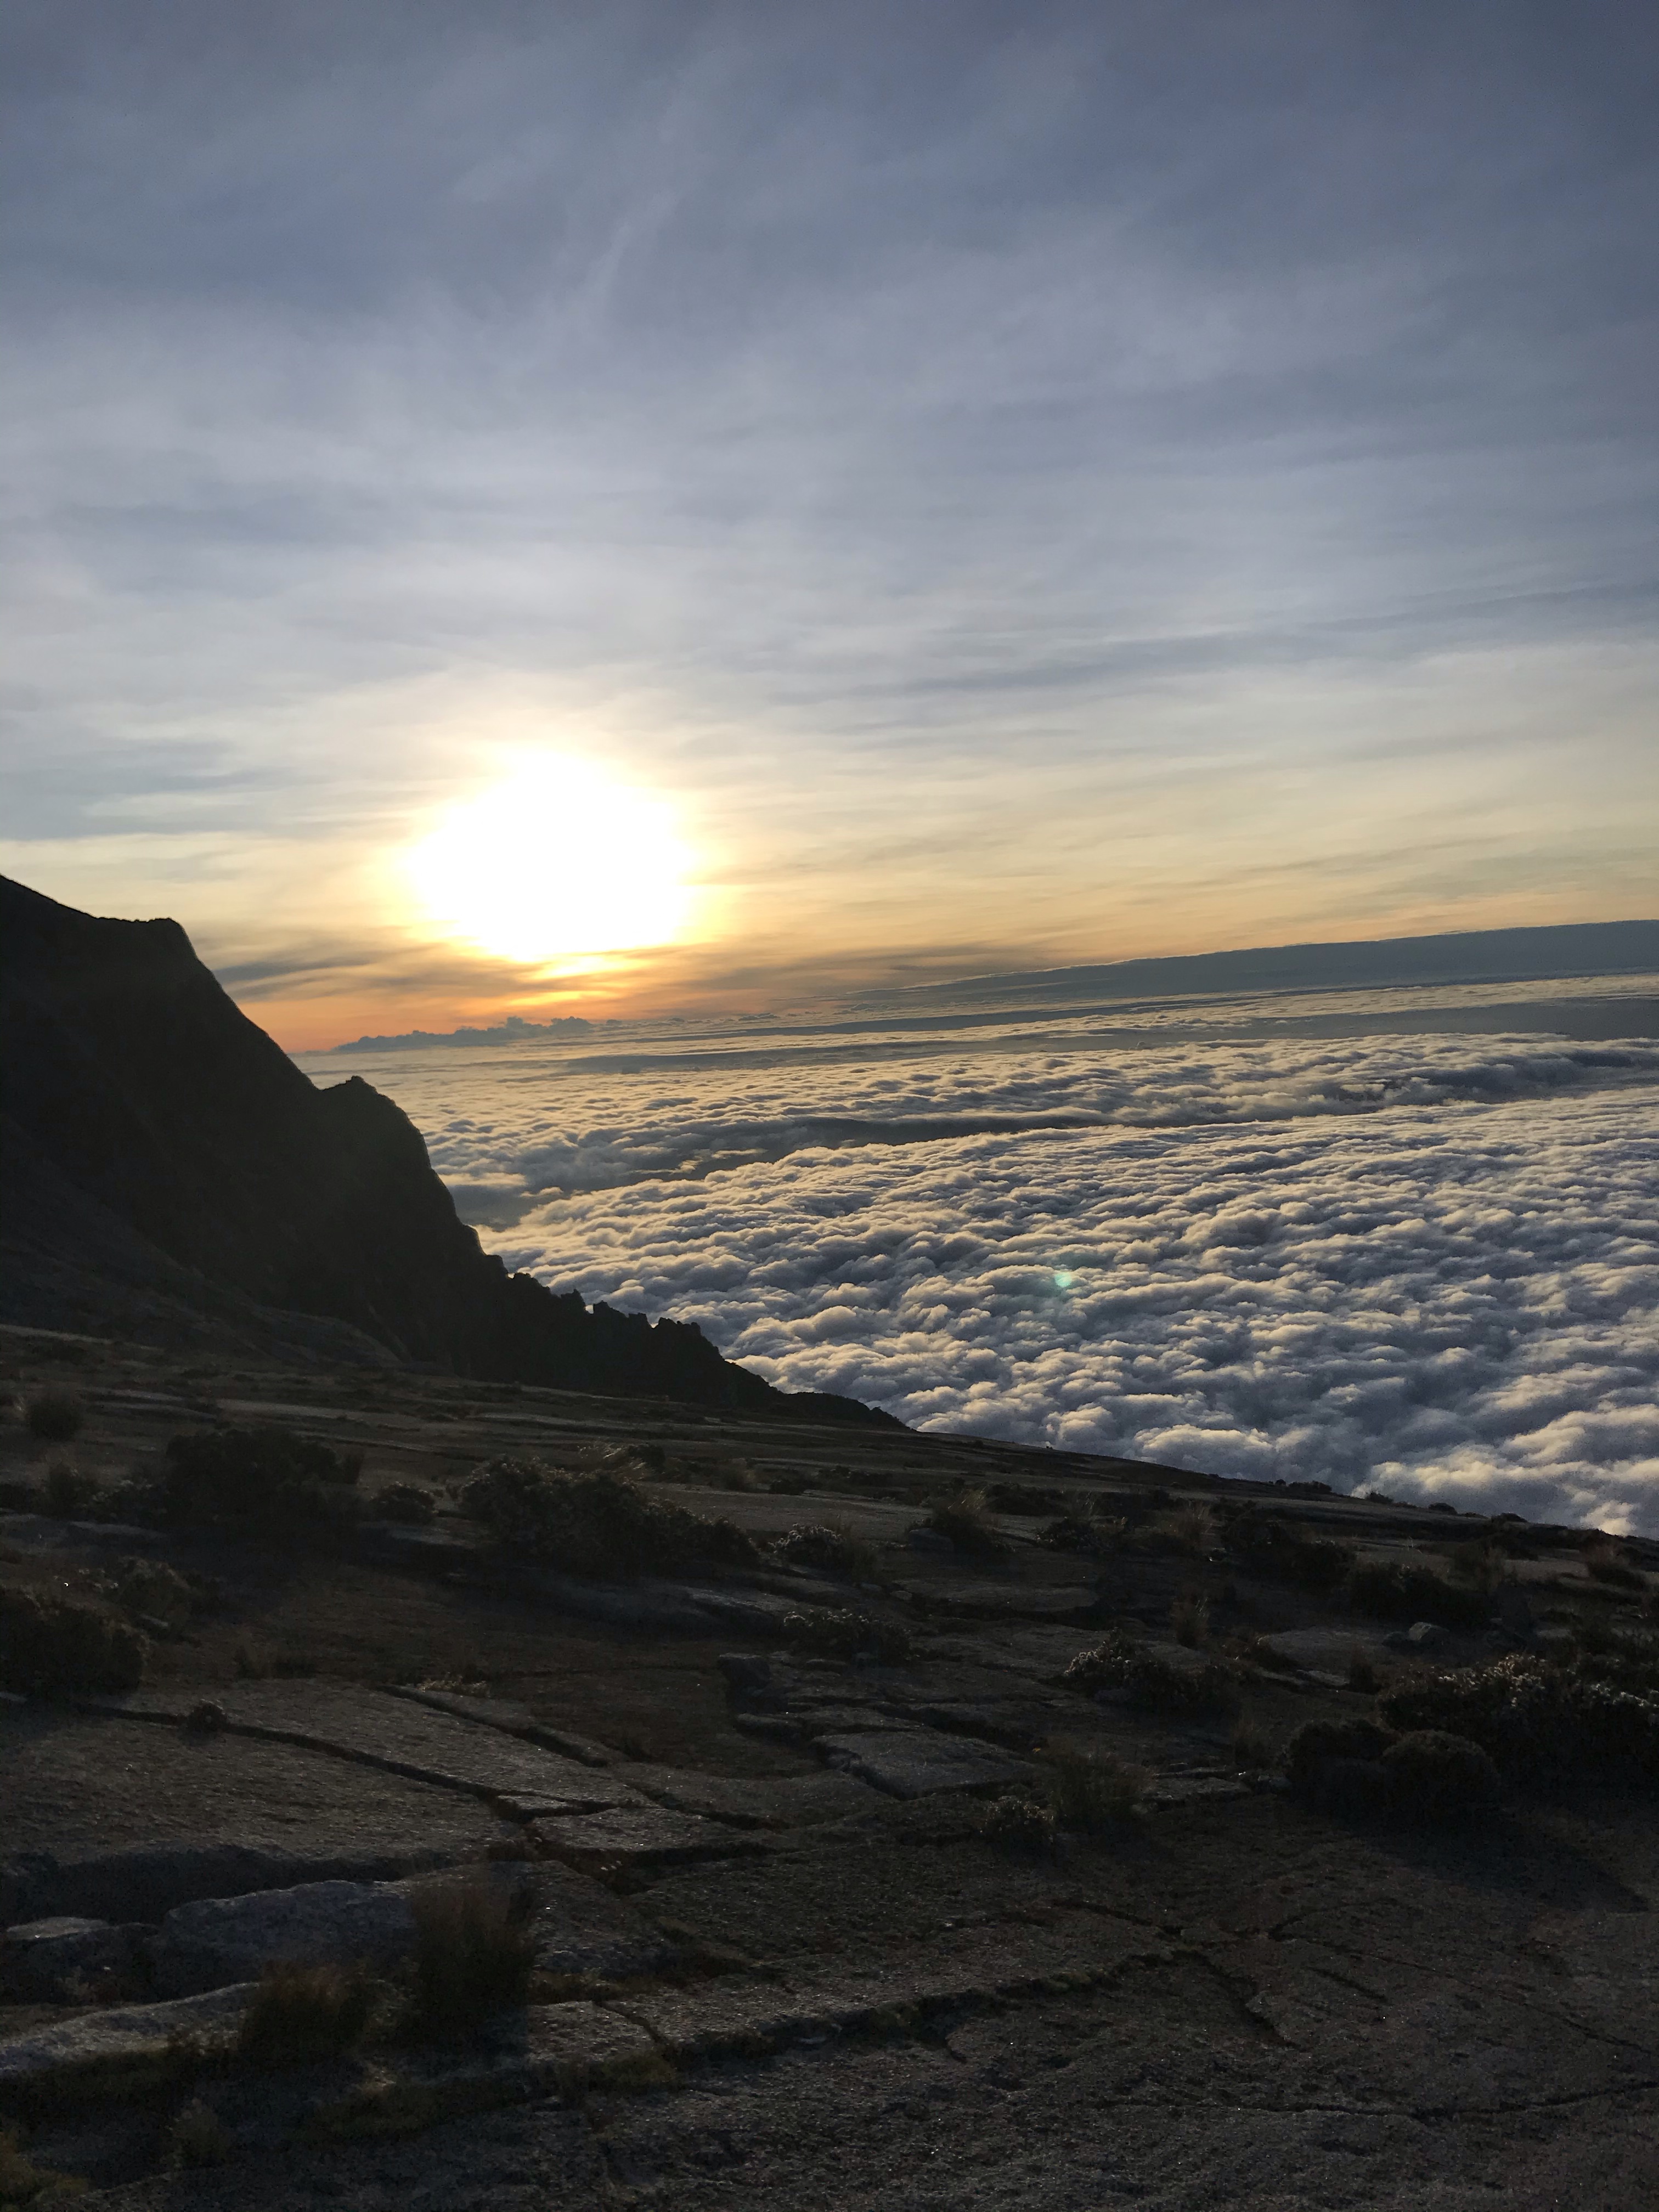
The next morning, En Jaffri woke us up sometime before 2am so we could get ready and head to the dining area to have our supper before continuing our summit hike. We honestly cannot tell you how unbelievably cold the morning was. I (Yasmine) was in three layers of shirts, and two layers of pants. We both were wearing hot packs in our gloves and shoes which tremendously helped in warming us.

I was told we got the newest dorm, so it was really spacious, comfortable, and also single bed for every one.

2:45 am: Start ascending to the peak

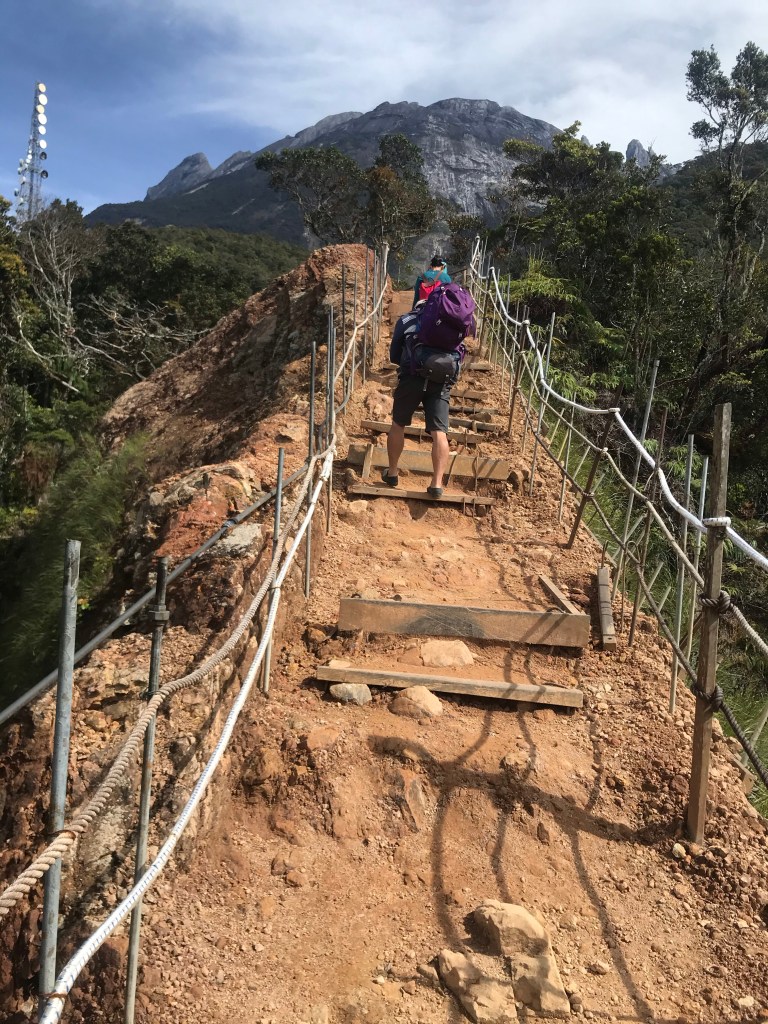
Unfortunately, we had no pictures during this part of the hike as we were freezing. Basically, our next checkpoint before reaching the peak was Sayat-Sayat hut. Our guide has told us that everyone had to reach Sayat-Sayat before 5:30 am or they would not allow us to venture any further. This was done as a safety precaution. So, we had to time ourselves for this part of the hike. This hut is located between KM 7.0 and KM 7.5. Therefore, we still had another 1km from Sayat-Sayat to Low’s Peak.

The trail from Panalaban to Sayat-Sayat was “staircase” steep, but was definitely 2x more intense from previous day.

We finally reached Sayat-Sayat checkpoint at 4:00 am. We waited for some of our group members here, but after 20 minutes, we decided to continue as we were getting cold.

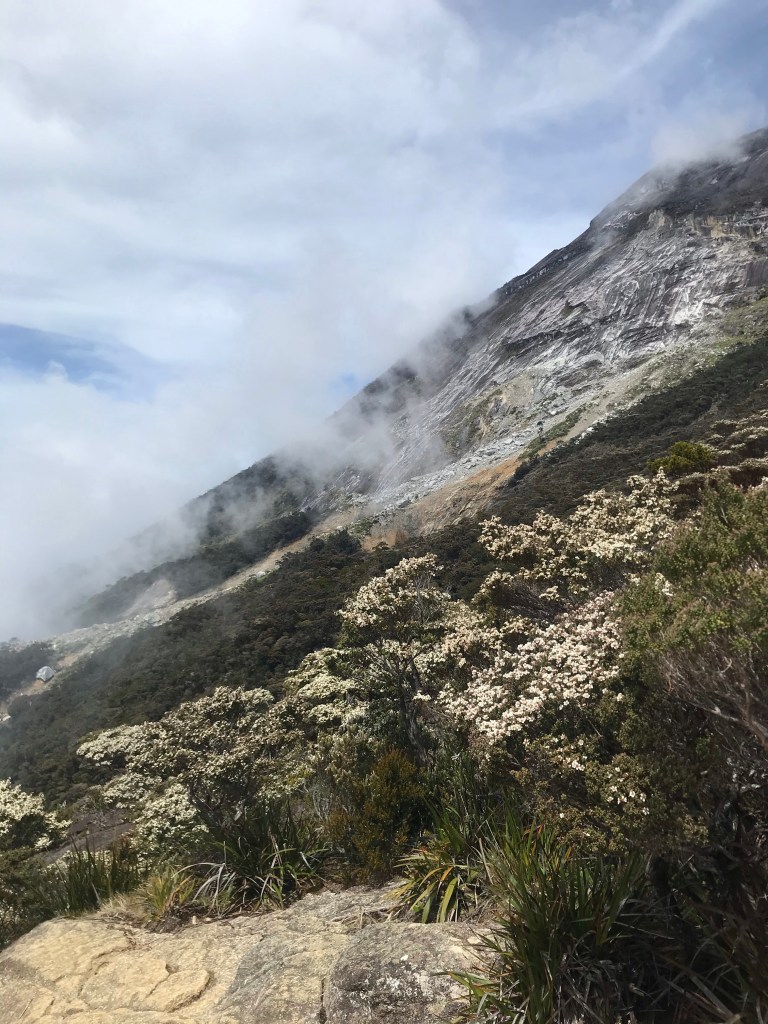
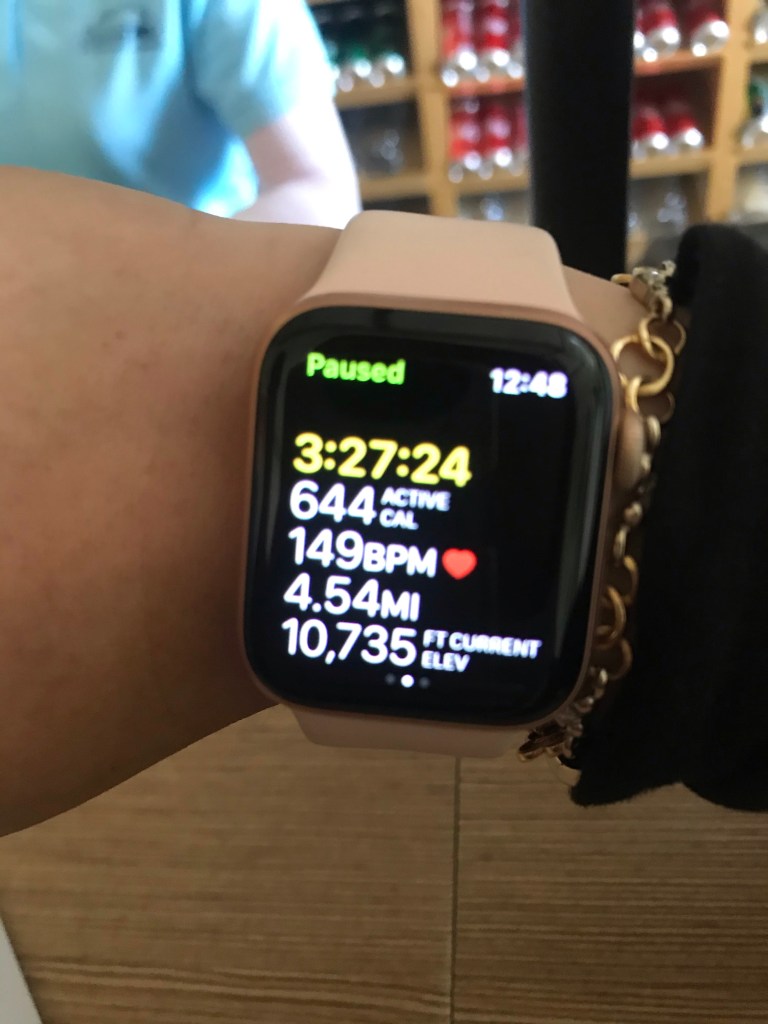
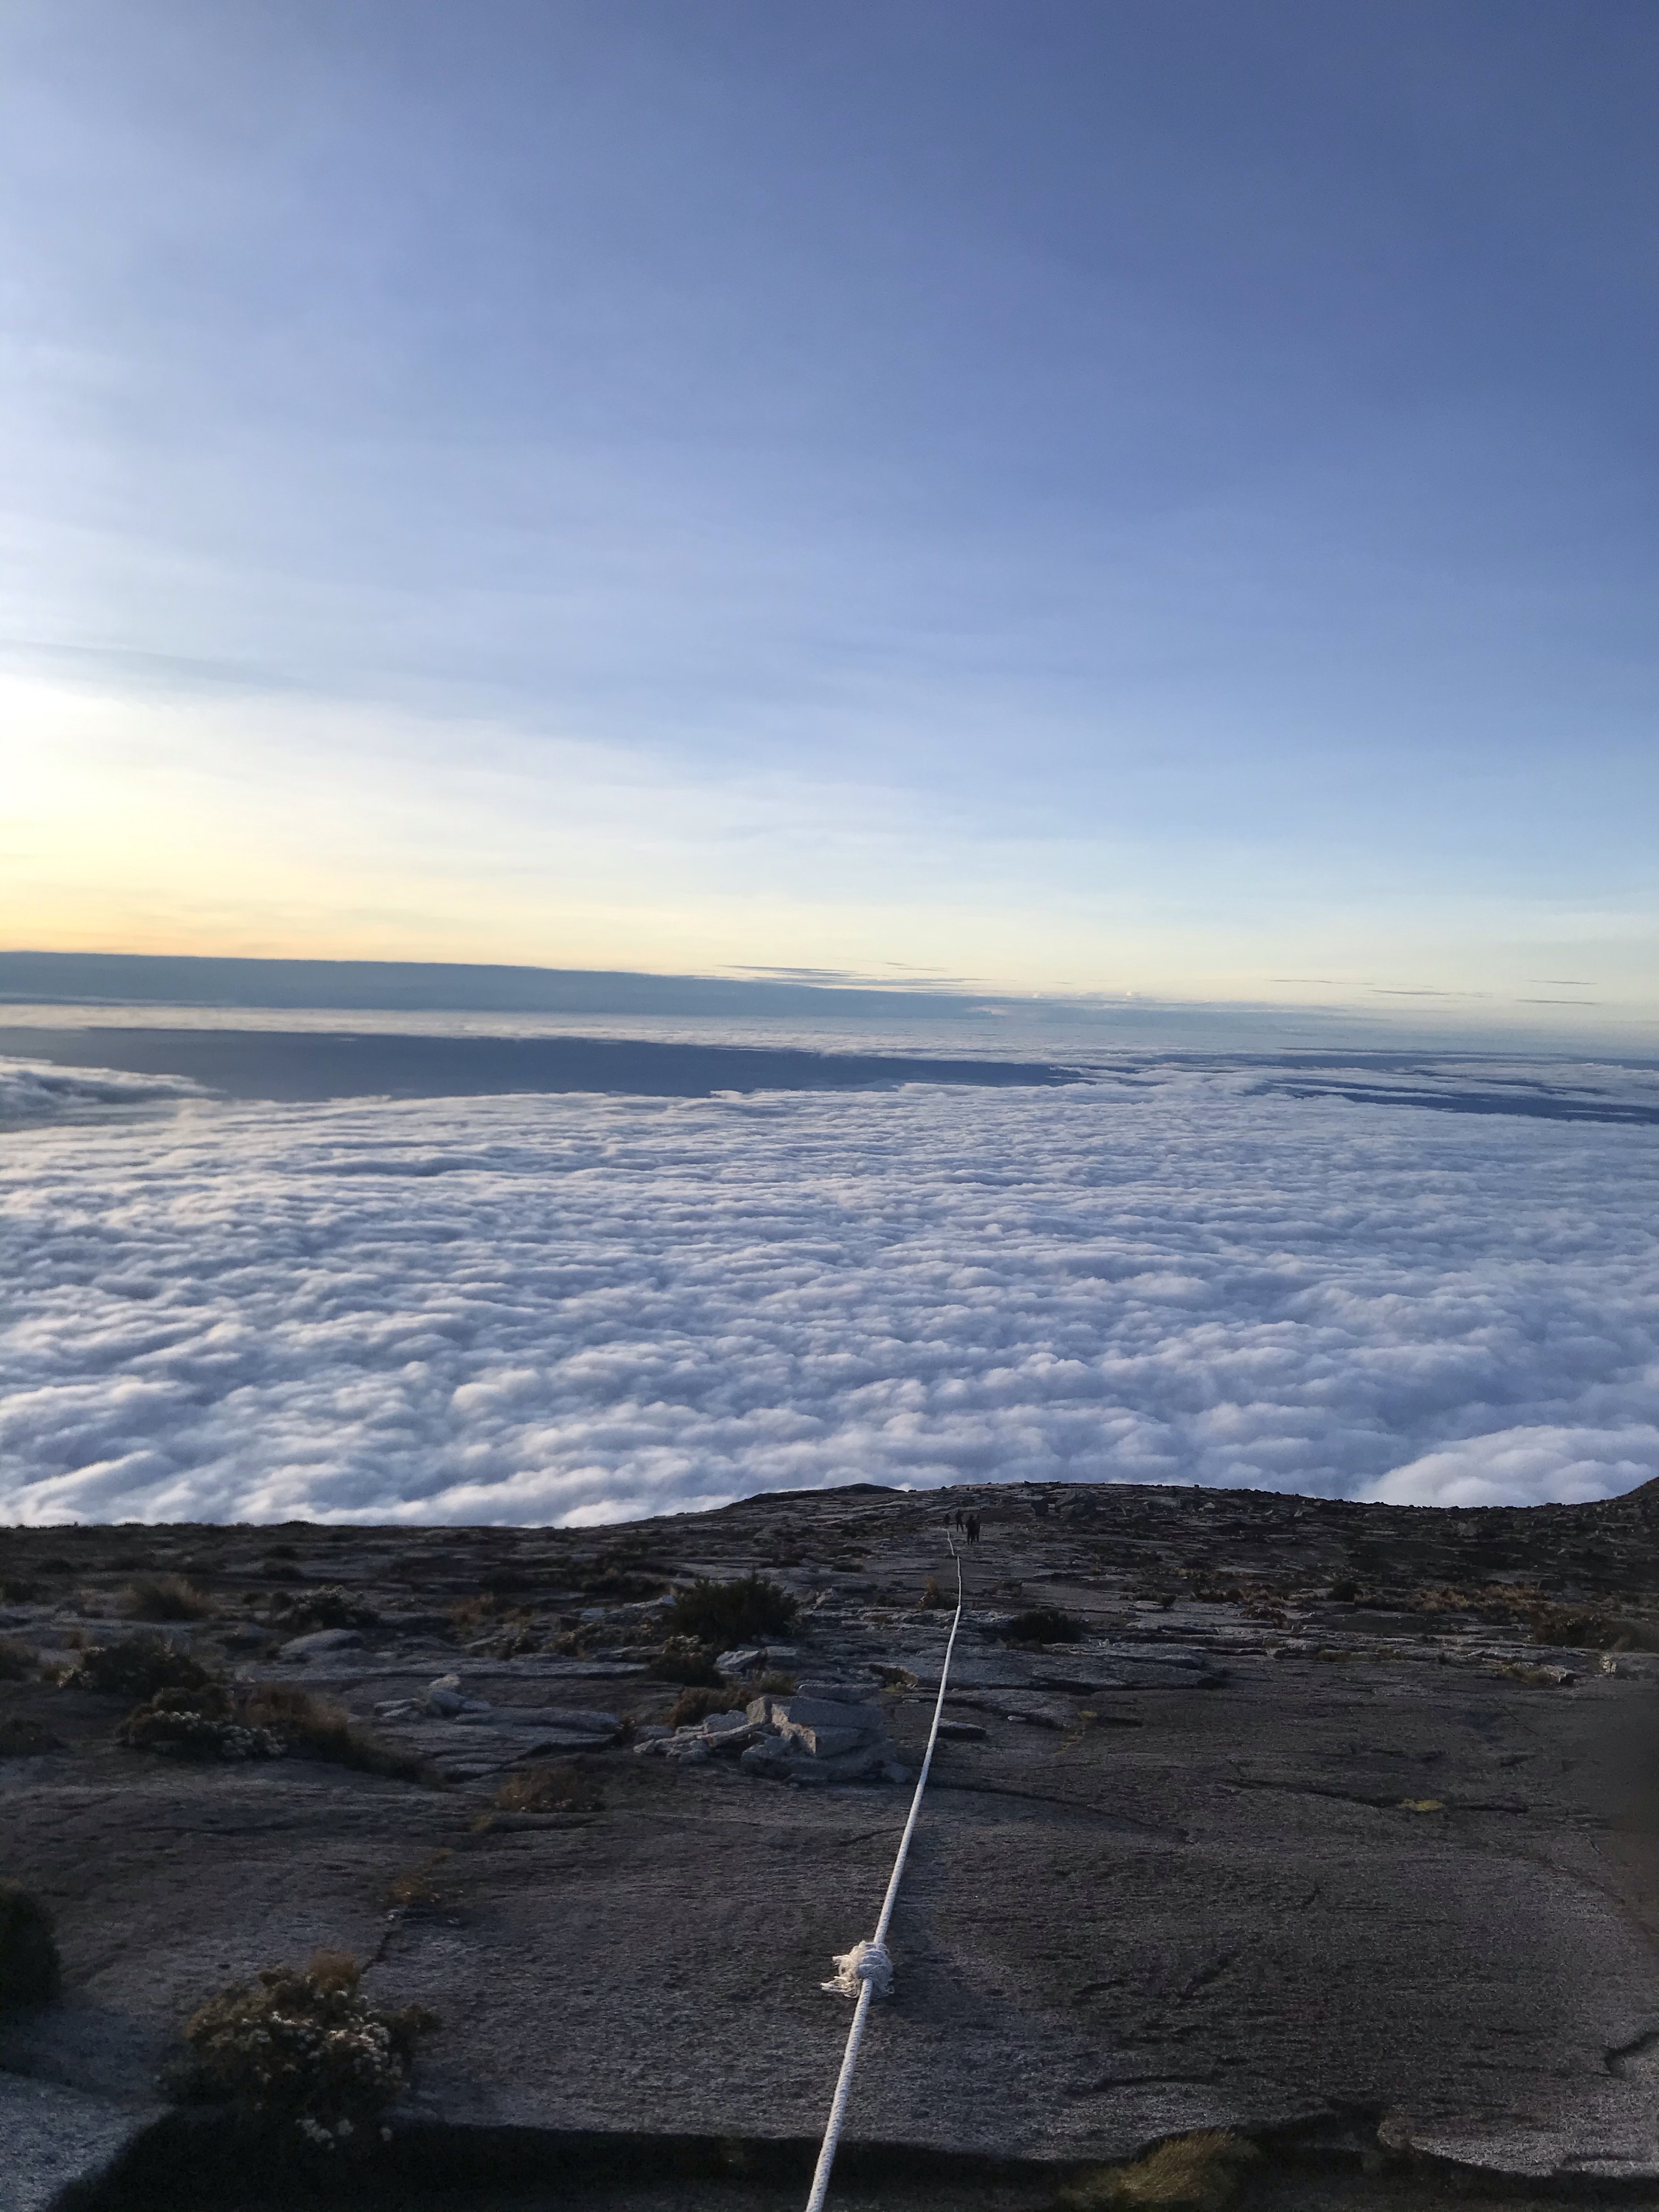
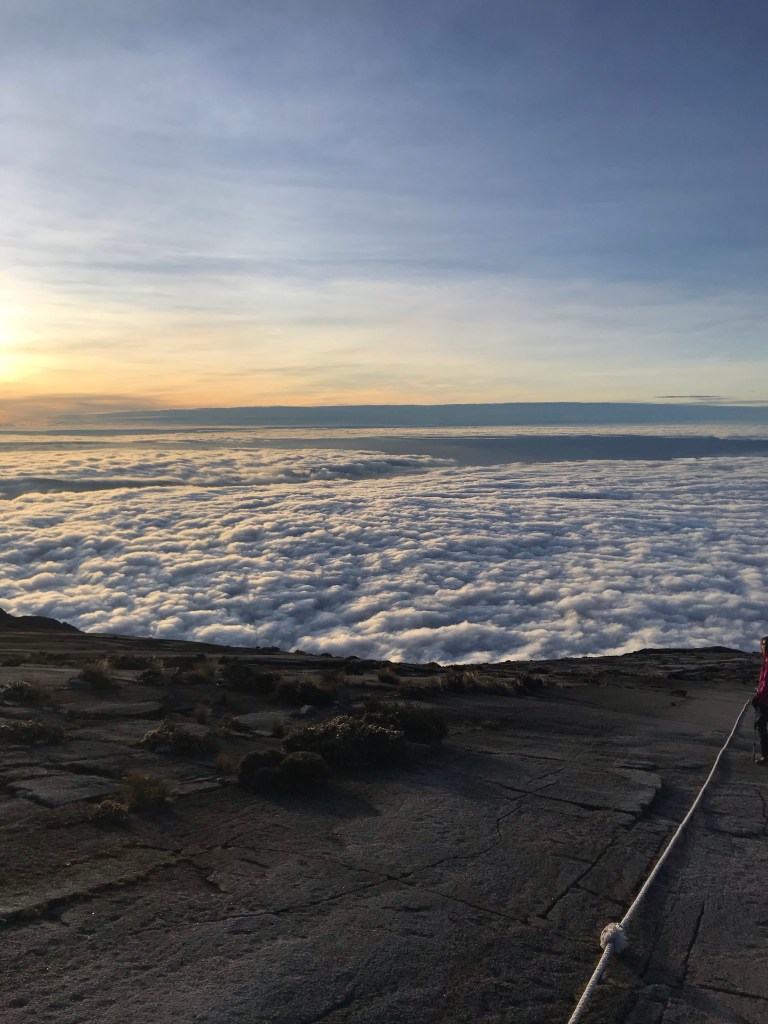
The trail from Sayat-Sayat hut to the peak is no joke. It was steep all the way, We’re pretty sure the inclination from here onwards was 45 degree-ish and steeper. There are ropes provided all the way to the peak at this point. It’s important to wear gloves to help you when you’re depending on the ropes. One can get severe AMS due to rapid elevation gain, so please be careful. If you start feeling AMS or cramps, please get the “air garam” or ORS dehydration salt to somewhat make you feel better.

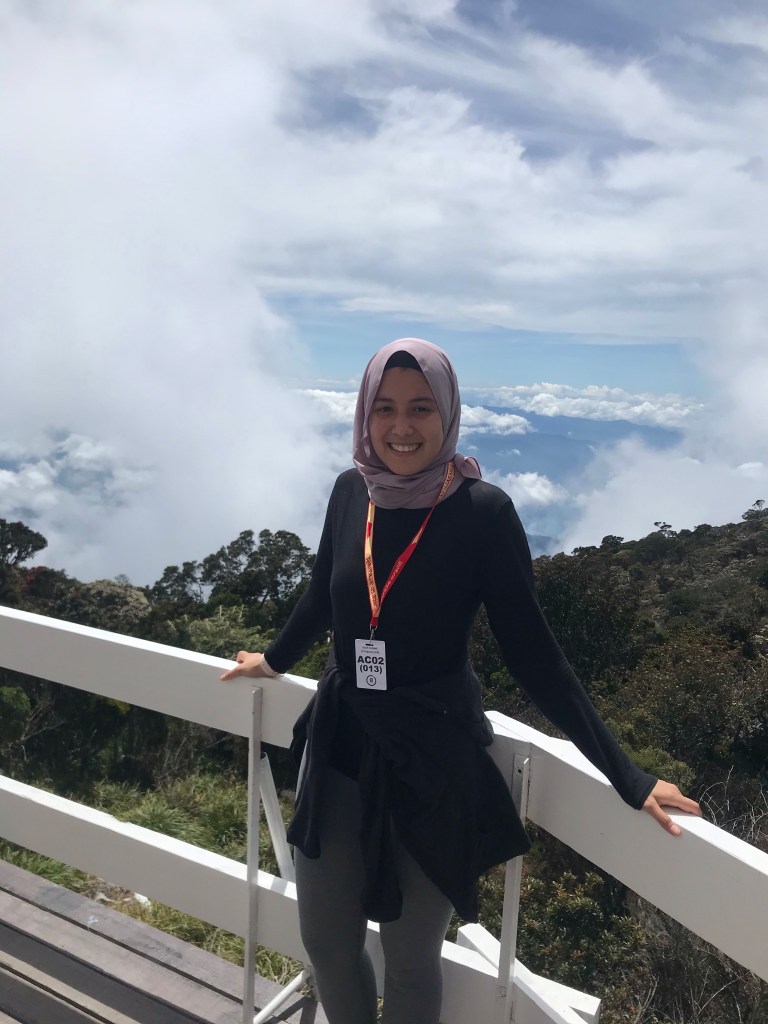
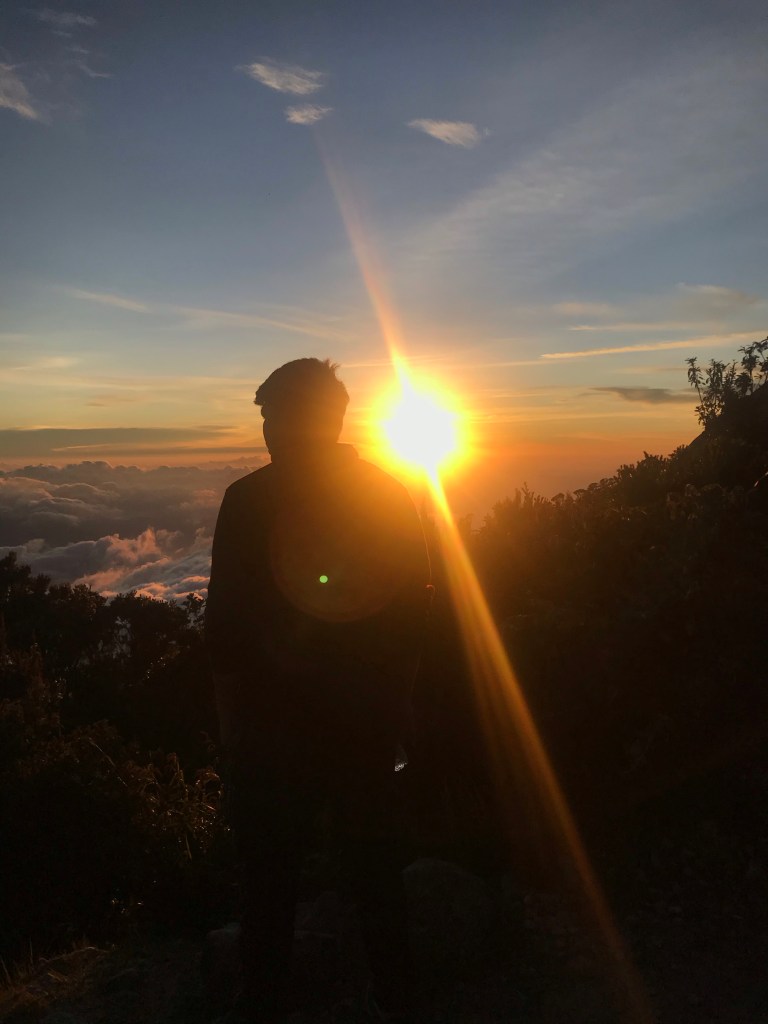
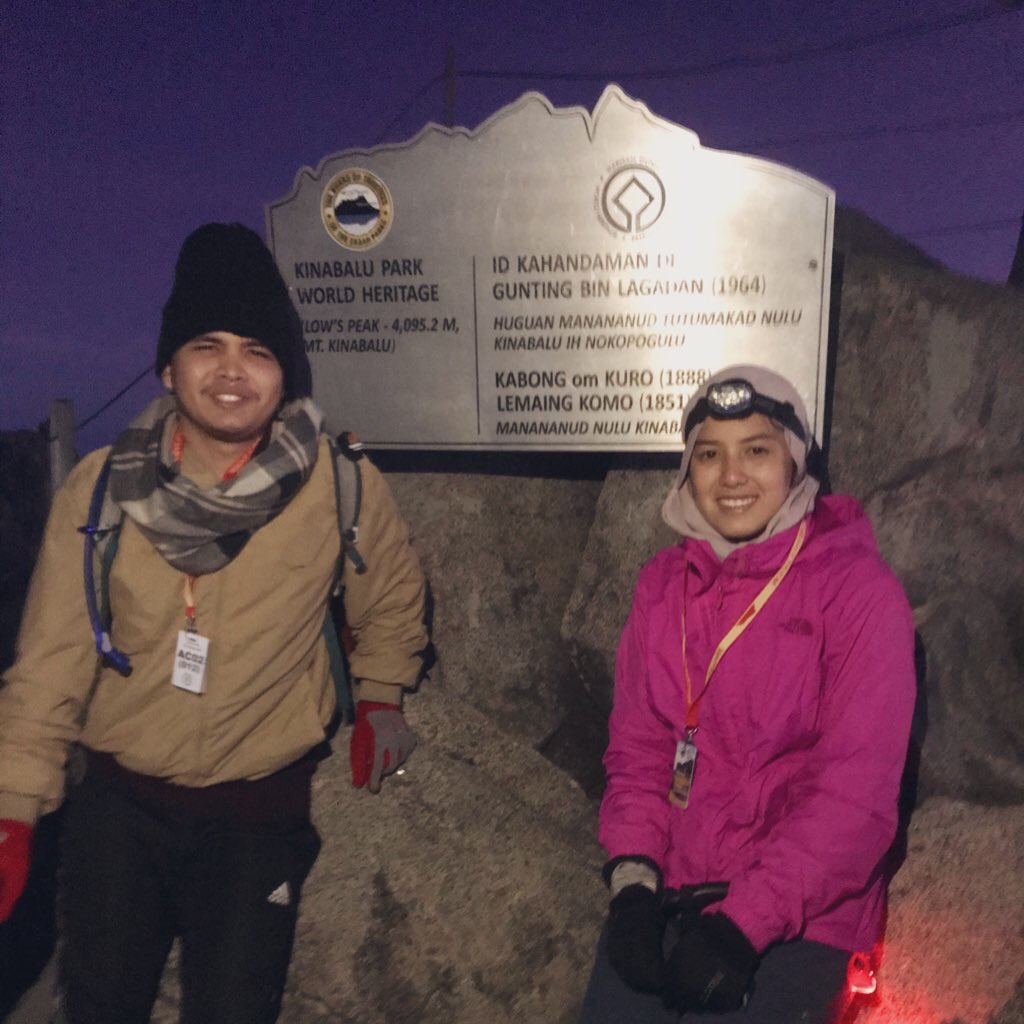
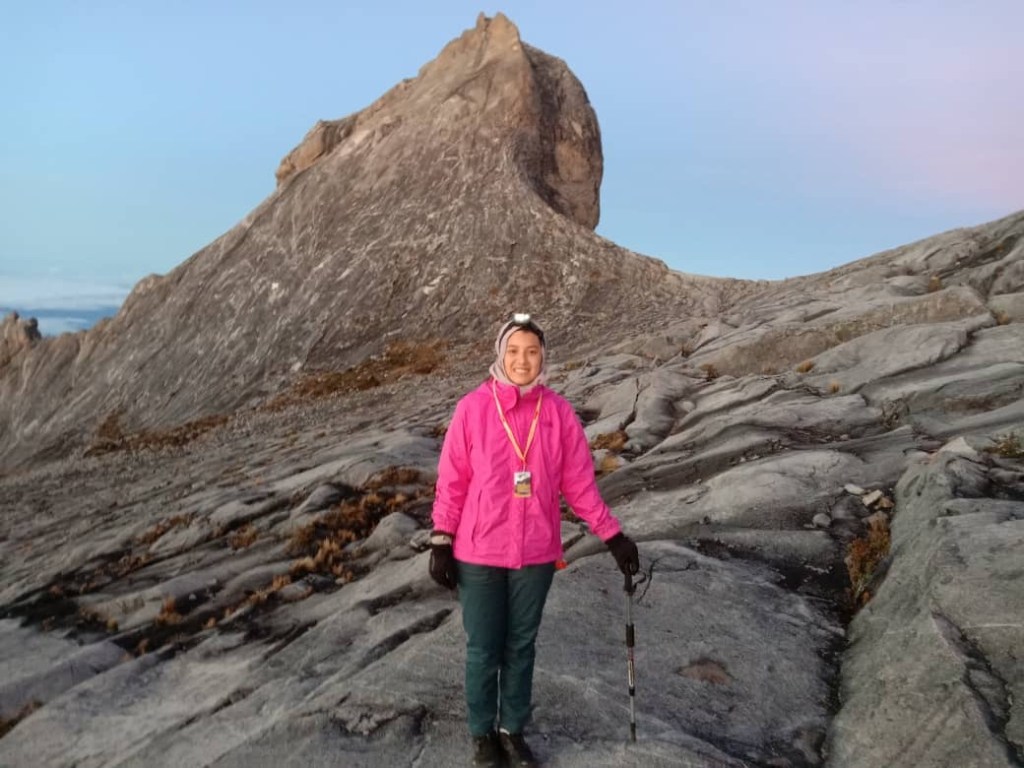
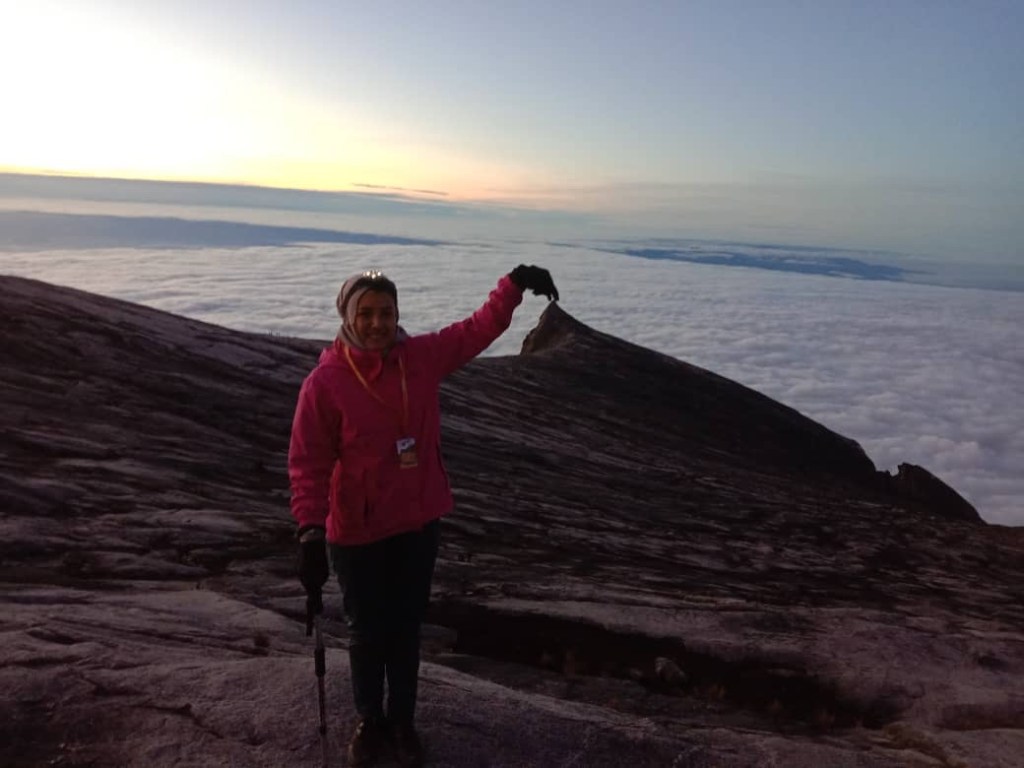
5:30 am: Reached peak

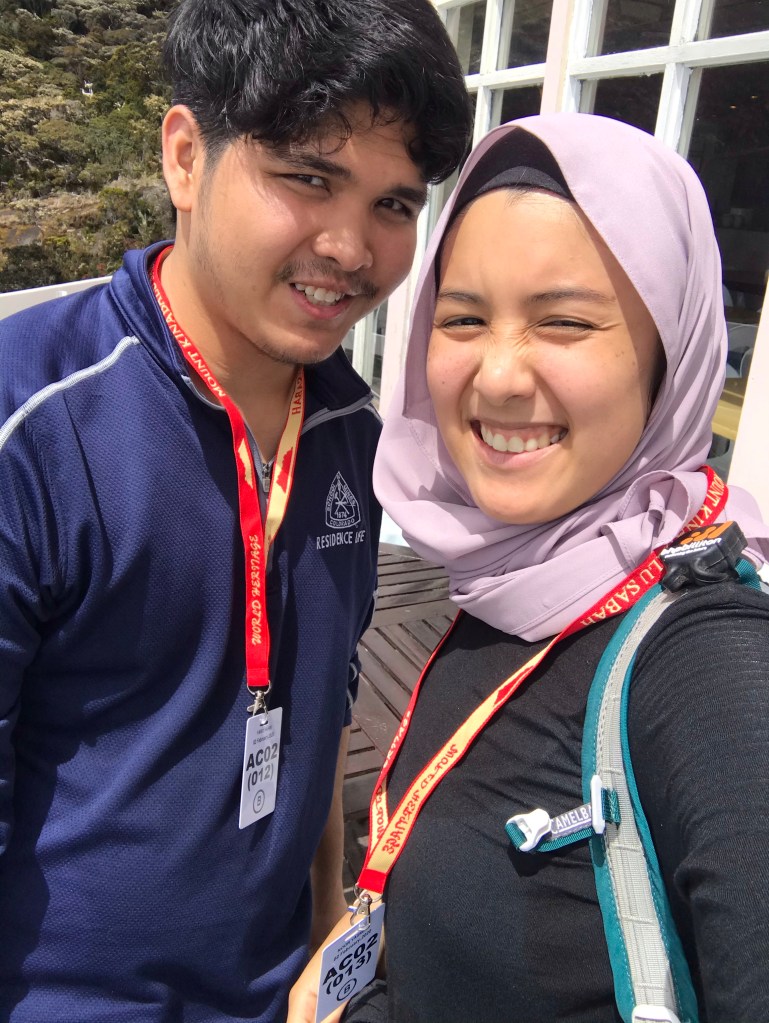
We were the first of our group to reach Low’s Peak. When we got there, there was already a long queue for photos at the signboard. Of course, we had to queue. Once we had our photos taken, we waited for the rest of our friends. Mind you, it was super windy and freezing, and we thought we could find shelter in between boulders while waiting for the rest of the group. However, after 30 minutes of waiting, we could not stay any longer so we decided to descend.

WE MADE IT! Reached here at 5:28 am.
Stats! From Panalaban to Low’s Peak! Clocked in at 13,420 ft!
The following pictures were taken during our descent, when we finally got some sun. Sunrise was at 6am.
Taken by our tourguide. We look like an old married couple.
And I look like a potato, with so many layers of clothes to keep myself warm.
Gotta do that generic pose!

6:00 am: Descend

8:00 am: Reached Panalaban

We were the earliest to reach back to our dorms. So, while waiting for the rest, we packed our stuffs, and managed to sleep for an hour and a half.

9:30 am: Breakfast 🥞

Tired but happy faces.

10 am: Start descending

We didn’t take any photos throughout our descend as we were saving batteries. We couldn’t charge our electronics in the dorm as electricity for our dormitory was only available after 12:00 pm.

1:30 pm: Reached Timpohon gate

WE did it! Once we have reached Timpohon gate, we signed off our names, just like how we did it before starting our hike yesterday.
With the rest of our group members! And our colored certificates! Basically, colored certificate simply means that you have reached the peak, whereas black and white certificate means you did not reach the peak.

6:00 pm: Dinner

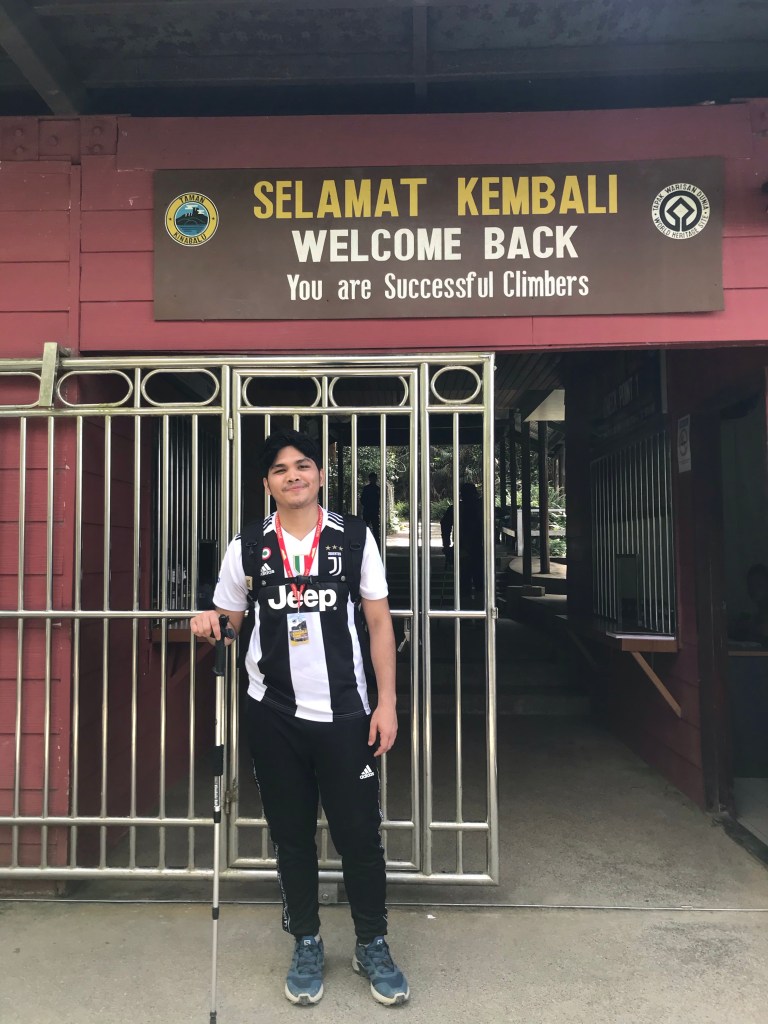
Our certificate giving ceremony was held during dinner at Restoran Panataran. We took pictures afterwards and bid goodbye to our friends.

Honestly, we had such an amazing time hiking Mt K, especially with the help of En Jaffri, and the local guides. Everyone else on the trip were really nice too. Everything went smooth for us, Alhamdulillah. We managed to get to the peak and back safely without any injuries.

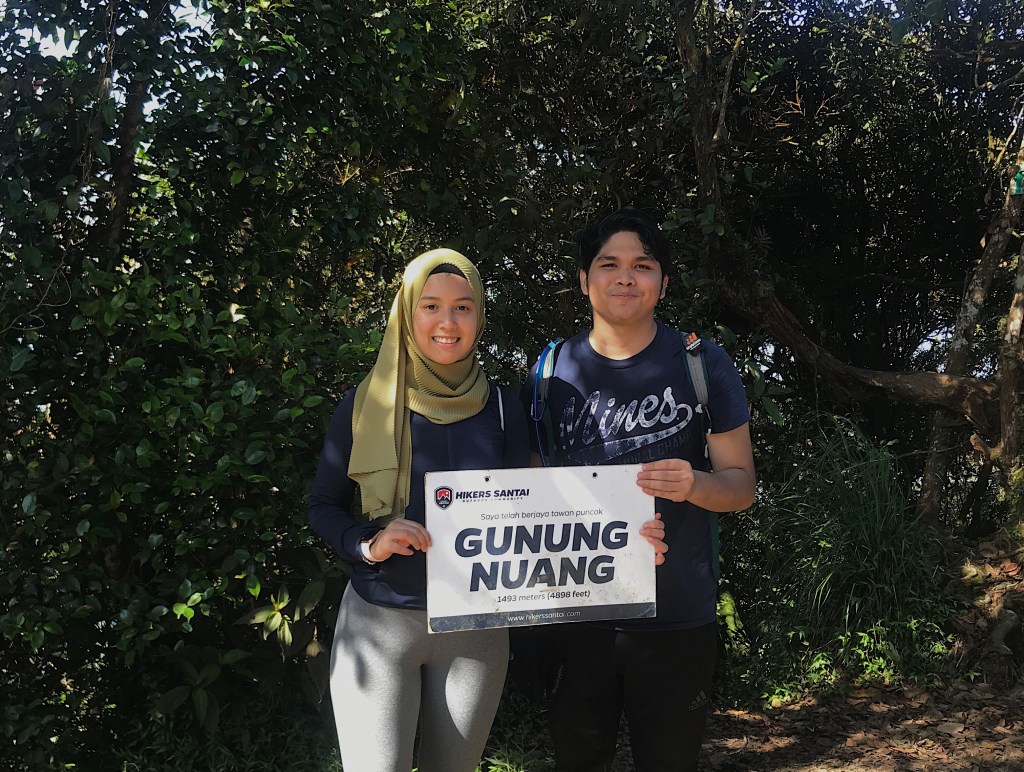
Our tip is that you follow the rules and regulations of the park. Be respectful of the surrounding and only mind your own business while hiking. Have proper training prior to the hike, because trust us, Kinabalu is intense. We were lucky as we have trekked Mt Nuang the week before, so we were both considered very fit for the hike. We also did not struggle with AMS as we were lucky to have summited mountains higher than Kinabalu prior to this. But, training regularly and wearing proper shoes are exceptionally important to avoid you from having cramps.

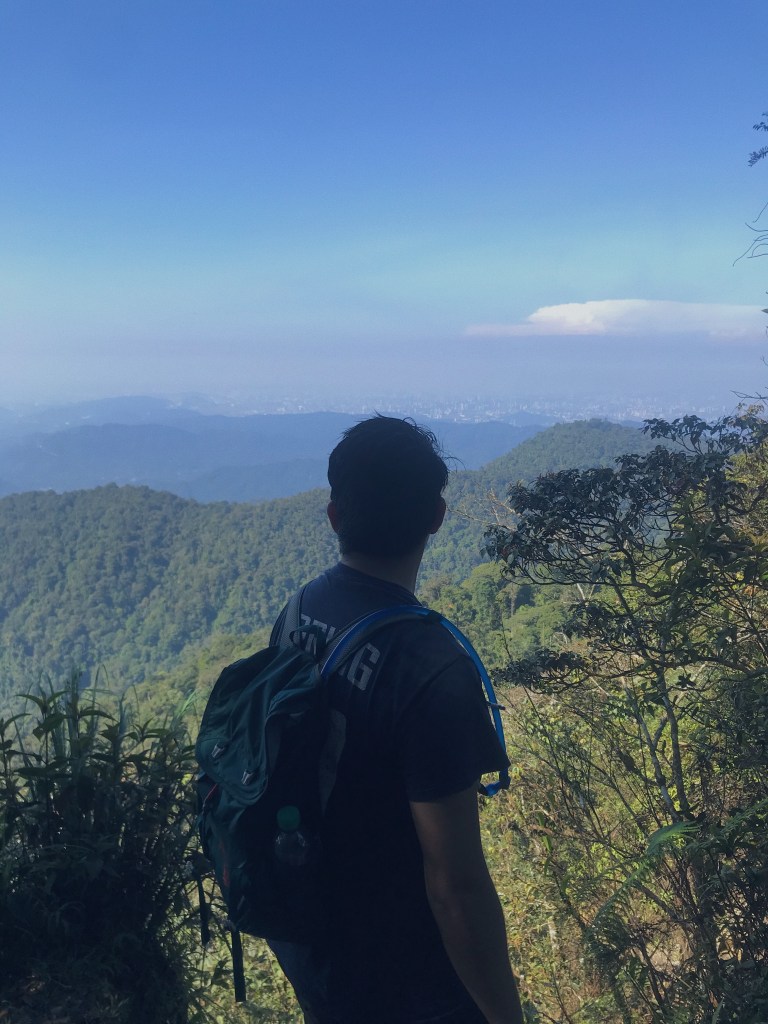
Overall, Kinabalu was beautiful and worth the struggle. I would recommend anyone with the right amount of fitness to try it and experience it. It’s definitely worth it.

That’s all for now.

Cheers,

Fahim & Yasmine

sweatspa: Not your regular sauna!

Hey there!

A week ago, I decided to try out the Full Spectrum Infrared Sauna Therapy at Sweatspa located in Great Eastern Mall. I have never been to a sauna before, let alone a full spectrum infrared sauna, whatever that means! But… I decided to give it a go and experience this sophisticated looking therapy anyway.

Booking

There are a few ways for you to book your sauna session.

  1. Walk-in
    • First-time sessions are at RM72. This is really worth it!
    • Google them! They have four different branches all over KL.
  2. Call for an appointment
  3. Classpass
    • This was how I did mine — through classpass. My first session with them was somewhat affordable as it was only at 7 credits! My second was relatively more expensive at 13 credits though.

The first thing that caught my eye as I read through the description of the spa was that it claims to be able to burn as much as 700 worth of calories in just one session. Honestly, I couldn’t believe it when I read it, but it definitely charmed me to the point I knew I could not ignore it. I mean, come on, 700 calories burned just by sitting down in heat? Sure, I can do that!

I’m pretty sure you’re just as intrigued as I am, aren’t you? With all those benefits it can offer you in just a session, you’re definitely googling for the contact number now, am I right?

Well, I definitely had to try it out if it was legit. I came to the spa with zero knowledge in hand but full of expectations on what it can offer.

Here’s what happened.

The one hour session comprises of two things:

1. 20 mins of consultation (pre- and post-sauna)

2. 40 mins of sauna therapy

In the first 10 mins of your session, the consultant will take your body measurements to analyze your fat and muscle percentages, as well as your overall body composition percentage. Higher percentage of body composition simply means that you are going towards the right direction, towards an ideal body shape — with lesser fat and higher muscle mass.

The idea of this consultation is to actually prove that even a session of sauna do shows immediate results. You will expect to see some percentage decrease of fat and higher percentage of muscle by the end of your sauna session.

Then, you will be escorted to the room in which the consultant will brief you on the sauna machine and what goes on while you’re in there. It’s recommended to go in there bare naked (don’t worry you are alone in this room, no cameras, and you can lock the door too) because trust me, you will be completely drenched anyway.

The sauna is placed in a room where you will be all alone and safe for you to remove your clothes.

You may control the temperature in the sauna to your liking, but my session was averaged out between 57-58 degrees Celsius. I swear, the last 5 minutes was probably the longest for me as I couldn’t keep still cos it was really hot! But, as I said, you could actually control the temperature so that it is manageable for you. I just realized I could do that at the end of my session… so, you know… silly me for not asking about it earlier.

After the 40 minutes, you may call the consultant to hand you a cold towel so you can wipe off the sweat and to balance out the temperature of your body. Once you’re all set, the consultant will take your measurements again to compare the readings from before, and to observe an overall improvement from the session.

Outcome

This may seem a little embarrassing as I have now realized I have a lot of tummy fat (shame on me!), but I guess I can show you what my readings are so you know what to expect out of this sauna session.

Before
After

Notice that my body percentage dropped 0.3% after the session! Not to mention, my overall body composition increased from 69% to 70%. Of course, it is not a drastic change, but it is a change nonetheless! Ultimately, it proves that there is immediate change just after one session. Although I have to admit that you may also see similar results if you were to do other intense workouts such as running, or HIIT. The consultant told me that the intensity of this workout is equivalent to jogging 3-4 km. I can’t 100% vouch for that, but I did feel exhausted, dehydrated and completely drenched in my own sweat after the session. I had to sit down right after getting out of the sauna for a few minutes as I was feeling lightheaded. It was a little intense, maybe because I wasn’t used to the heat, but it was definitely tiring too. All in all, it did feel like a workout, but much better, due to the benefits of what an infrared sauna can give you. The two most apparent to me were:

  1. Detoxifying body from toxins
    • The first 10 mins of sauna will have you sweating as if you’re going for a workout, you know, like those sticky sweat we all hate so much, right? But the other 30 minutes will have you drip out water as if you’re showering. These liquids are actually toxins being removed from your skin. I also noticed things coming off from my skin, and I thought they were ‘daki’, but they’re actually toxins that are being removed!
  2. Weight management
    • It burns calories, and a good amount at that too! Although it is not recommended to have it as a replacement to exercising, it can be a good add-on to your workout routine. It can also act as a replacement on days that you’re too busy to hit the gym. But, it does do a good job in maintaining an ideal weight as it proves to reduce a small percentage of fat even in just one session.
I was told that the tiny dot is actually toxin removed from my skin!

There are a lot more benefits other than those two, trust me. You just have to try it out for yourself!

Honest opinion

Truthfully, I was absolutely amazed by the whole experience especially because it showed immediate results. I was amazed at the fact that it was not your traditional sauna (I did go to a traditional sauna a couple of days after to experiment) because it was not as scorching hot. You can definitely feel the heat, but not as intense as a traditional sauna. This goes back to the foundation of the infra red sauna, in which it applies a full spectrum of wavelength so it can penetrate not just on your skin, but deeper into your body for that full-on application.

I also liked how my body felt after the session, in which I felt more energized and more relaxed as if I had a really good workout.

I was definitely in love with it that I came back for another session on Sunday, and brought my mom to try it out too. I also had the privilege of meeting the owner of the sauna, Sabrina, who I respect so much for her passion and dedication of introducing this cutting edge technology to Malaysia.

Overall, I really enjoyed my session and would definitely recommend many others to give it a go! Even my mom loved it!

My mom with Sabrina, who is super nice and gorgeous!

Thanks for reading.

Love,

Yasmine

Experience in Nuang

Hey folks! Today we would like to share our hike to Gunung Nuang a couple of weeks ago. This was done as our preparation for Mt. Kinabalu. We picked Nuang as our training ground as most hikers within the Klang Valley are aware of the difficulty that Nuang poses — the distance, the wilderness, the steepness, although not so of the prominence as it is nothing compared to the mountains in the Crocker Range.

Overlooking Banjaran Titiwangsa

Before we start off with the lengthy paragraphs, we would like to accentuate some useful statistics on Gunung Nuang:

  1. Location: Pahang-Selangor border
  2. Available routes:
    • via Kuala Pangsoon, Hulu Kelang
    • via Janda Baik
    • via Kampung Kemensah
  3. Elevation: 1, 493 meters (4, 898 ft) — courtesy of Wikipedia
  4. Elevation gain: 1, 155 meters (3, 789 ft)

We managed the Janda Baik route as it is relatively easier as stated by bloggers. Even so, we had to start the morning earlier than usual as it is an hour journey from Kuala Lumpur.

Trail via Janda Baik:

  1. Transportation: 1-hr drive from KL, exit via Genting Sempah.
  2. Trailhead coordinates: 3.303979,101.887121 (You can easily copy paste this on GoogleMaps).
  3. Facilities: There is a RM10 parking fee per car just before the trailhead starts. The parking has a toilet provided.
  4. Distance from trailhead to peak: ~8 km

So, here comes the lengthy yet useful paragraphs if you are to summit Nuang via Janda Baik. First off, we would like to say that it is most recommended to start the hike early so you can finish by noon. Usually, it would start raining in the afternoon, so the earlier you get up, the better. We drove off from KL at around 5:30am and reach the trailhead at about 7am. Remember to eat your breakfast! This is a relatively long hike so be sure to fuel your body prior to the hike. Also, bring lots of water. We brought 6 liters of water, and it was just enough for the two of us until the end of the hike. Pack along some energy bars or light munchies in case you get hungry in the middle of the hike.

The thing with hiking early in the morning is that the cool weather in the jungle will make you more likely to forget to drink. However, you need to remind yourself to sip at least a little amount to avoid being dehydrated or getting headaches since you are constantly moving. Thus, drinking plenty of water is a must!

Okay, enough with the safety precautions. Let’s roll in the best part of the hike.

We started off at 7:27 am, walking from the car park to the starting point. Here, you must cross a short stream to get to the other side. Then, we passed through some agriculture farms that stretched out probably for 15 minutes. *Please note that the hike hasn’t started yet at this point. This is merely a brisk walk. Then, walked through a sandy route fit for a 4WD and this went on for another 15 minutes before coming to a 3-way route. We proceeded on by taking the middle route, which led up to a hill, and here is where the aching starts. We also found out from fellow hikers that this trail normally used by ultra-runners as part of their training. Anyway, this trail leads to the deep rainforest where you’ll find yourself overwhelmed by the millions of various trees and plants that make up the profile of the mountain. This went on for awhile until you reached Chemperoh waterfall. *Also! Tip on not getting yourself lost: Follow the colored signs on trees or tapes belted around the trees.

The trail at the agriculture farm

At the end of the 4WD road is a 3-way route, follow the trail with red arrow which leads up to the hill.

Some forest loving appreciation pic


Once we have reached the Chemperoh waterfall, we crossed a second stream to get to the other side. Then, we took a left and continued our hike. Some might get confused here and take a right, but it’s a dead end anyway, so you’re bound to take the left from where you crossed the stream, and soon you’ll find the tapes on trees like what we mentioned earlier. The trail gets steeper at this point so if you have a hiking pole, this would be handy. But, if you don’t, work those asses off! You’re getting yourself a booty… and leg day. The trail from here is pretty straightforward, there is only one path at this point on, so it’s impossible to get yourself lost. Again, mind the tapes belted around the trees! Be wary of your surrounding. The steep route after Chemperoh waterfall gets most of the elevation gain, as it is steppy steep steps all the way up. You may start getting tired or headaches, but remember to drink water once you feel tired. Water is your best friend at this point. Many hikers had their chances of meeting pacat (english: leeches) during this hike, so please wear appropriately.

About an hour or so of hiking, you will encounter the mossy forest. When you get here, you will realize that the elevation gain is legit and that you’re almost there. There are ropes at this point of the trail to assist you in those sloping, difficult reaches. 10 minutes or so, you will finally reach the peak! Like us! Congratulations, you’ve made it to the top!

At the ropey place just below the peak.
We made it to the top!


Now, it’s just a matter of going back down. The same way. Only, this time, your ankles will ache.

As for us, we made to the peak in 2:59 hrs, and back down in 5:58hrs. We reached car park at 1:51 pm, covering a total distance of 16-ish km. Our tip is slow and steady wins the race, and we avoid stopping for more than 15 seconds, until we reached the peak or carpark. We believe that when you have the momentum to push yourself further, go for it and don’t stop. Otherwise, you’ll tire yourself. You may have a different approach that speaks to you, and that’s completely fine. It isn’t a race. The idea is to get up and down the mountain all in one piece. So, safety is key.

Tip: If you’re a beginner, we don’t really recommend Nuang as your first hike. You should try Broga or other hills equivalent to that prior to this hike.

Also, if you’re unfamiliar with the trails, hike within a group, and most probably during the weekends as more people tend to hike during this time. You will feel safer this way, and you get to meet new friends too.

If you think you’re slow or heavy, don’t get the mountains discourage you. Just start earlier, and at a steady pace, whatever pace that may be. The key is to get up and down in a safely manner.

More hiking posts coming up!

Til then,

Fahim & Yasmine

P.S.: Please carry your trash with you. Treat the rainforest as an exotic destination, and not your home! Your trash doesn’t belong in the forest, it will not decompose so don’t litter!

sushi love

Who here loves sushi as much as we do? 🙋🏻‍♀️

This evening, I brought Fahim to one of my favorite Japanese restaurants in KL called Rakuzen. We had some good ol’ salmon sashimi, some yakinikujyu (grilled beef 🥩 on rice 🍚), some spicy zosui-beef (spicy beef broth on rice), and also some tempura mori (combined deep-fried veggies and shrimp). The meals were absolutely delicious and we felt that it was worth the experience and the price tag.

Truth be told, Fahim was never a big fan of sushi 🍣 or anything raw prior to today, but now, it is safe to say that he has a completely different opinion on Japanese cuisine. He loved every single dish and I’m glad that I brought him to Rakuzen. As for myself, I’m a big sashimi fan! Although I haven’t had the luxury of trying out sashimi in Japan yet, but I can always tell the difference between sashimi from an upscale sushi restaurant such as Rakuzen versus the ones you get from Sushi King or those ready made ones at the grocers. I hope I’m not being offensive, it is only my personal opinion that there is an obvious difference in the taste. No doubt that fresh, delectable sashimi can burn a hole in your pocket, but that is why I have them on special occasions only. To me, sashimi is an indulgence one should crave for.

If you’re a sashimi lover, you can always tell the difference between a fresh sashimi, and mediocre ones.

There are no pictures for the yakinikjyu or the spicy beef broth since we were too busy devouring our food, but trust me, they were just as delicious! Fahim and I enjoyed their thinly sliced beef that were topped off with rice and half boiled egg, and yum! They were so good. Some restaurants give you small portions of beef and a whole lotta rice, but in Rakuzen, you get equal portions of beef and equal portion of rice, which is so reasonable yet so sinful!

This isn’t really a sponsored post, hence the lack of pictures. But we just wanted to share our thoughts on it, and that if you’re craving or been wanting to try really good sushi, you should give Rakuzen a try. It is definitely a little pricier than Sushi King or other franchises equivalent to that, but with Rakuzen, you definitely get more options in terms of menu, with a much cleaner and cozy atmosphere, as well as having meals that comes in big portions which are always worth the price tag.

All in all, we had a great dining experience! Tell us where your favorite restaurants are, and we would love to give them a try.

welcome to weekendlogue

Hi there! Before we start off with the rest of our postings, we think it would be appropriate to first introduce ourselves.

Who are we?

We’re Fahim and Yasmine, co-authors of this blog. We’re pretty much like any other Malaysians in their 20s, in which we are both trying to make ends meet, while maintaing a stable, healthy lifestyle and doing what we love most together — spending our weekend trying out new things. Hence, the name ‘weekendlogue.’

What’s weekendlogue?

Basically, weekendlogue is our journal, per se, or a domain for us to jot down memories or anything that is worth publishing to the public. Postings will be based on trips, or activities that we do together, or individually. We decided on the name ‘weekendlogue’ because let’s be real, most of our trips/outings are during the weekend anyway, and a log or ‘logue’ to record these memories in a blog.

Why blogging all of a sudden?

We thought it would be great to write it down in a domain so we could come back to reminisce memories of the past. While doing so, who knows if we might attract audiences that are interested in knowing more about certain trips or activities that we do, so that’s like killing two birds with one stone, ain’t it?

How often will we blog?

The idea is to be as consistent as possible, which means, most probably once a week or so. But, this depends on our availability to write and to venture… off into doing new things.

We think this is enough for an intro for now. Anyhoo, welcome to weekendlogue and stay tune for our very first post!

With love,

Fahim and Yasmine