Lately I’ve been feeling extremely tired in the morning even though I’ve had a good 7-ish hours of sleep. It is definitely a struggle to wake up and not contemplate on taking Grab to work. Our home from the nearest LRT takes about roughly 12 minutes of walking, which isn’t that bad to be honest, but every morning I dread the feeling of having to just move these muscles. It’s not being lazy, it’s just a feeling of sluggishness. What gives me the sheer motivation to walk is the fresh feeling after the morning showers, and also after looking at the crazy Grab fares! RM15-18!! I’ve taken a taxi once back home and it only costed me RM5.50 so what’s the deal here, Grab??
Anyway, I still make the effort to walk to the LRT albeit complaining about it. 5 days a week, that is. LOL. Walking always leaves me feeling better at work. Like at least I know I’ve sweat it out a bit in the morning, and definitely helps to put me in a good mood throughout the day.
I gotta at least savor the moment while I can. There will come a time where I can no longer make the effort to walk 12 minutes a day crossing streets, and I will cry when that happens. I’ve always known to love walking and jogging and hiking but slowly my legs will wear out on me and say “Nope Yasmine, not now.”
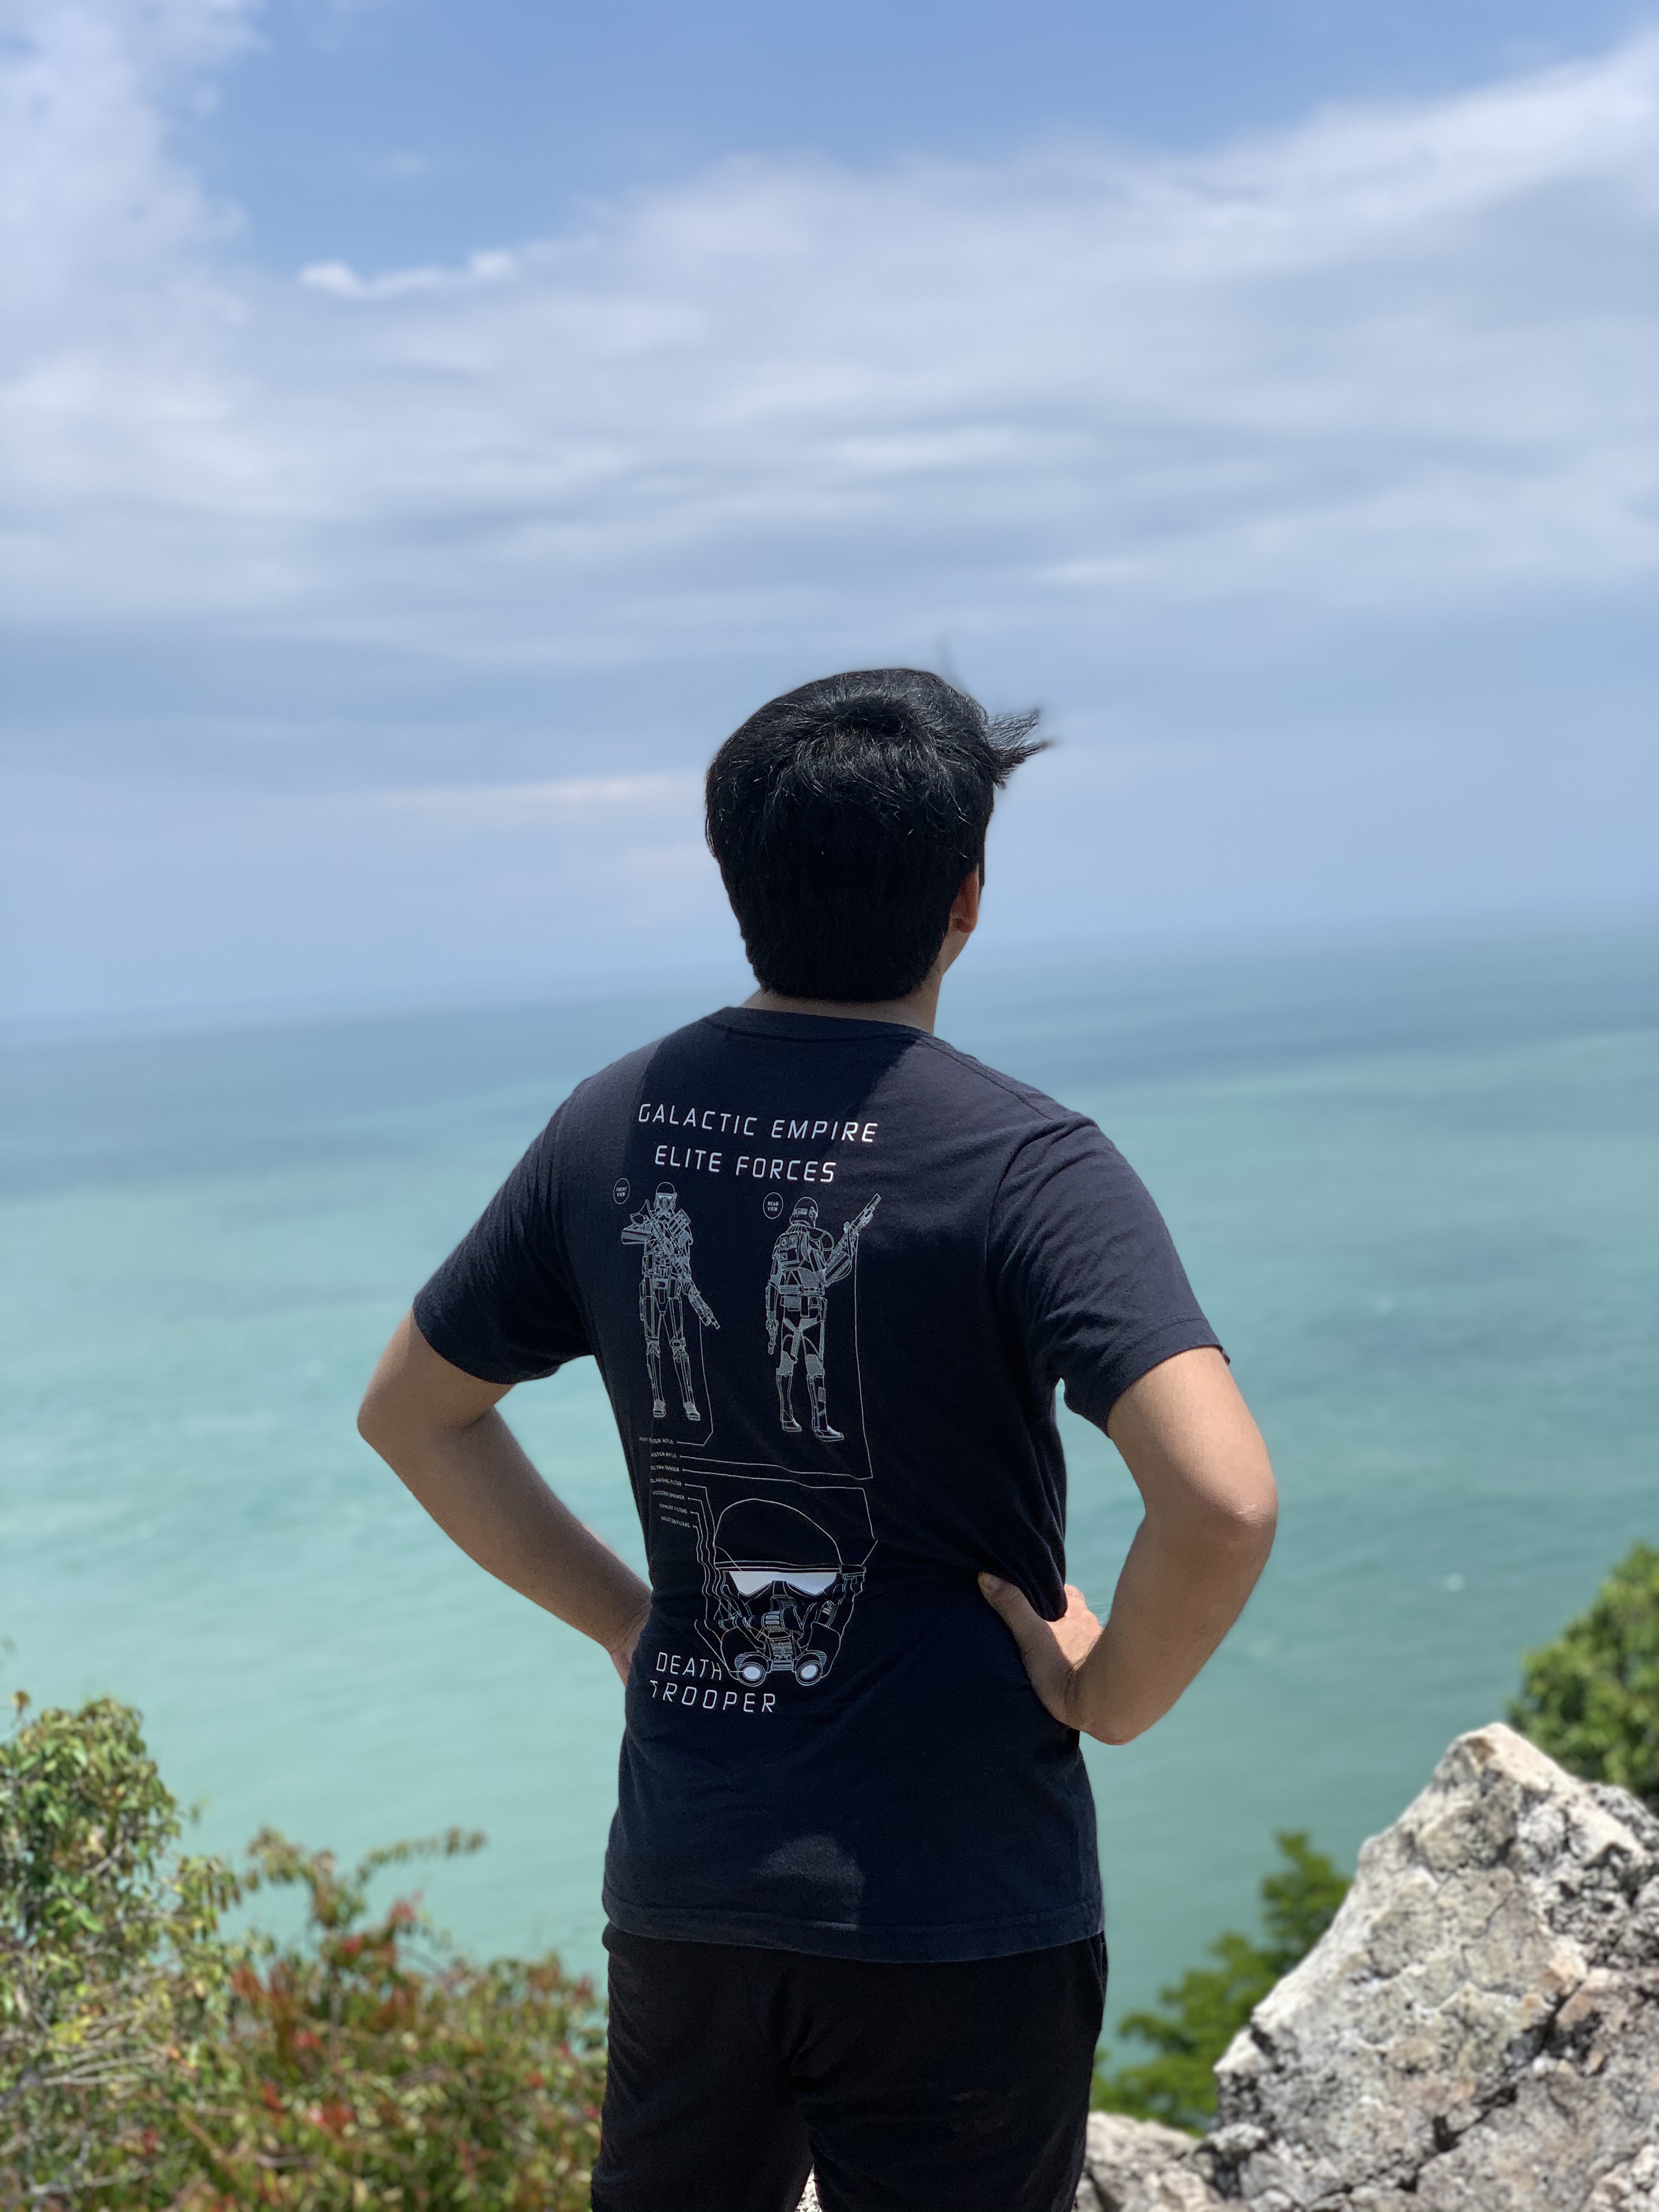
There are two types of people in the world – those that enjoy sceneries from up above, and those that enjoy sceneries from down below. We’re talking about elevation here. But, what if there is a place where you can enjoy the best of both worlds?
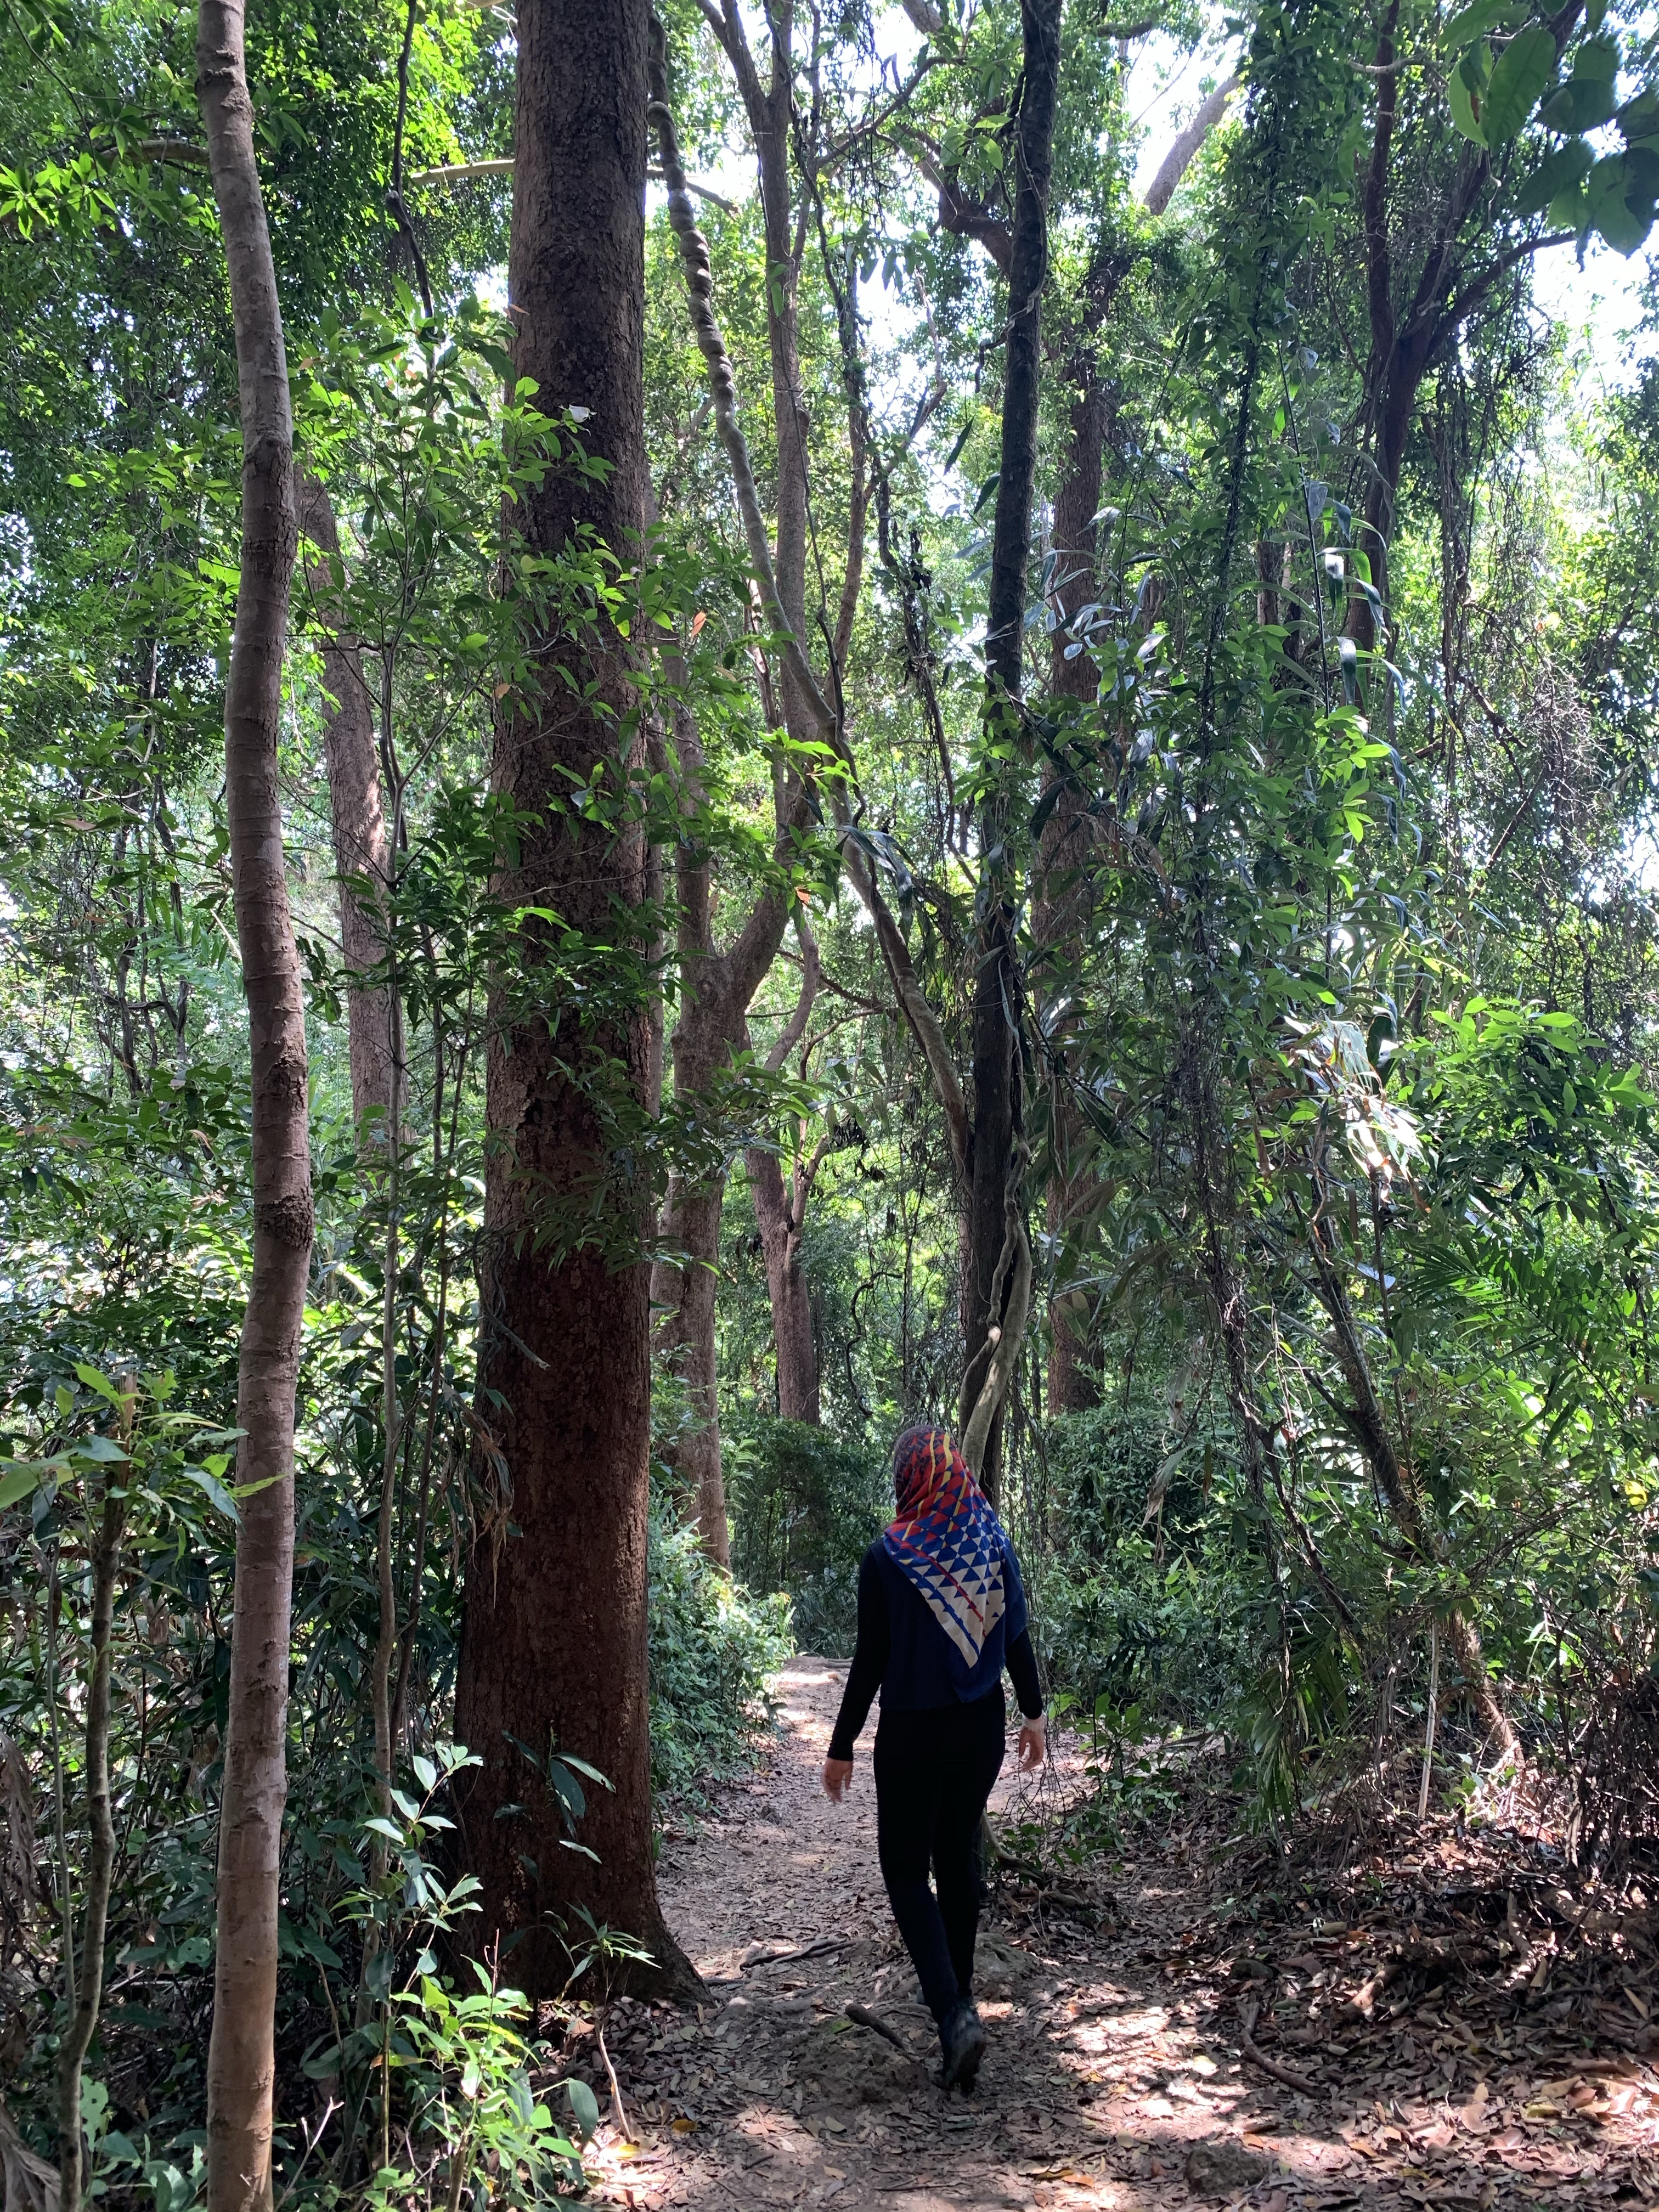
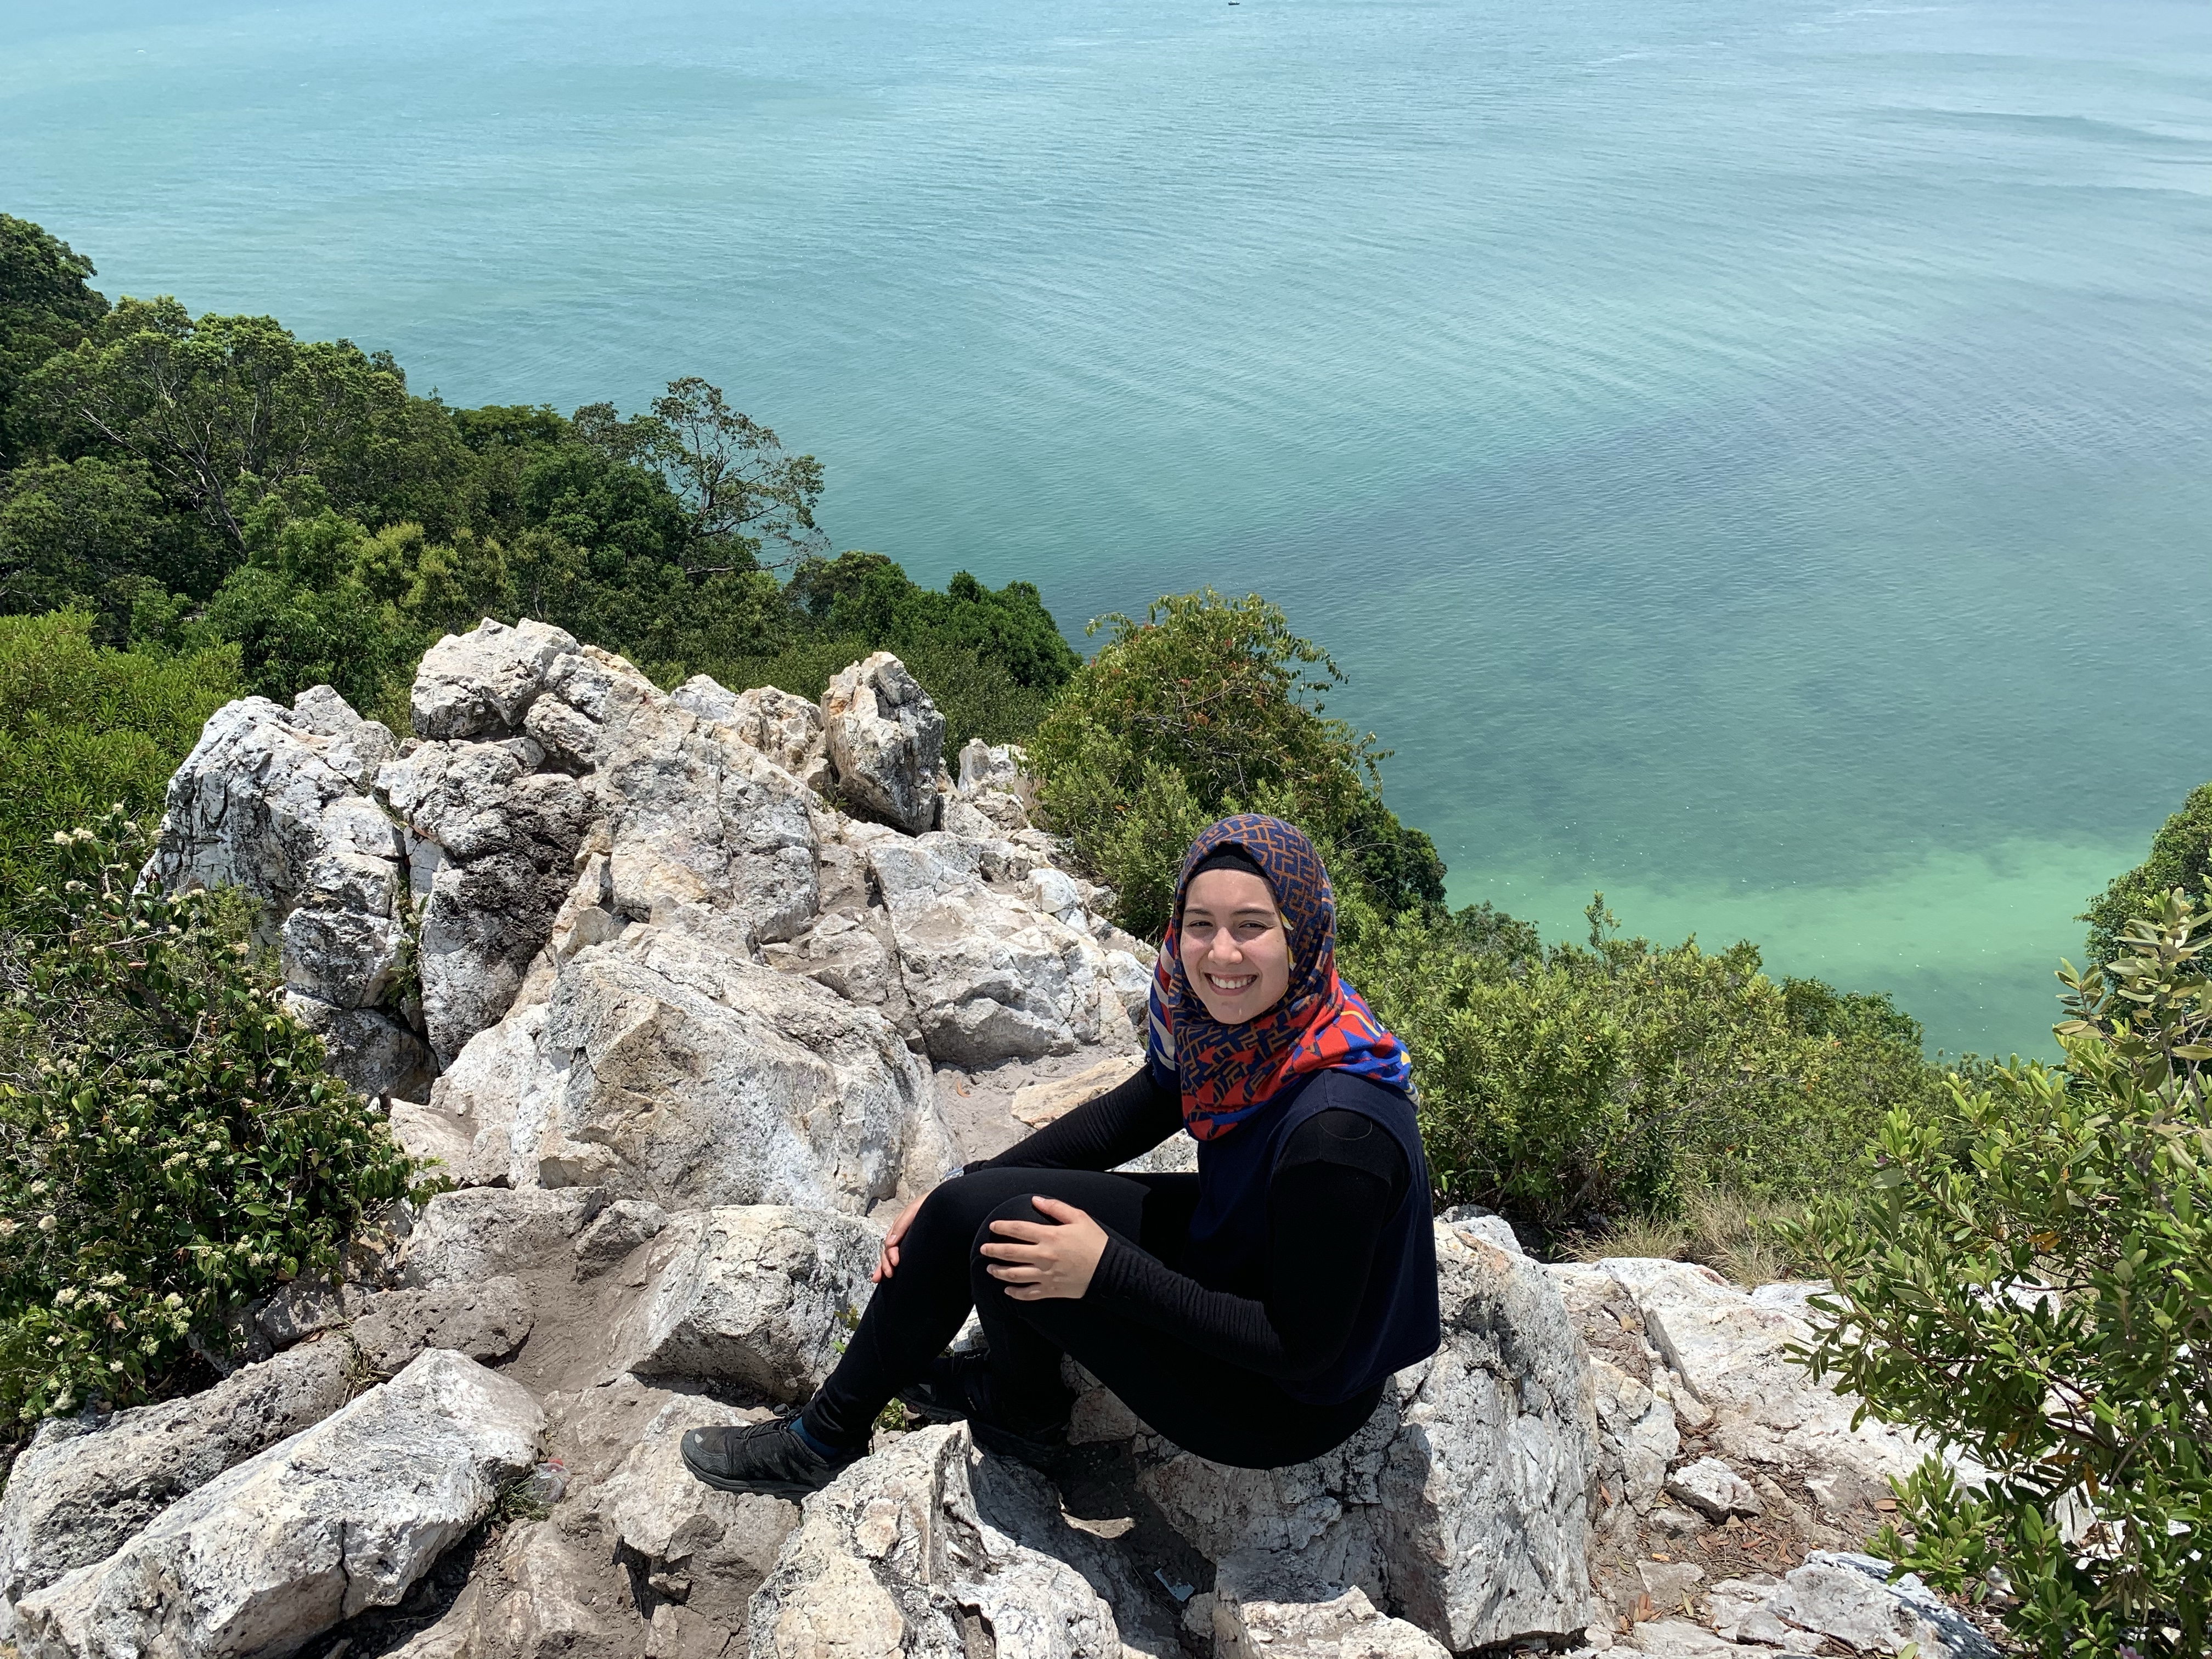
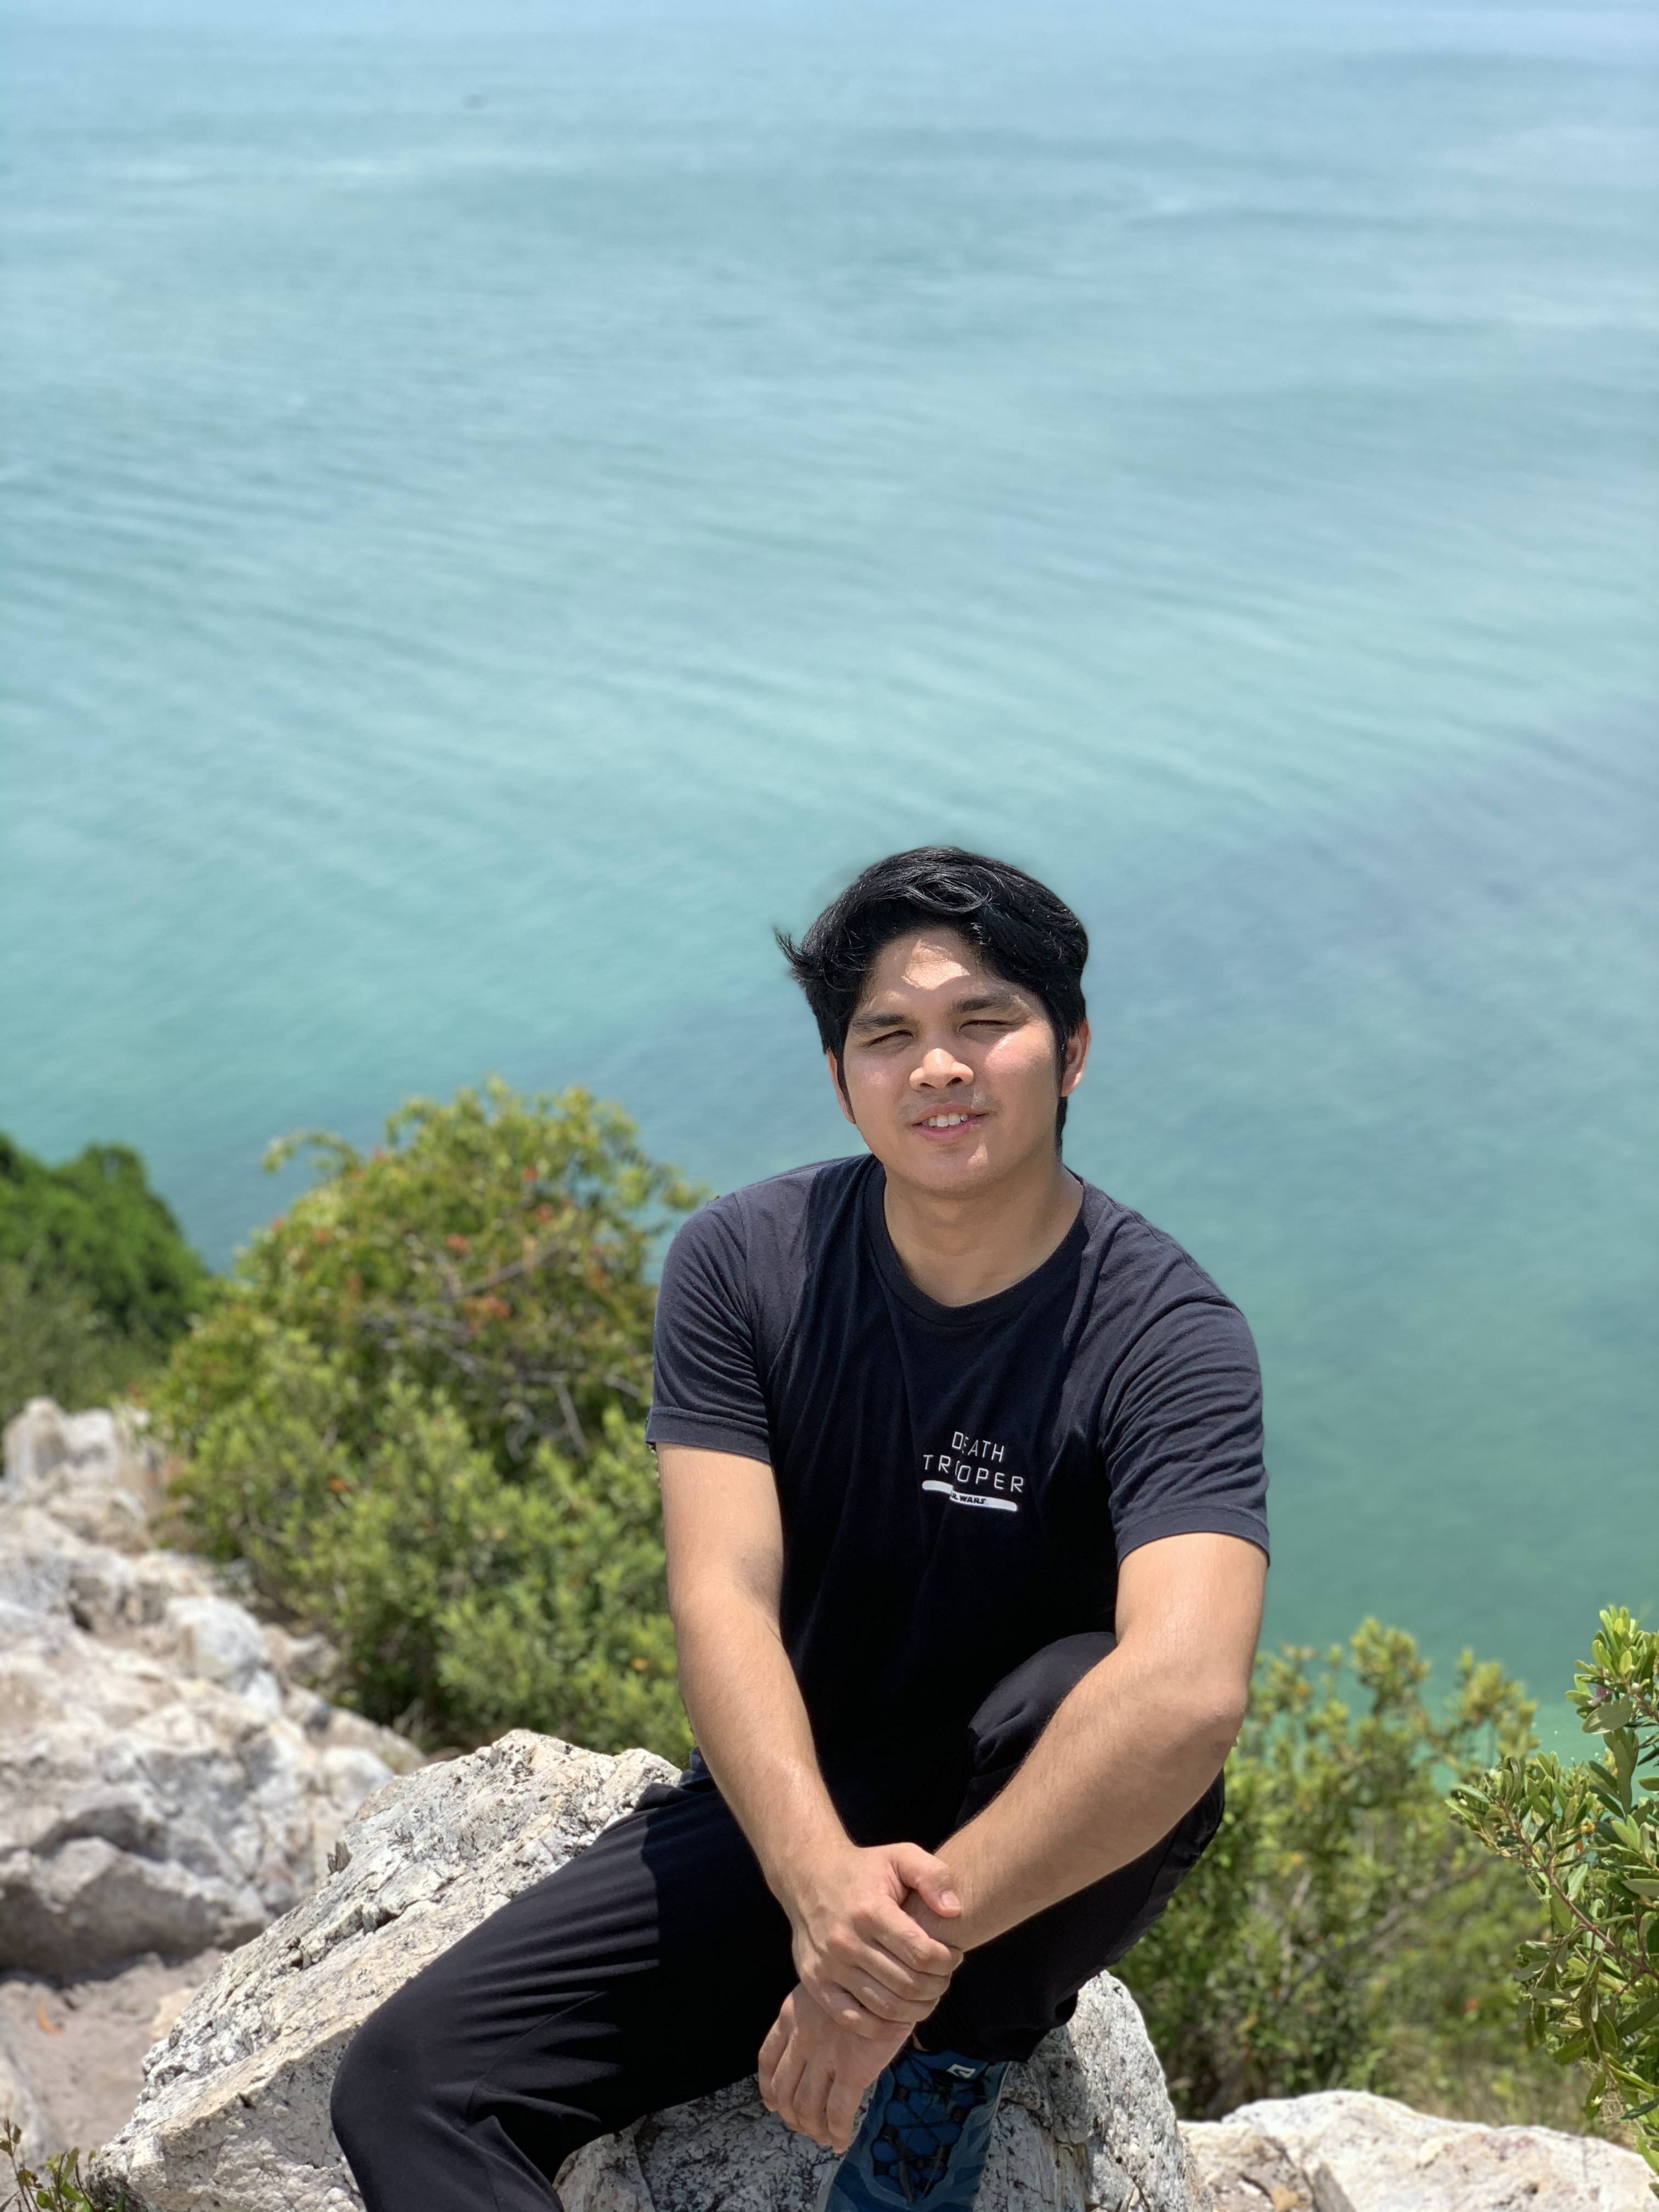
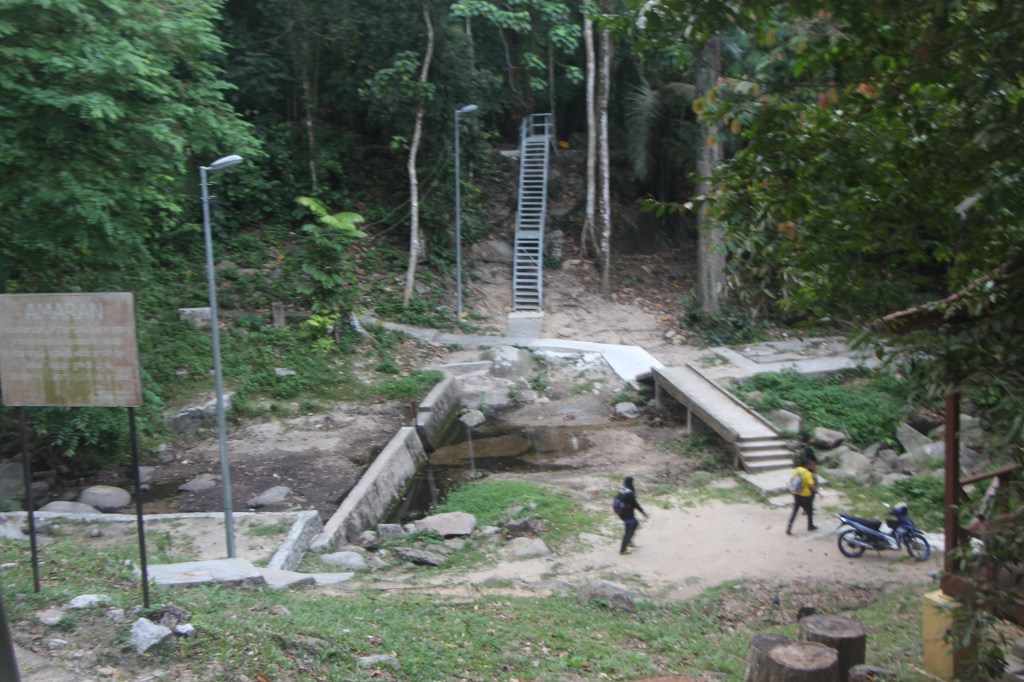
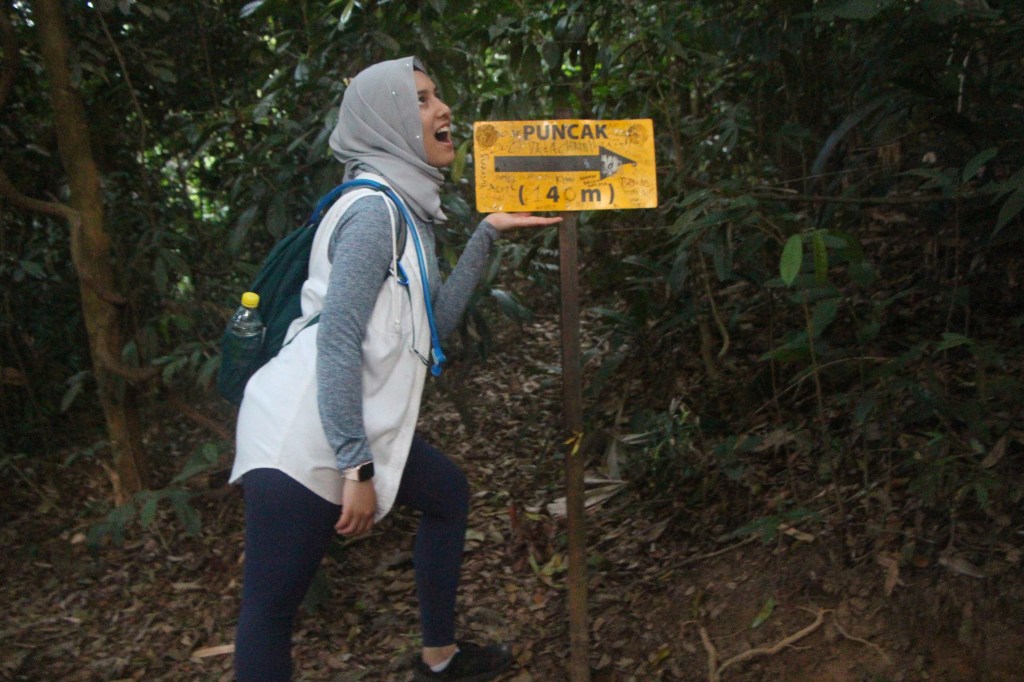
Few weeks ago, we drove up to Tanjung Tuan, Port Dickson to hike Bukit Batu Putih. Famously known for its limestone rocky peak, this hike is relatively easy and short, perfectly designed for those who simply wants to break sweat before tanning yourself up at the beach.
Info:
Location: Tanjung Tuan, Port Dickson
Trailhead: Tanjung Tuan Recreational Forest
Summit elevation: 285 meters
Elevation gain: 219 meters
Distance: 3km (path that we took)
Duration: 45 mins
Permit fee: RM1 per head
Trail condition: There are different trails provided. Tar road, forest trail or by the beachside. Take your pick.
Facilities: Toilet is provided.
Trail route:
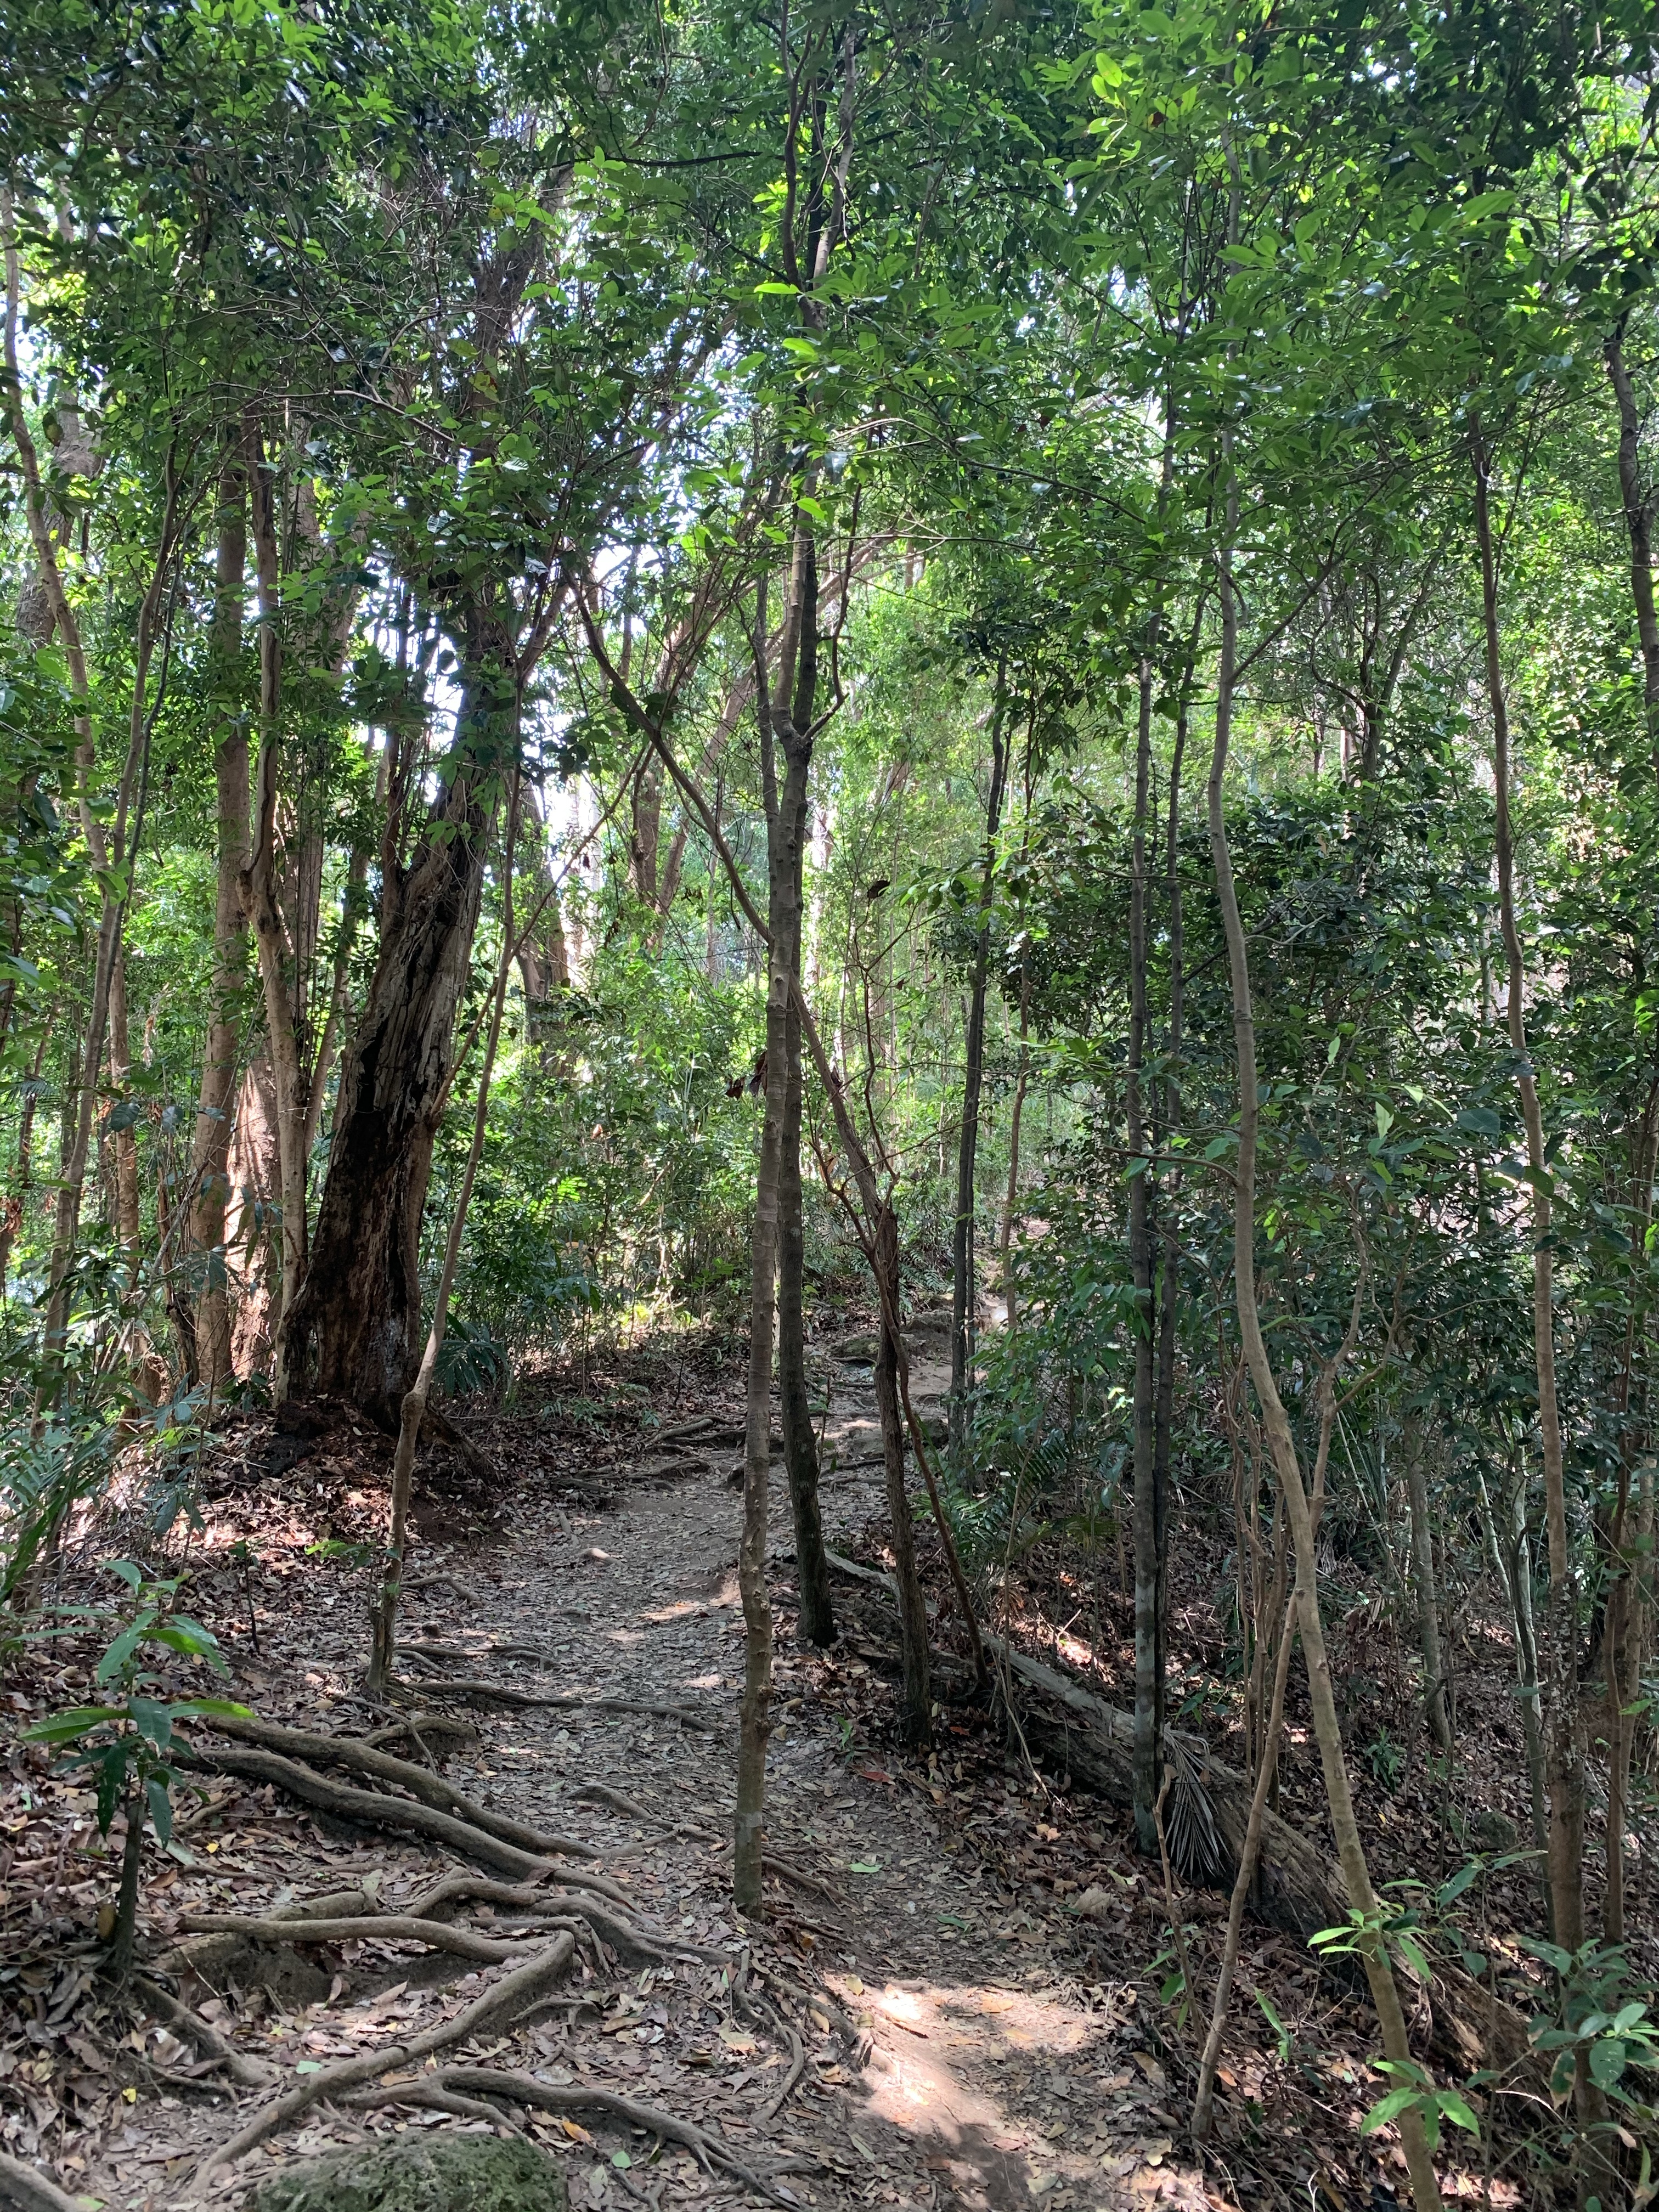
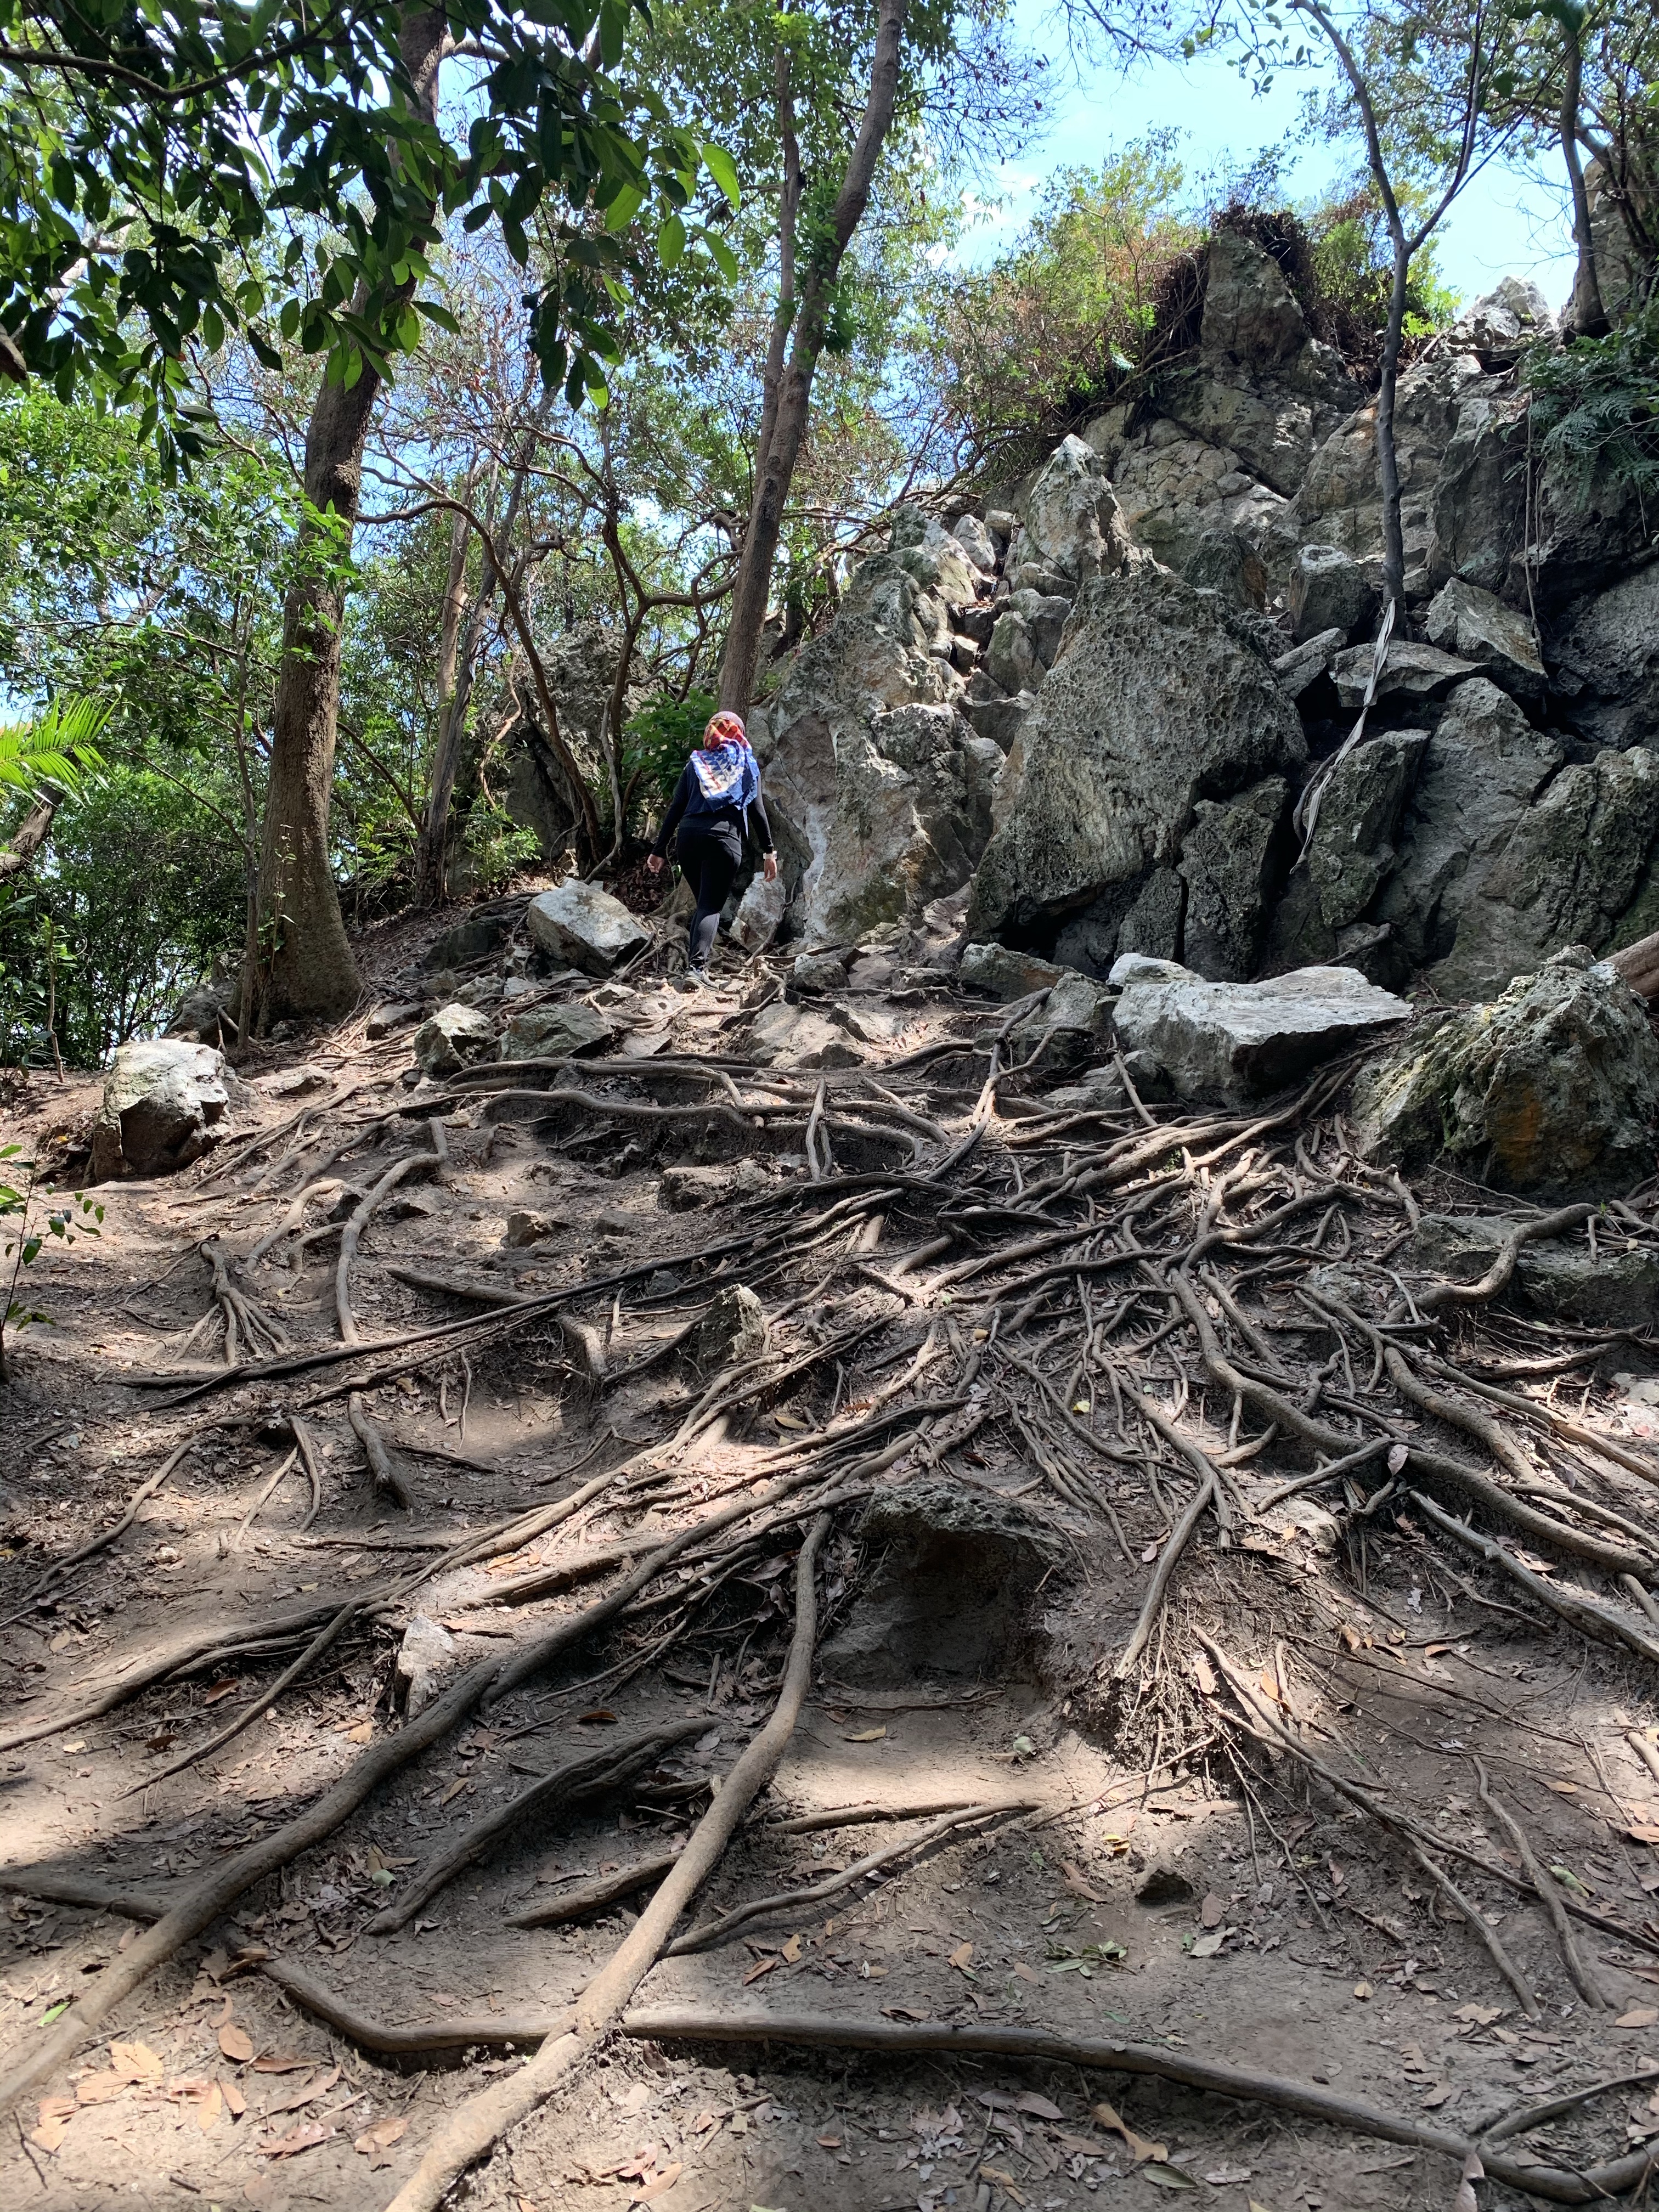
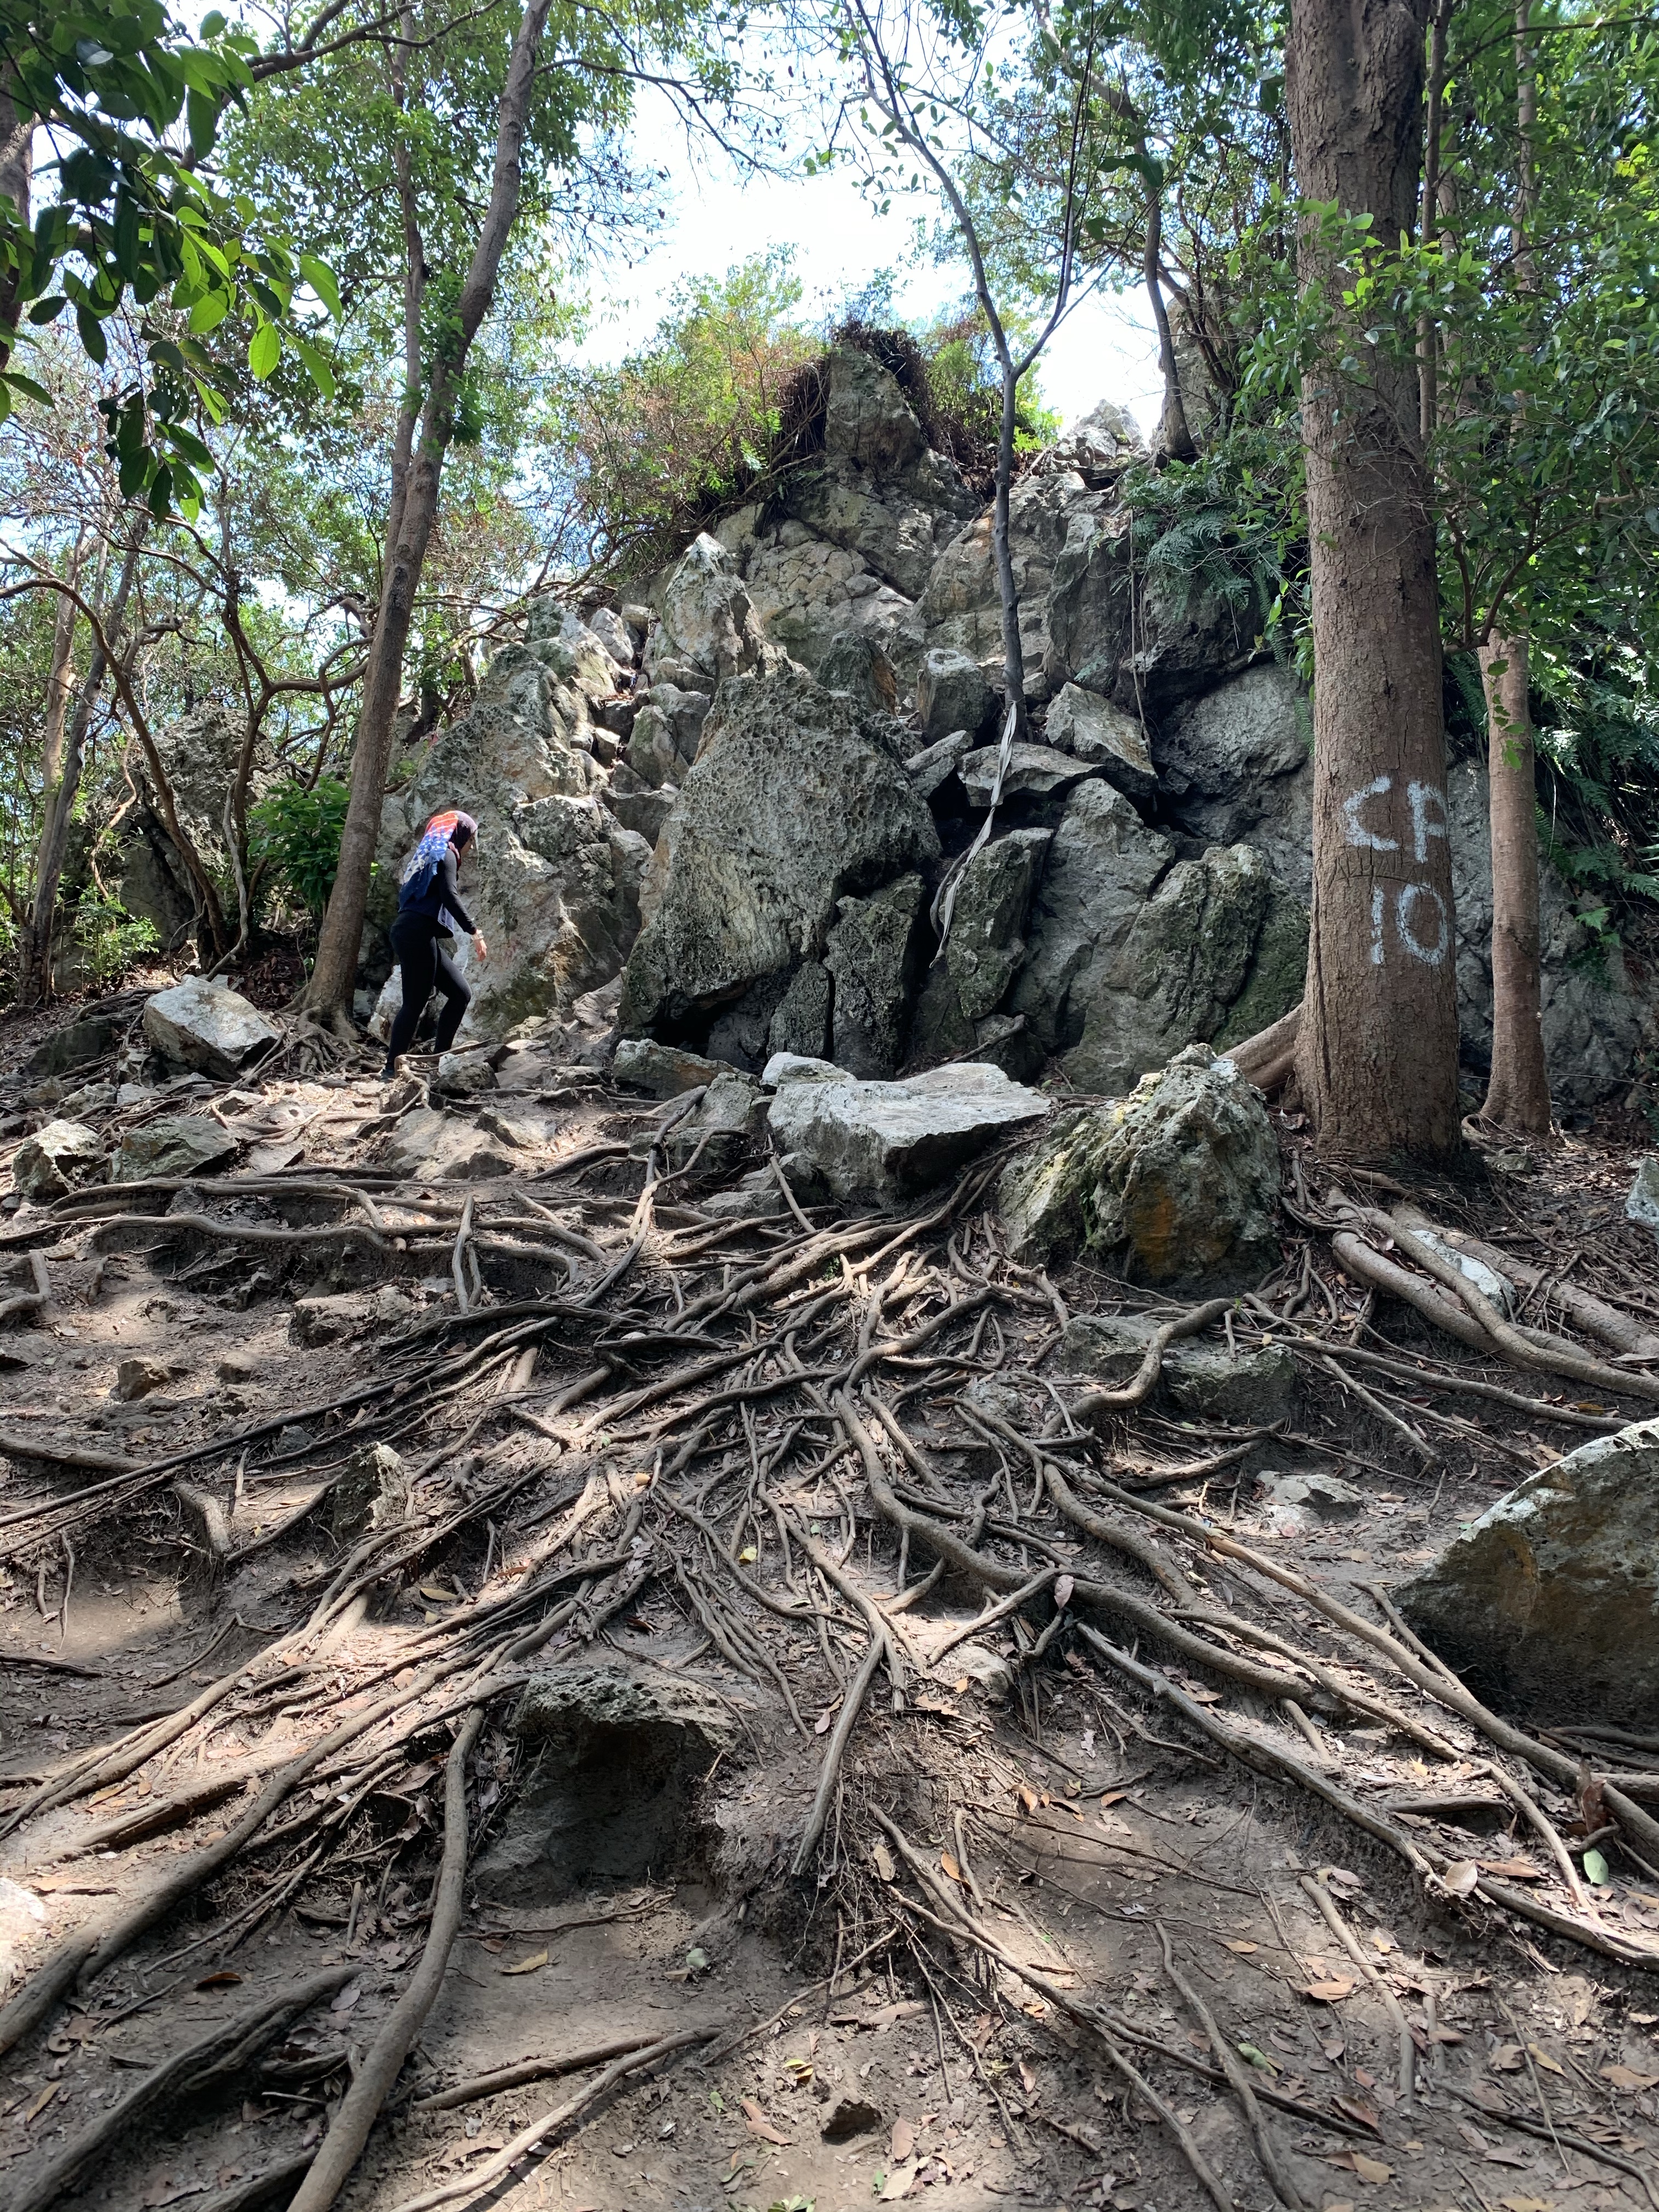
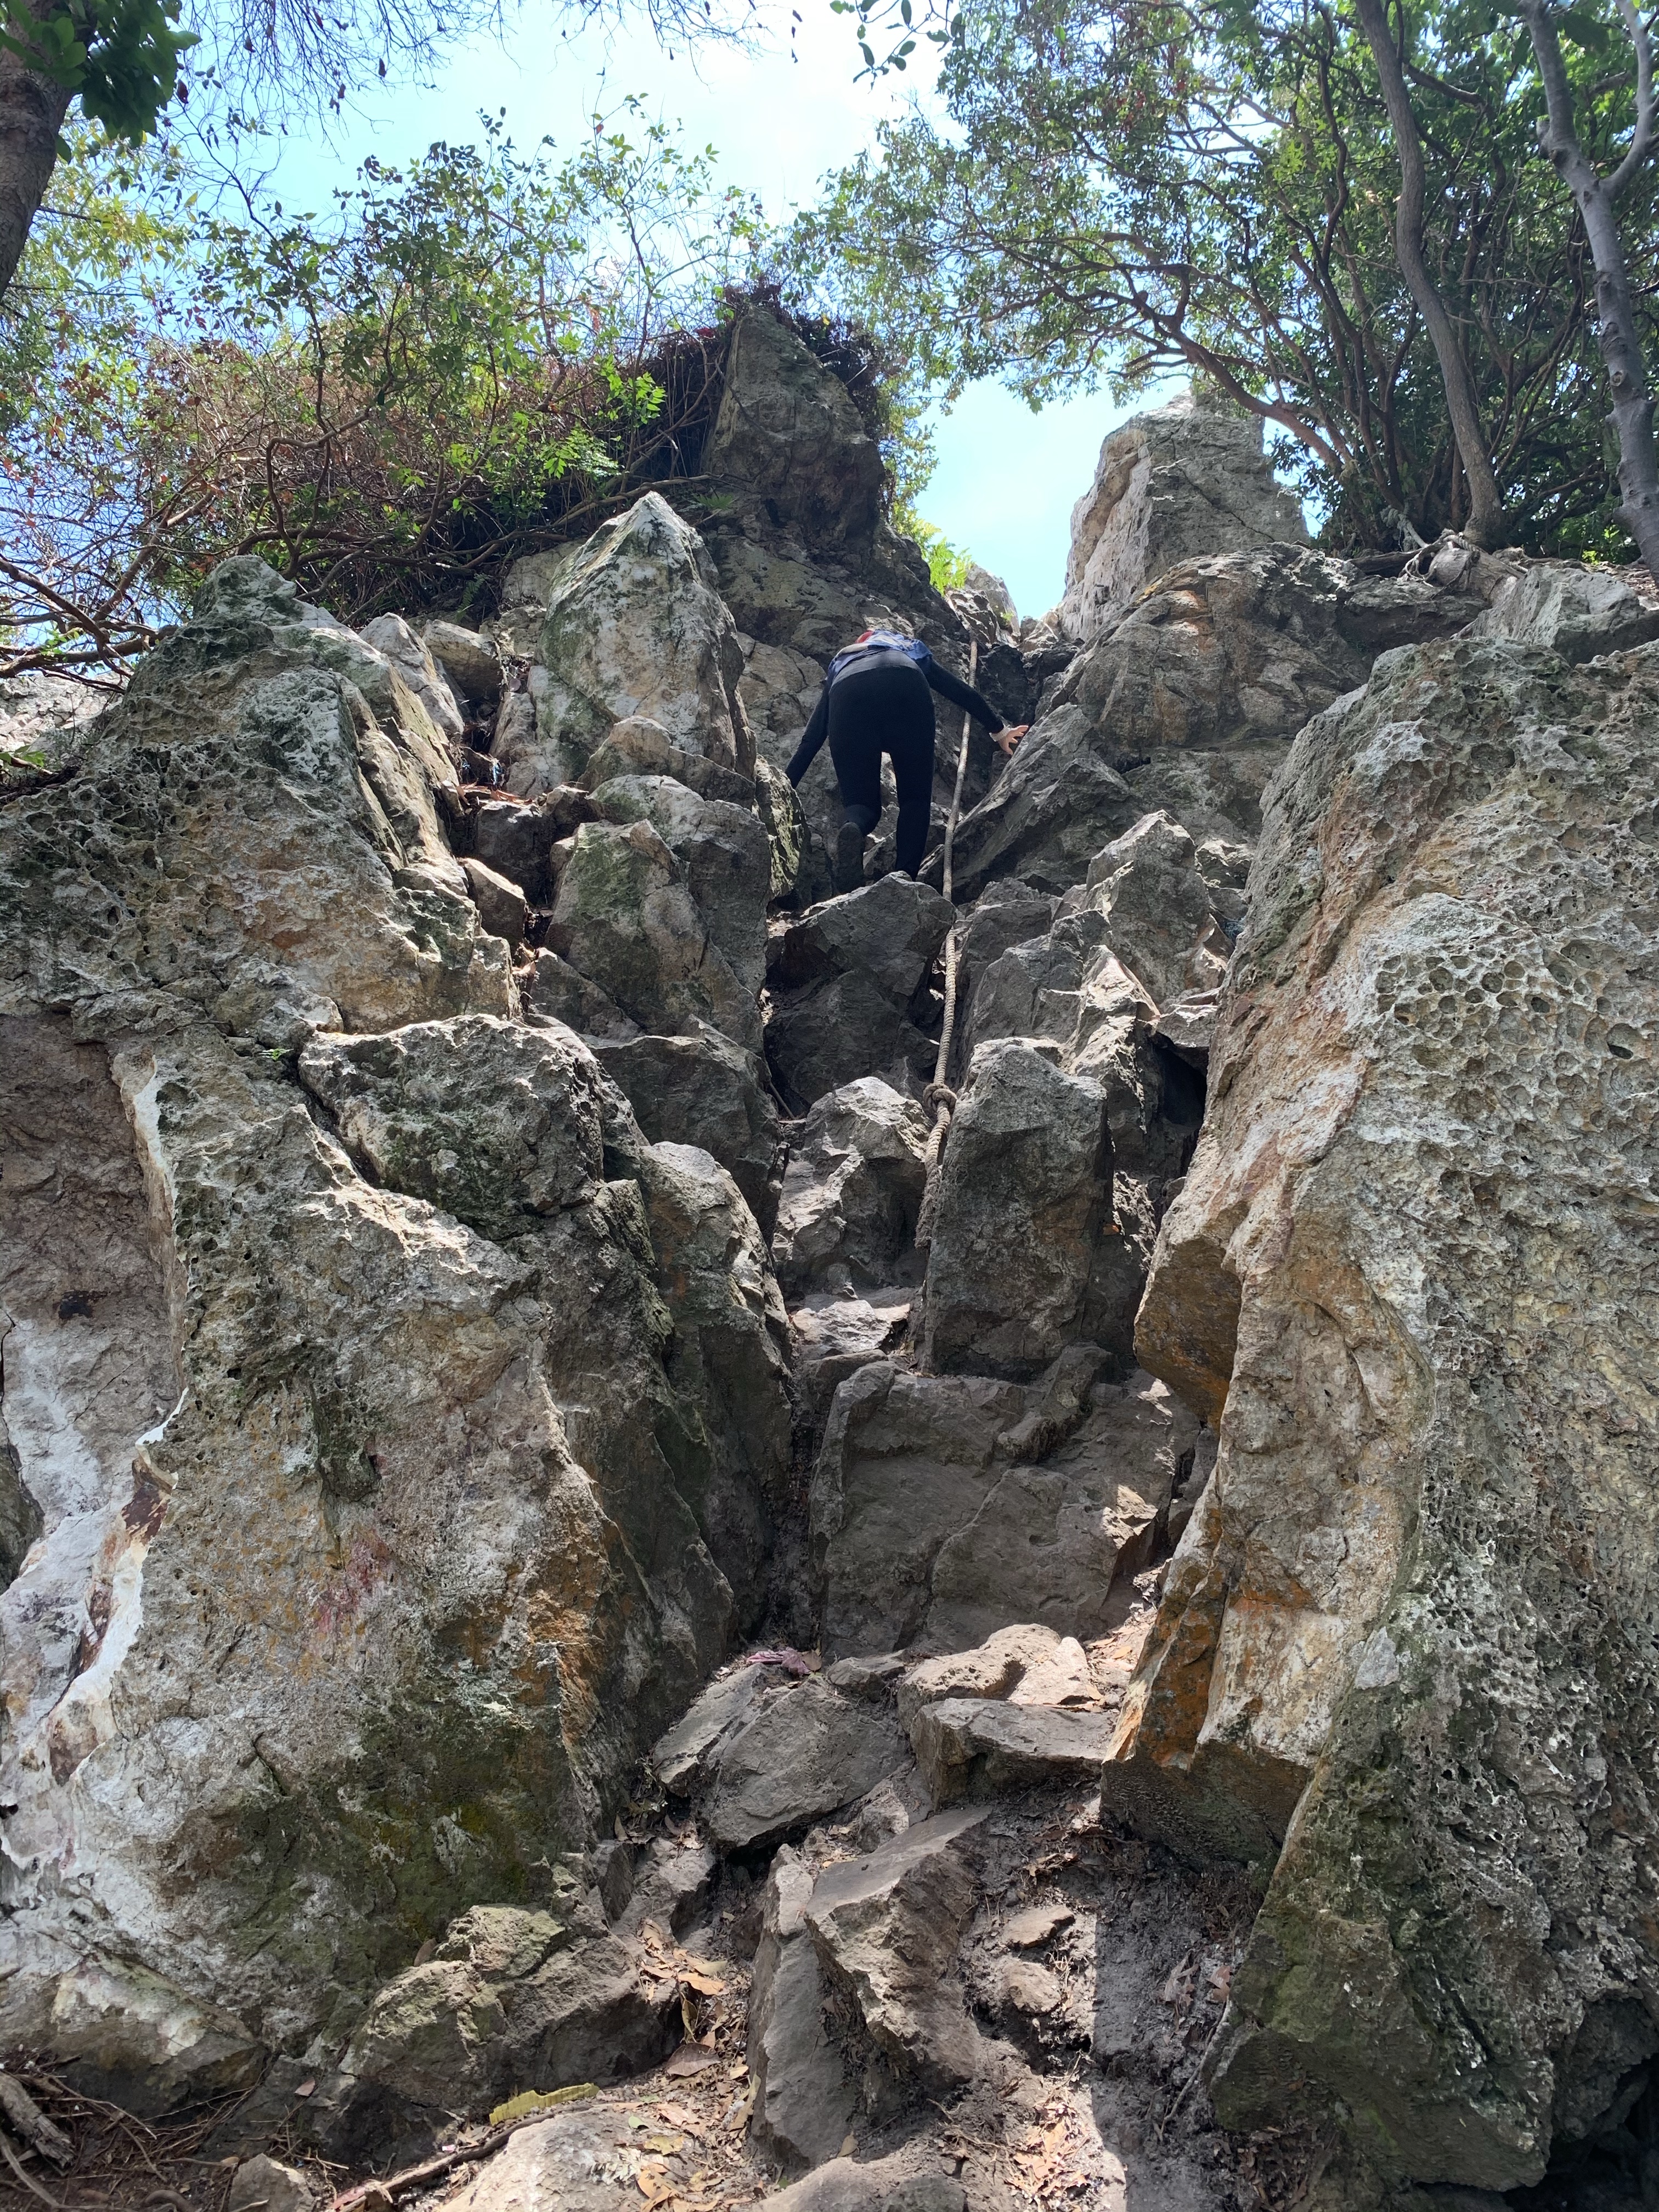
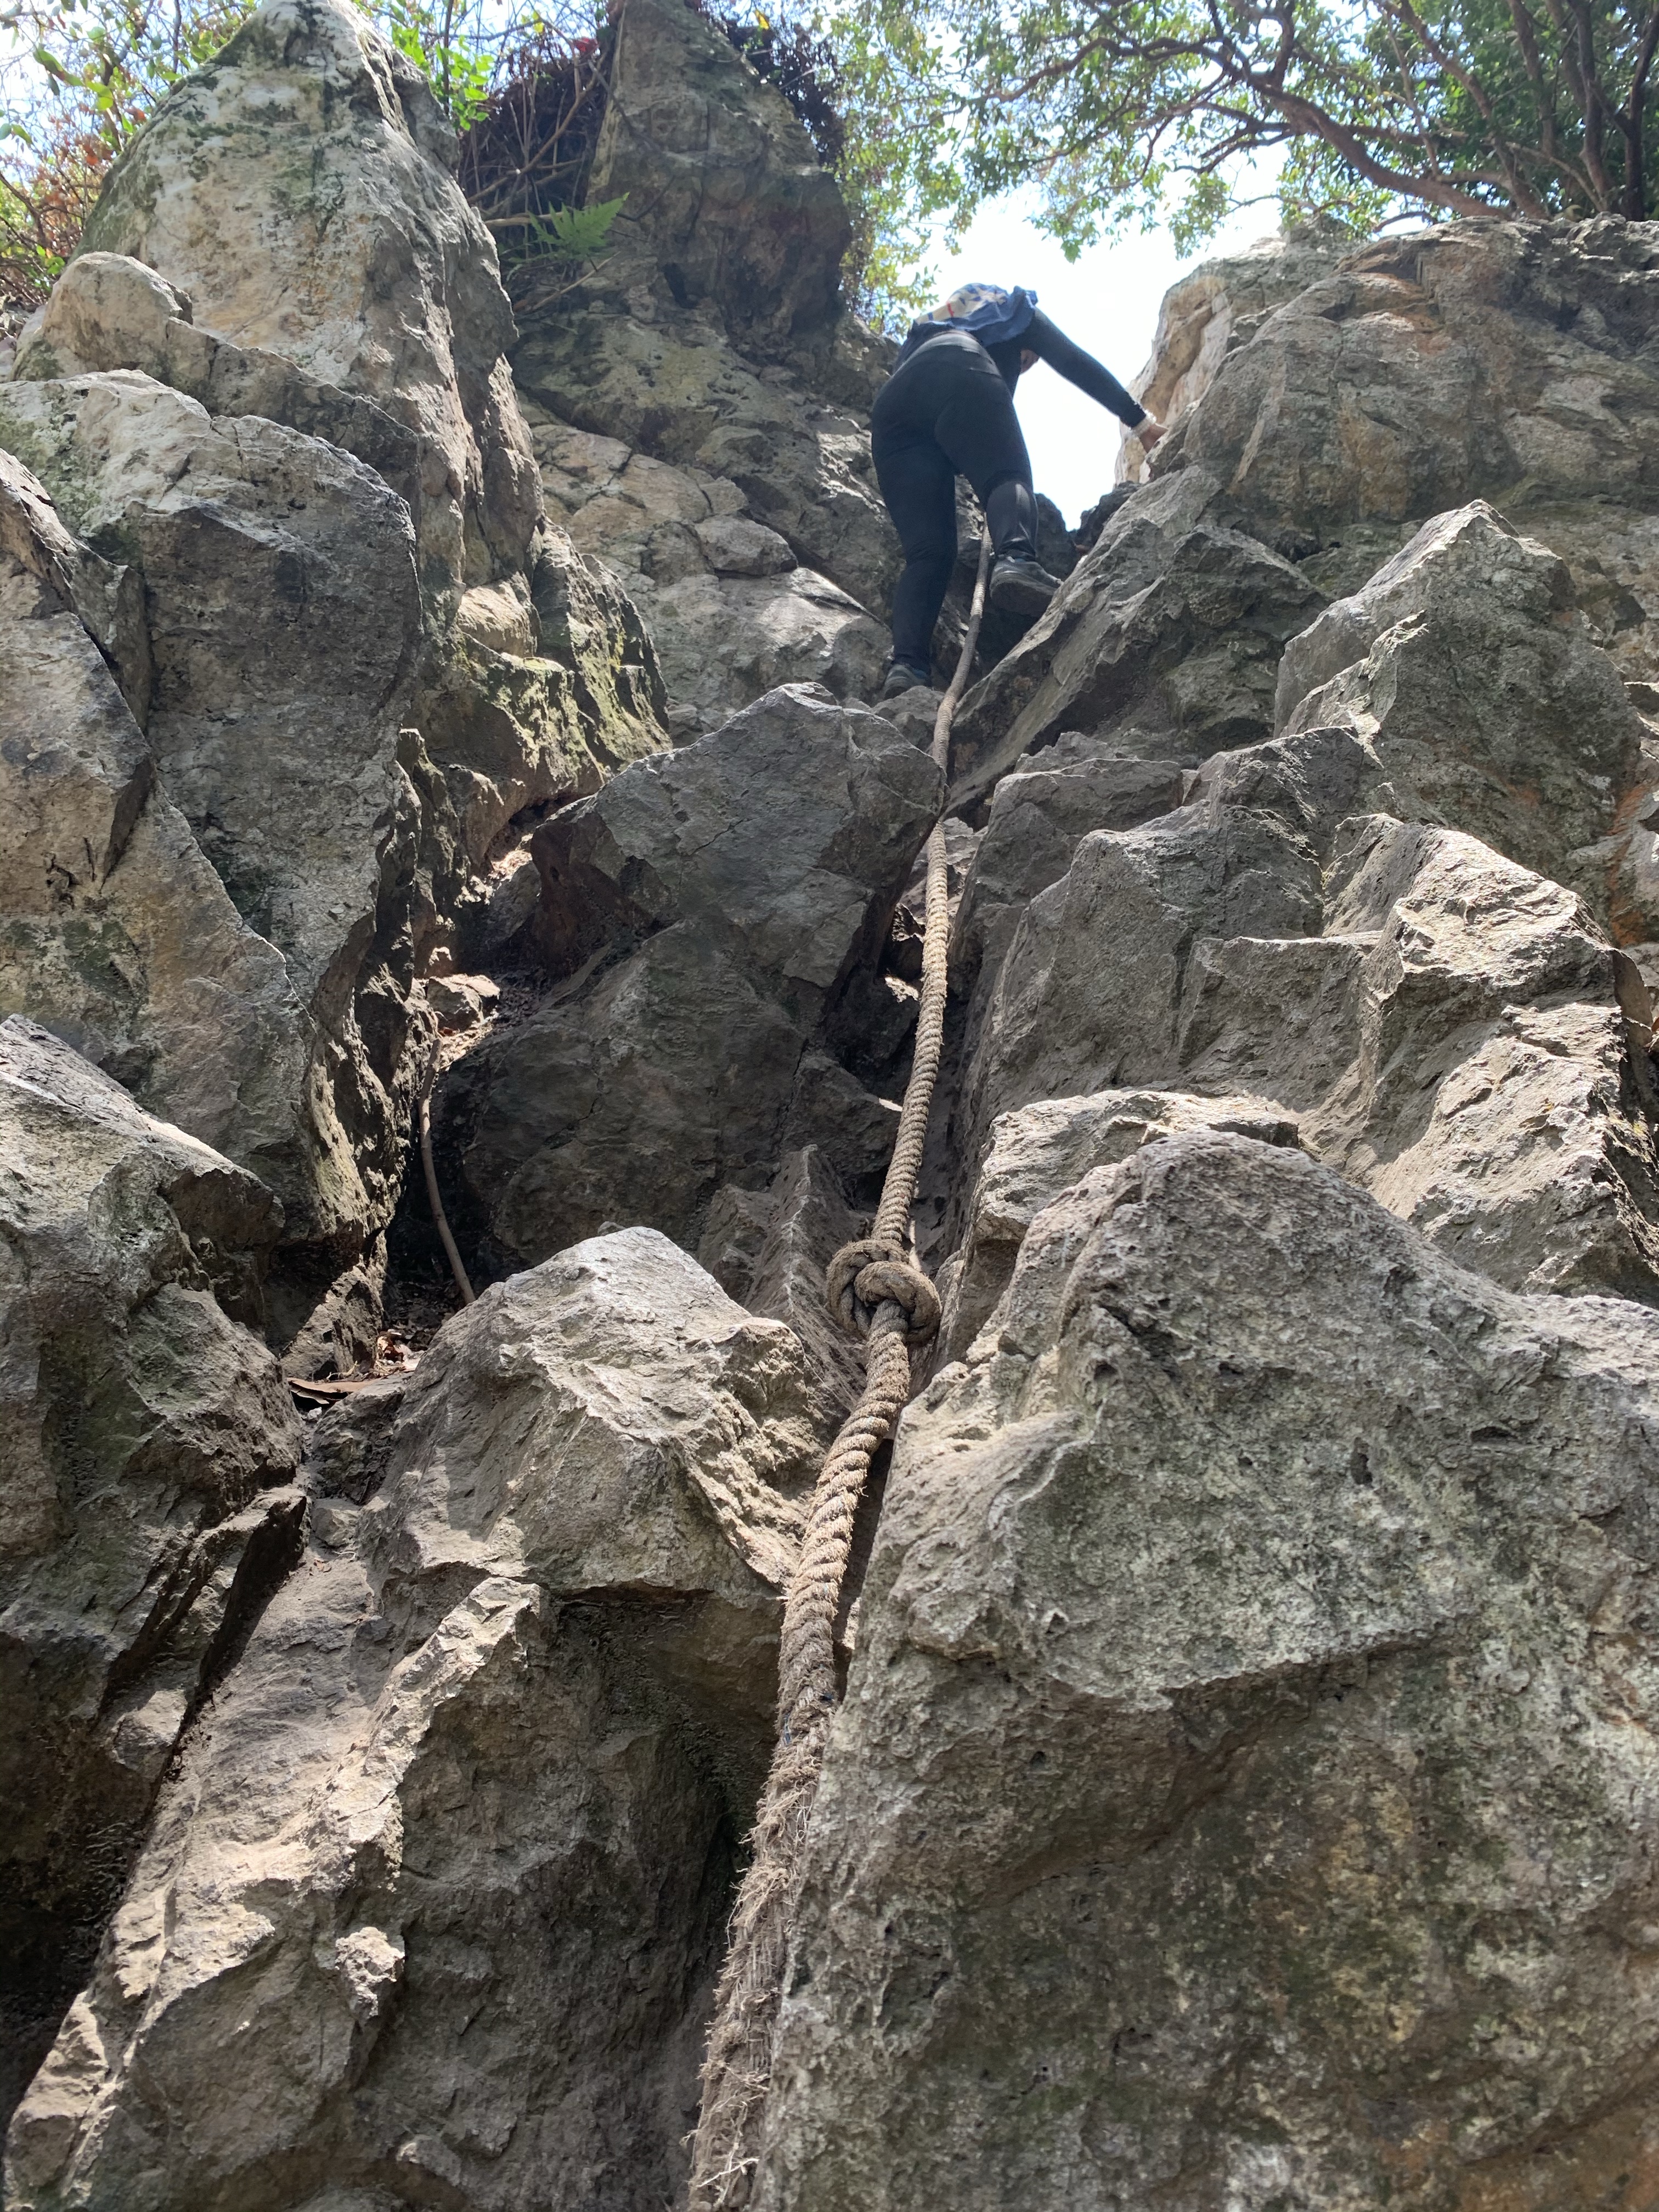
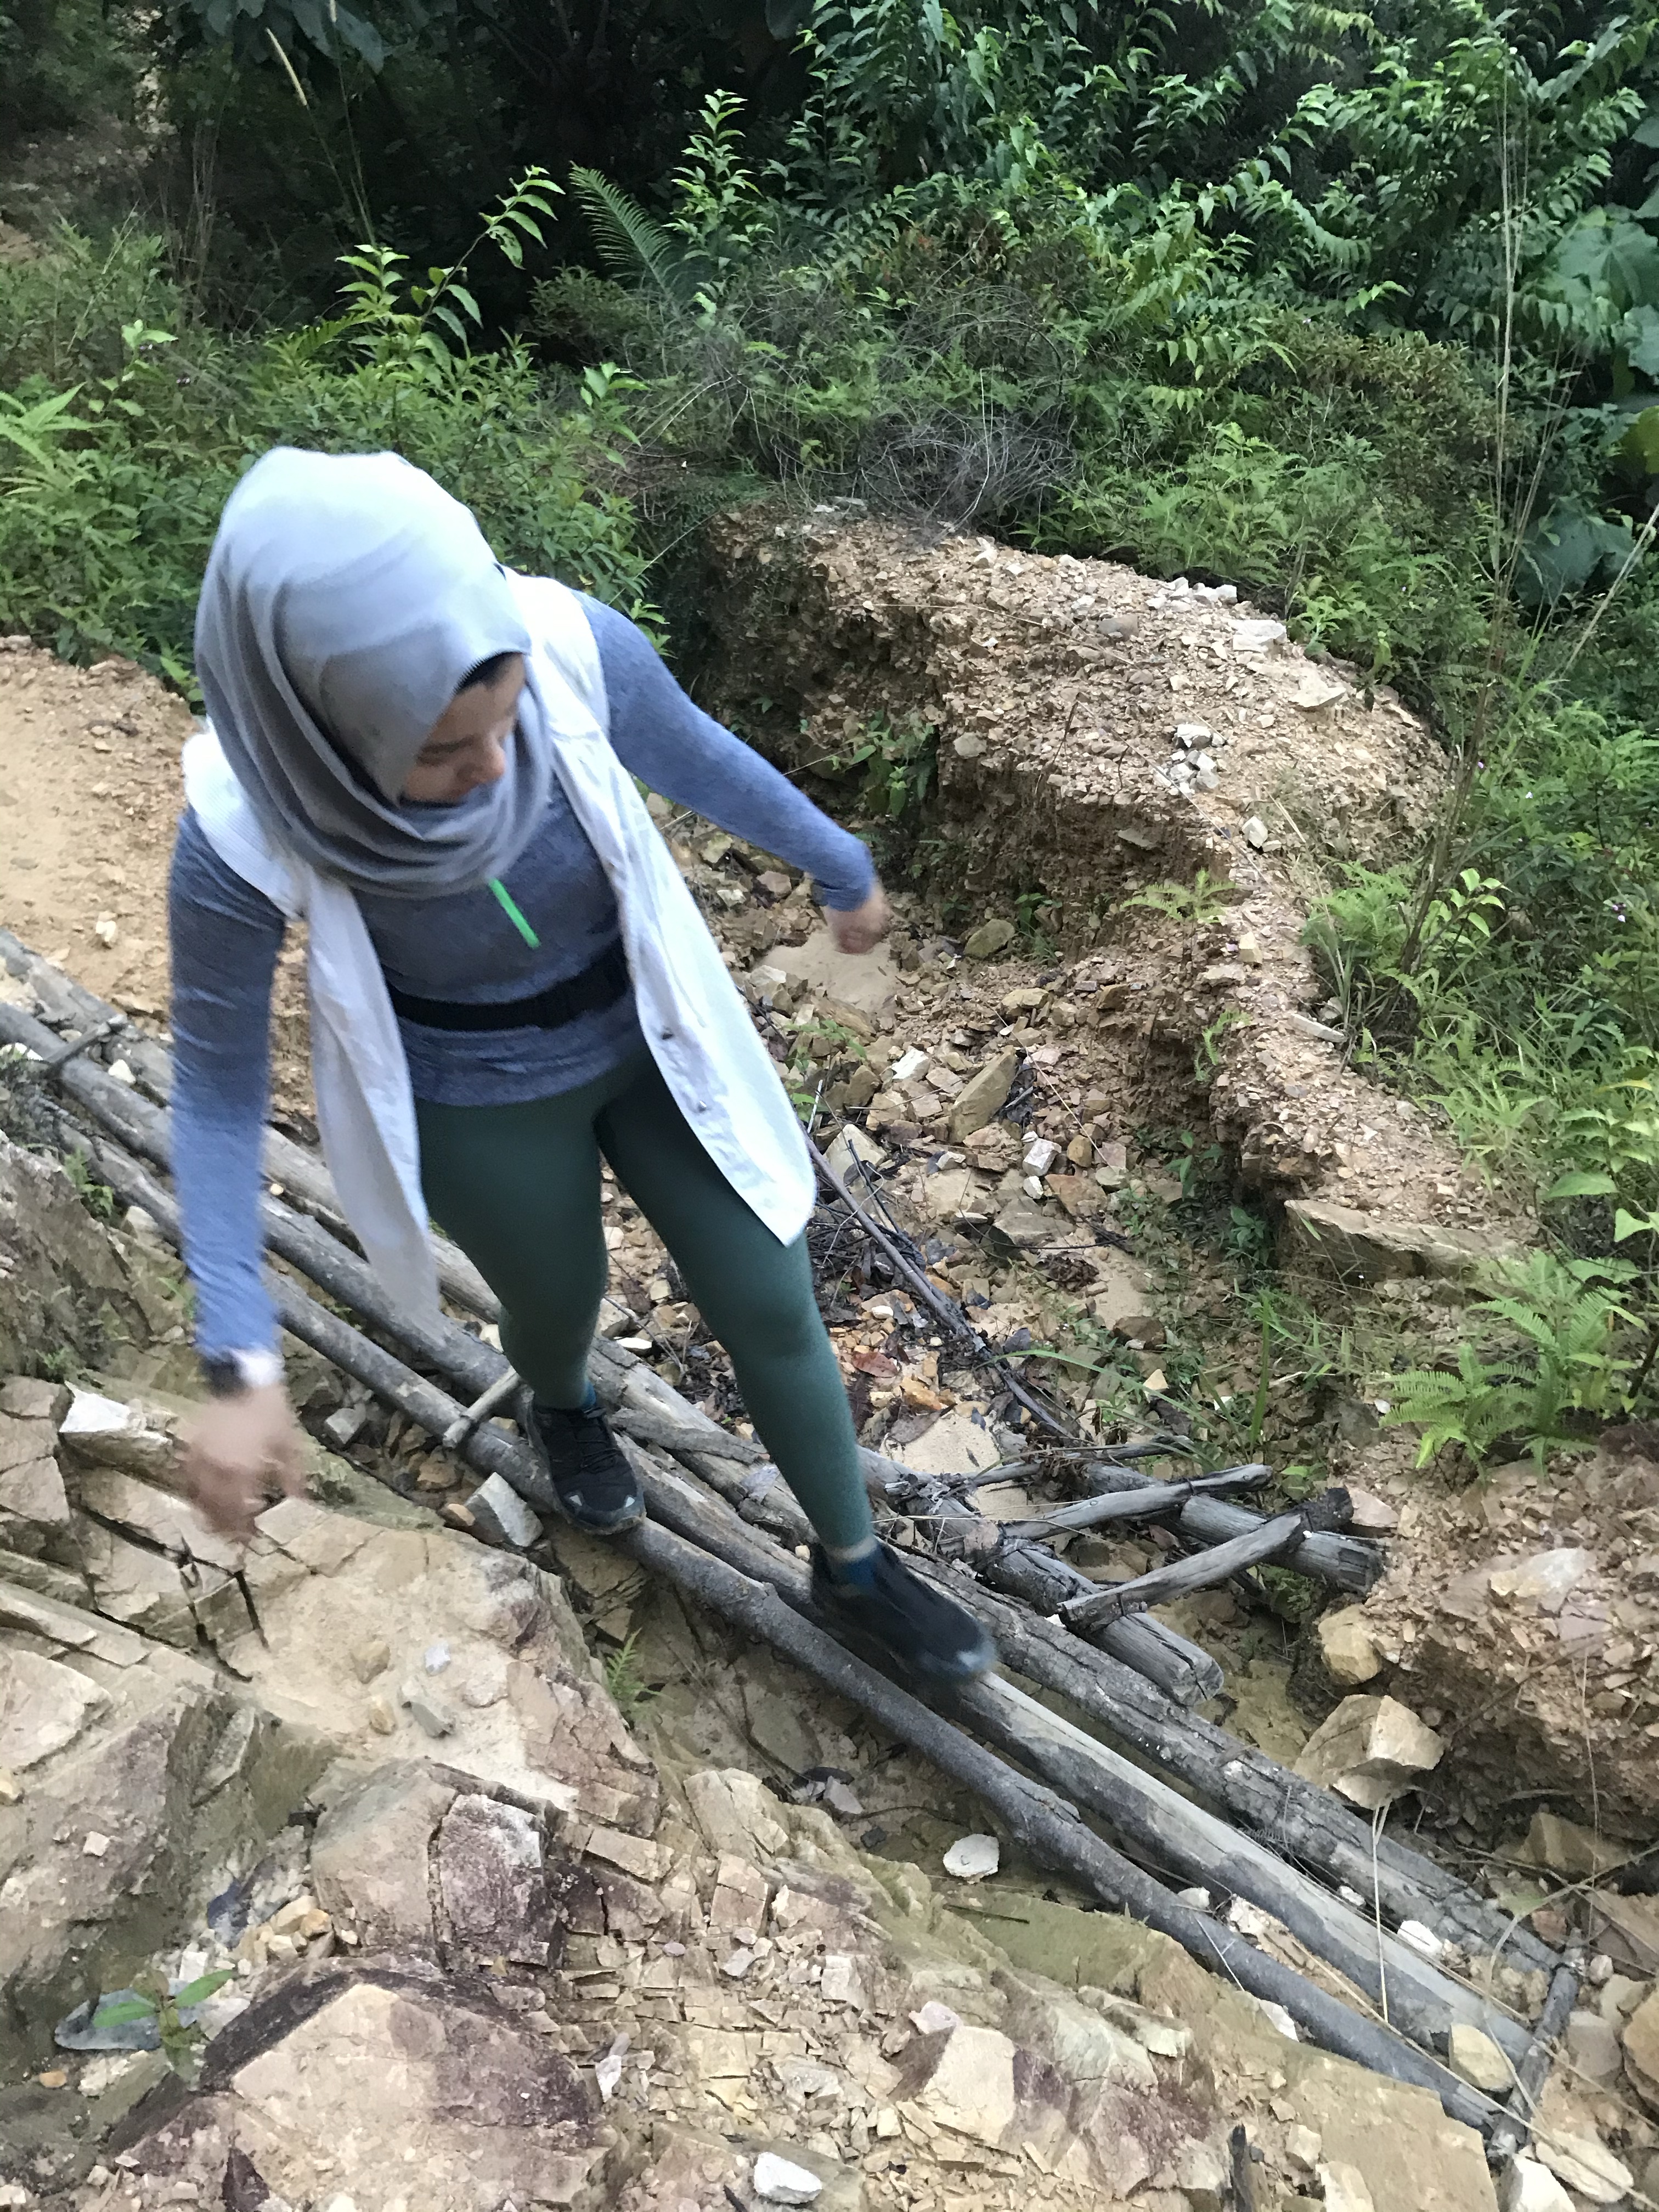
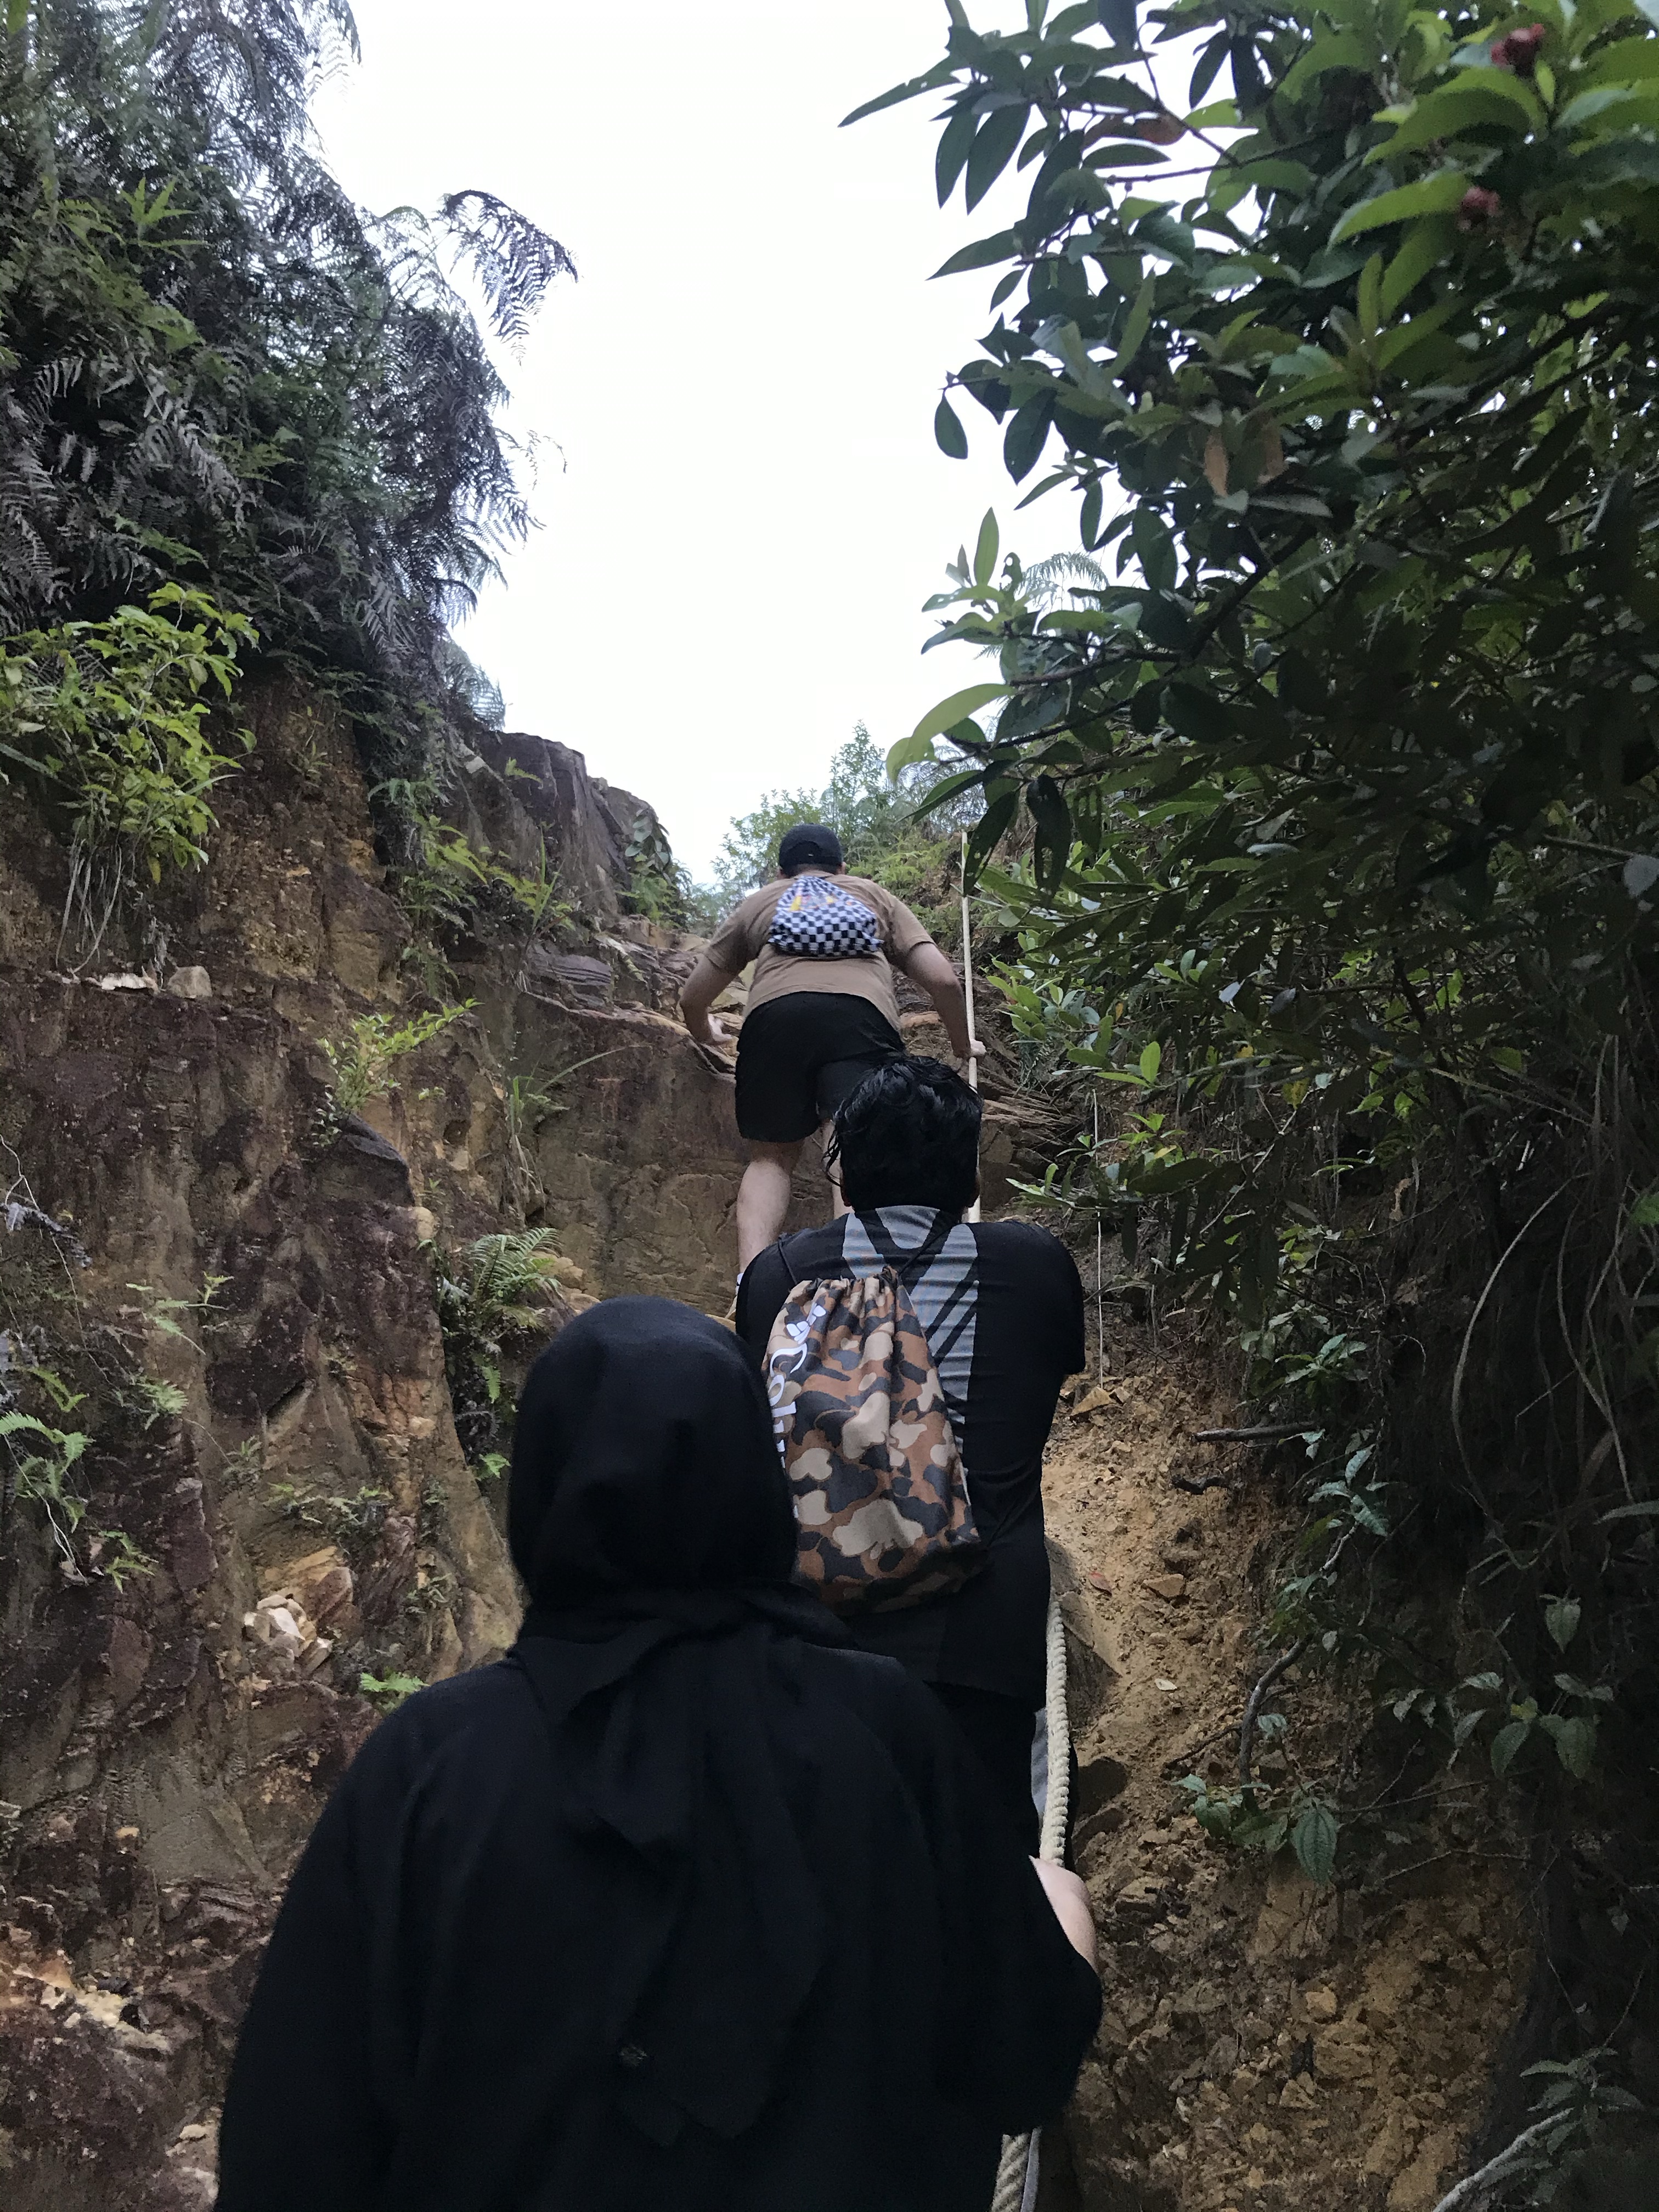
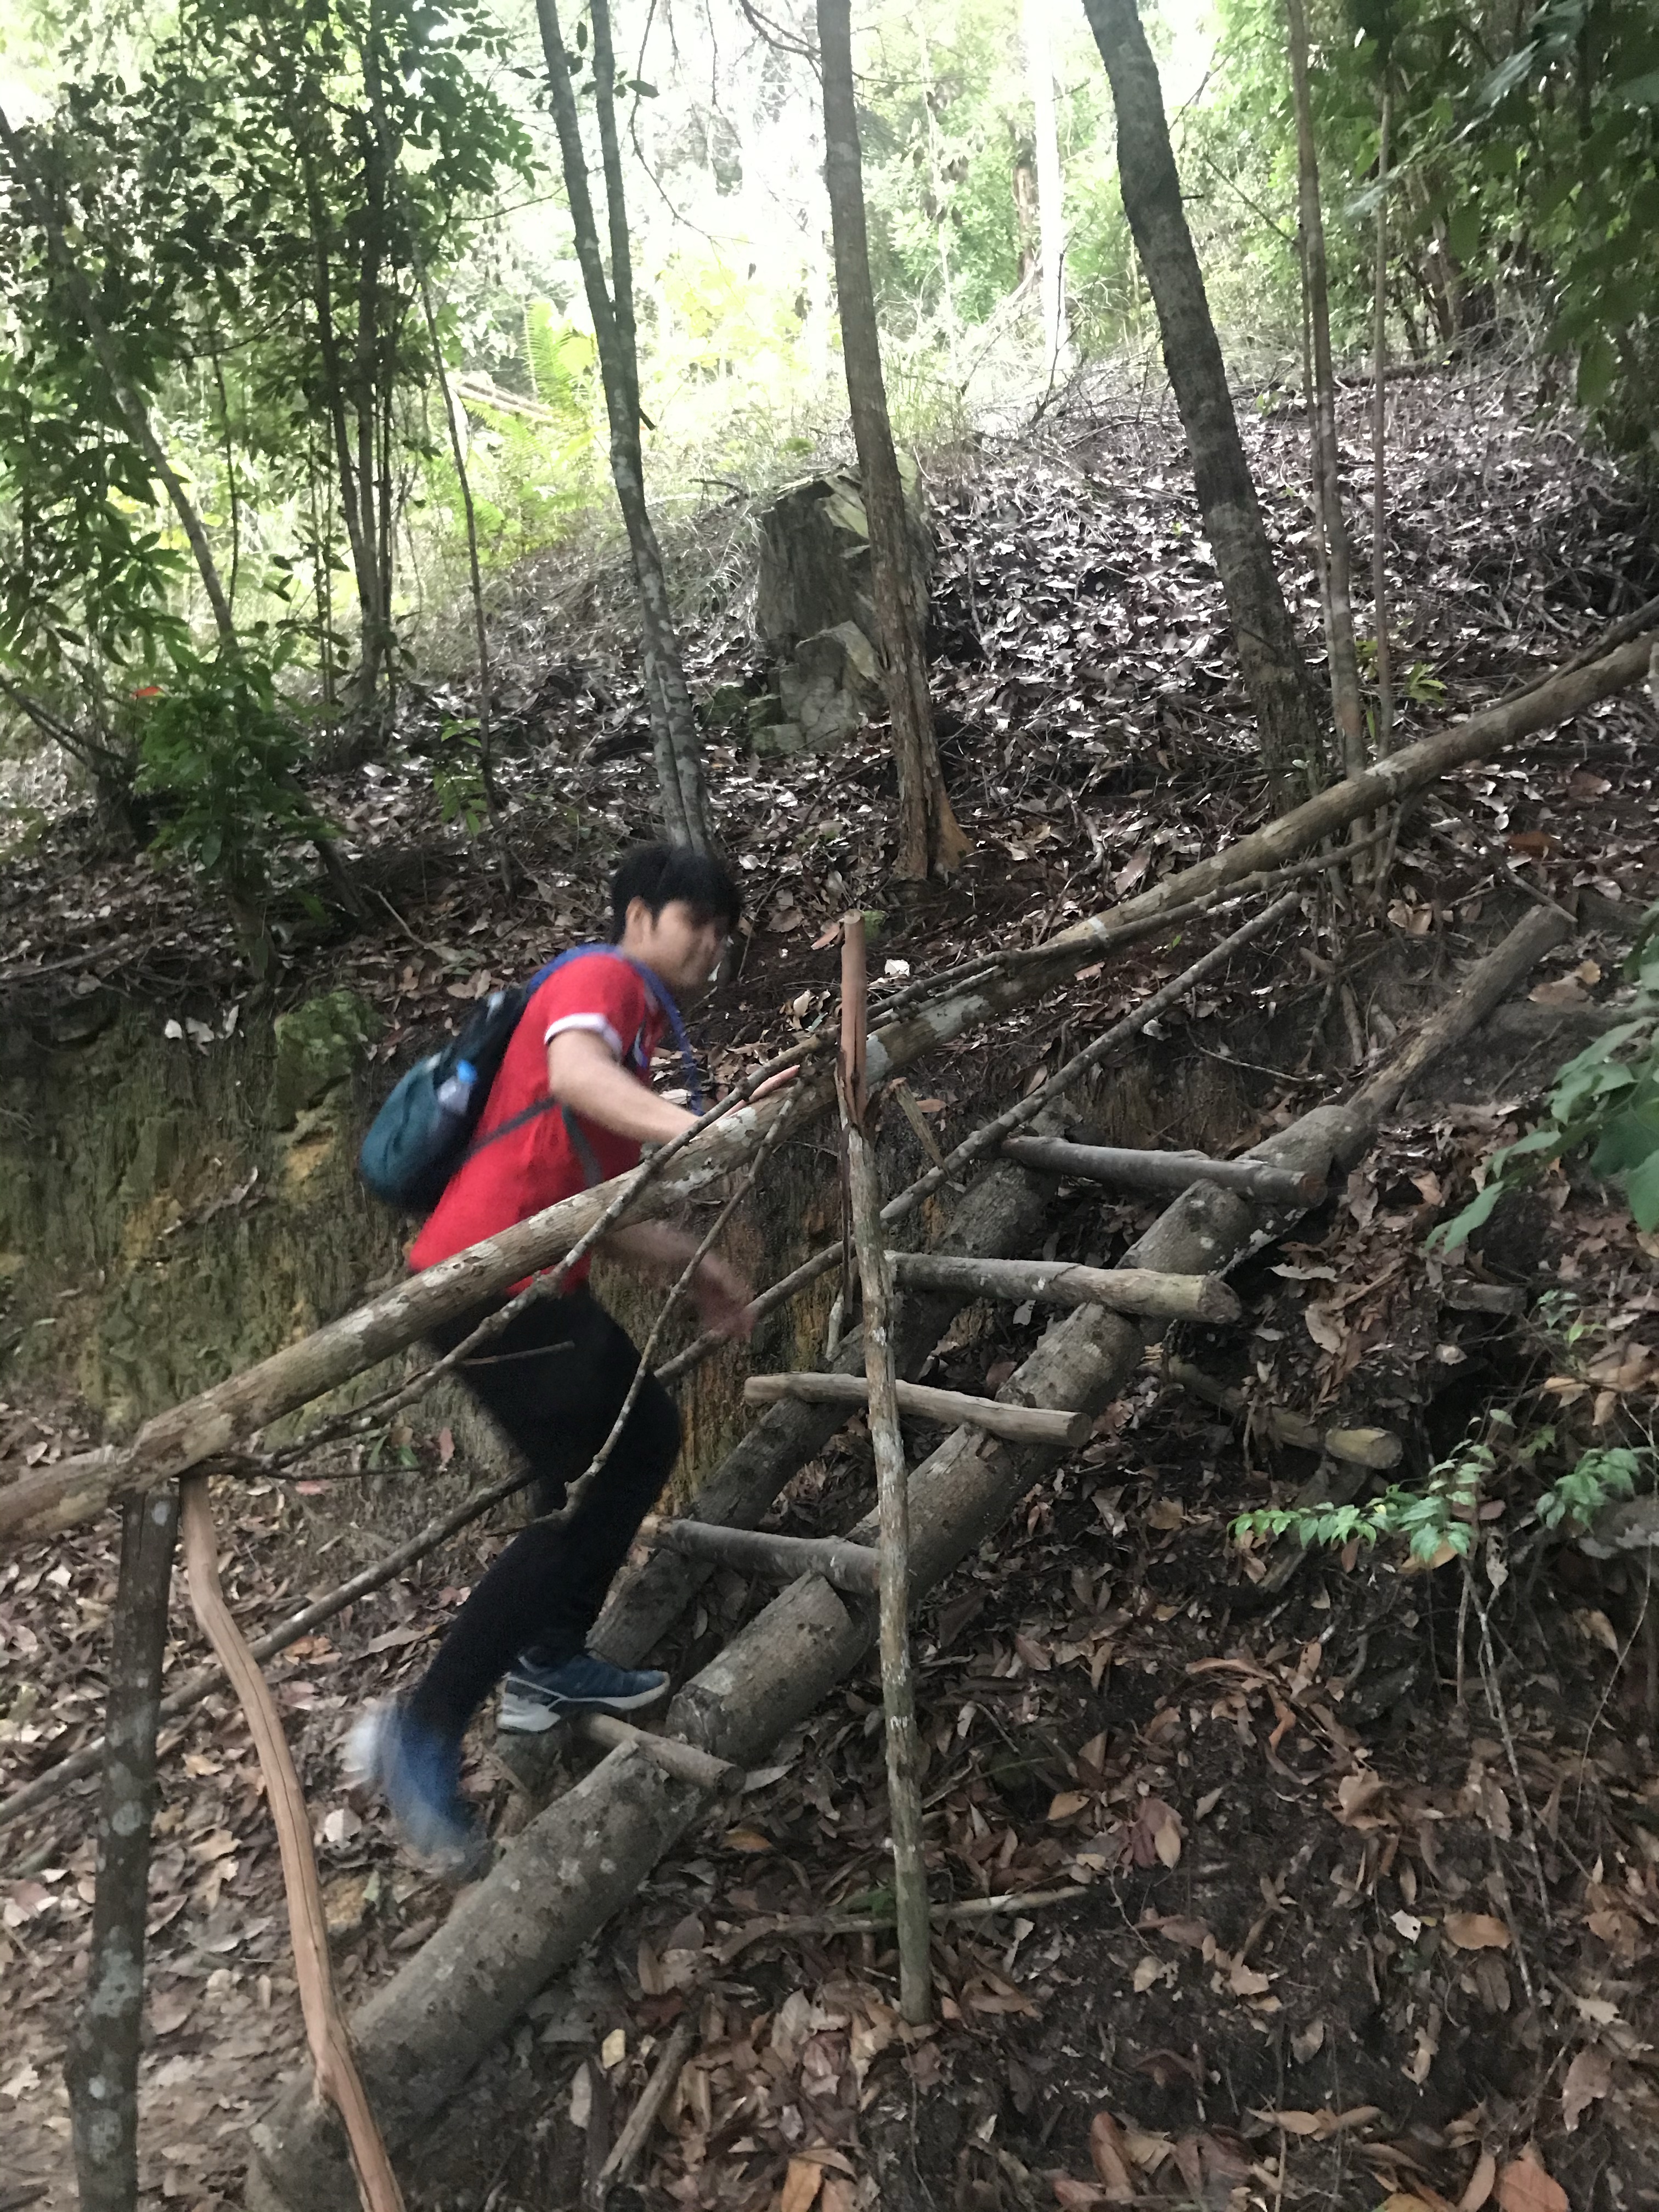
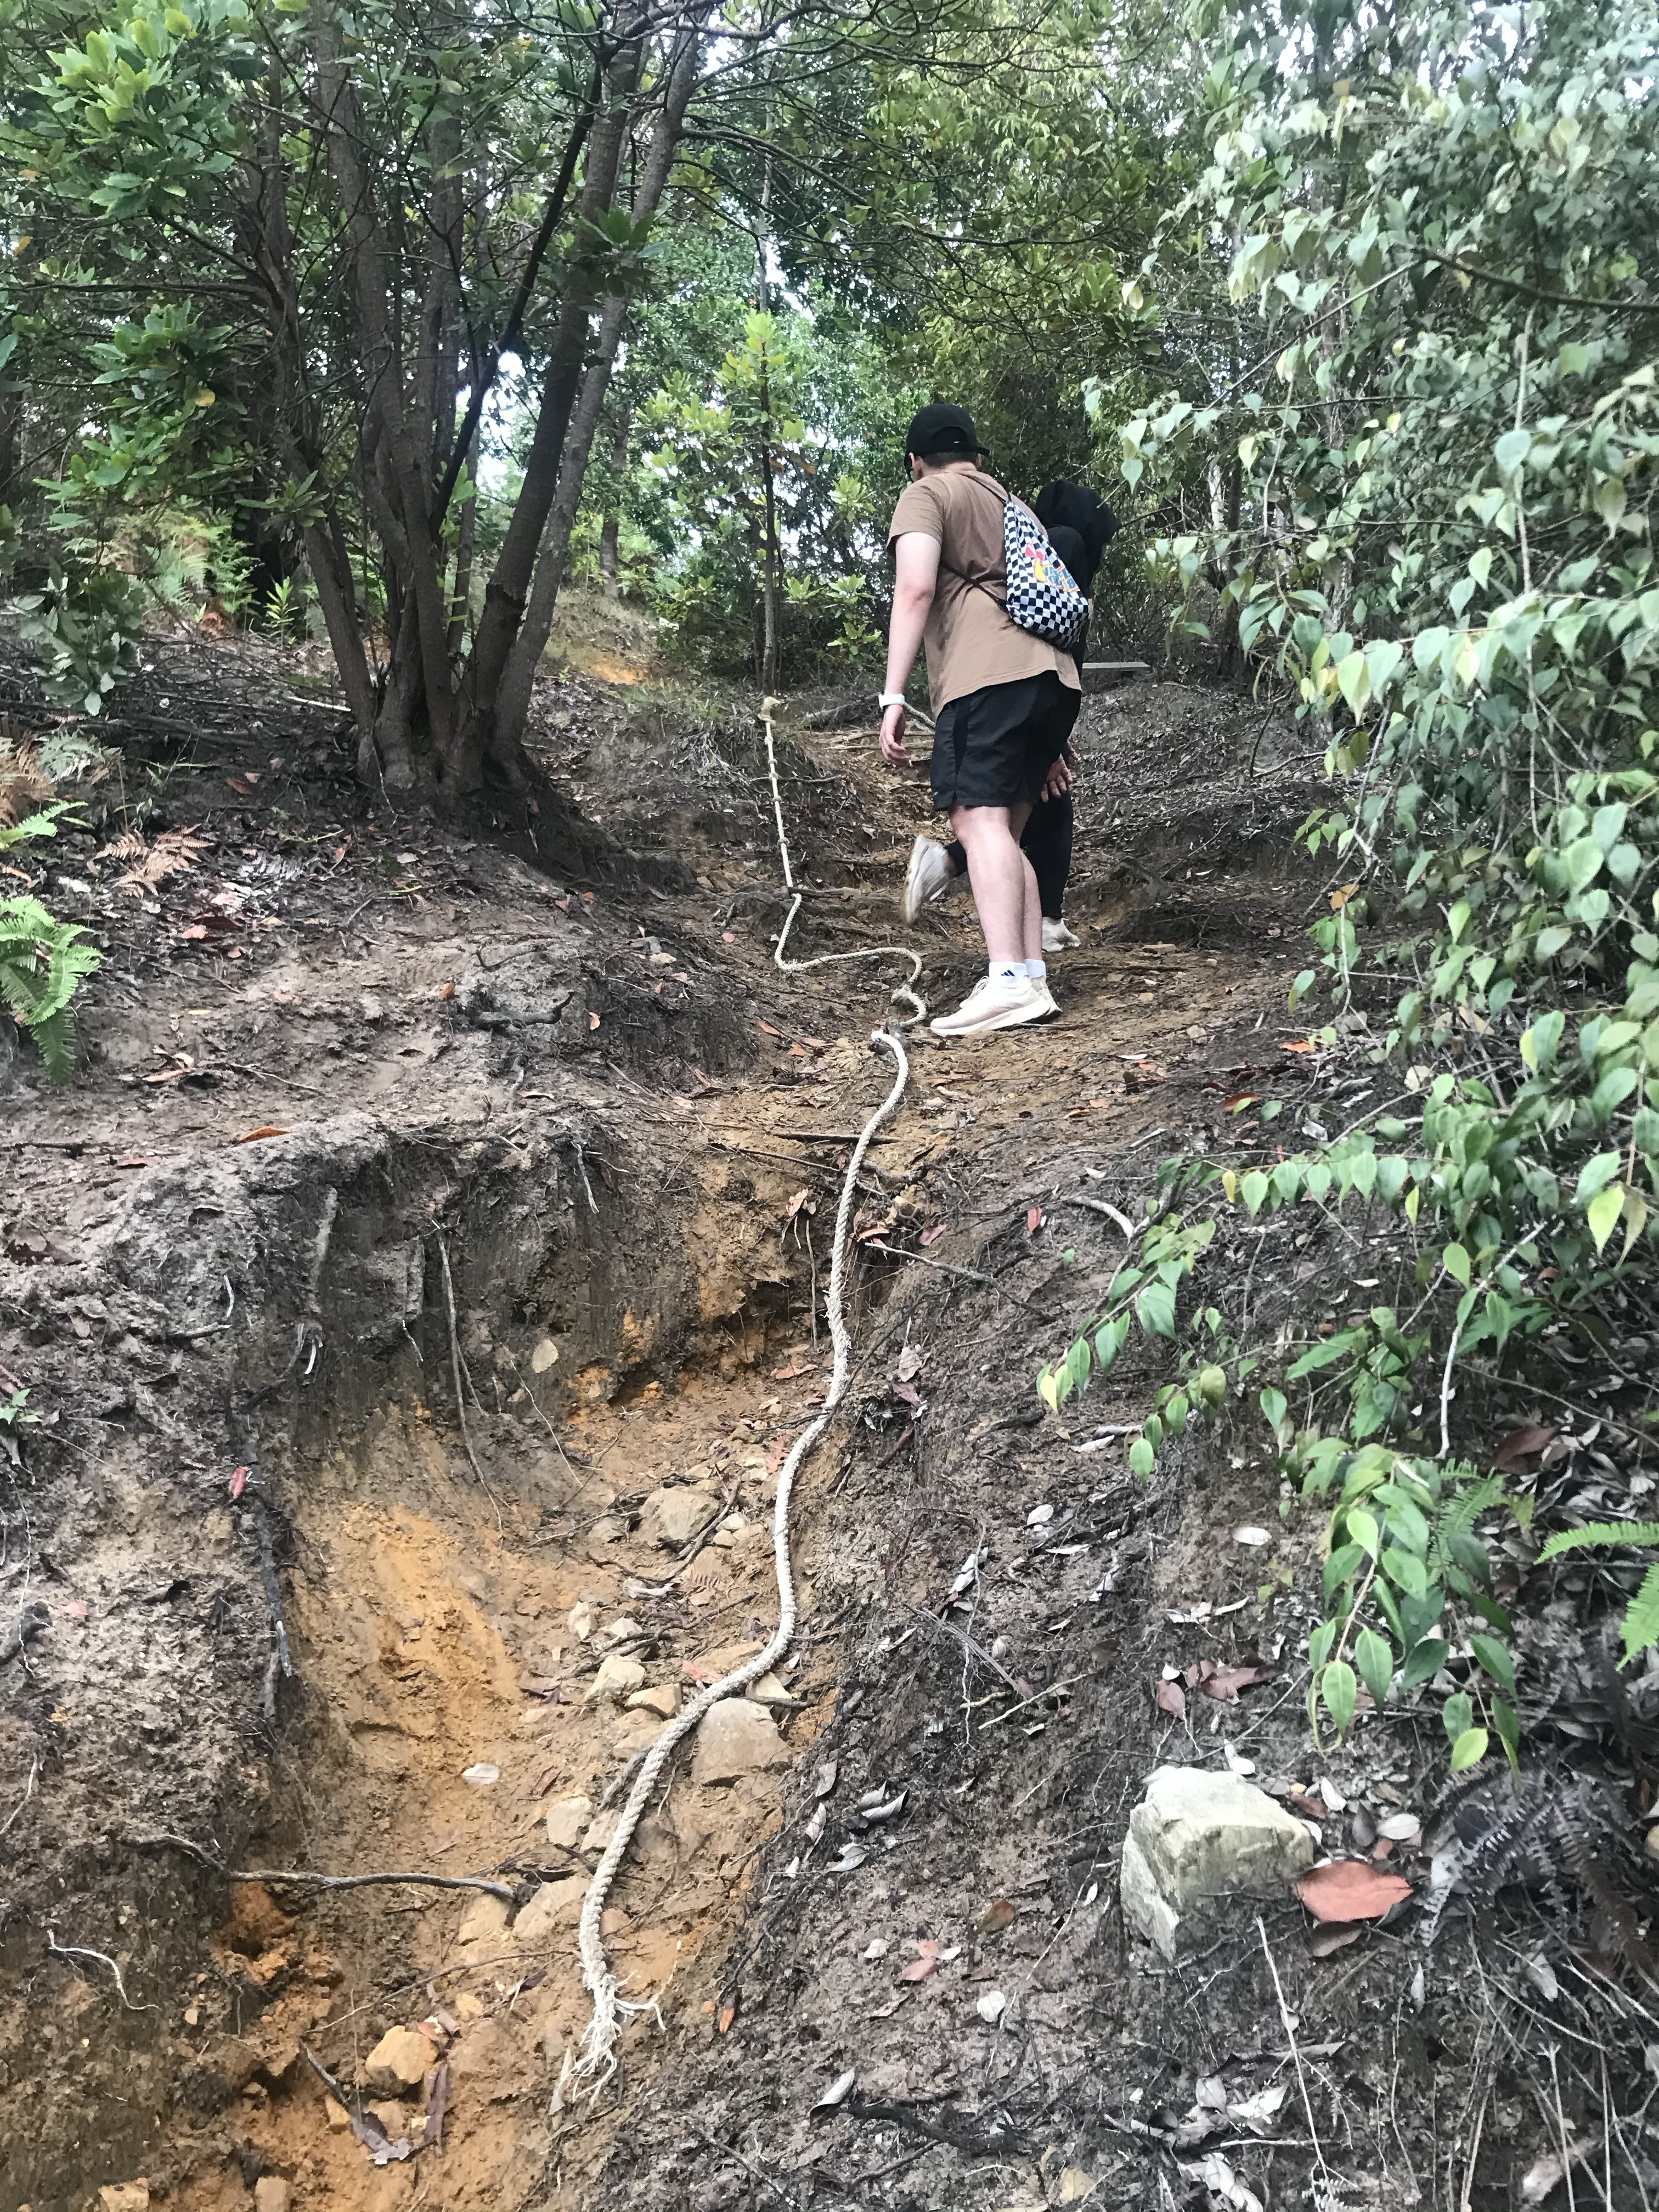
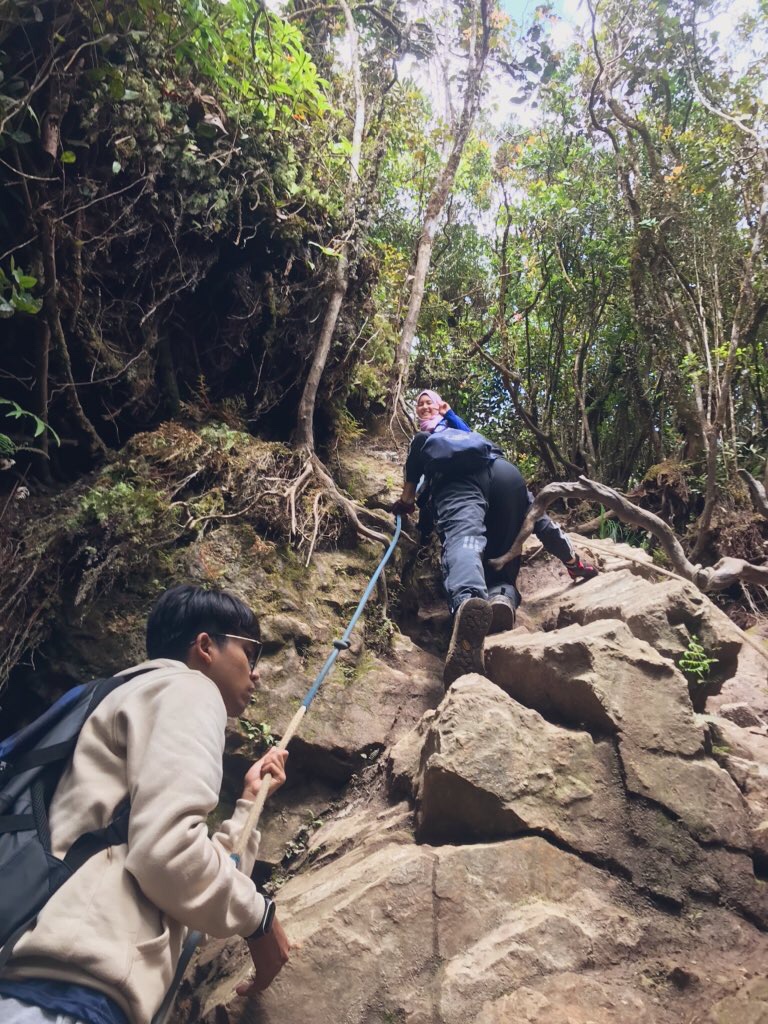
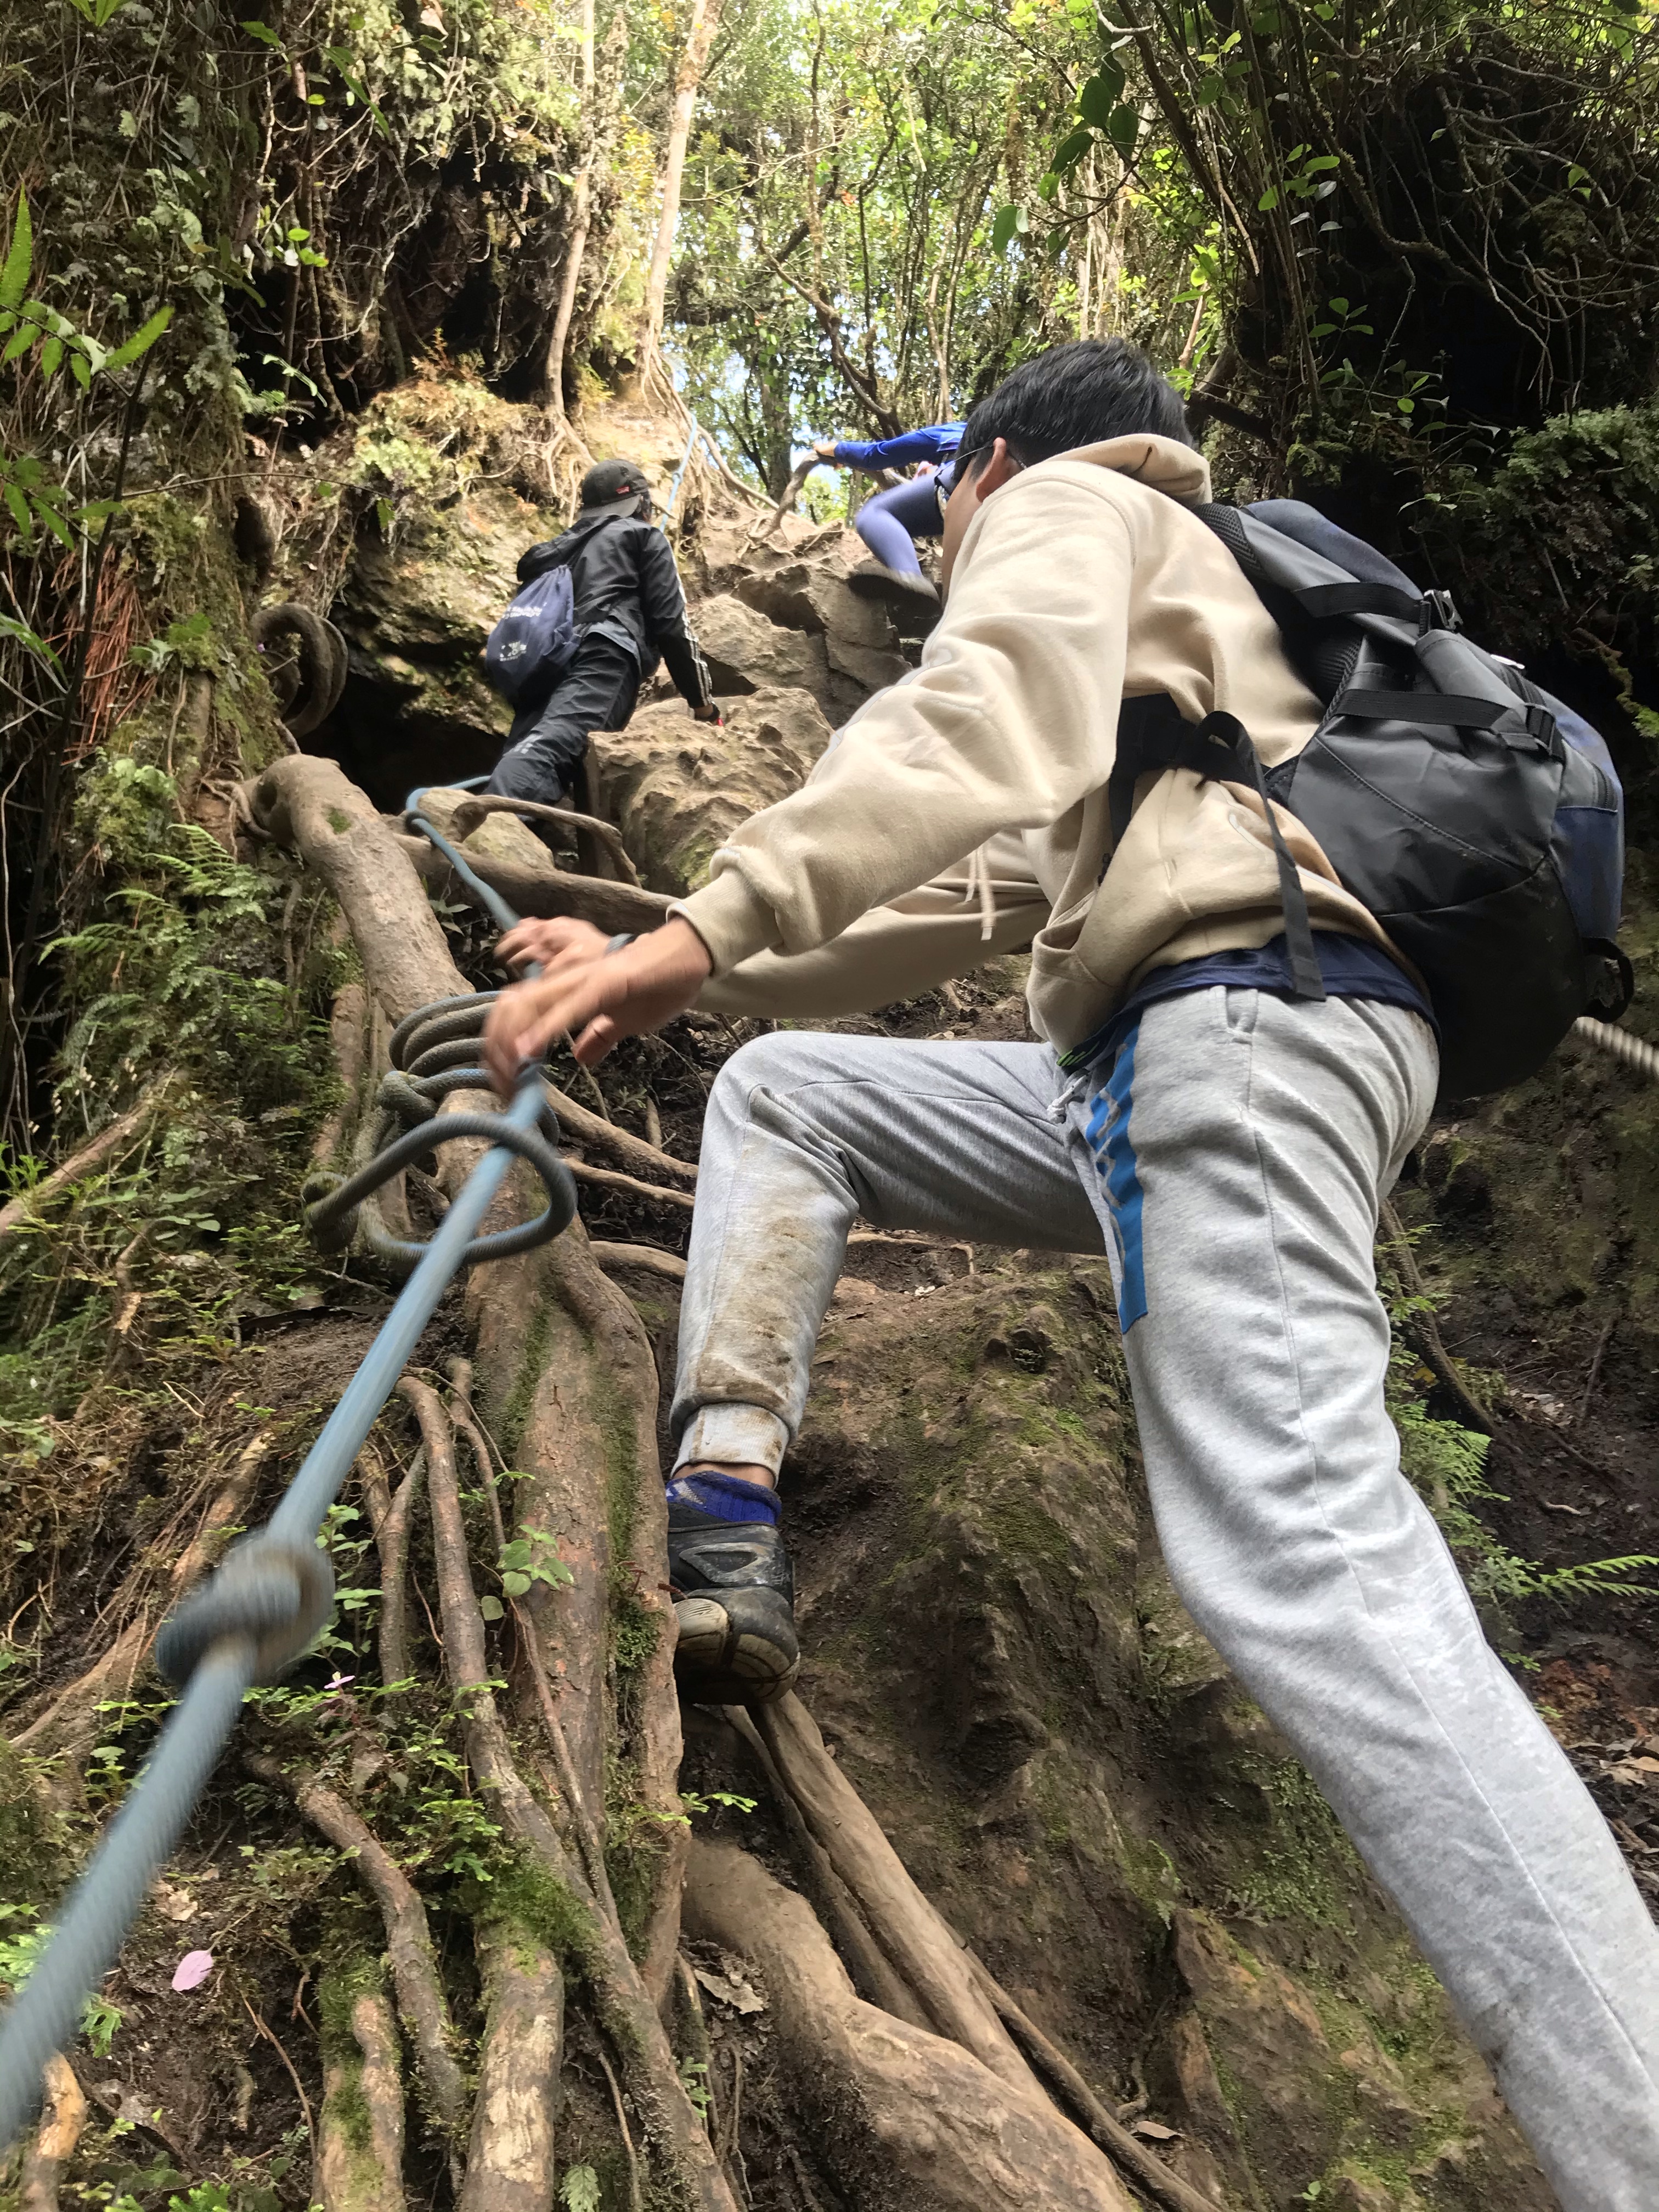
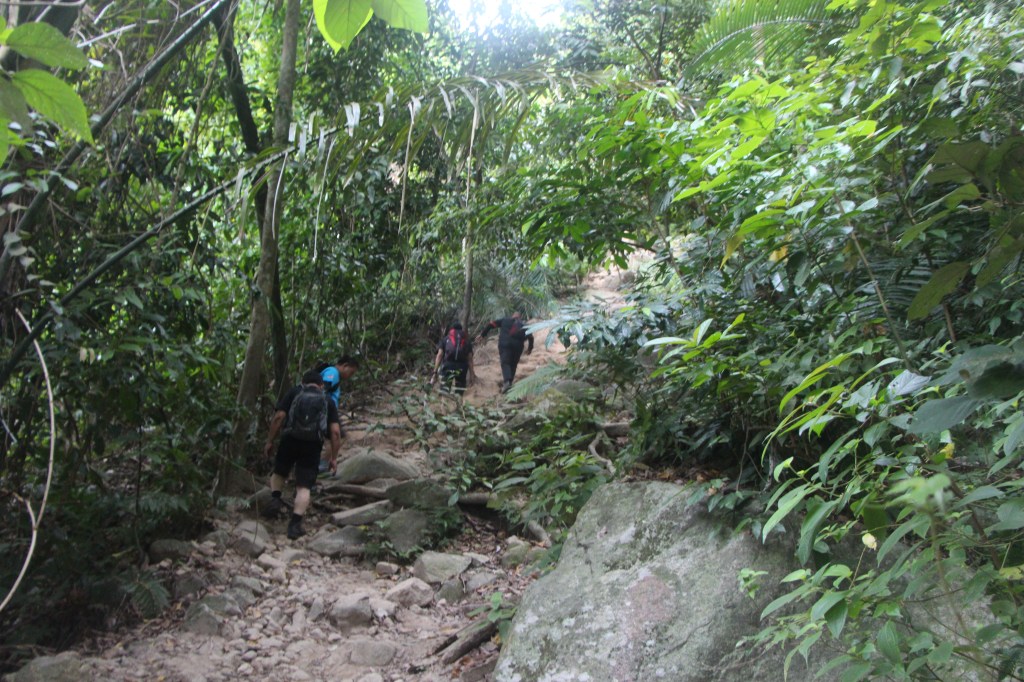
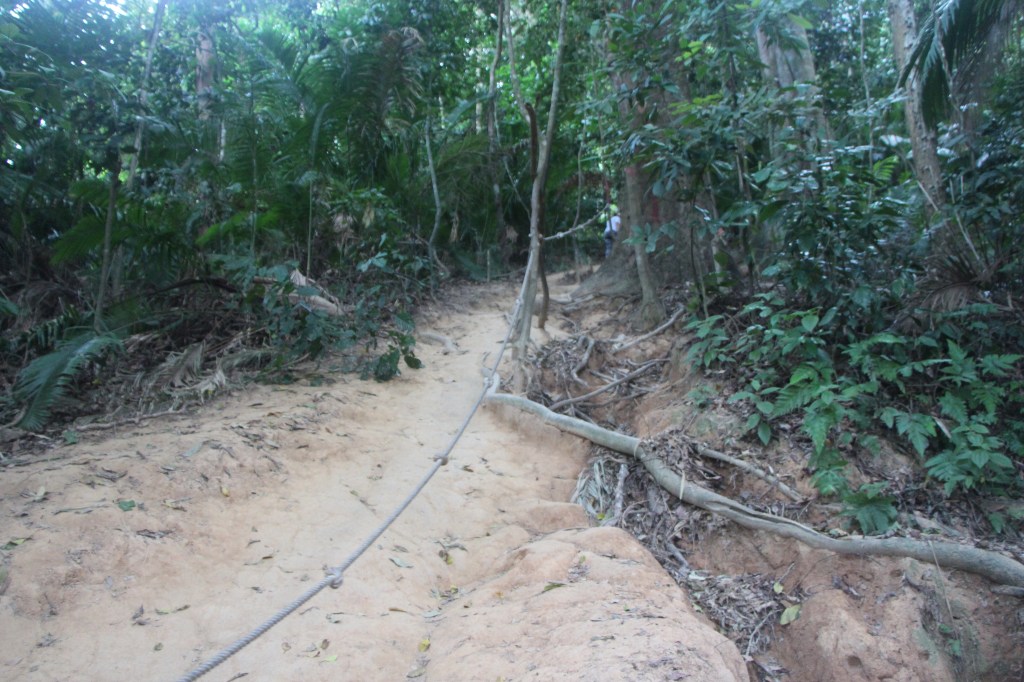
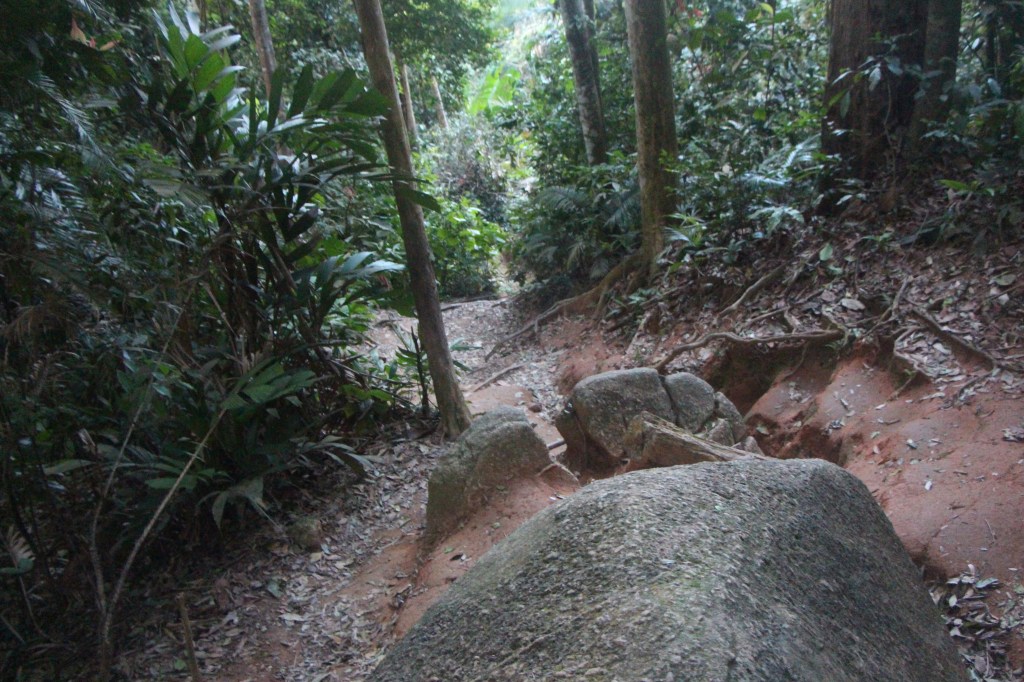
The trail is very easy to follow. The path that we took is up on the tar road as we pass through the entrance, then there will be a signboard which leads to the peak, and this signboard marks the start of the trail through the forest. Finally, the peak lies above a tower of boulders which requires a short scrambling with ropes provided to help you ascent.
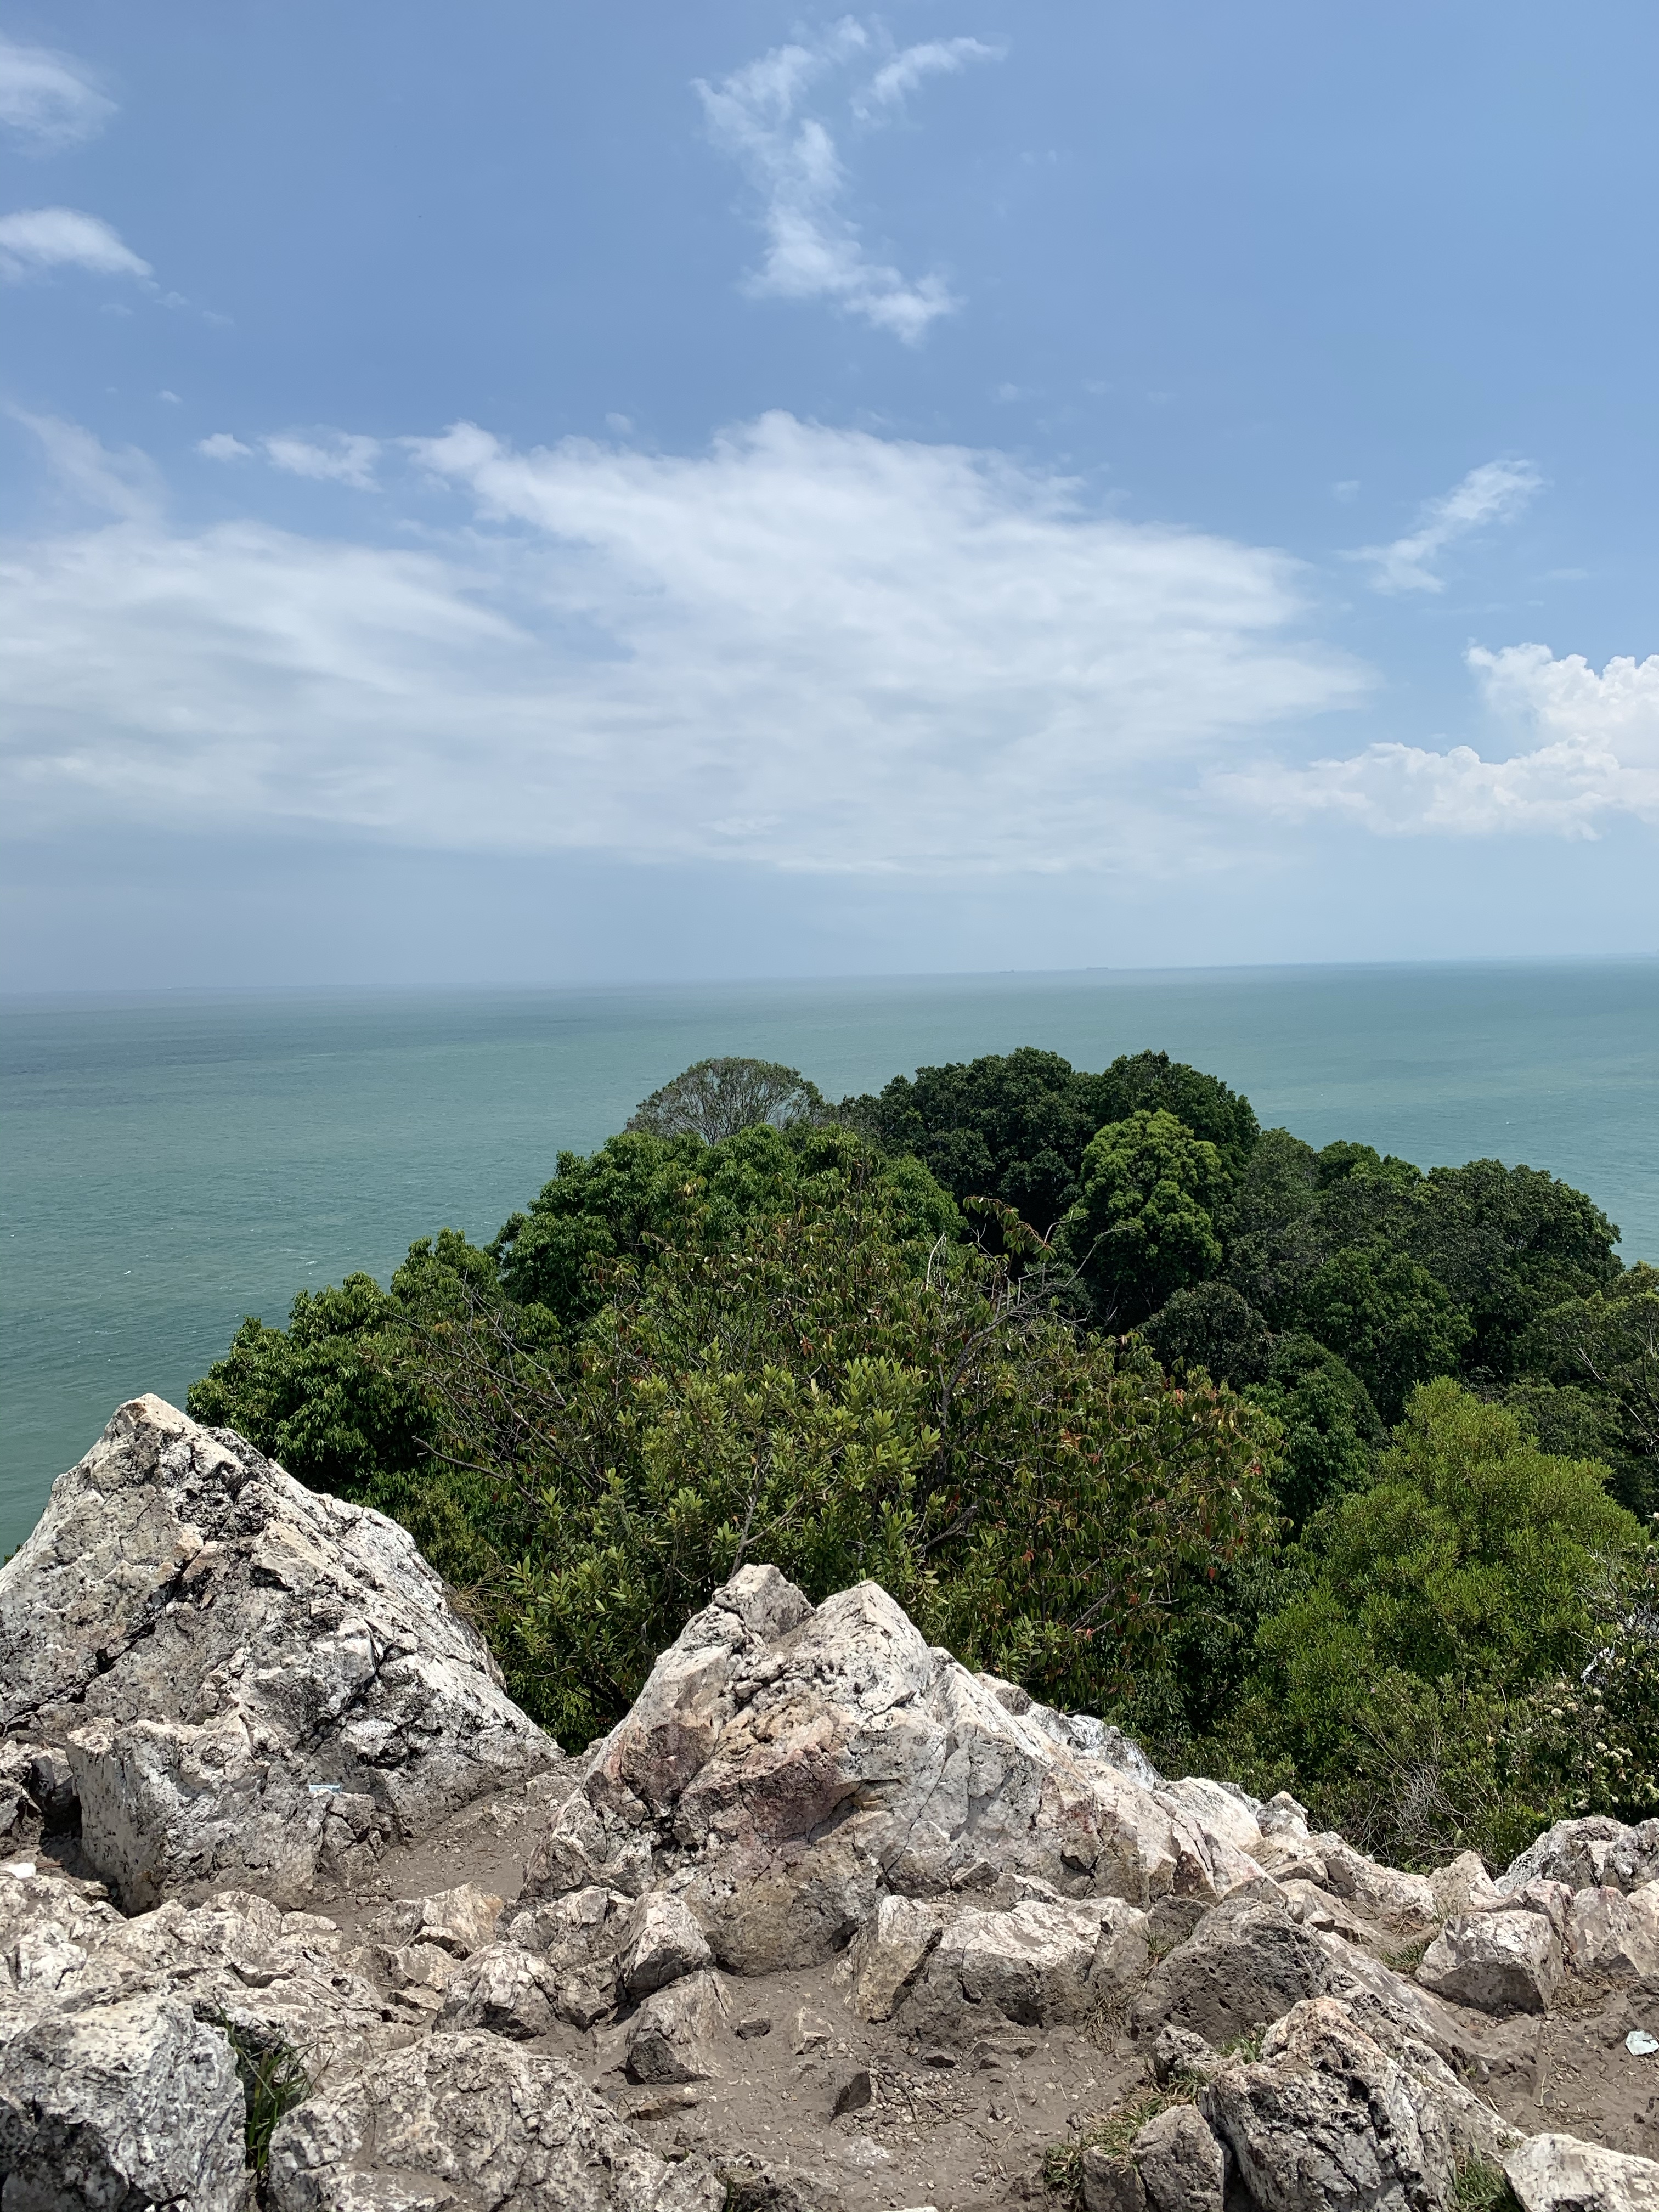
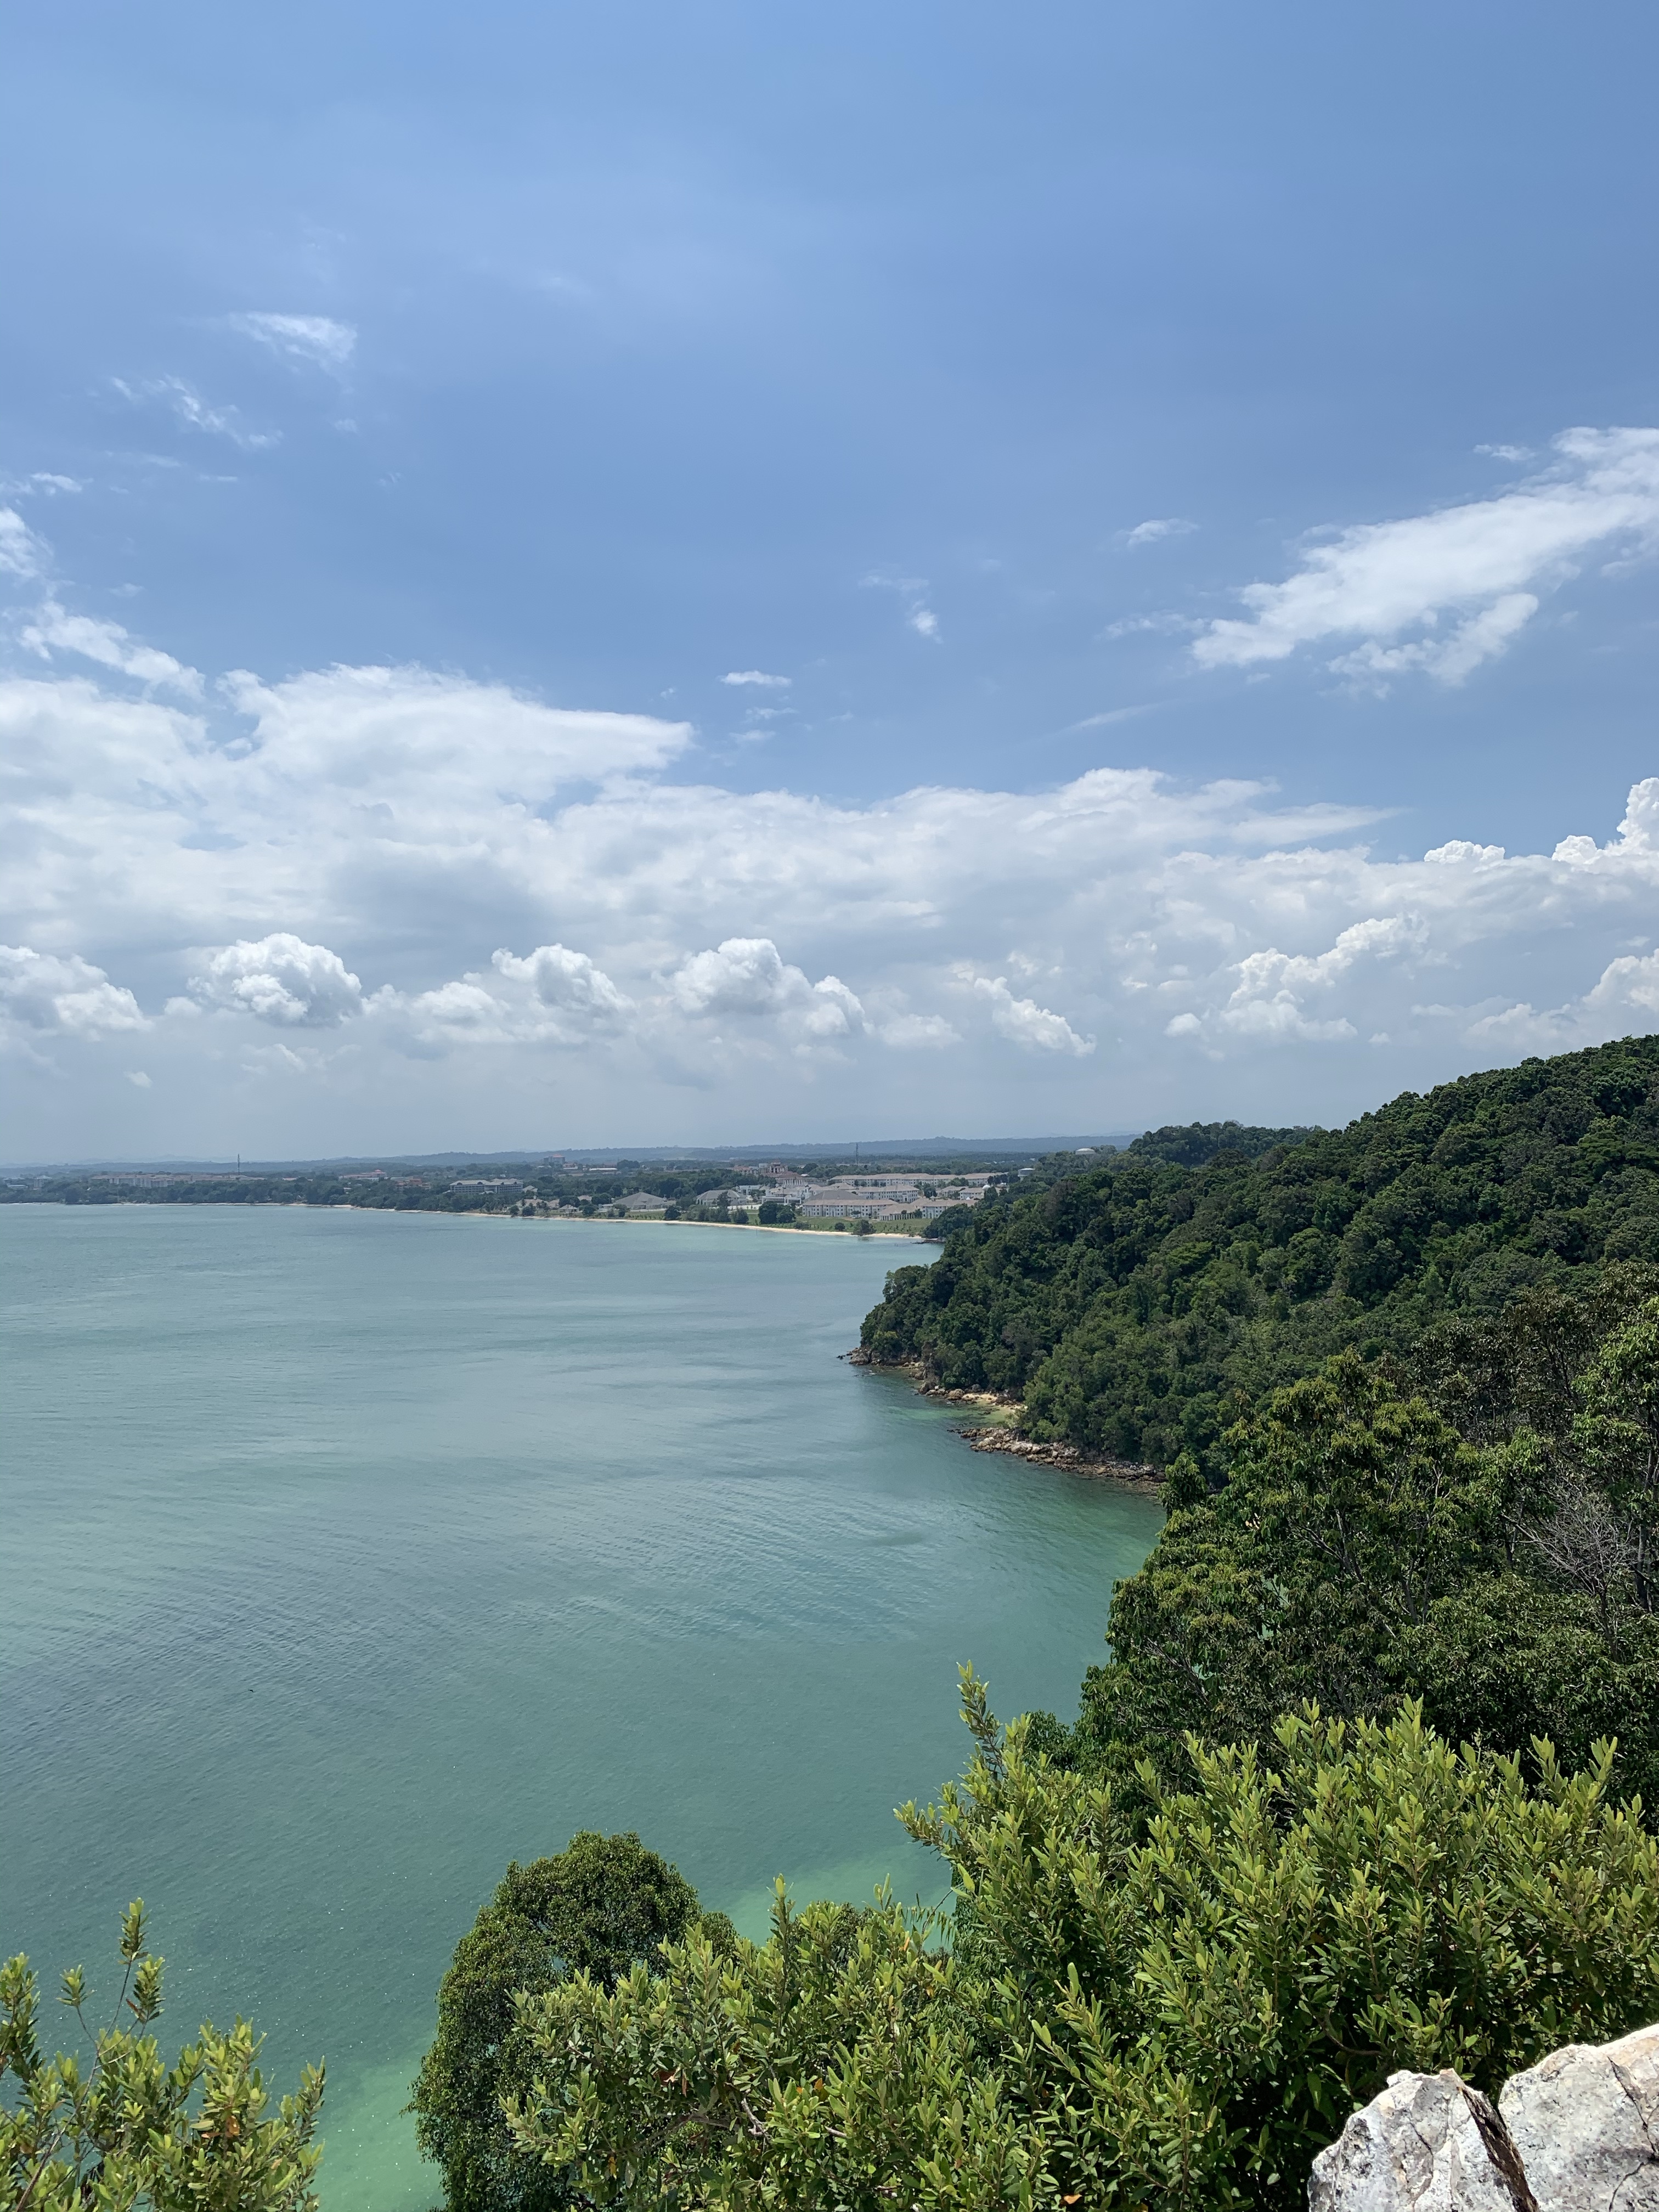
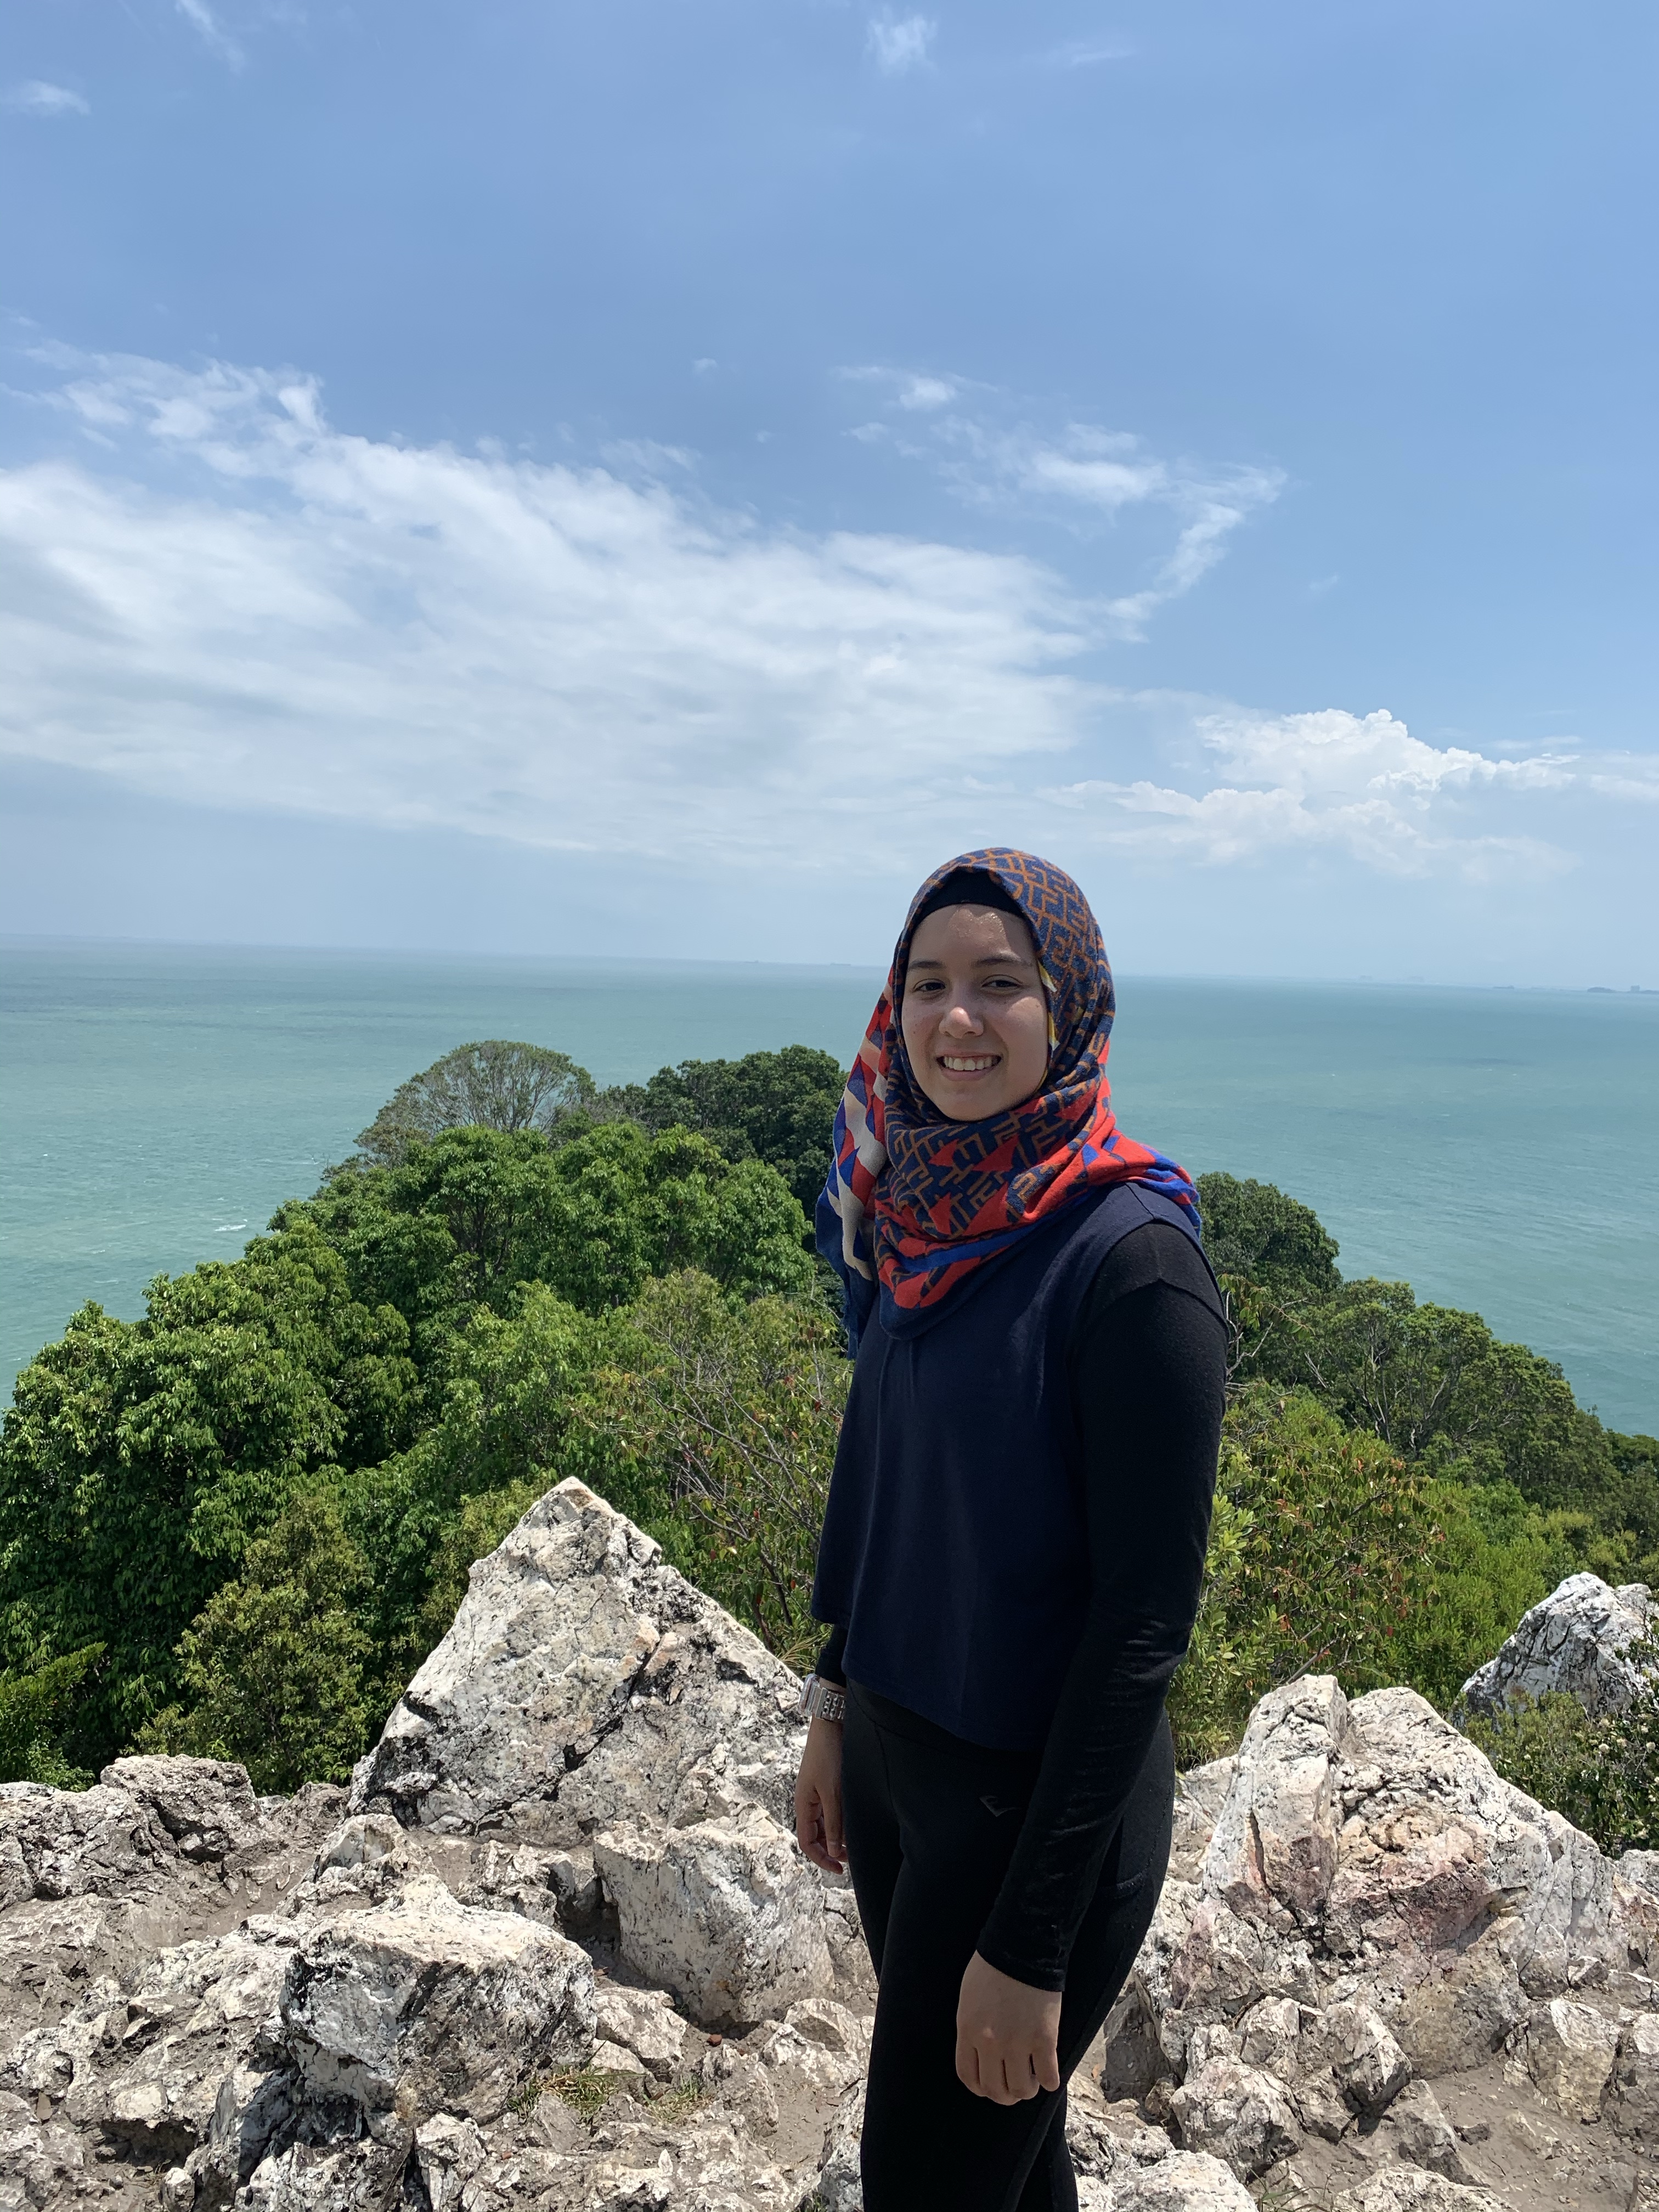
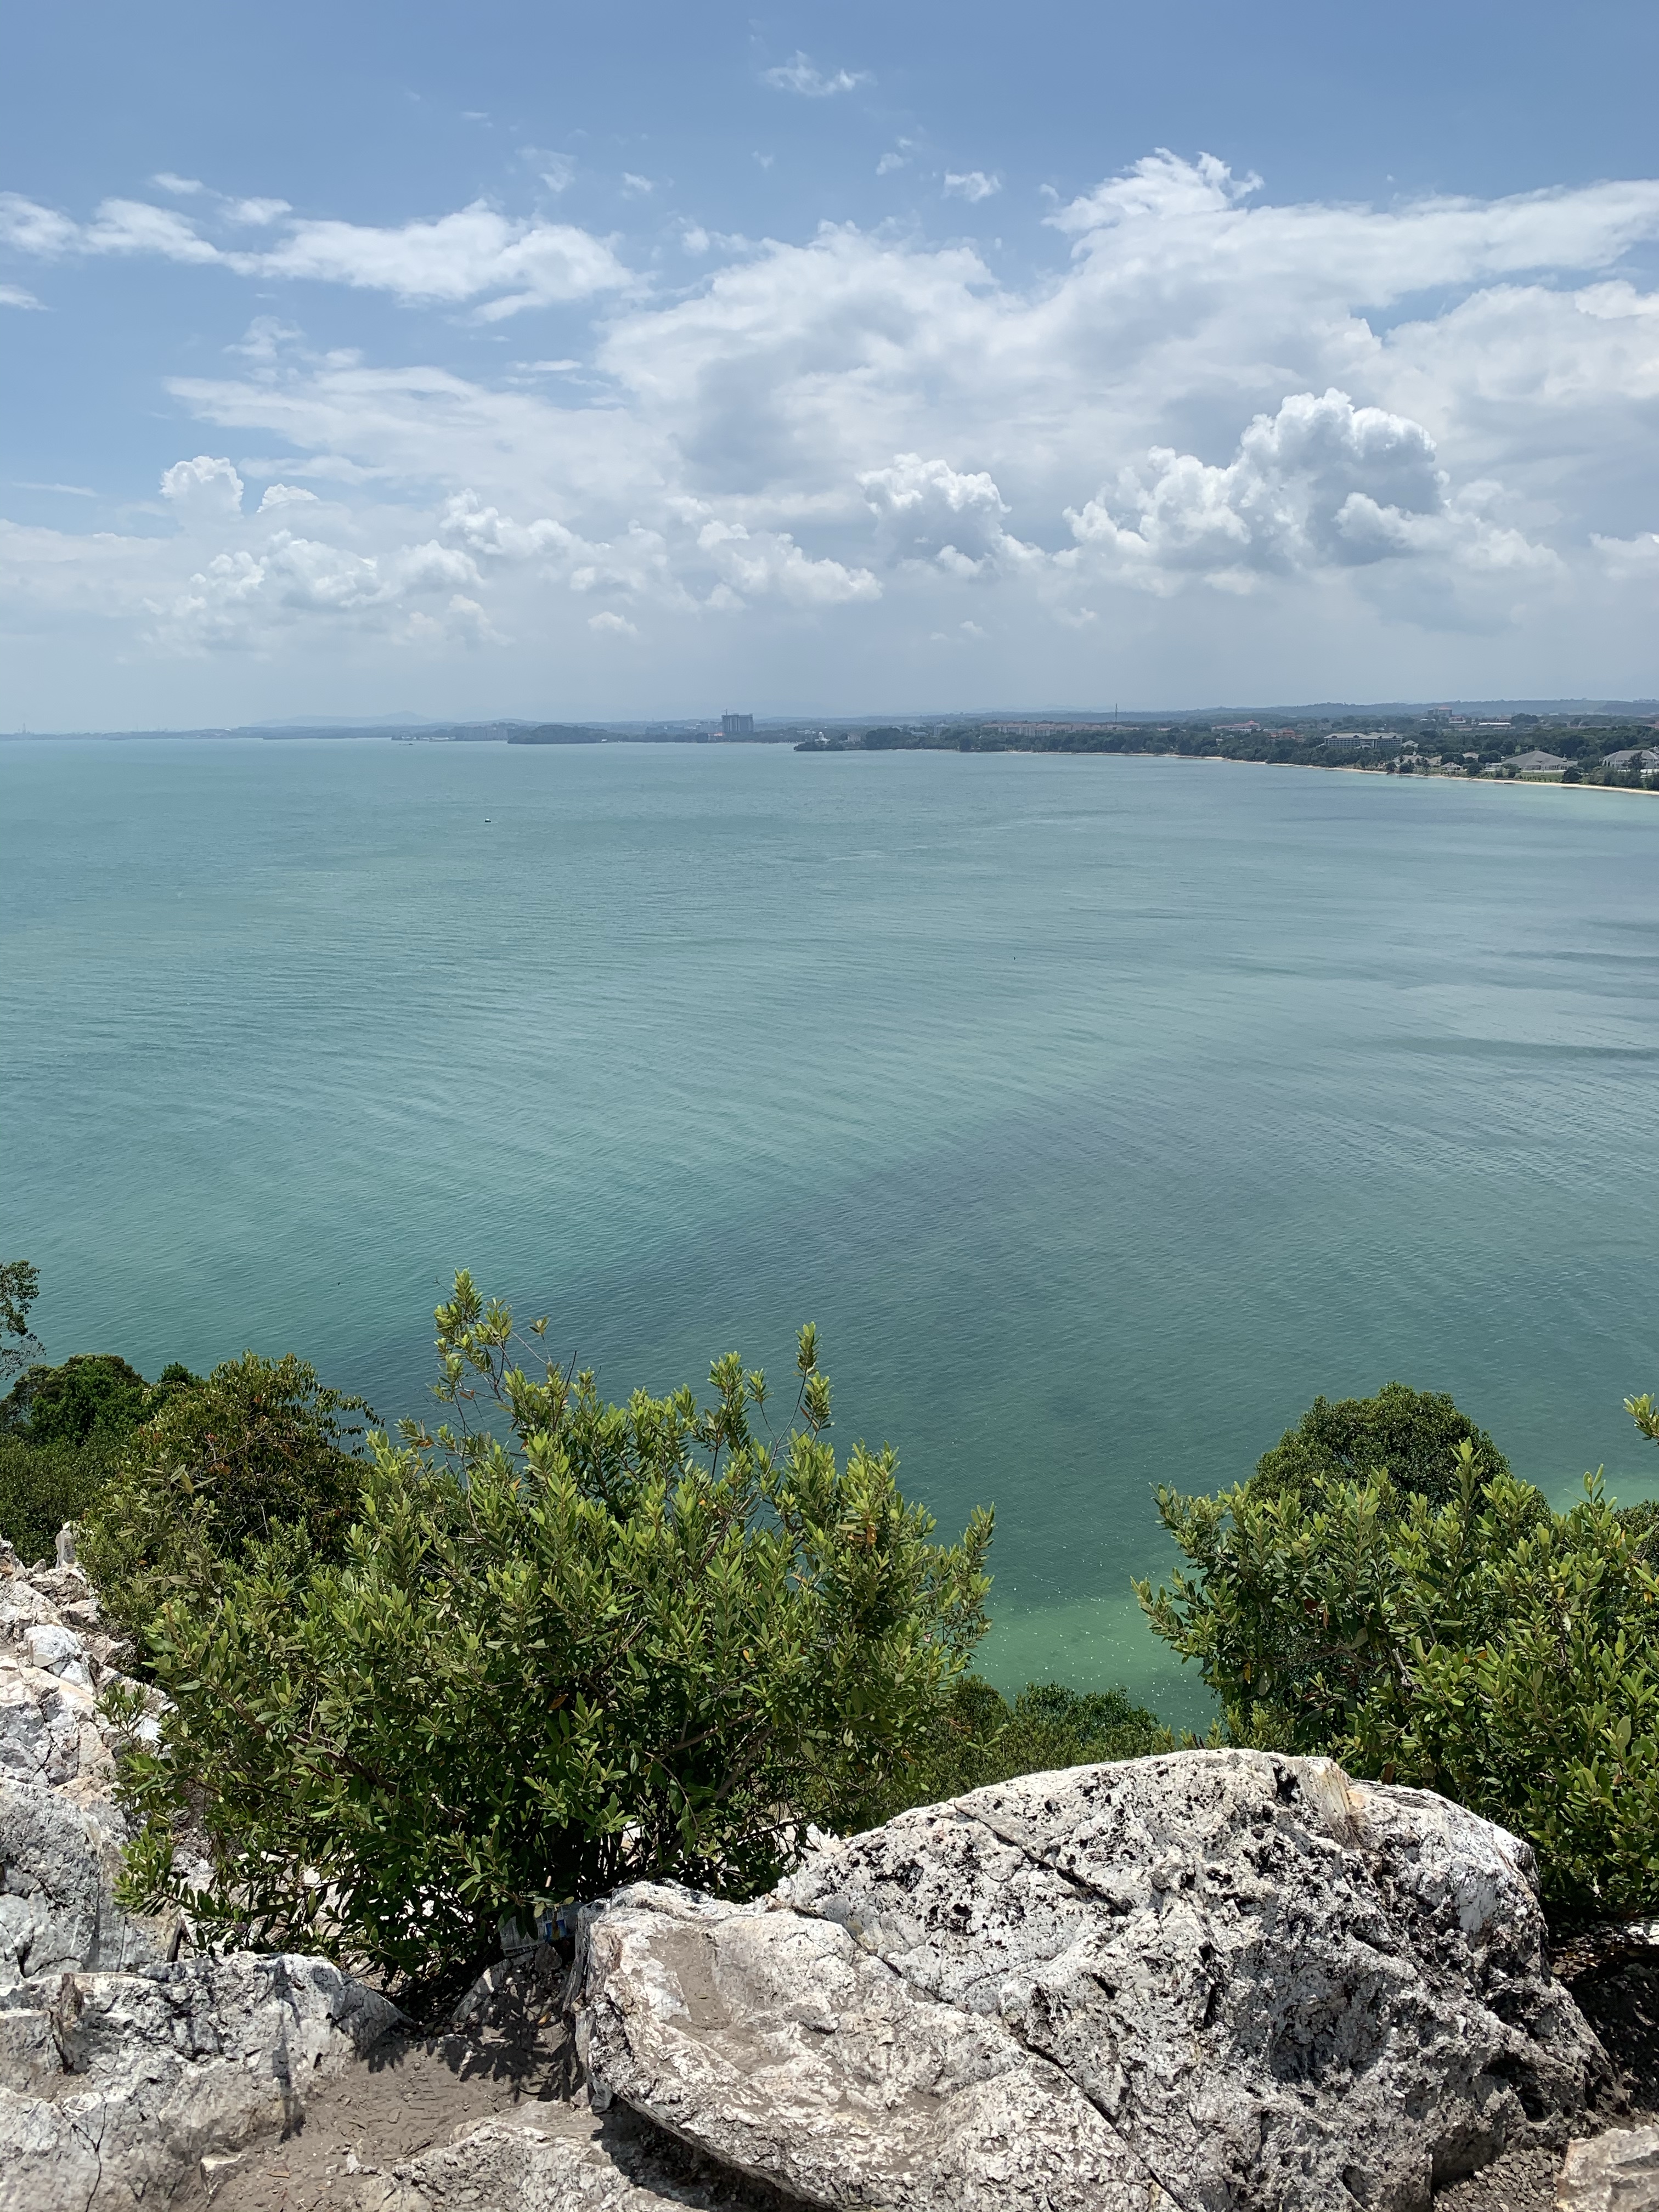
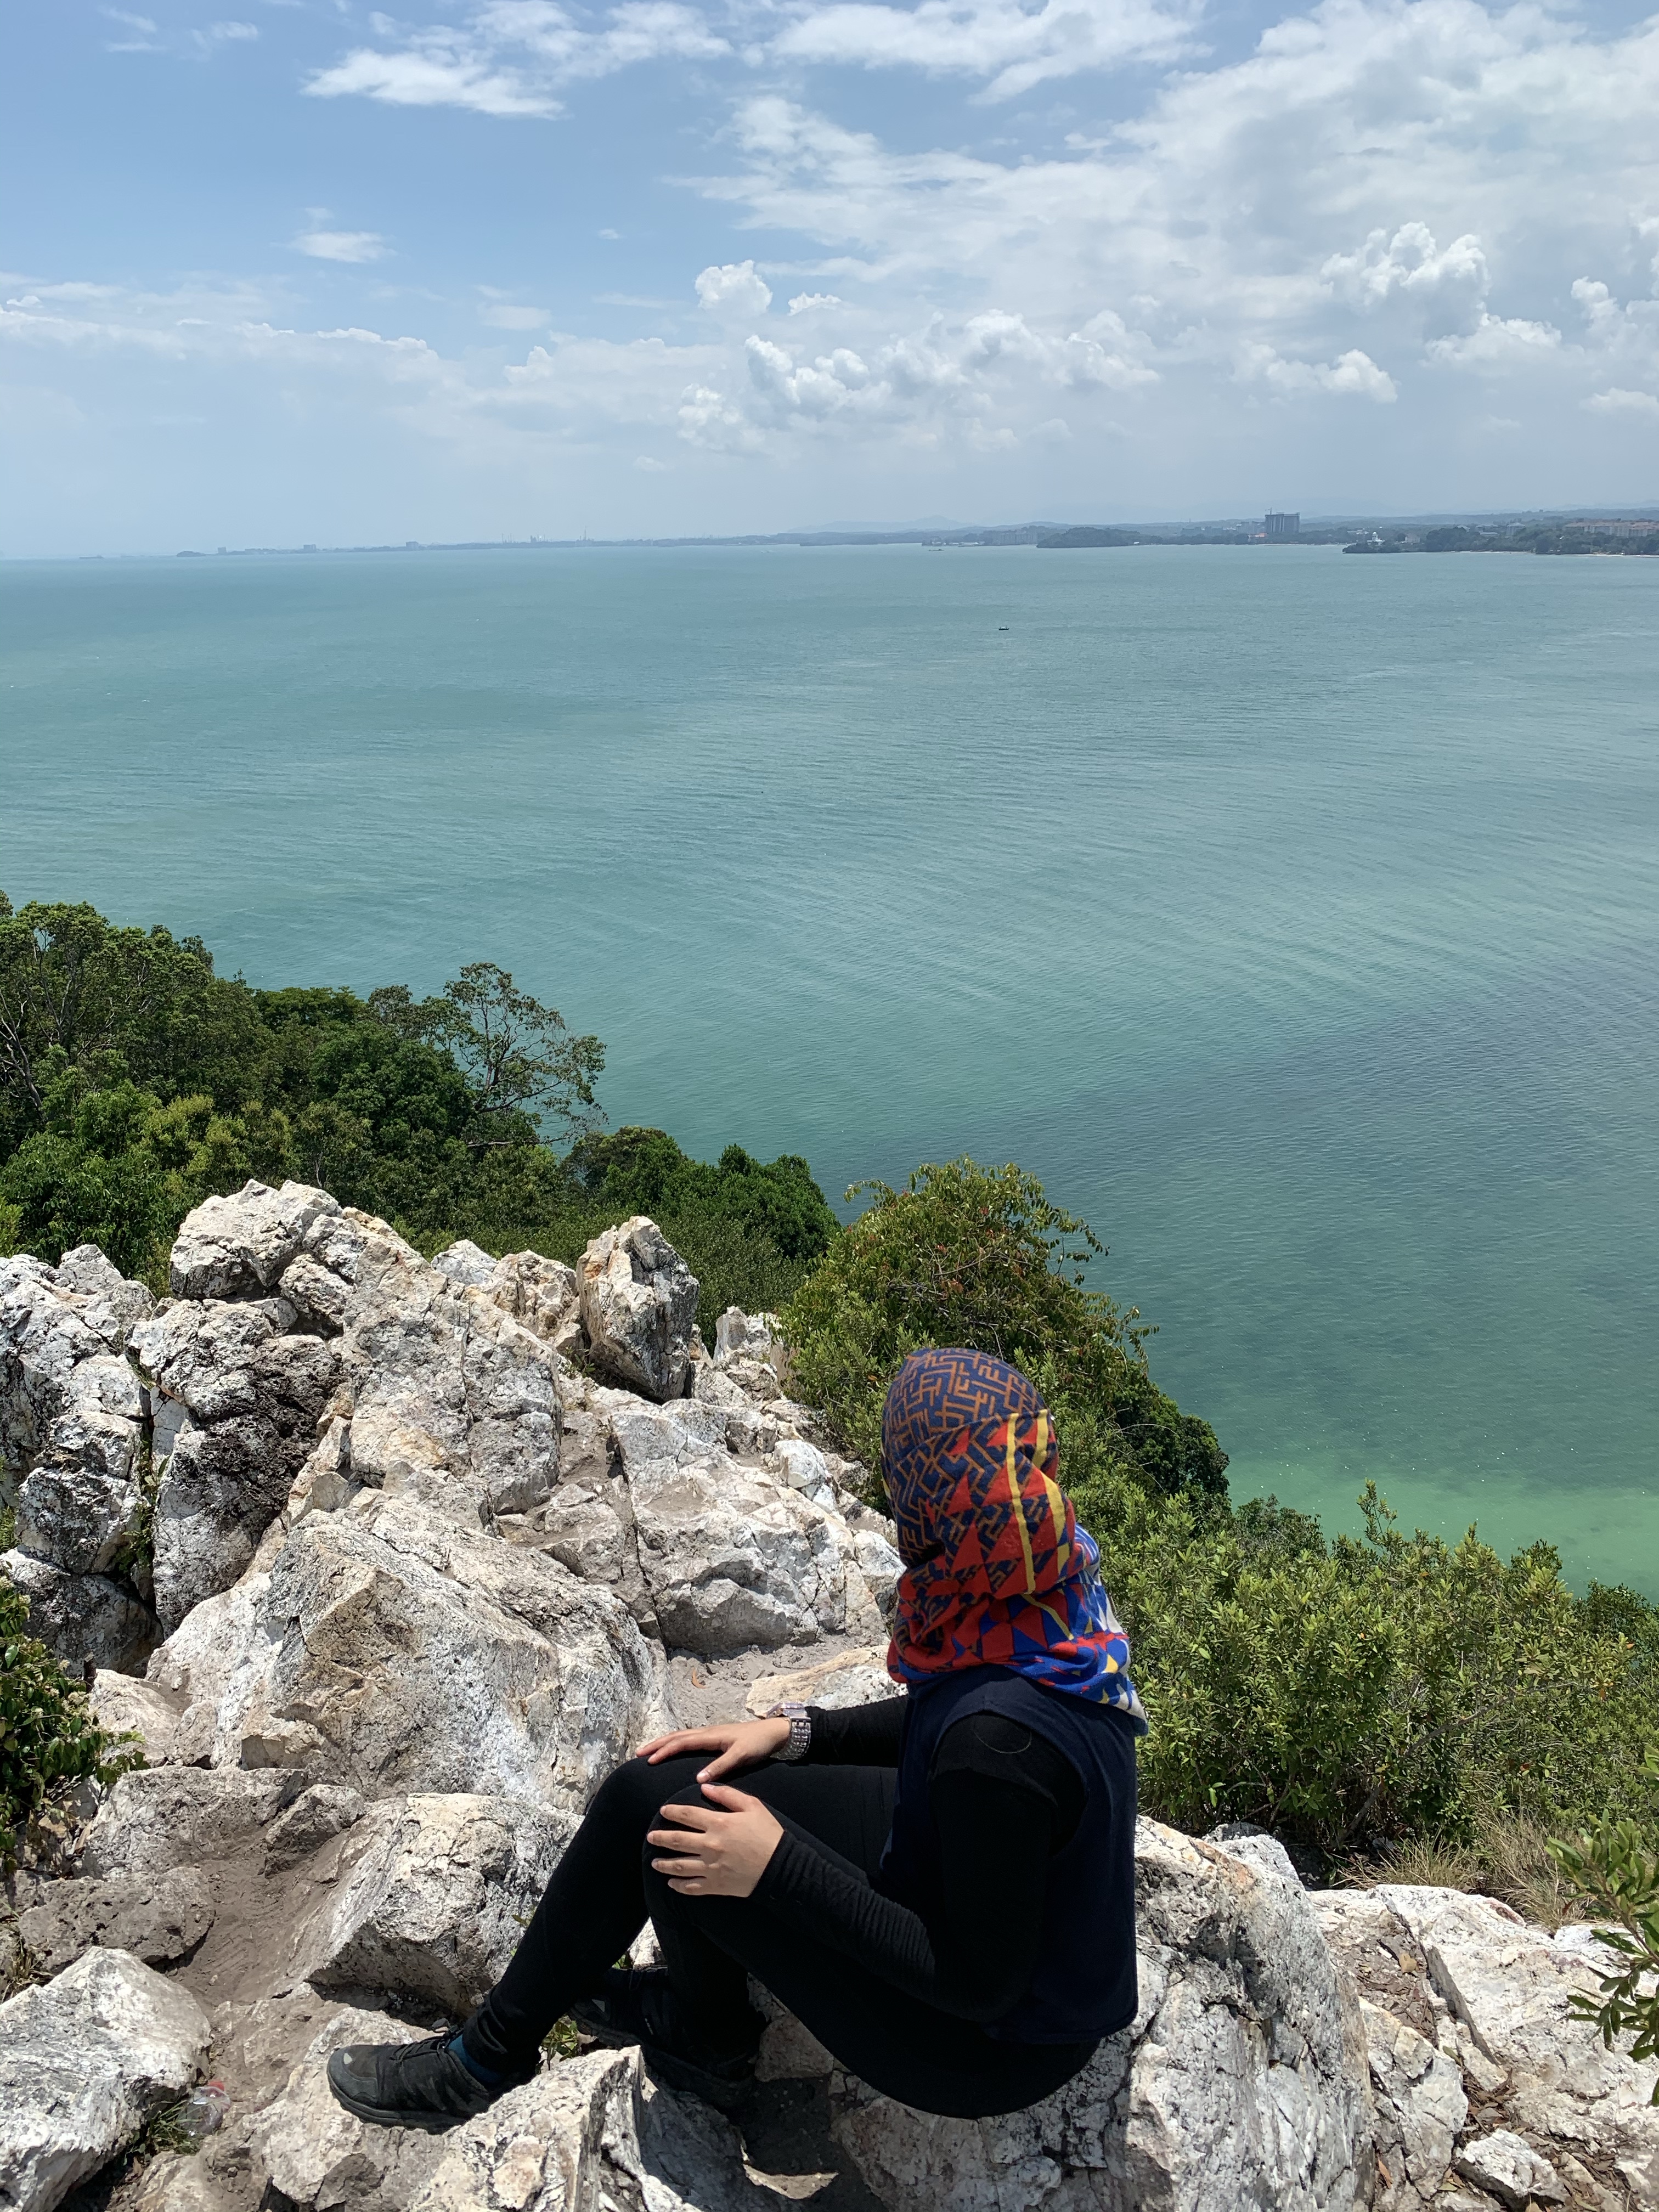
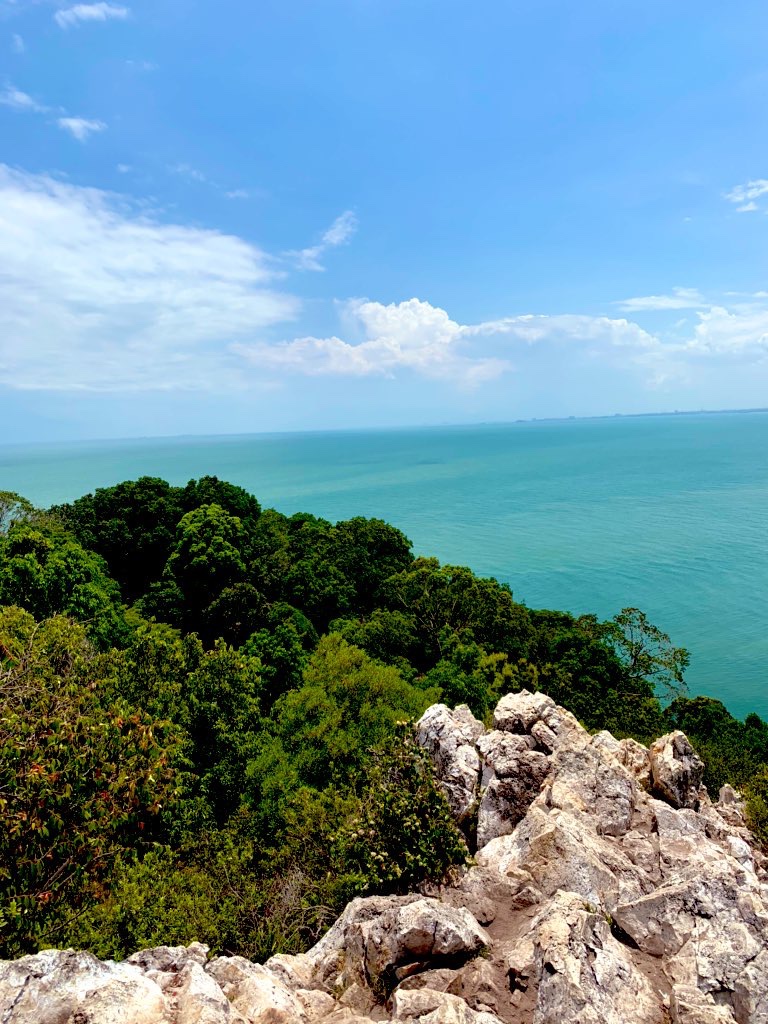
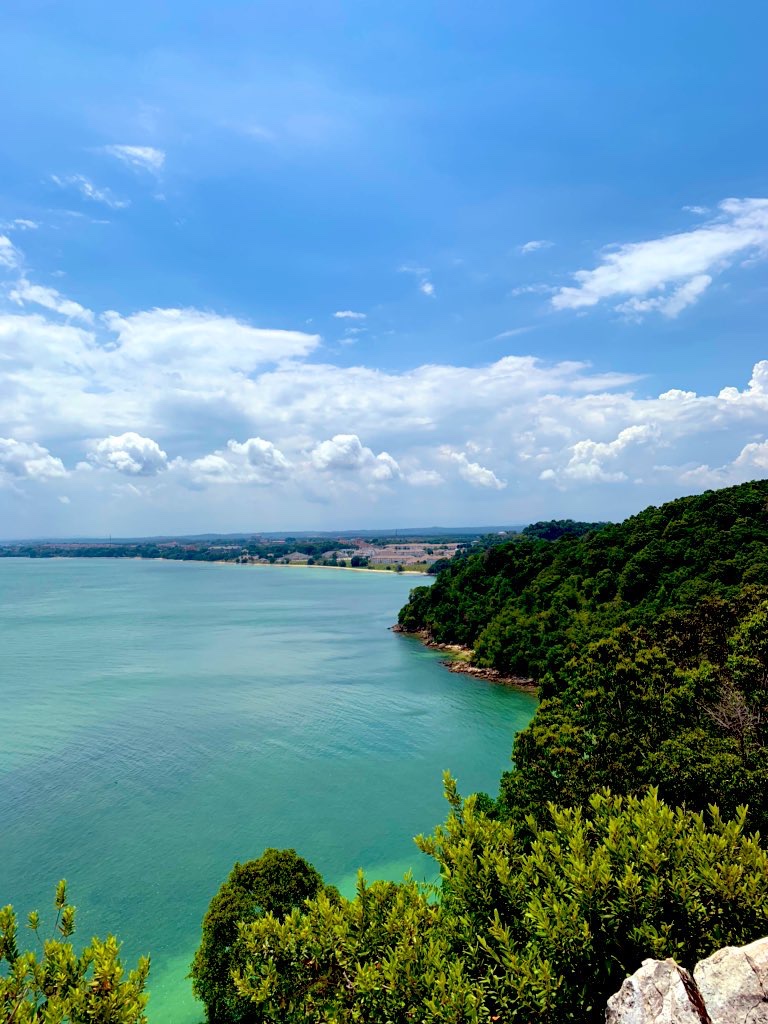
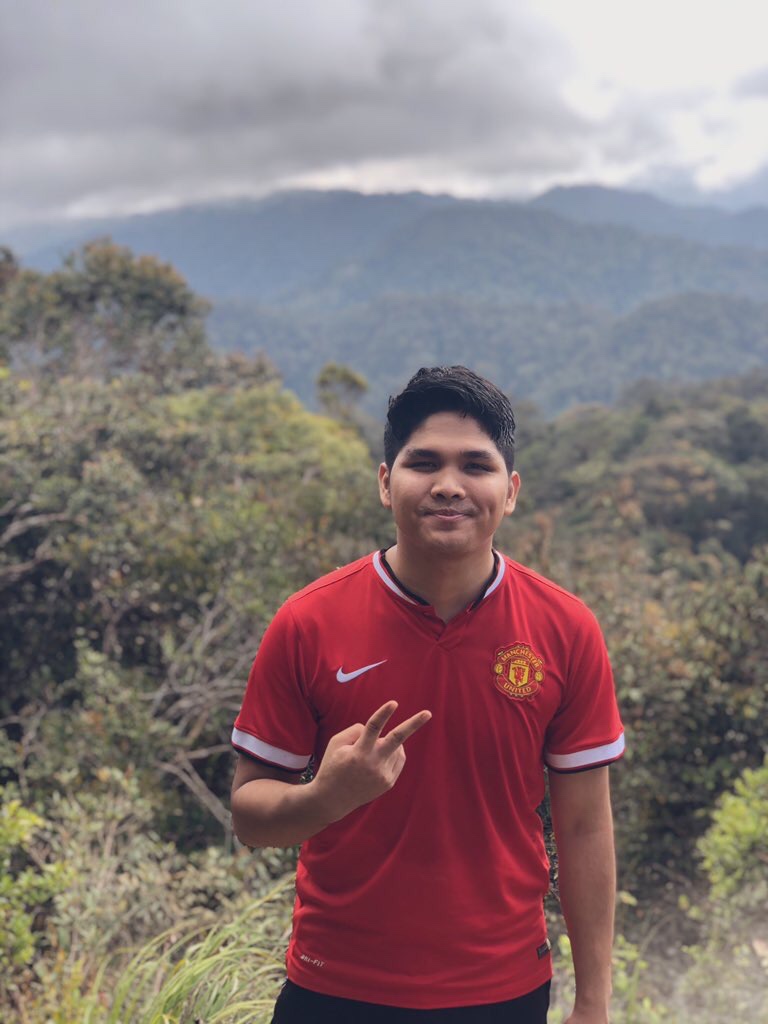
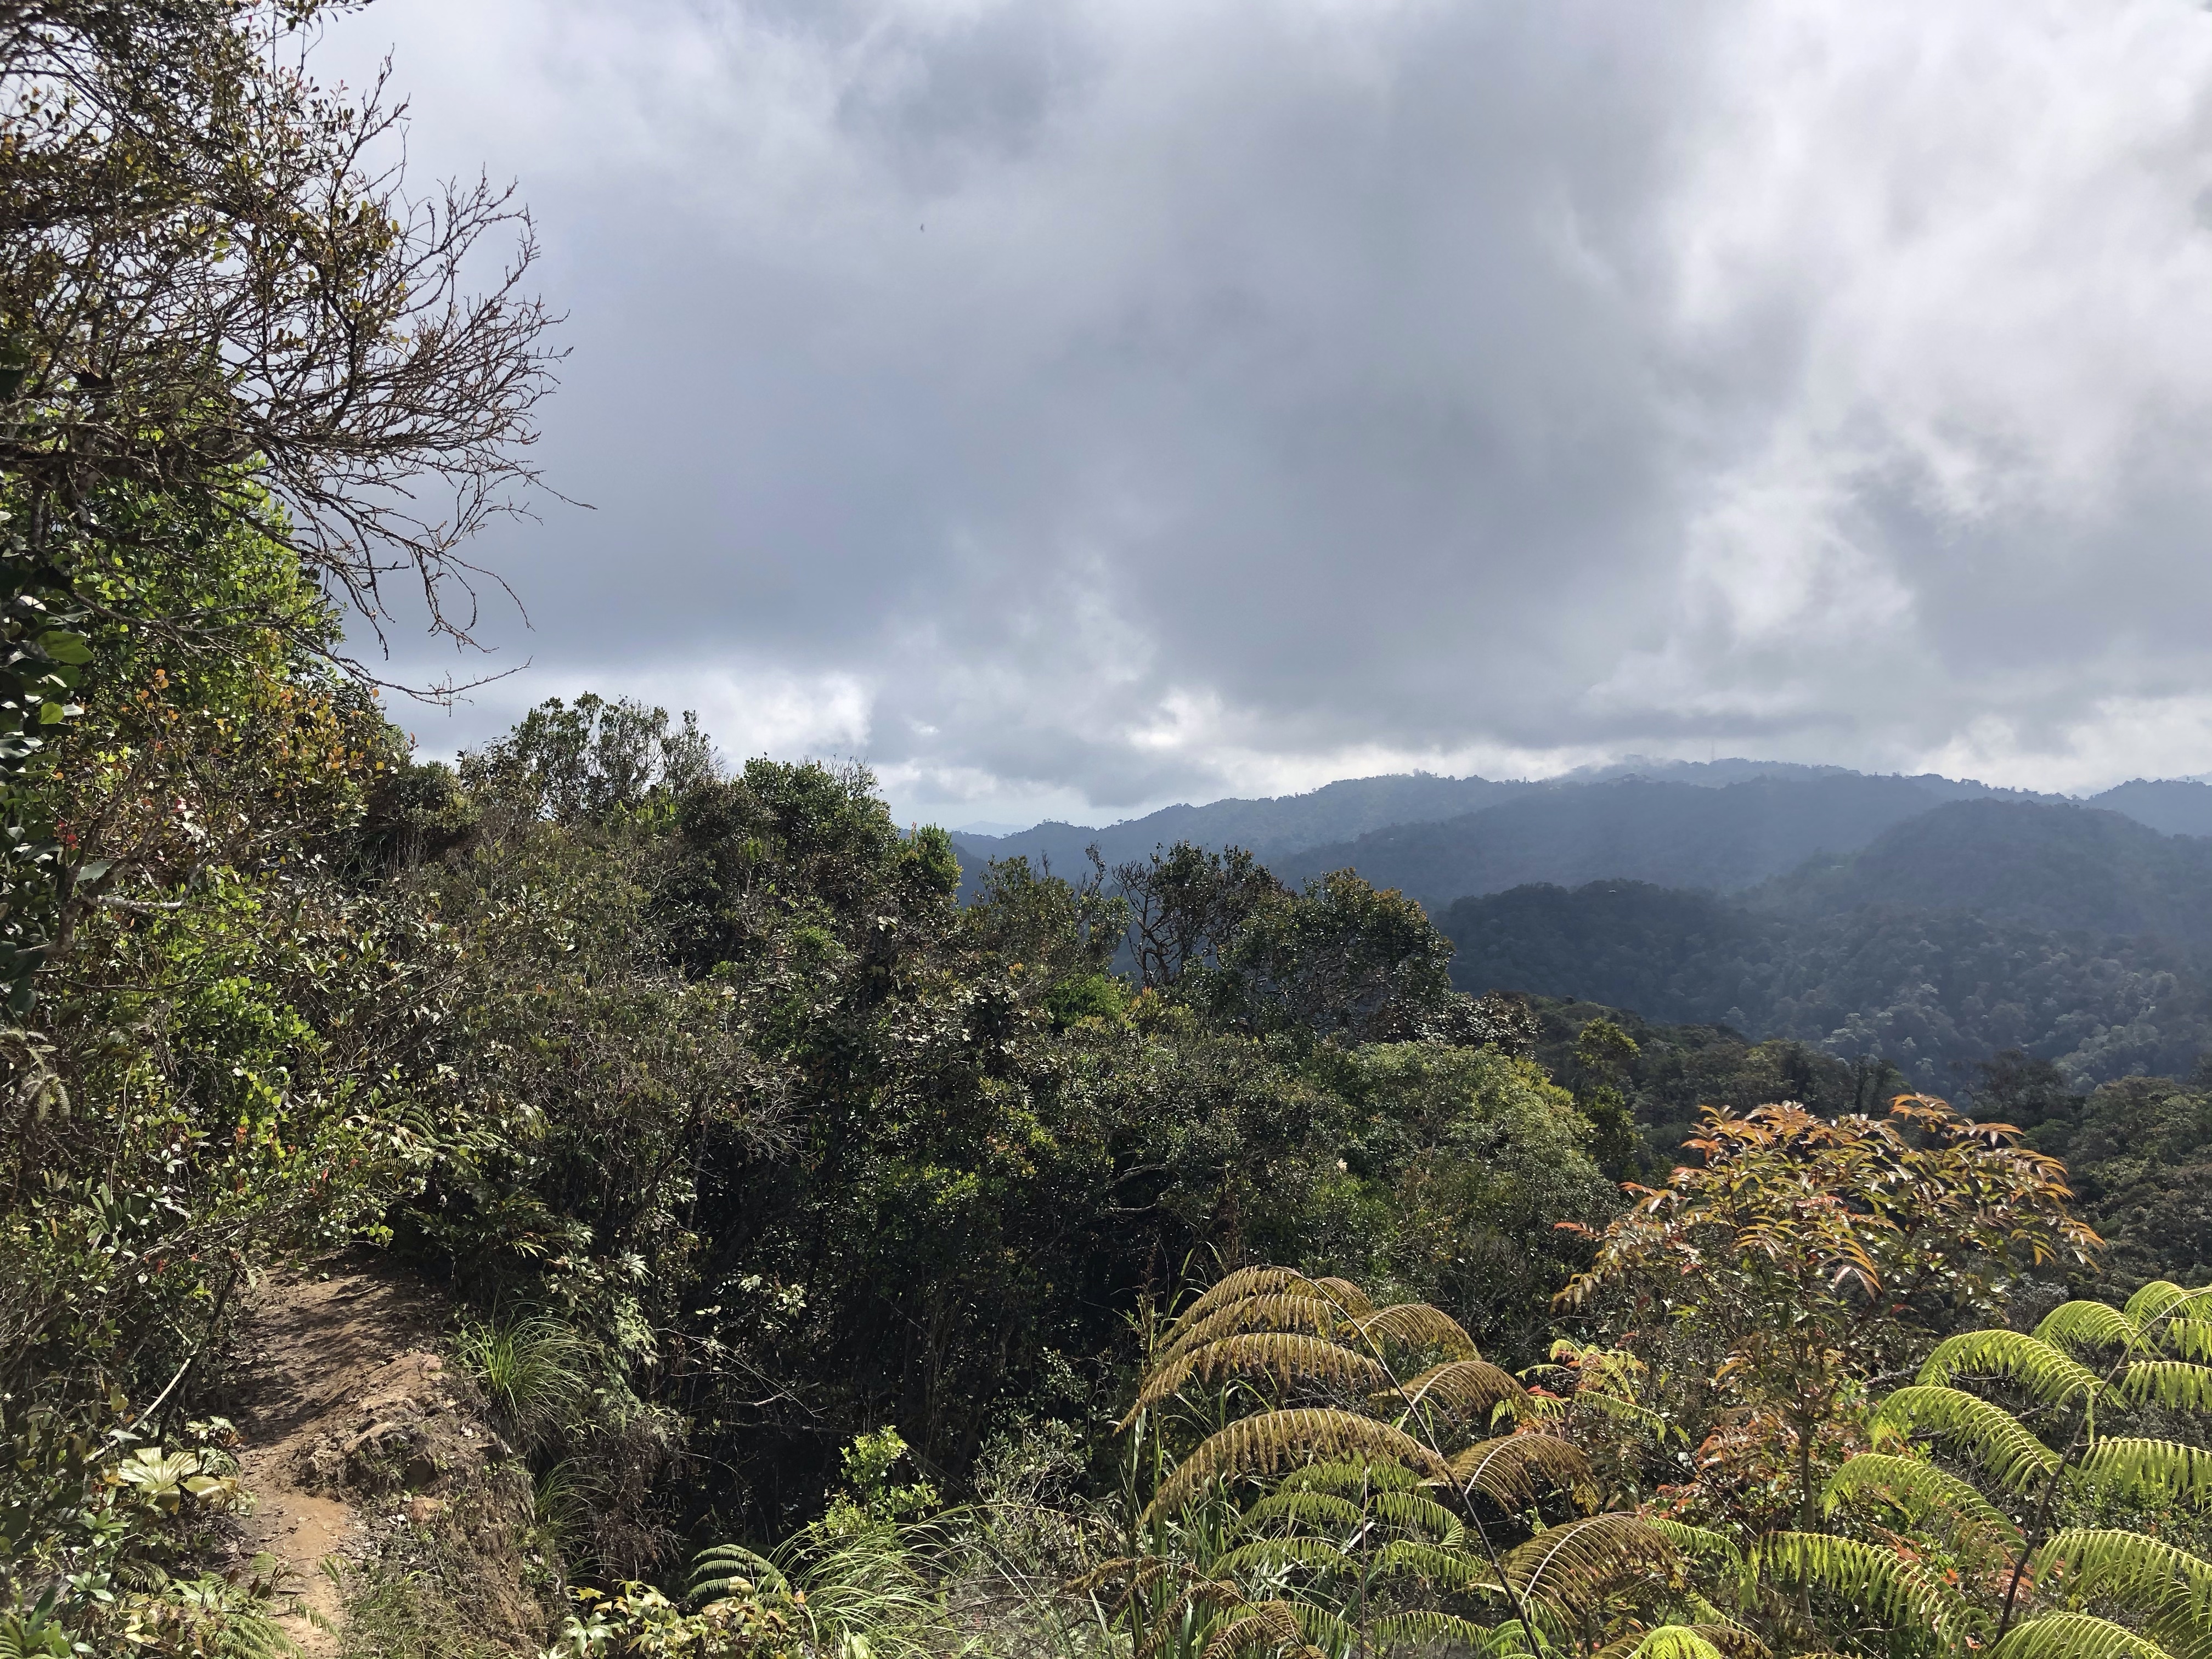
Once you’re here, feast your eyes on the most beautiful view of the Straits of Malacca.
Trail through the forest
Tower of boulders just before the peak
Scrambling our way up
Panoramic view from peak
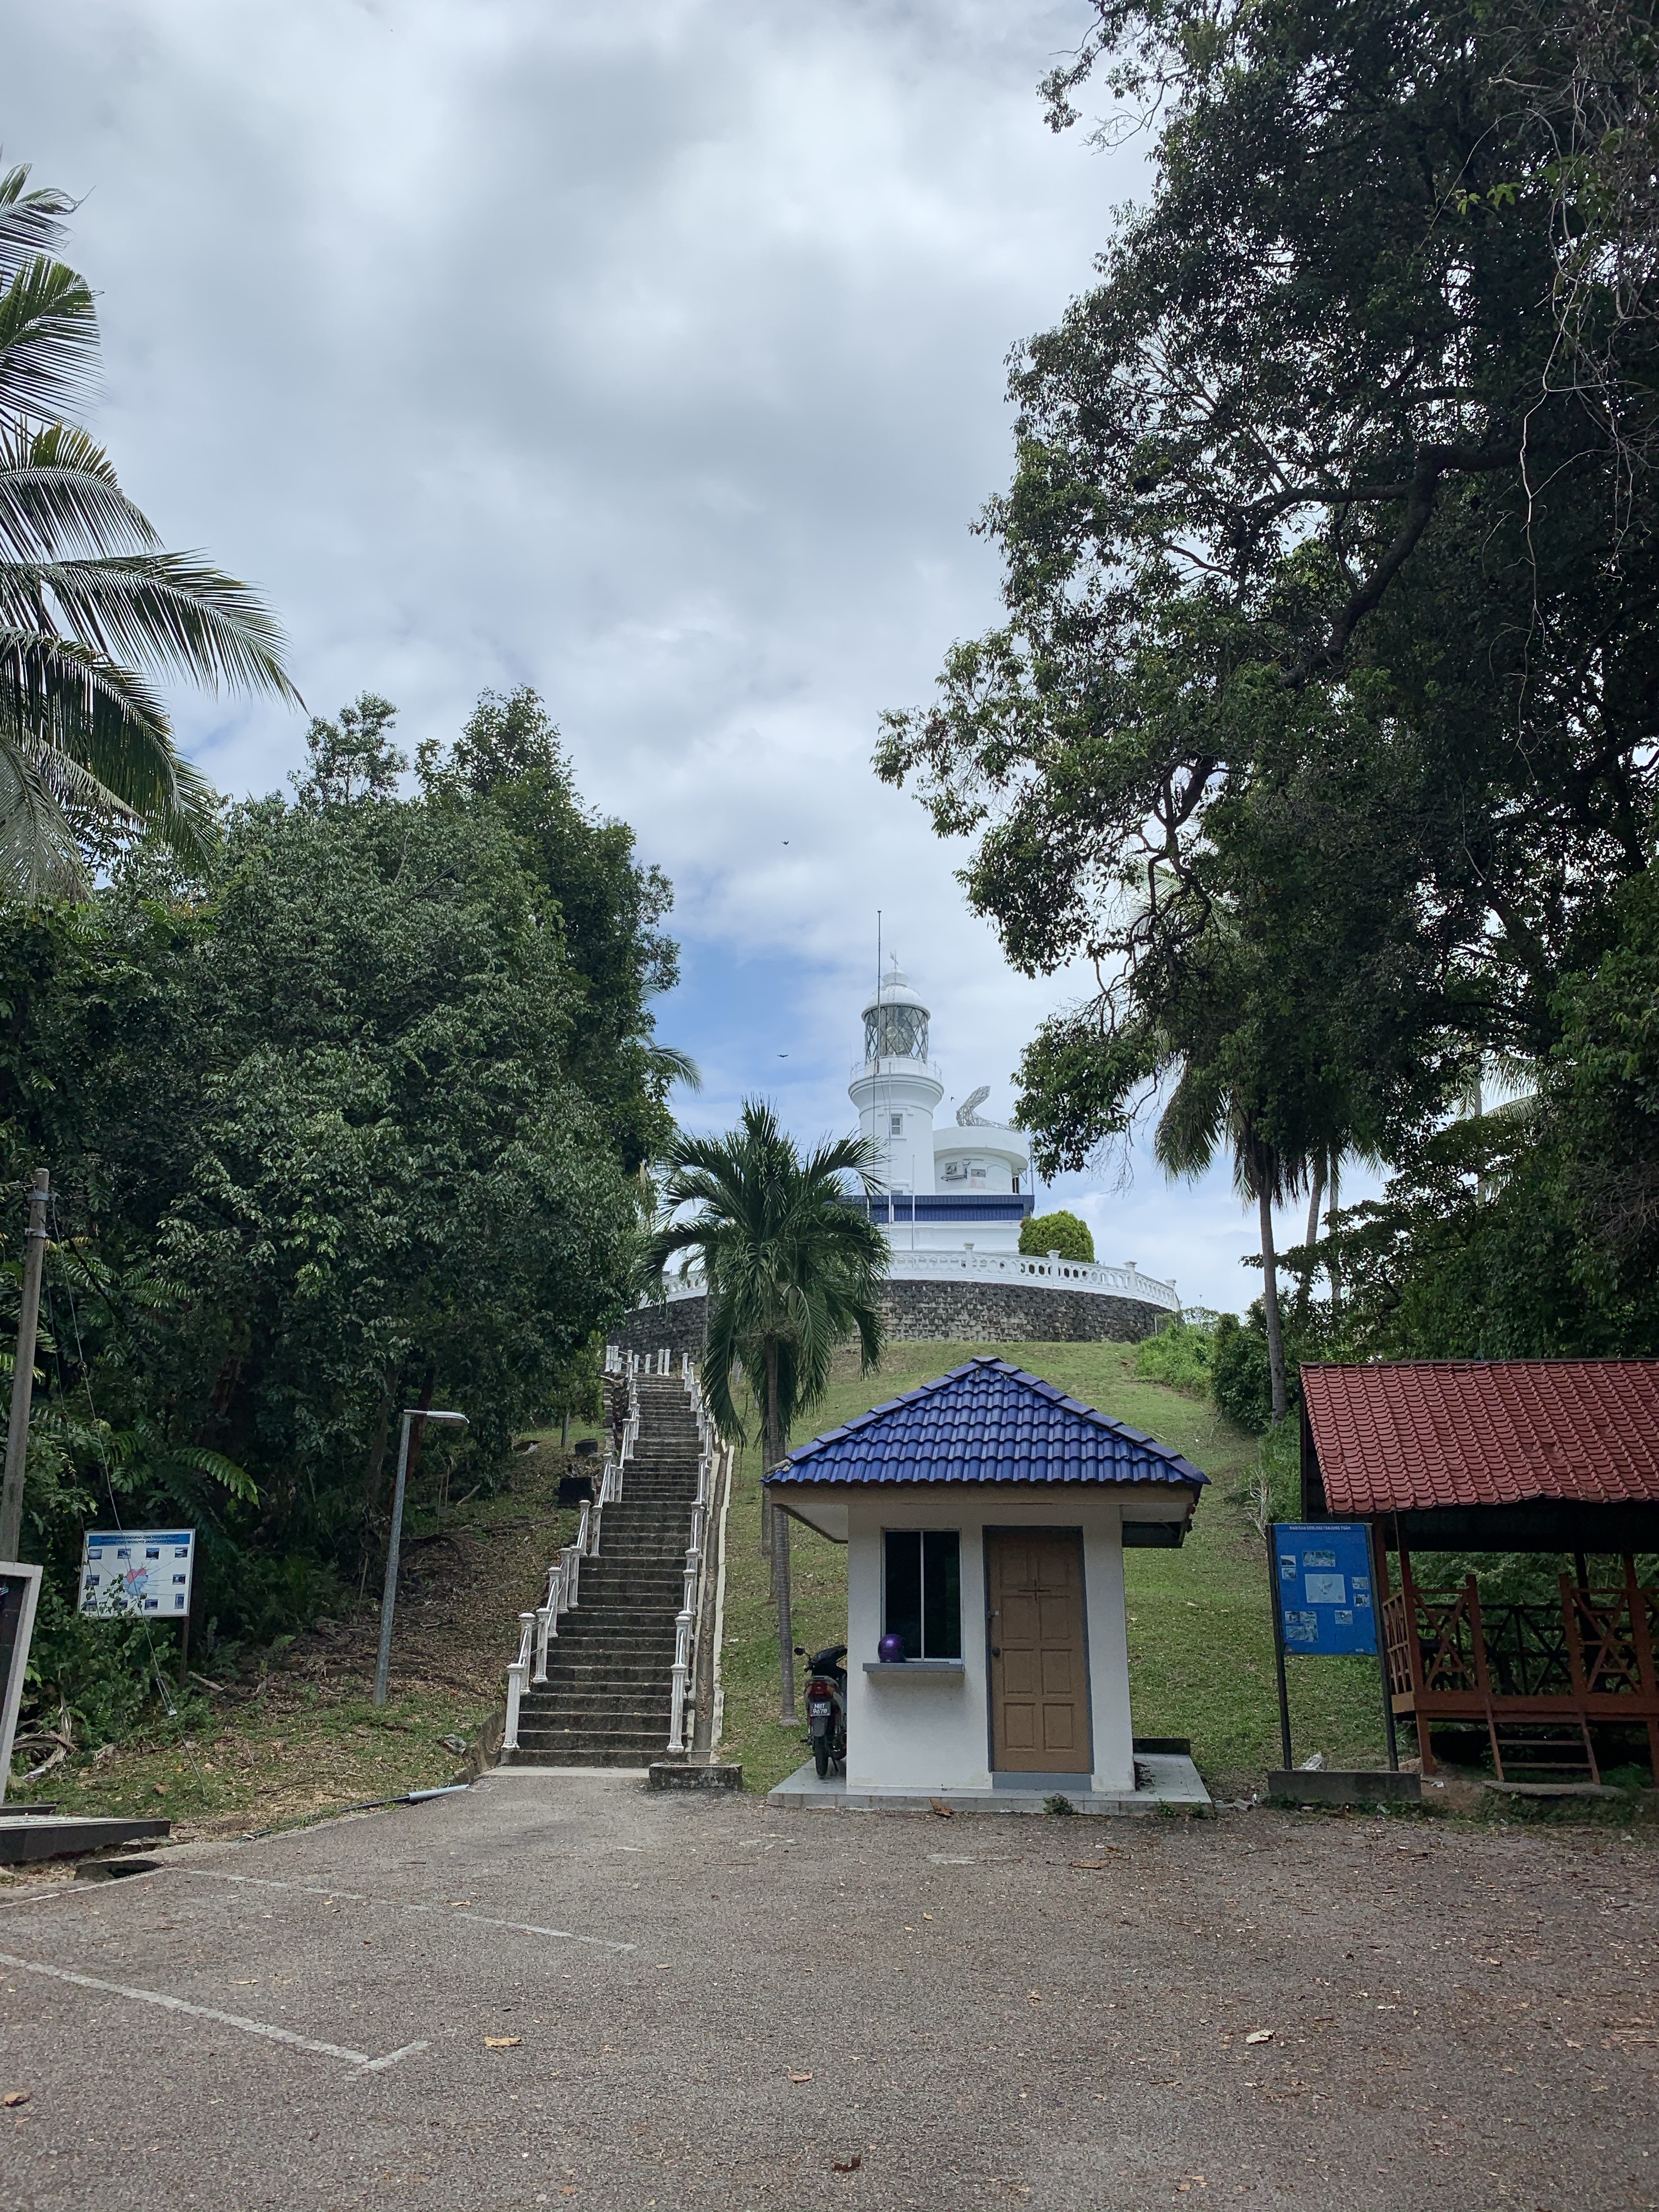
On our way back, quick stop to visit the light house
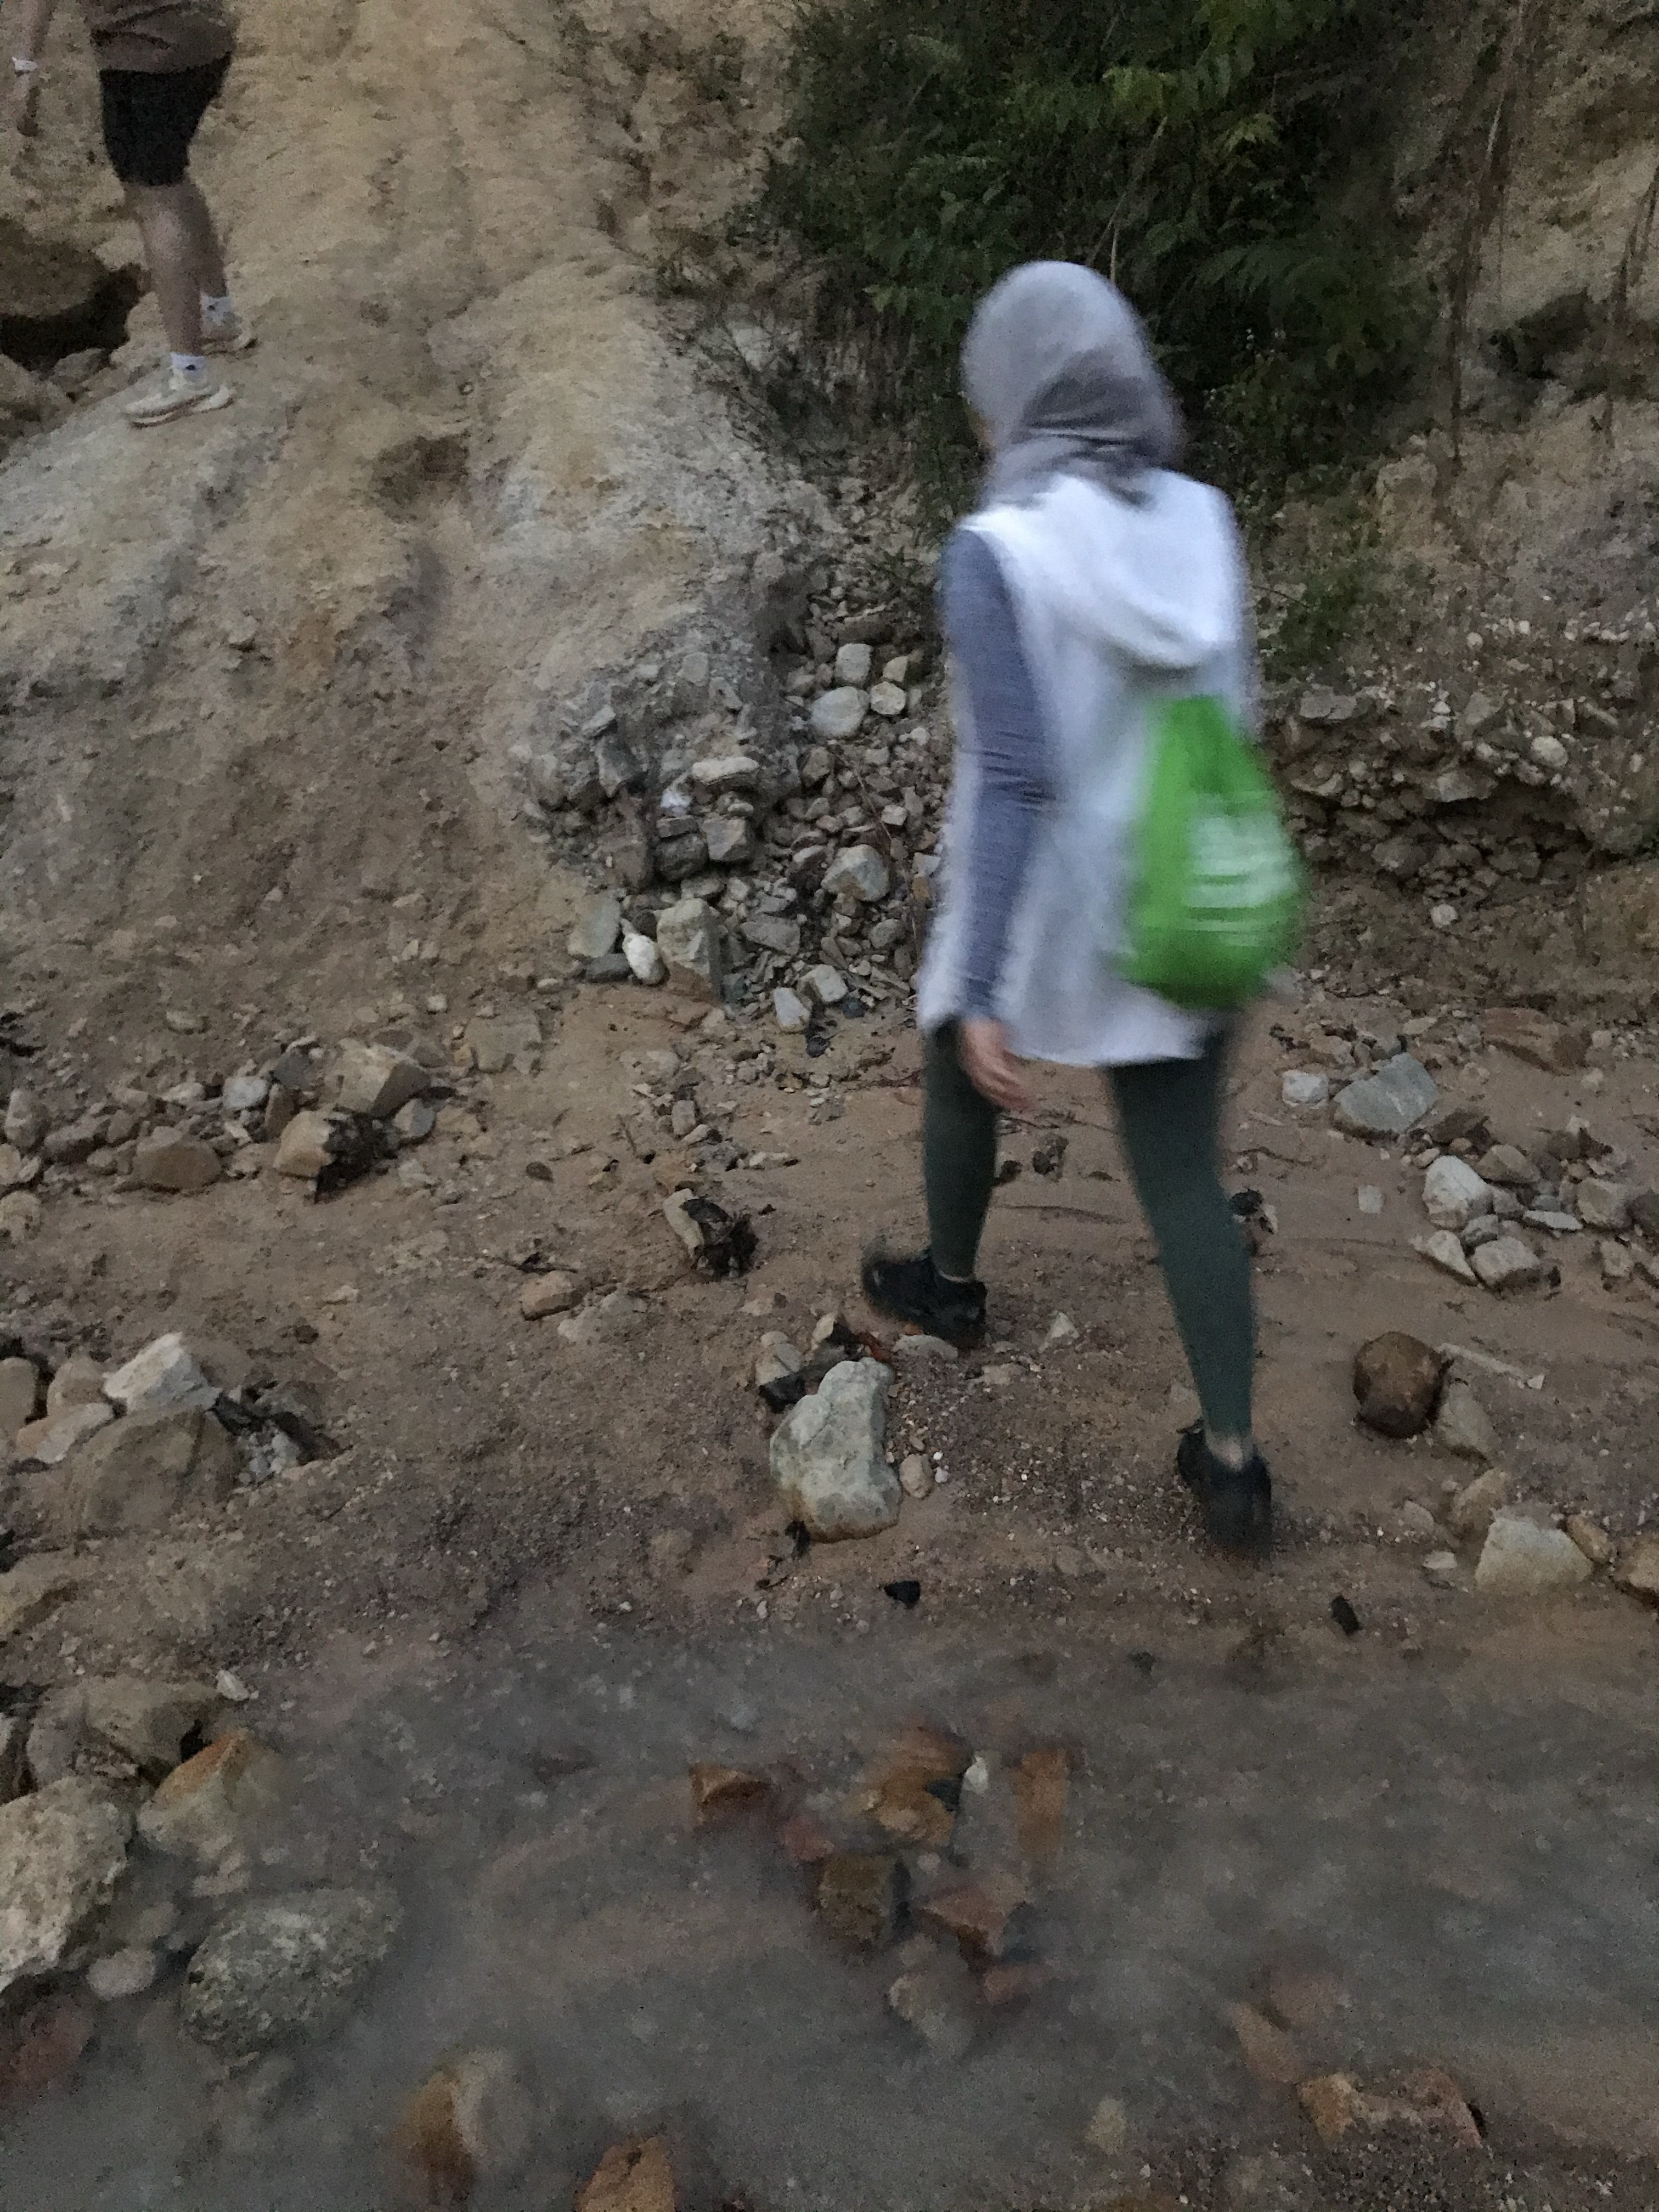
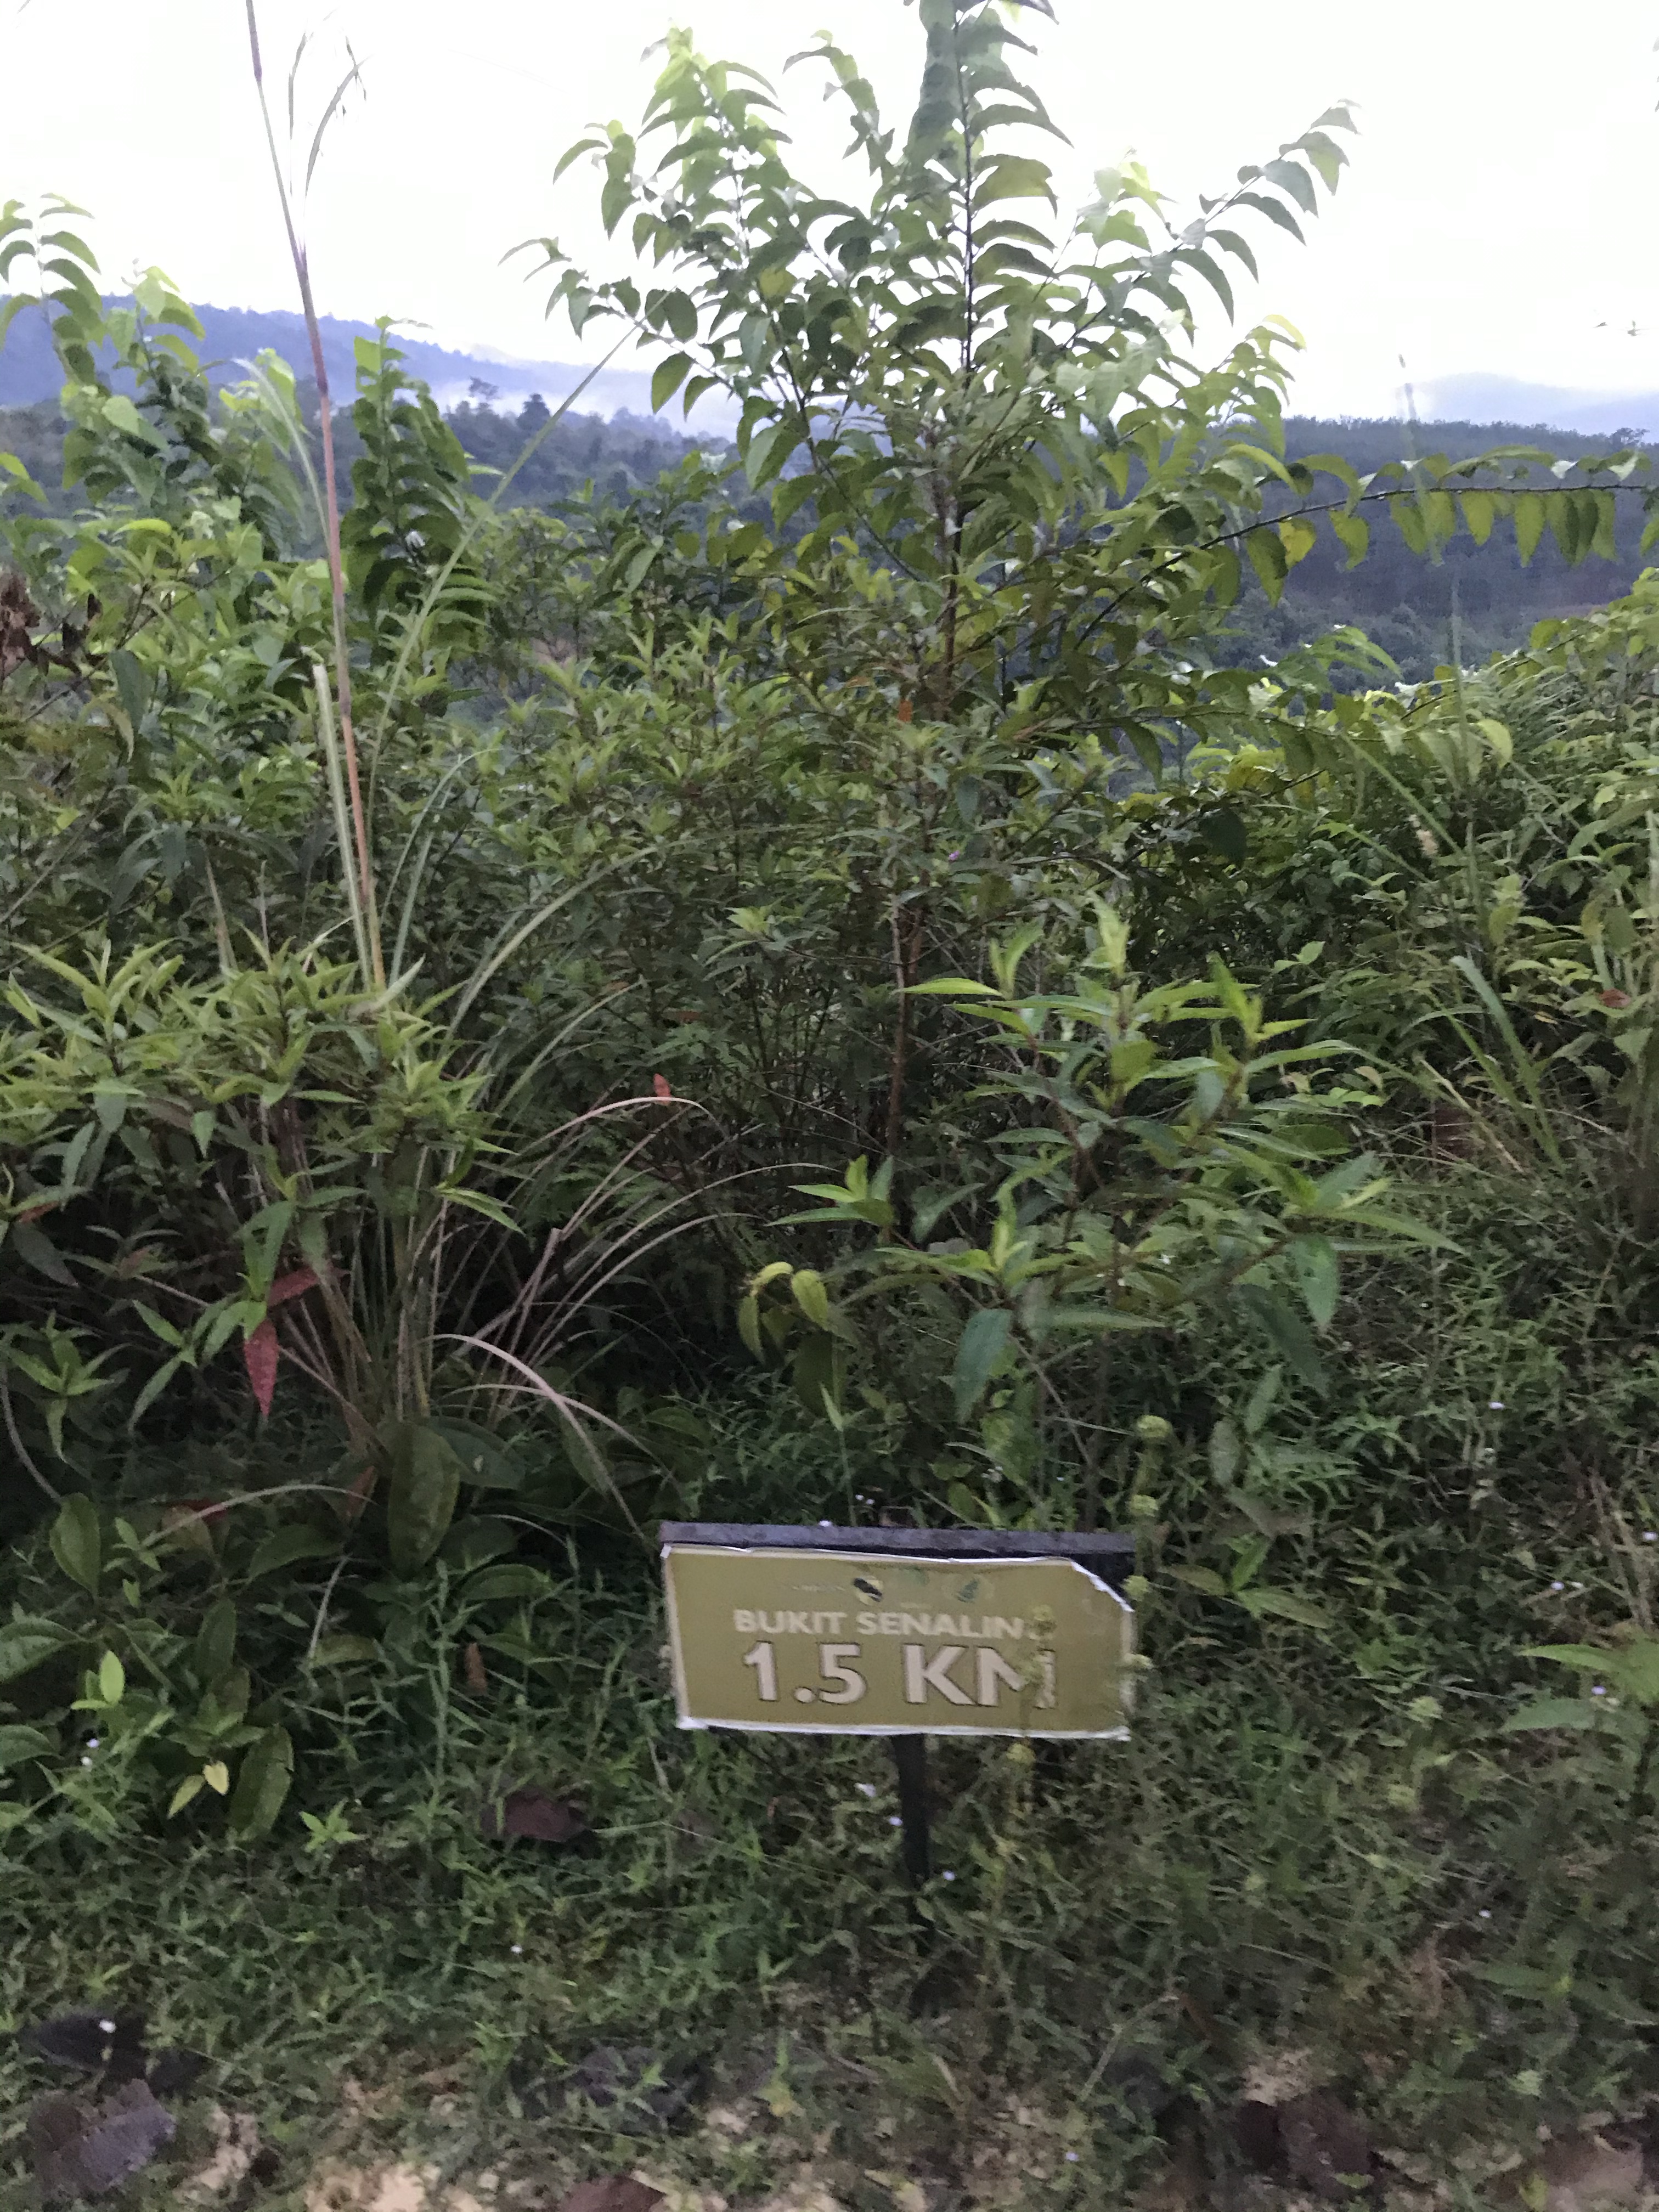
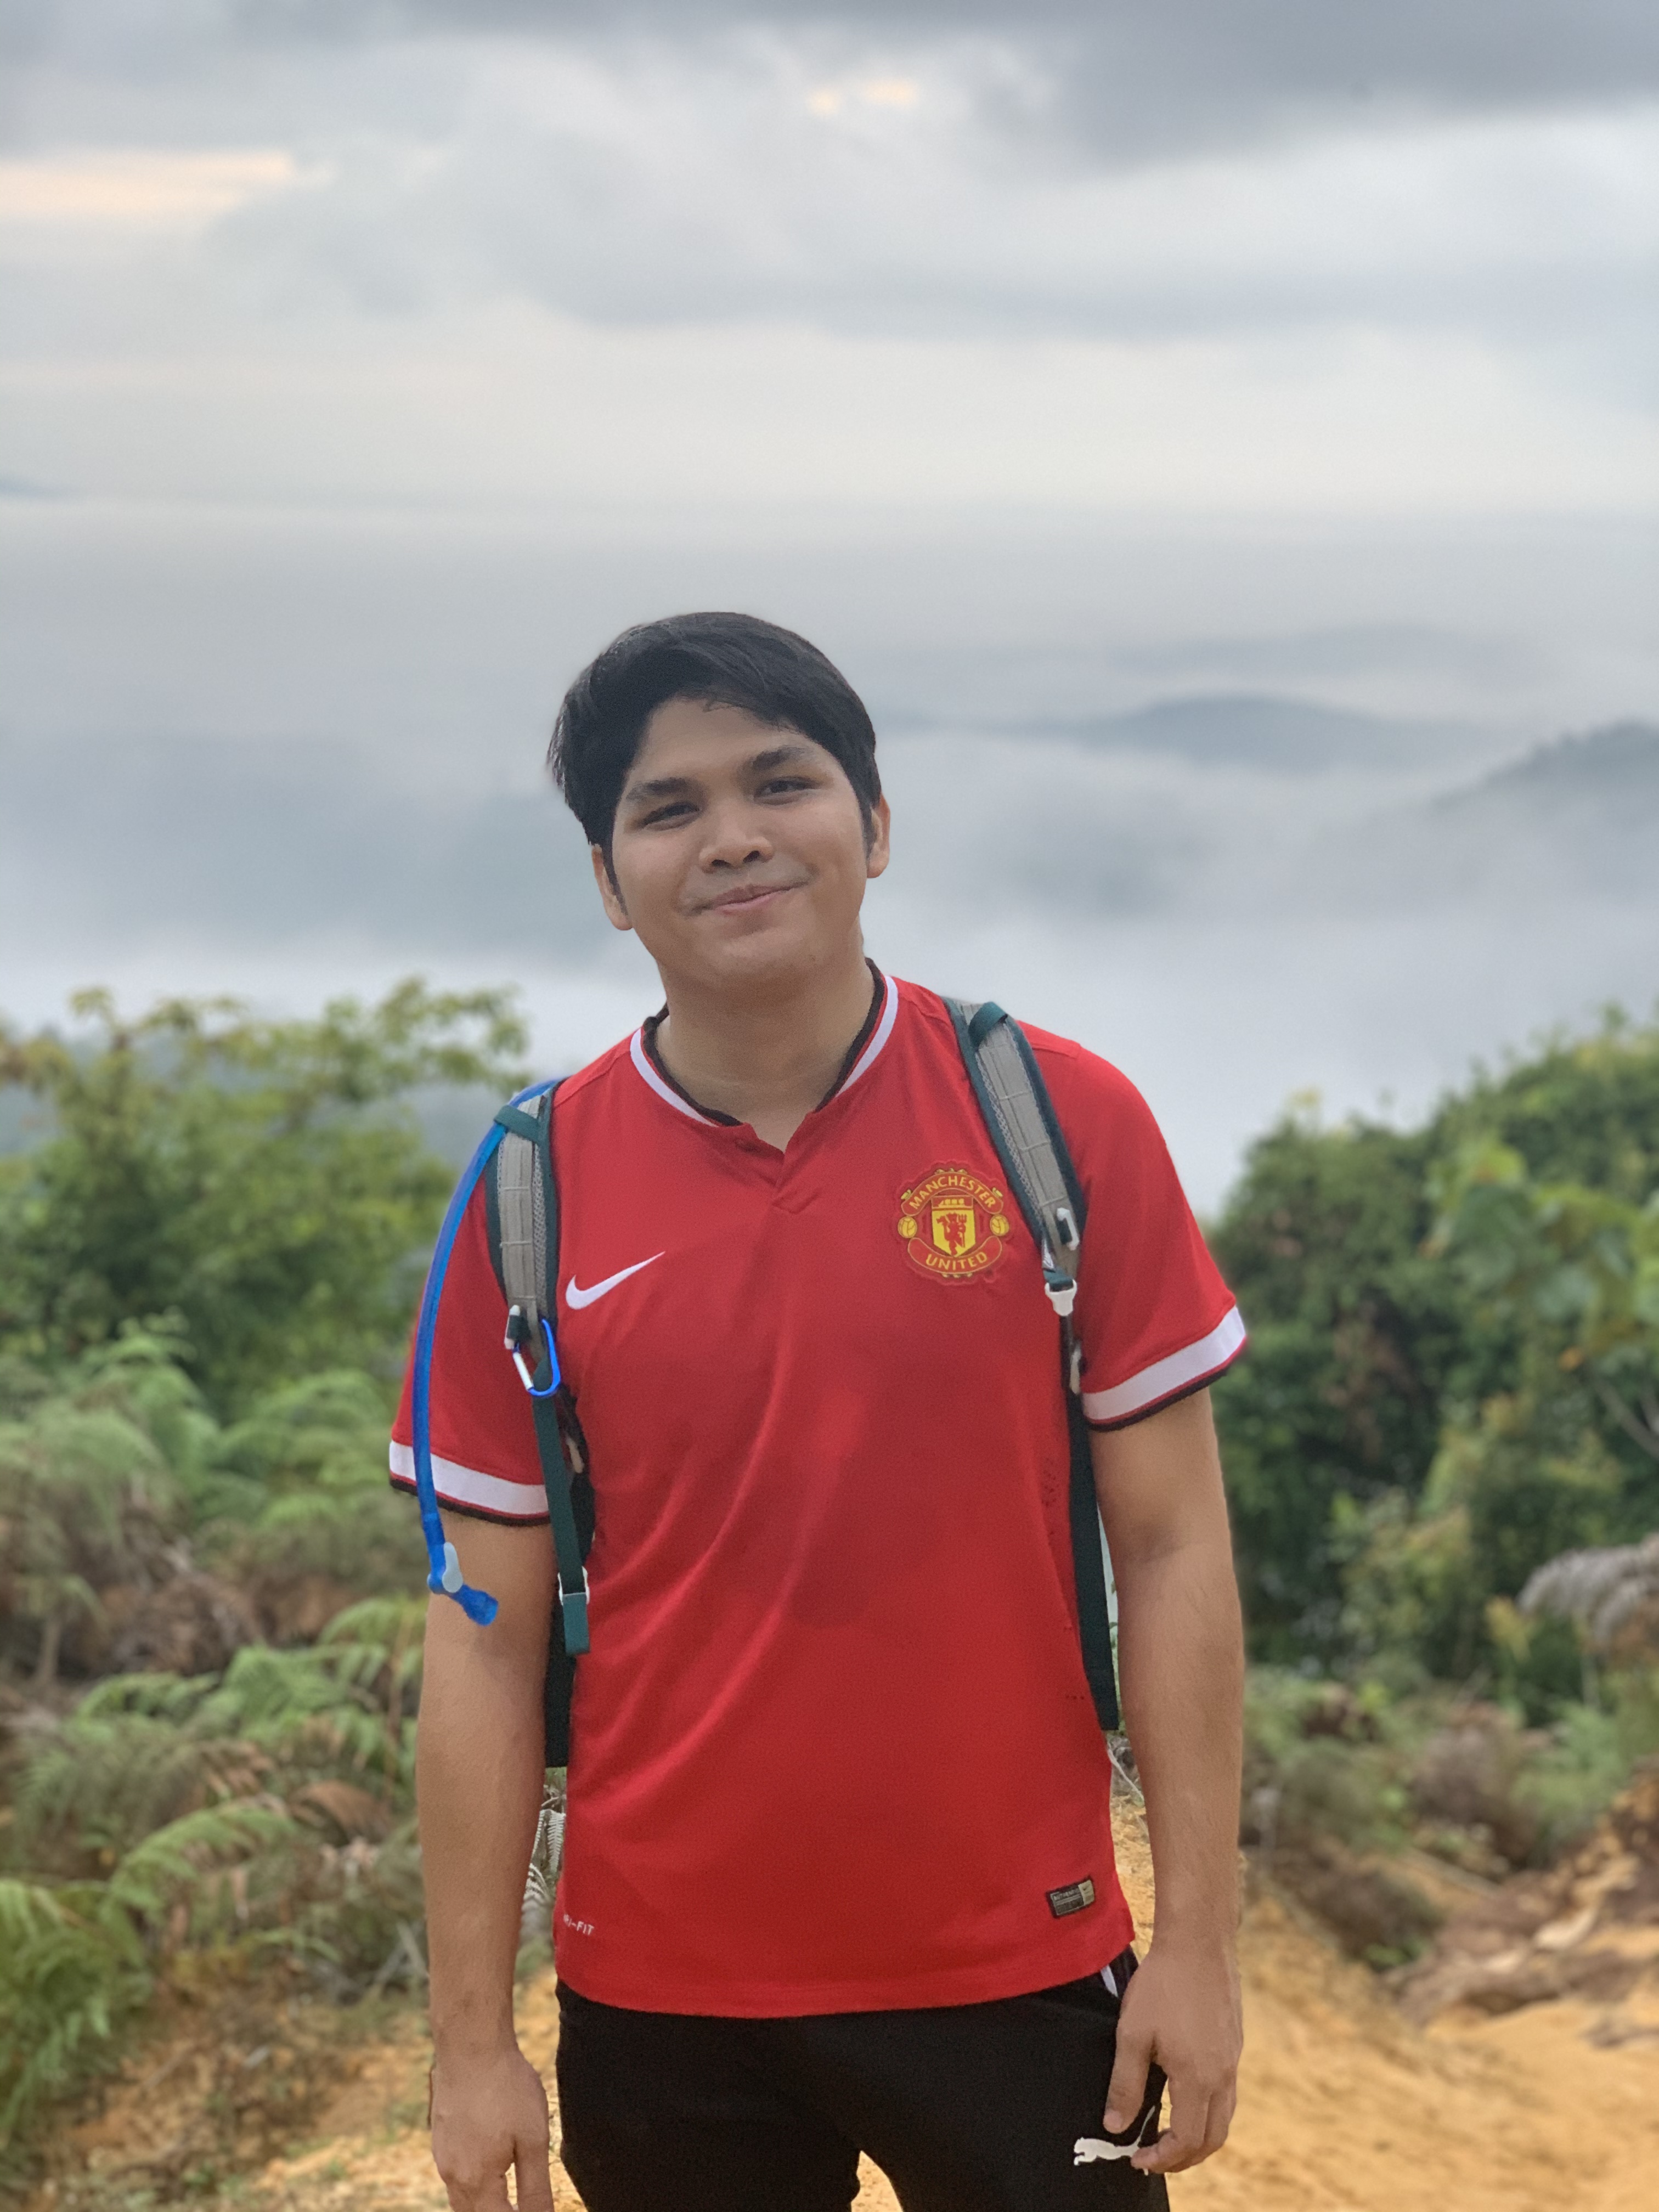
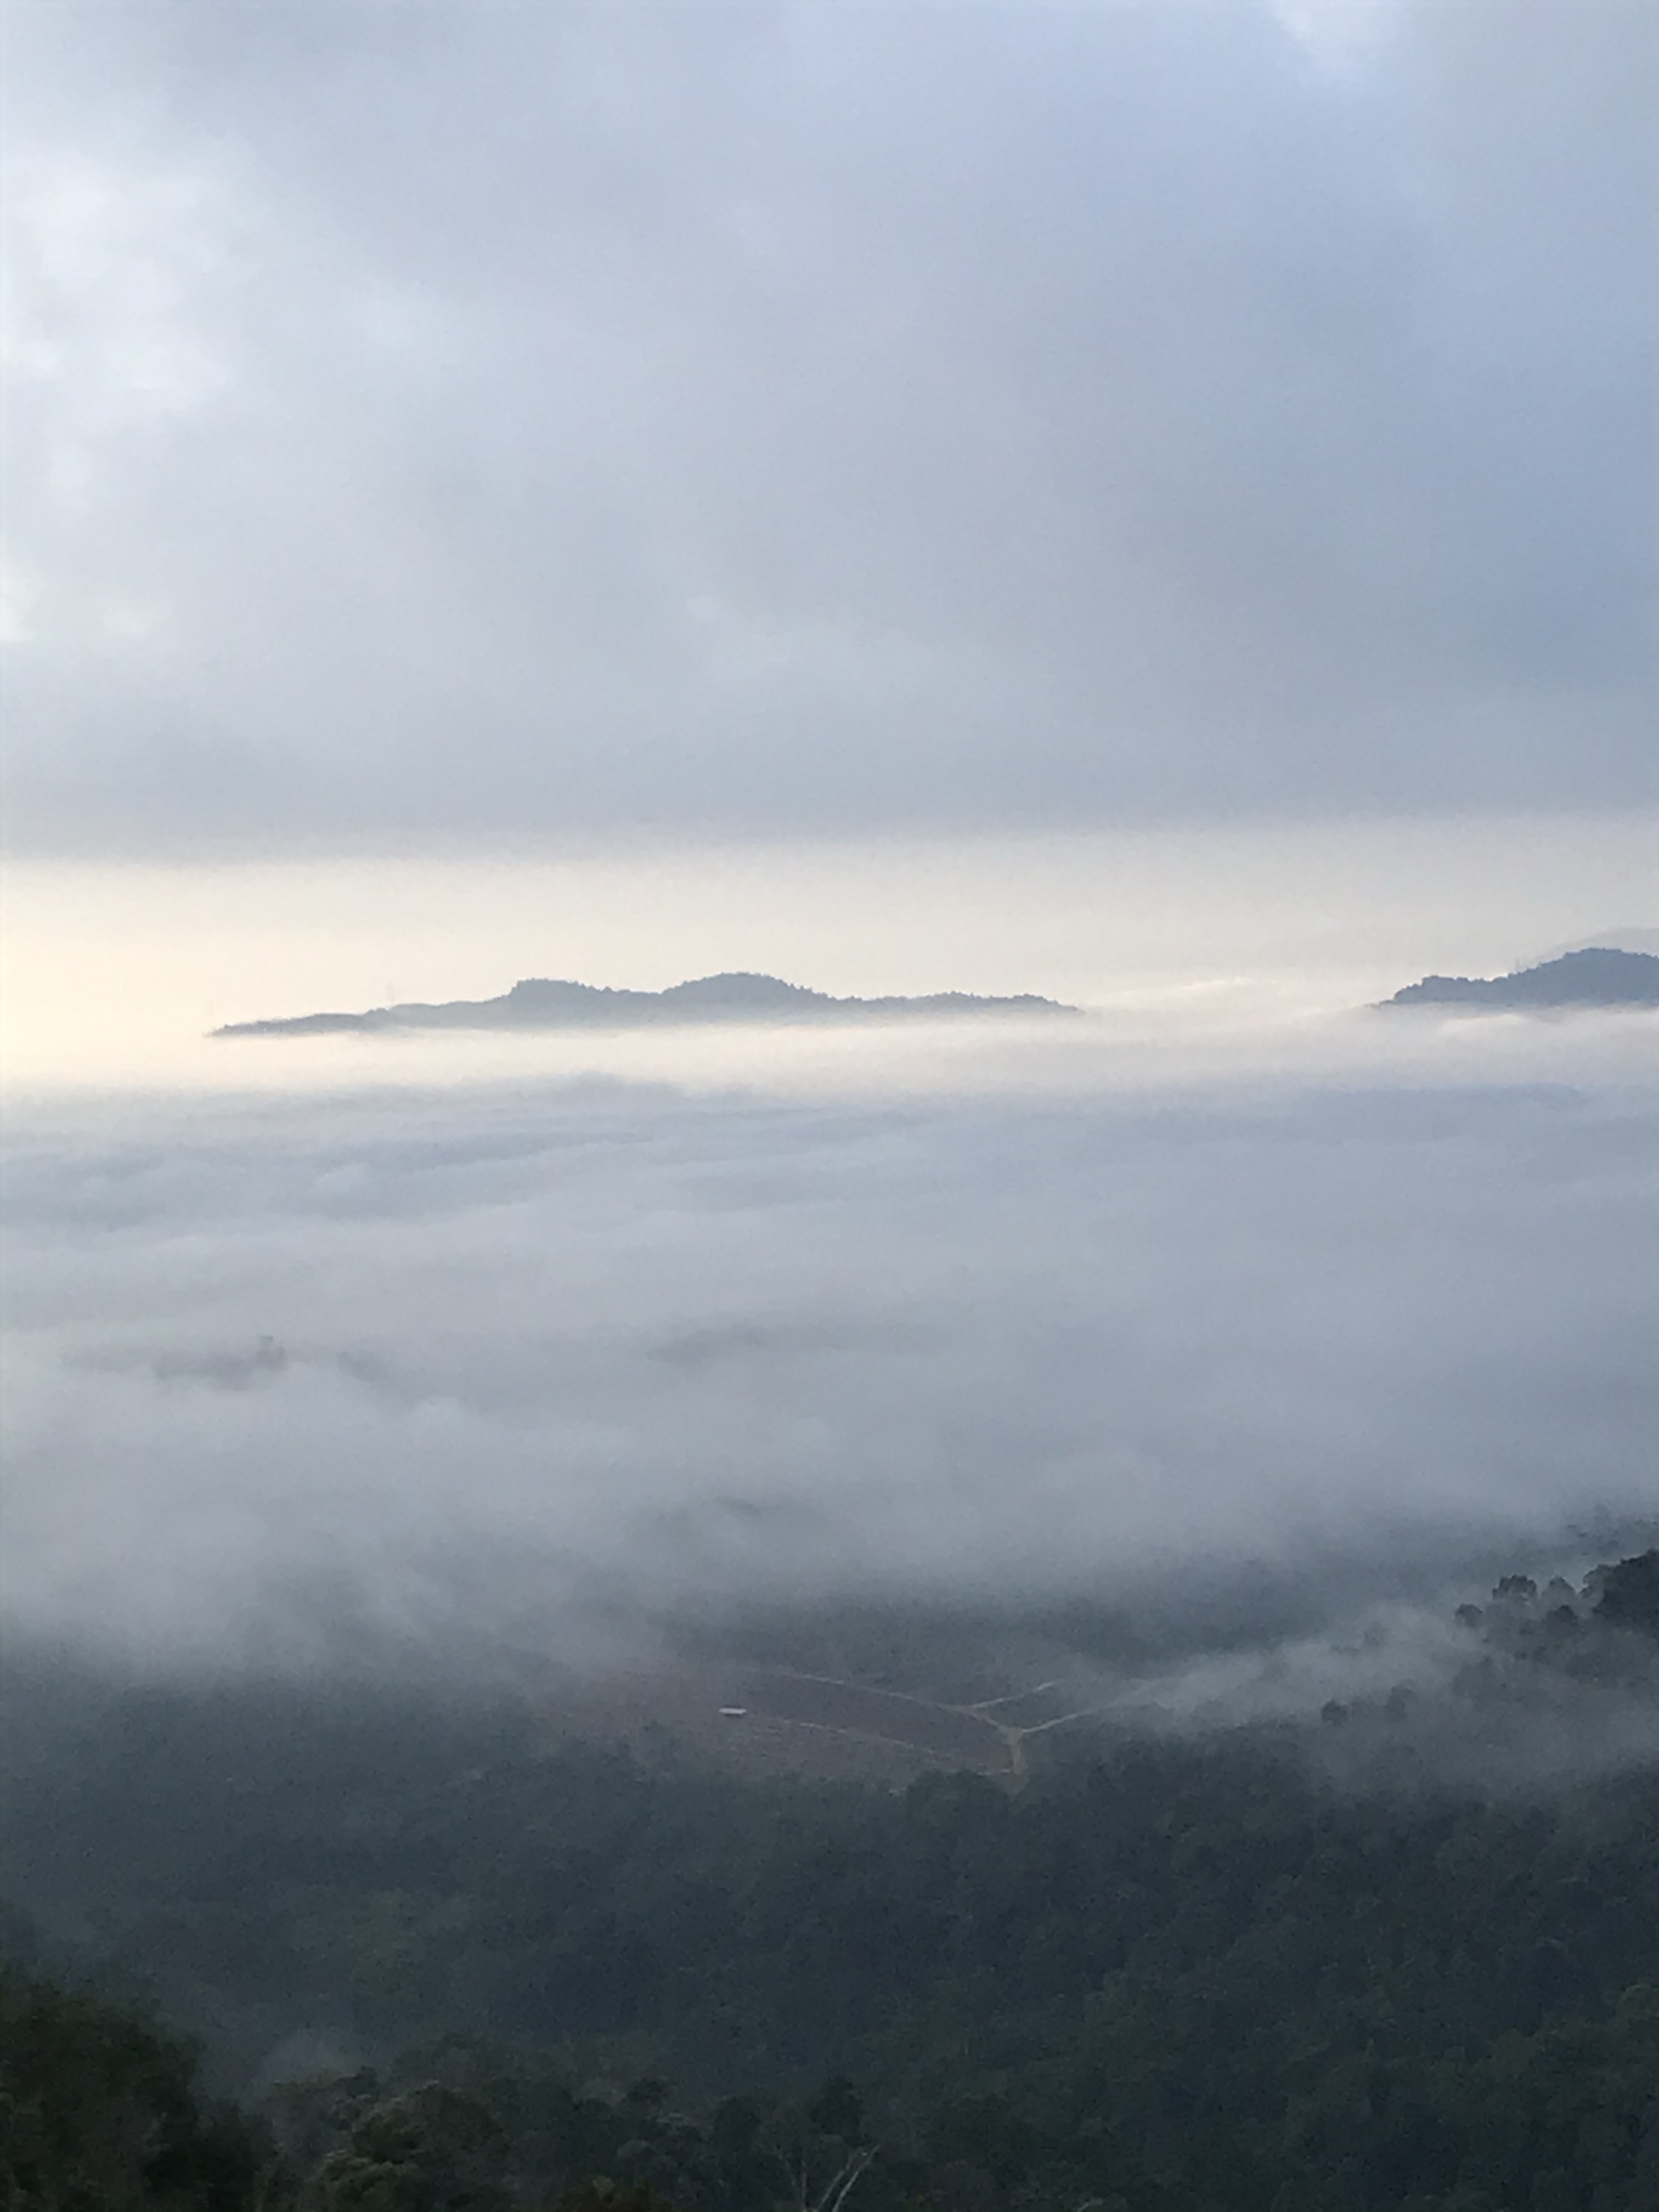
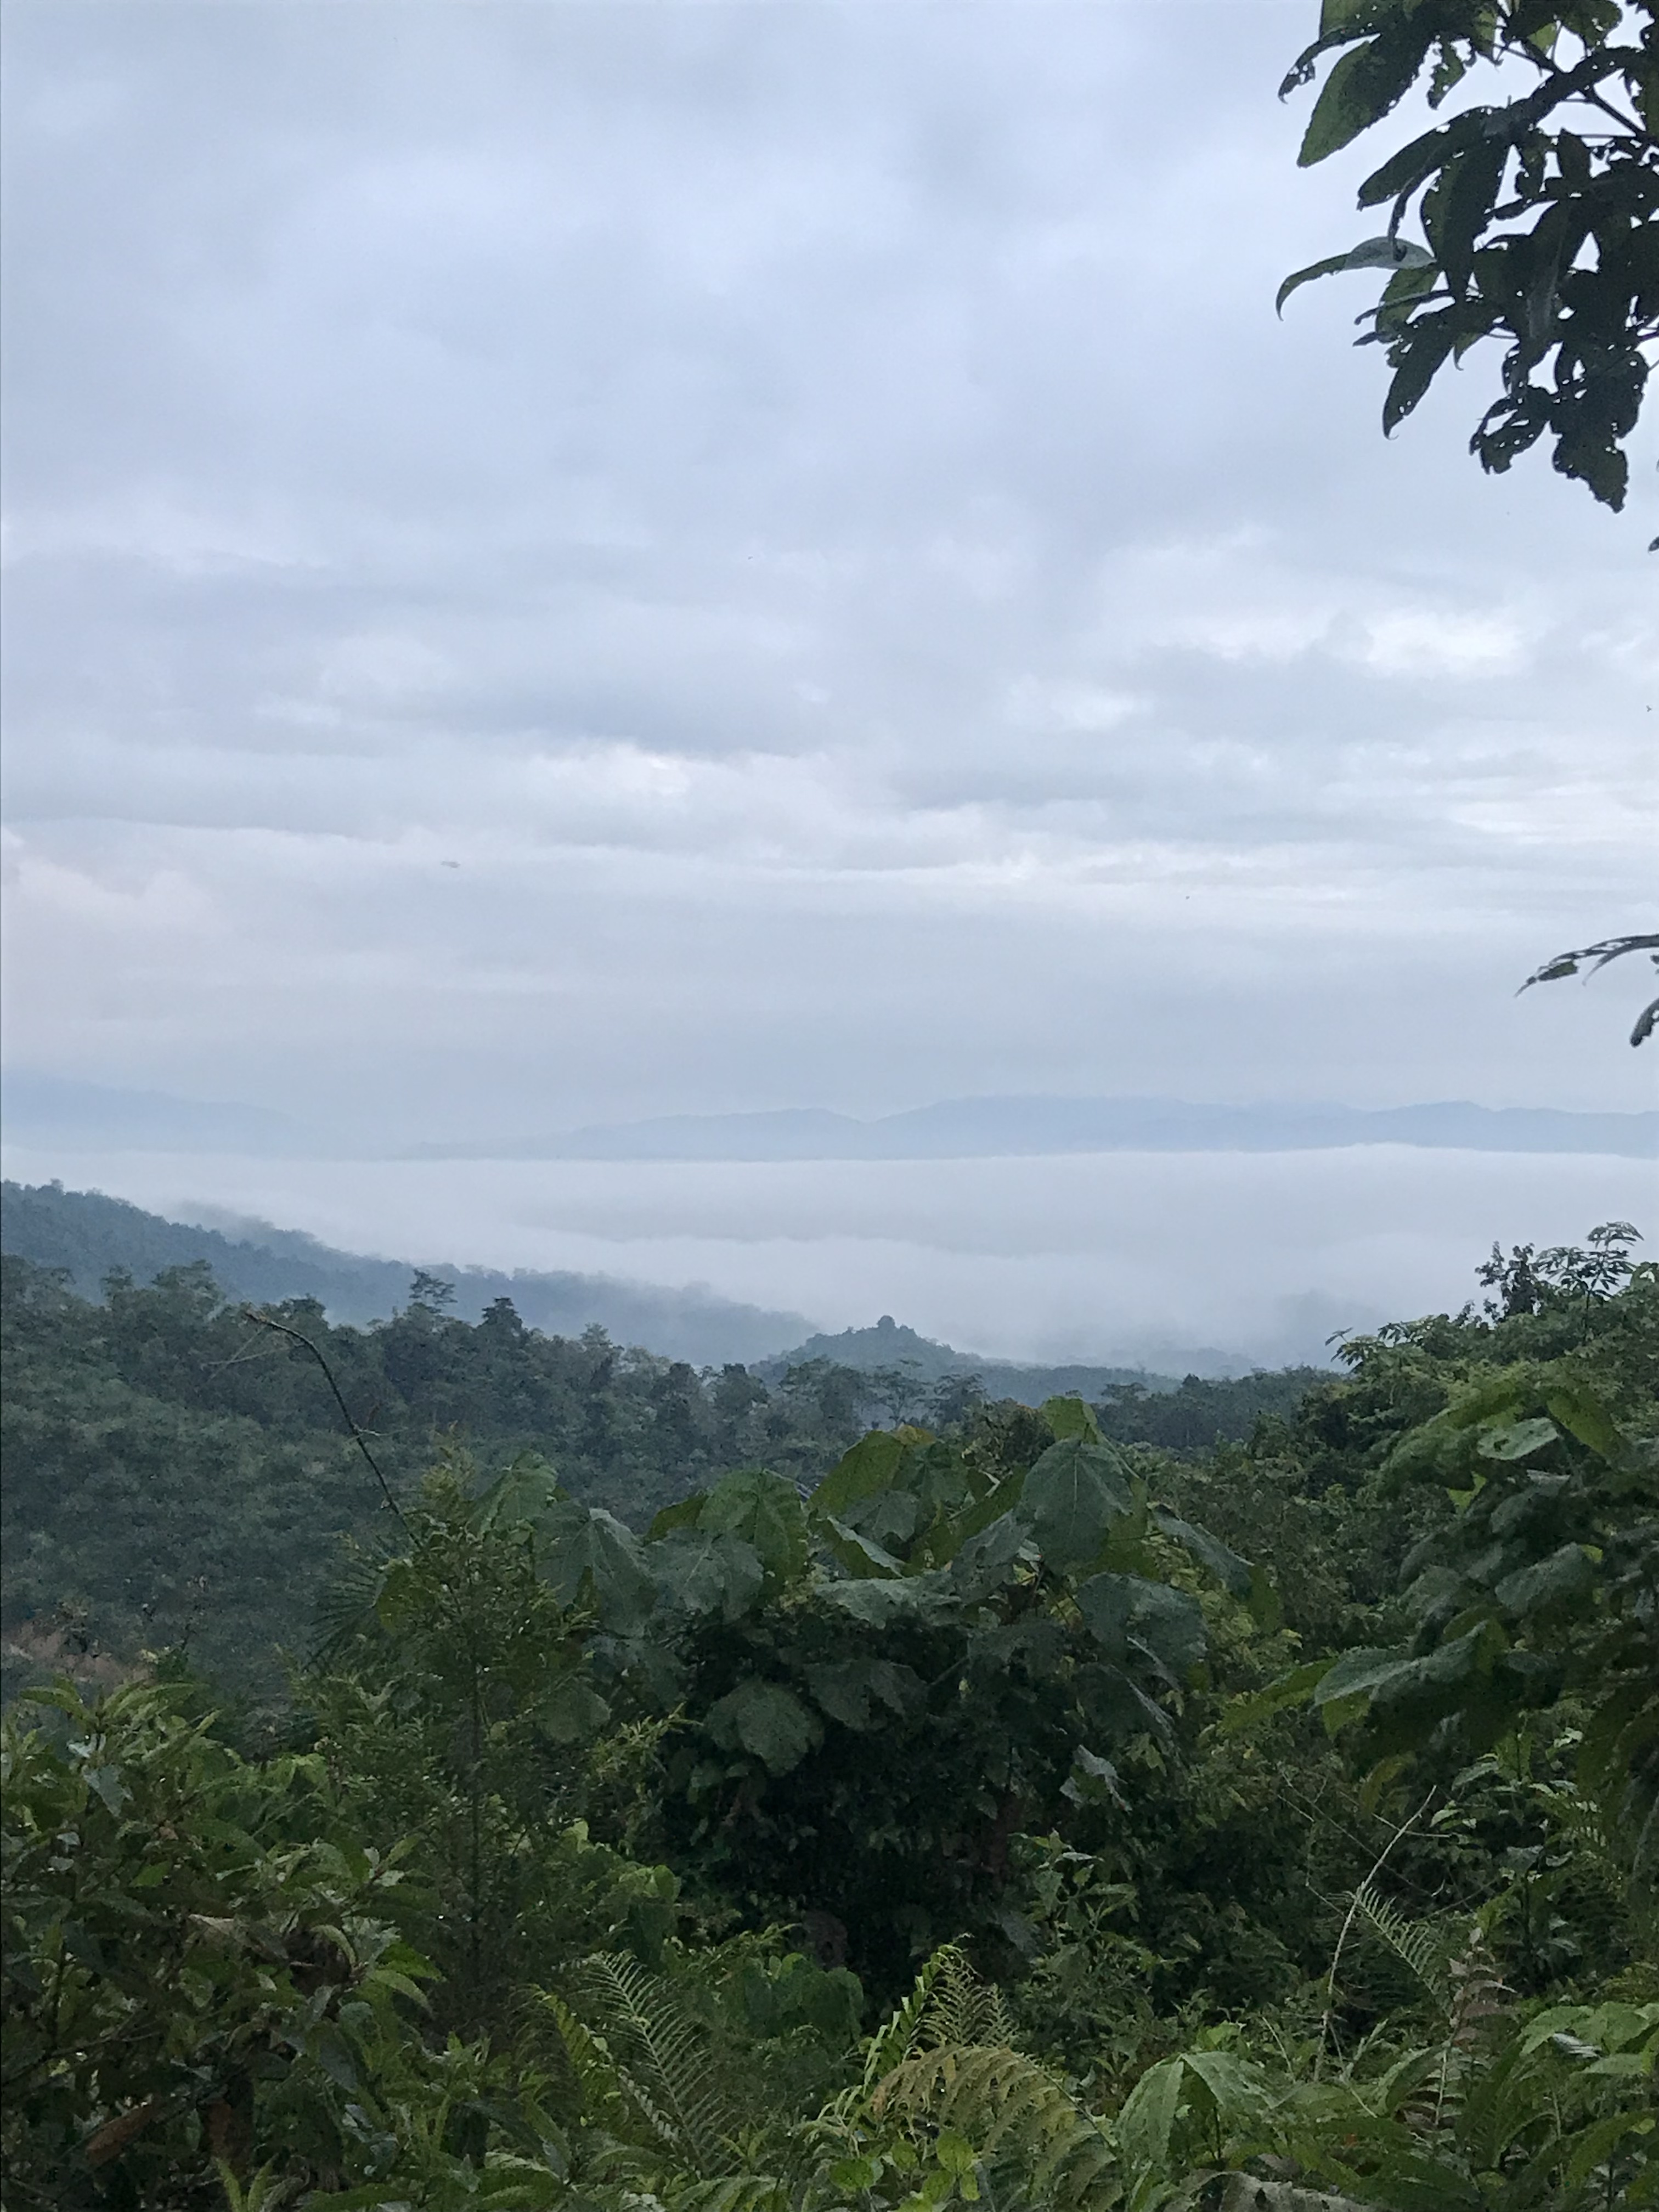
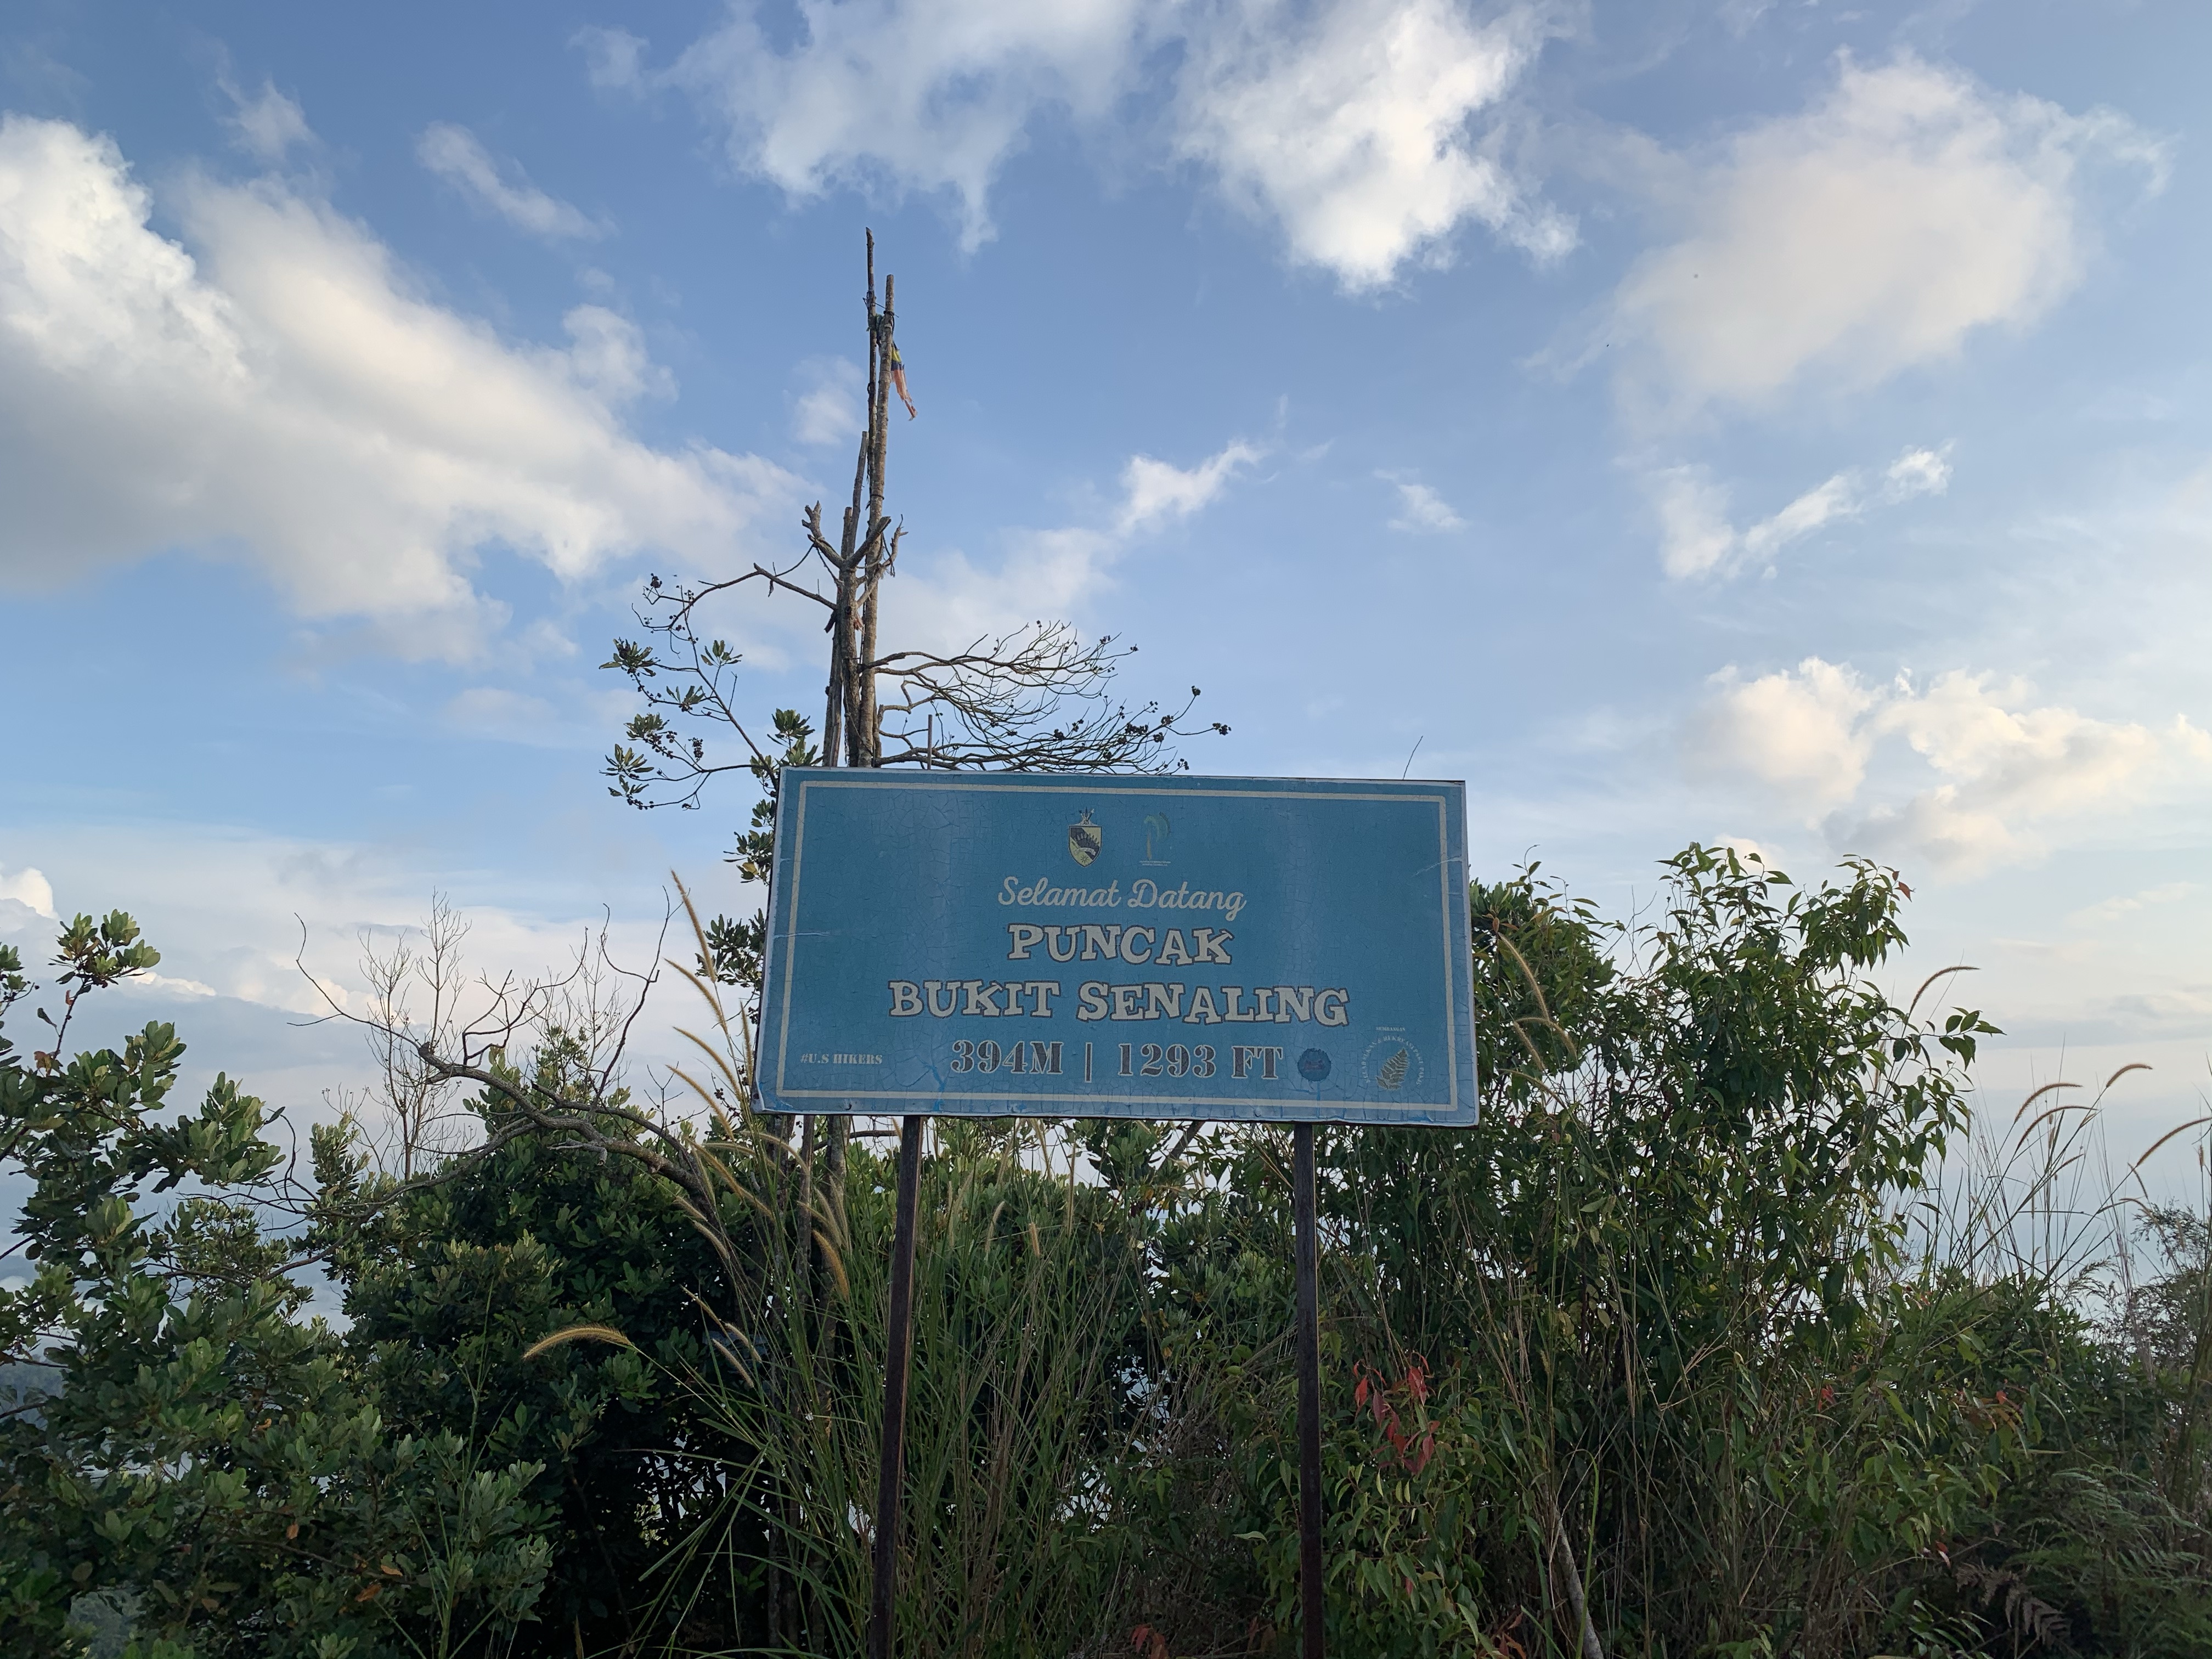
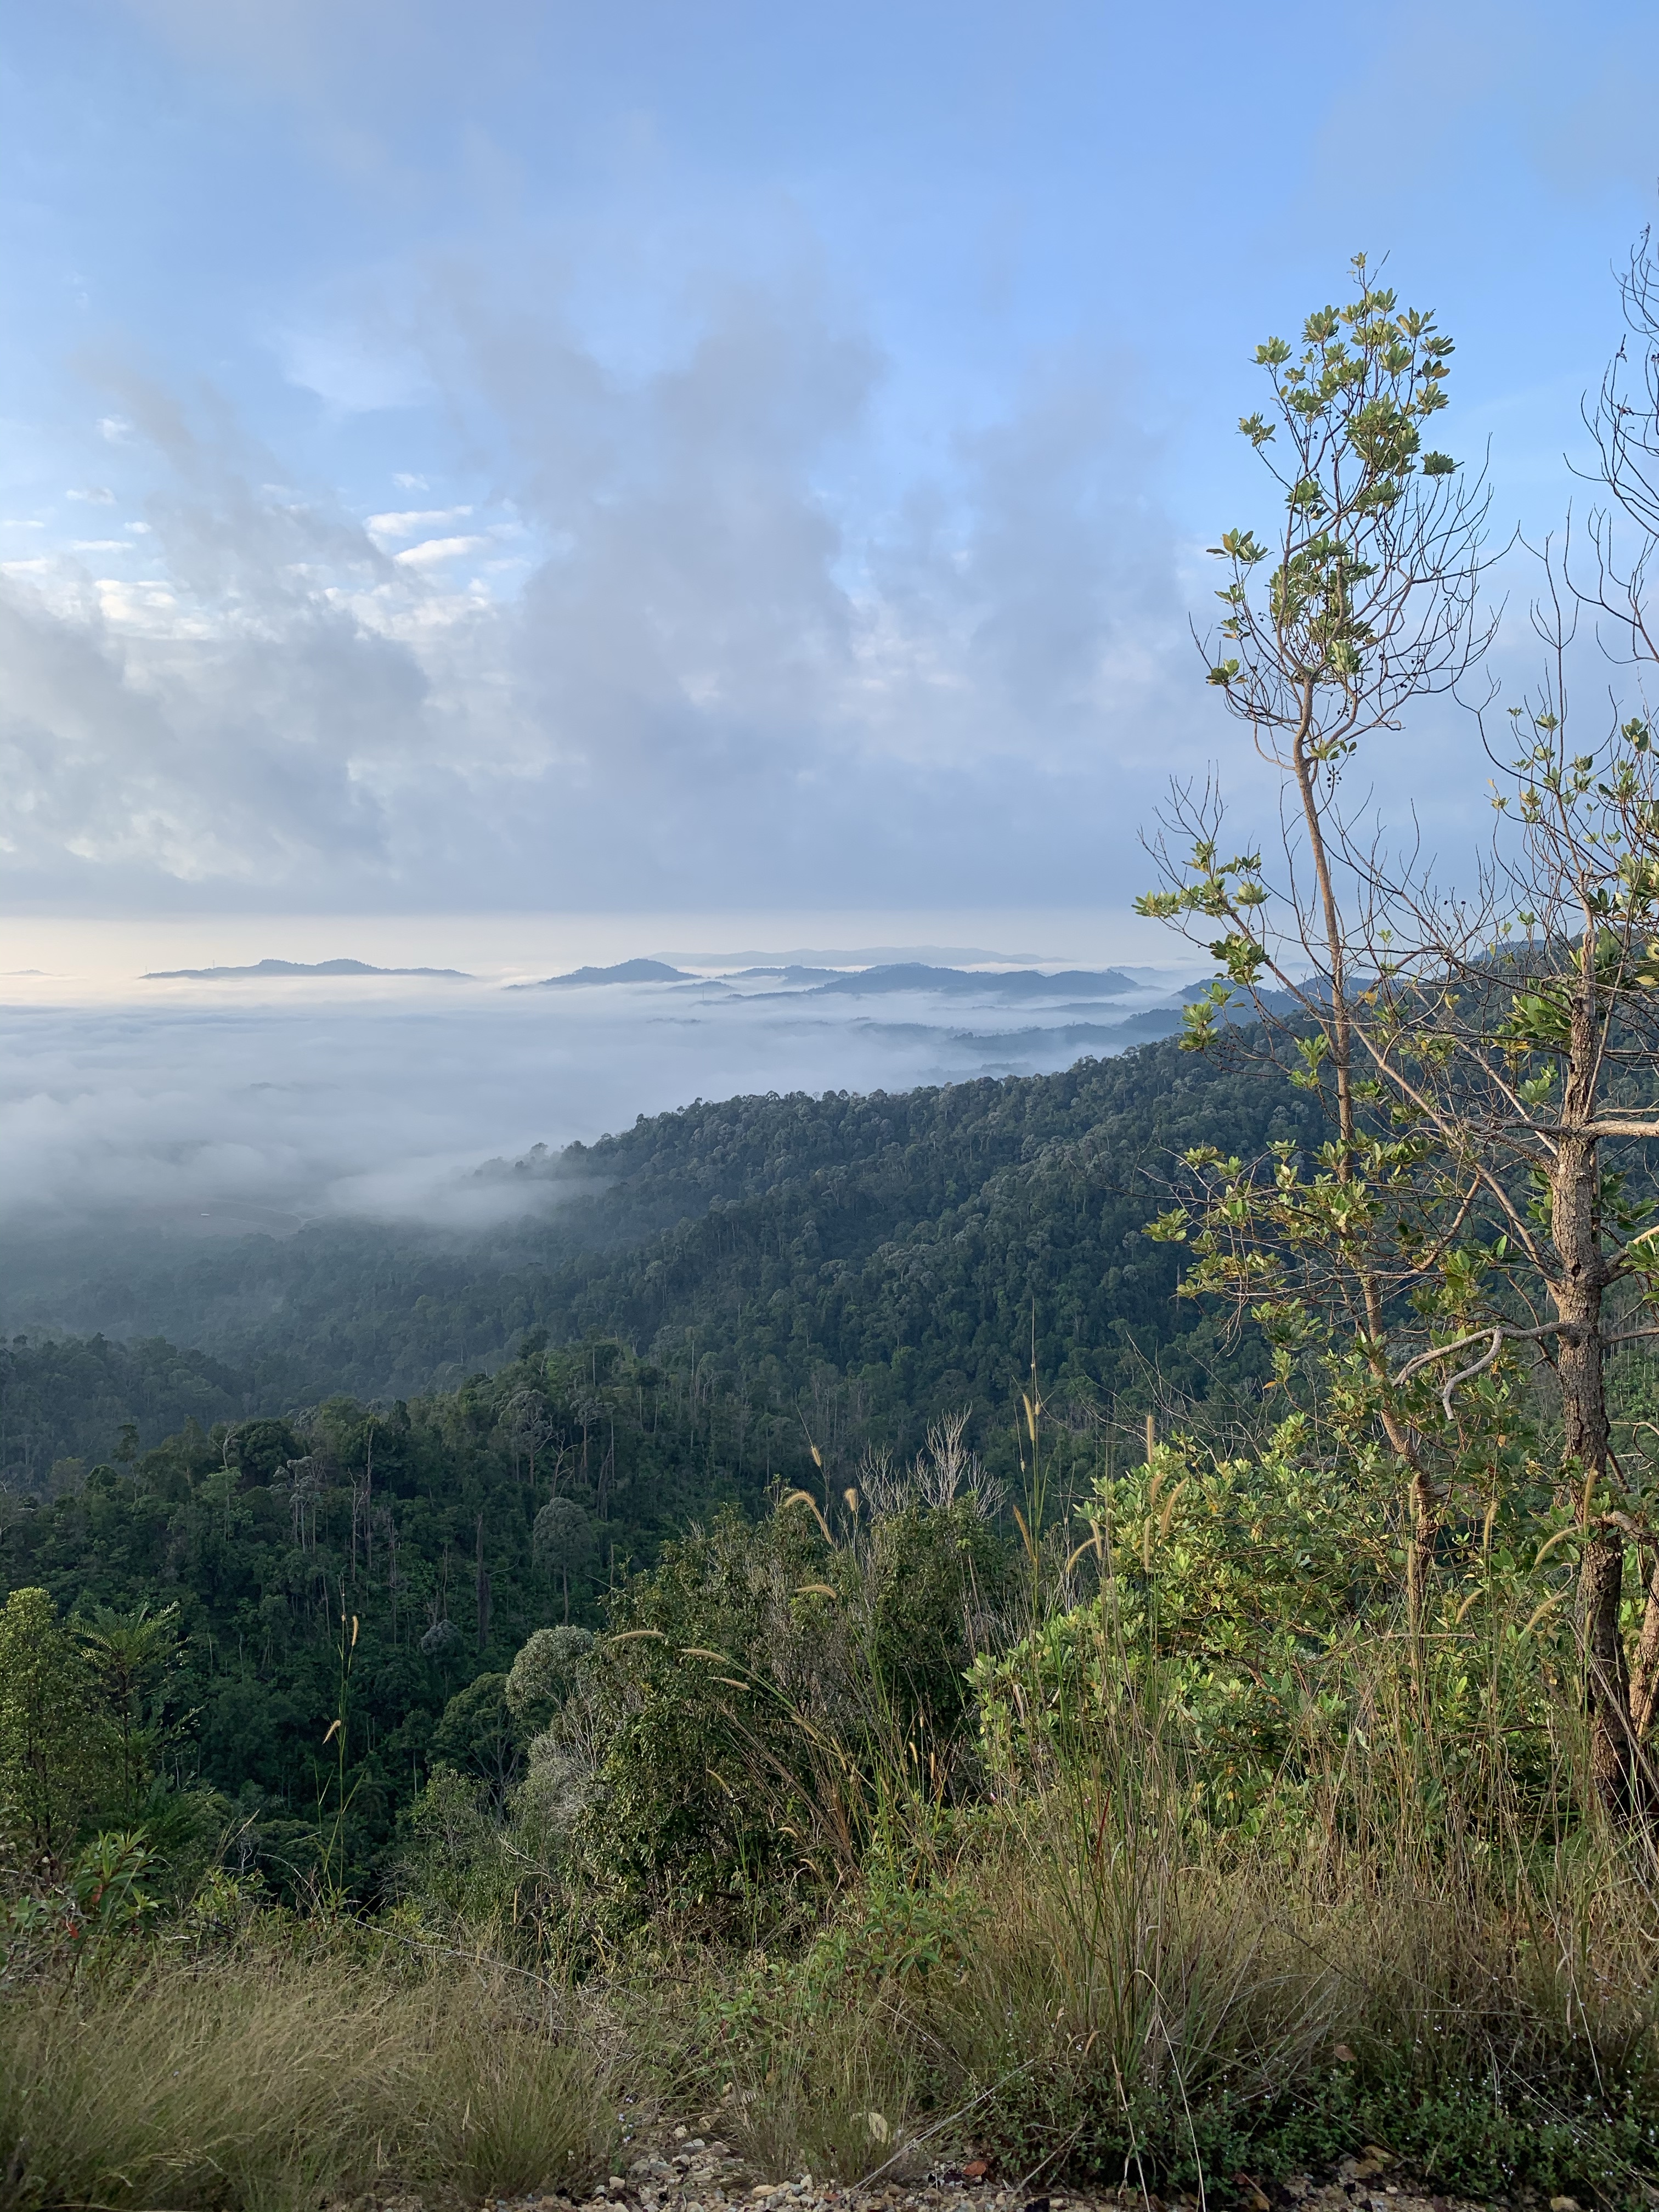
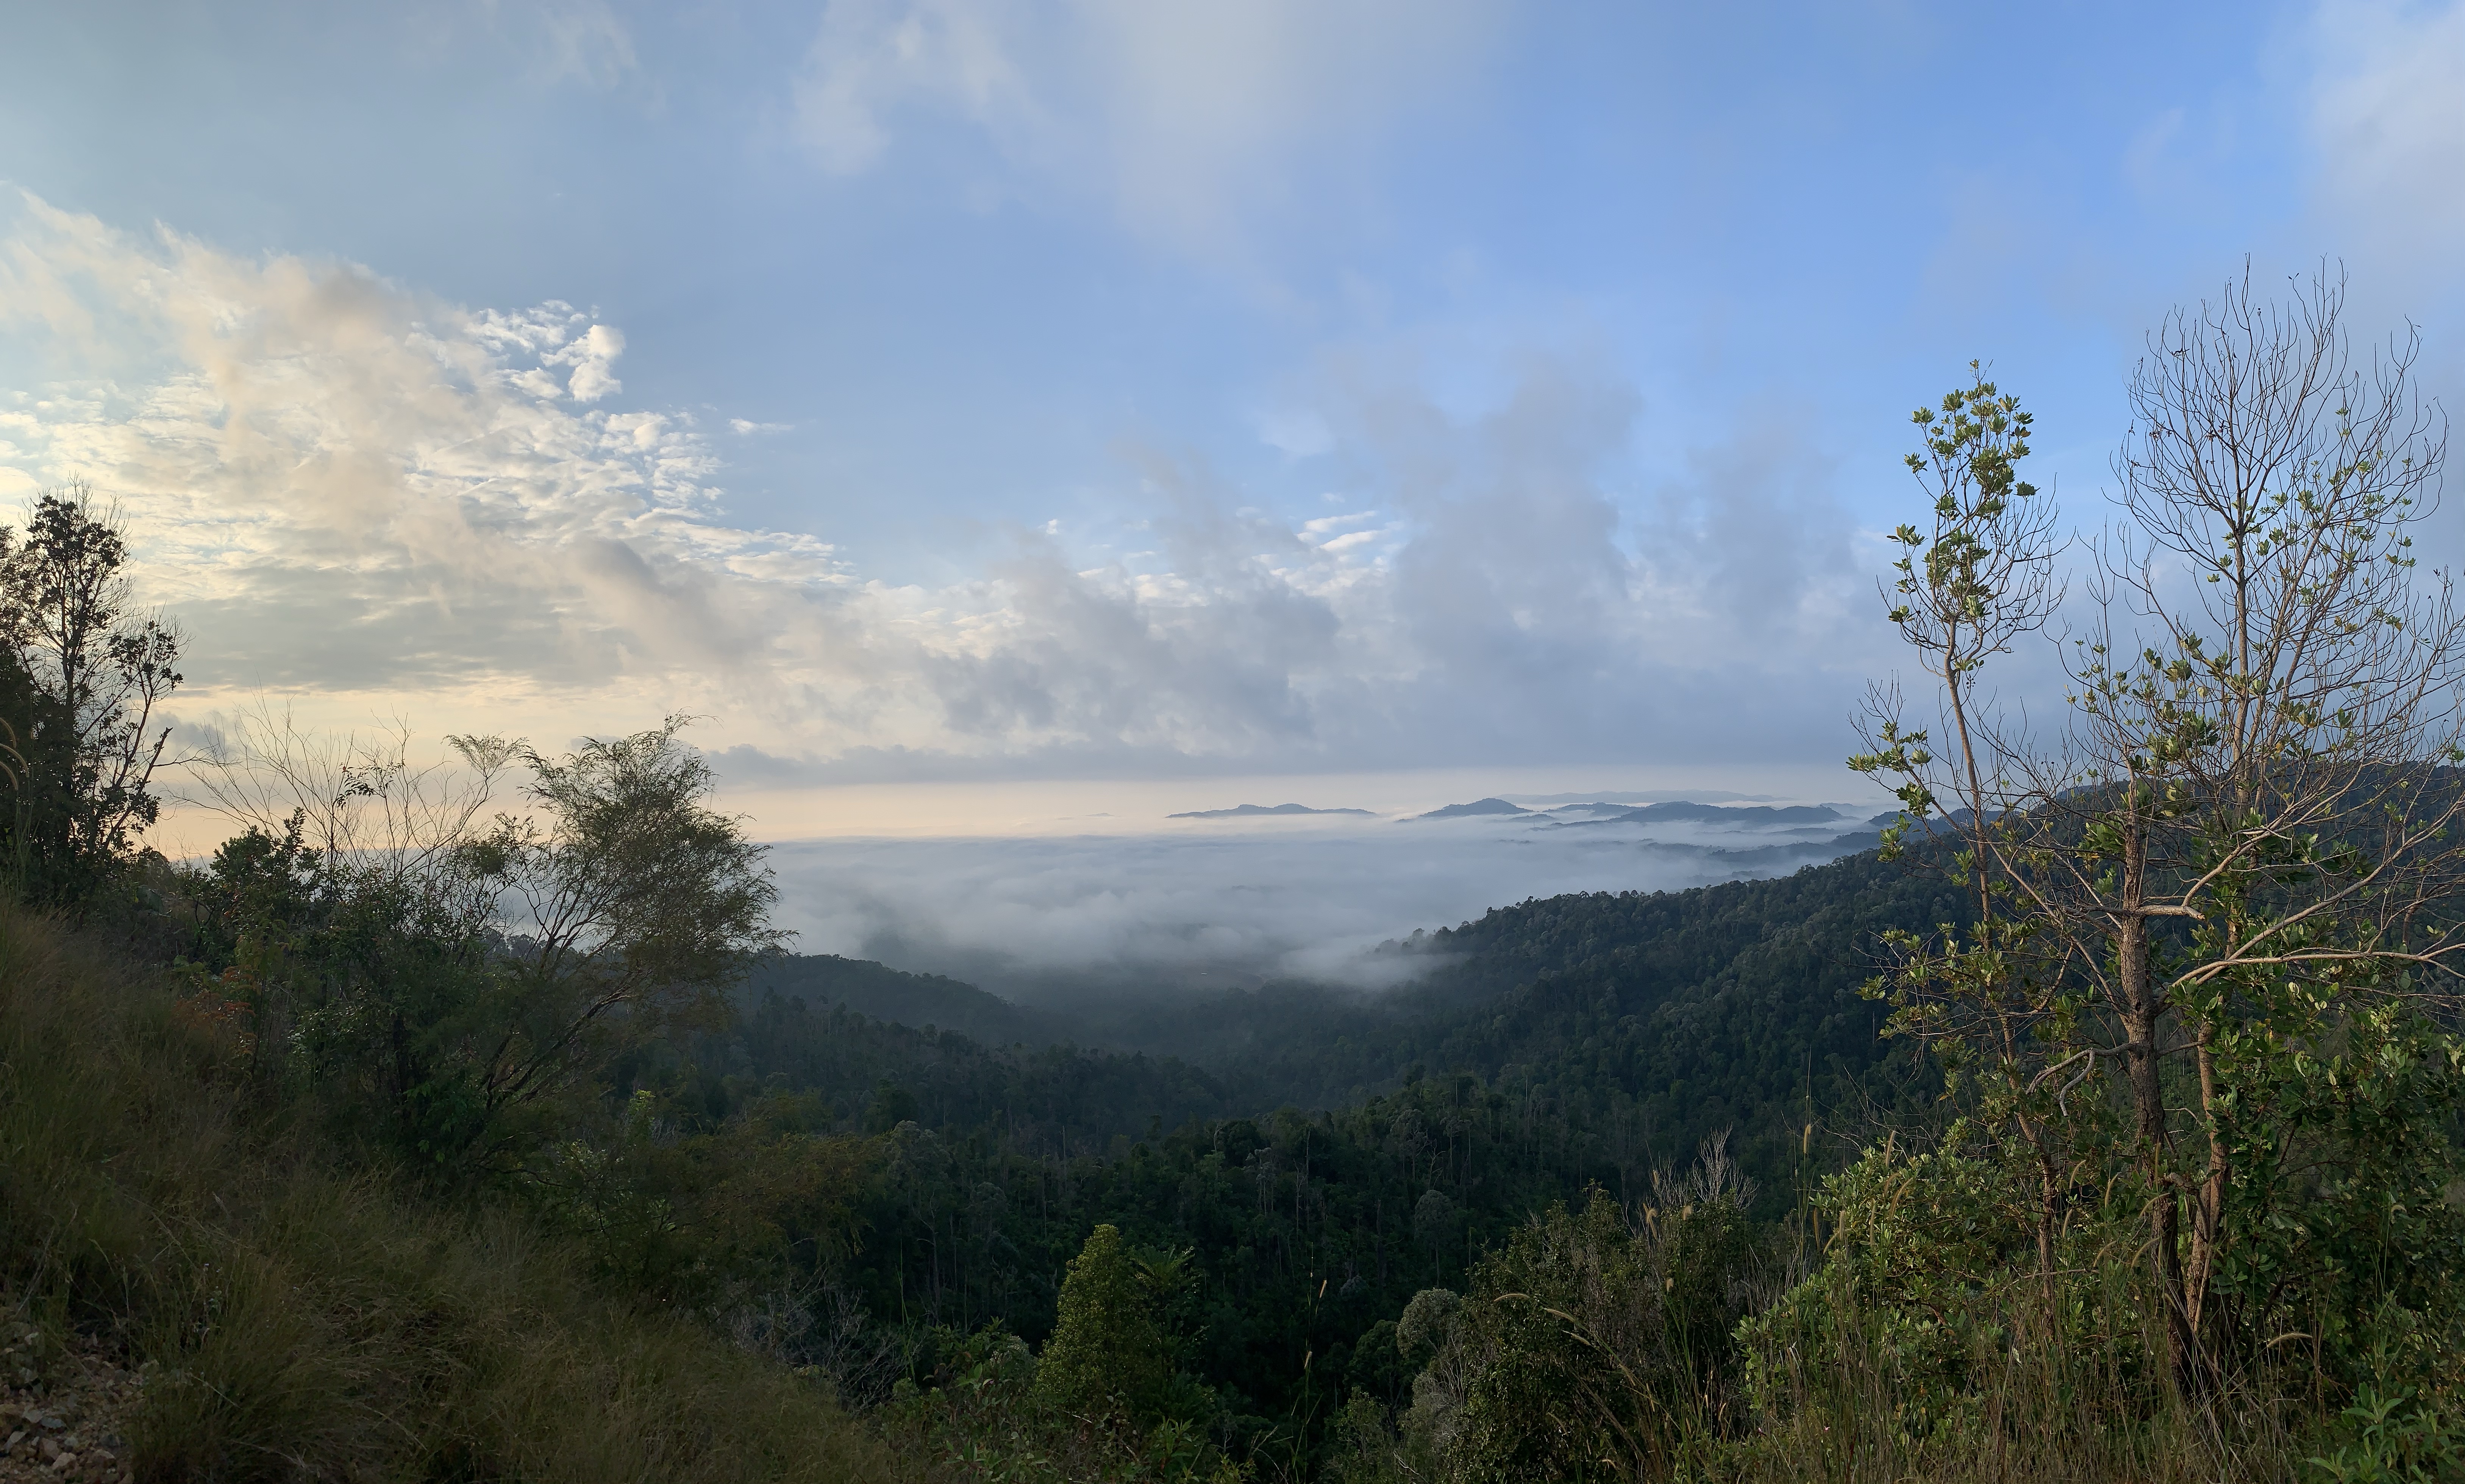
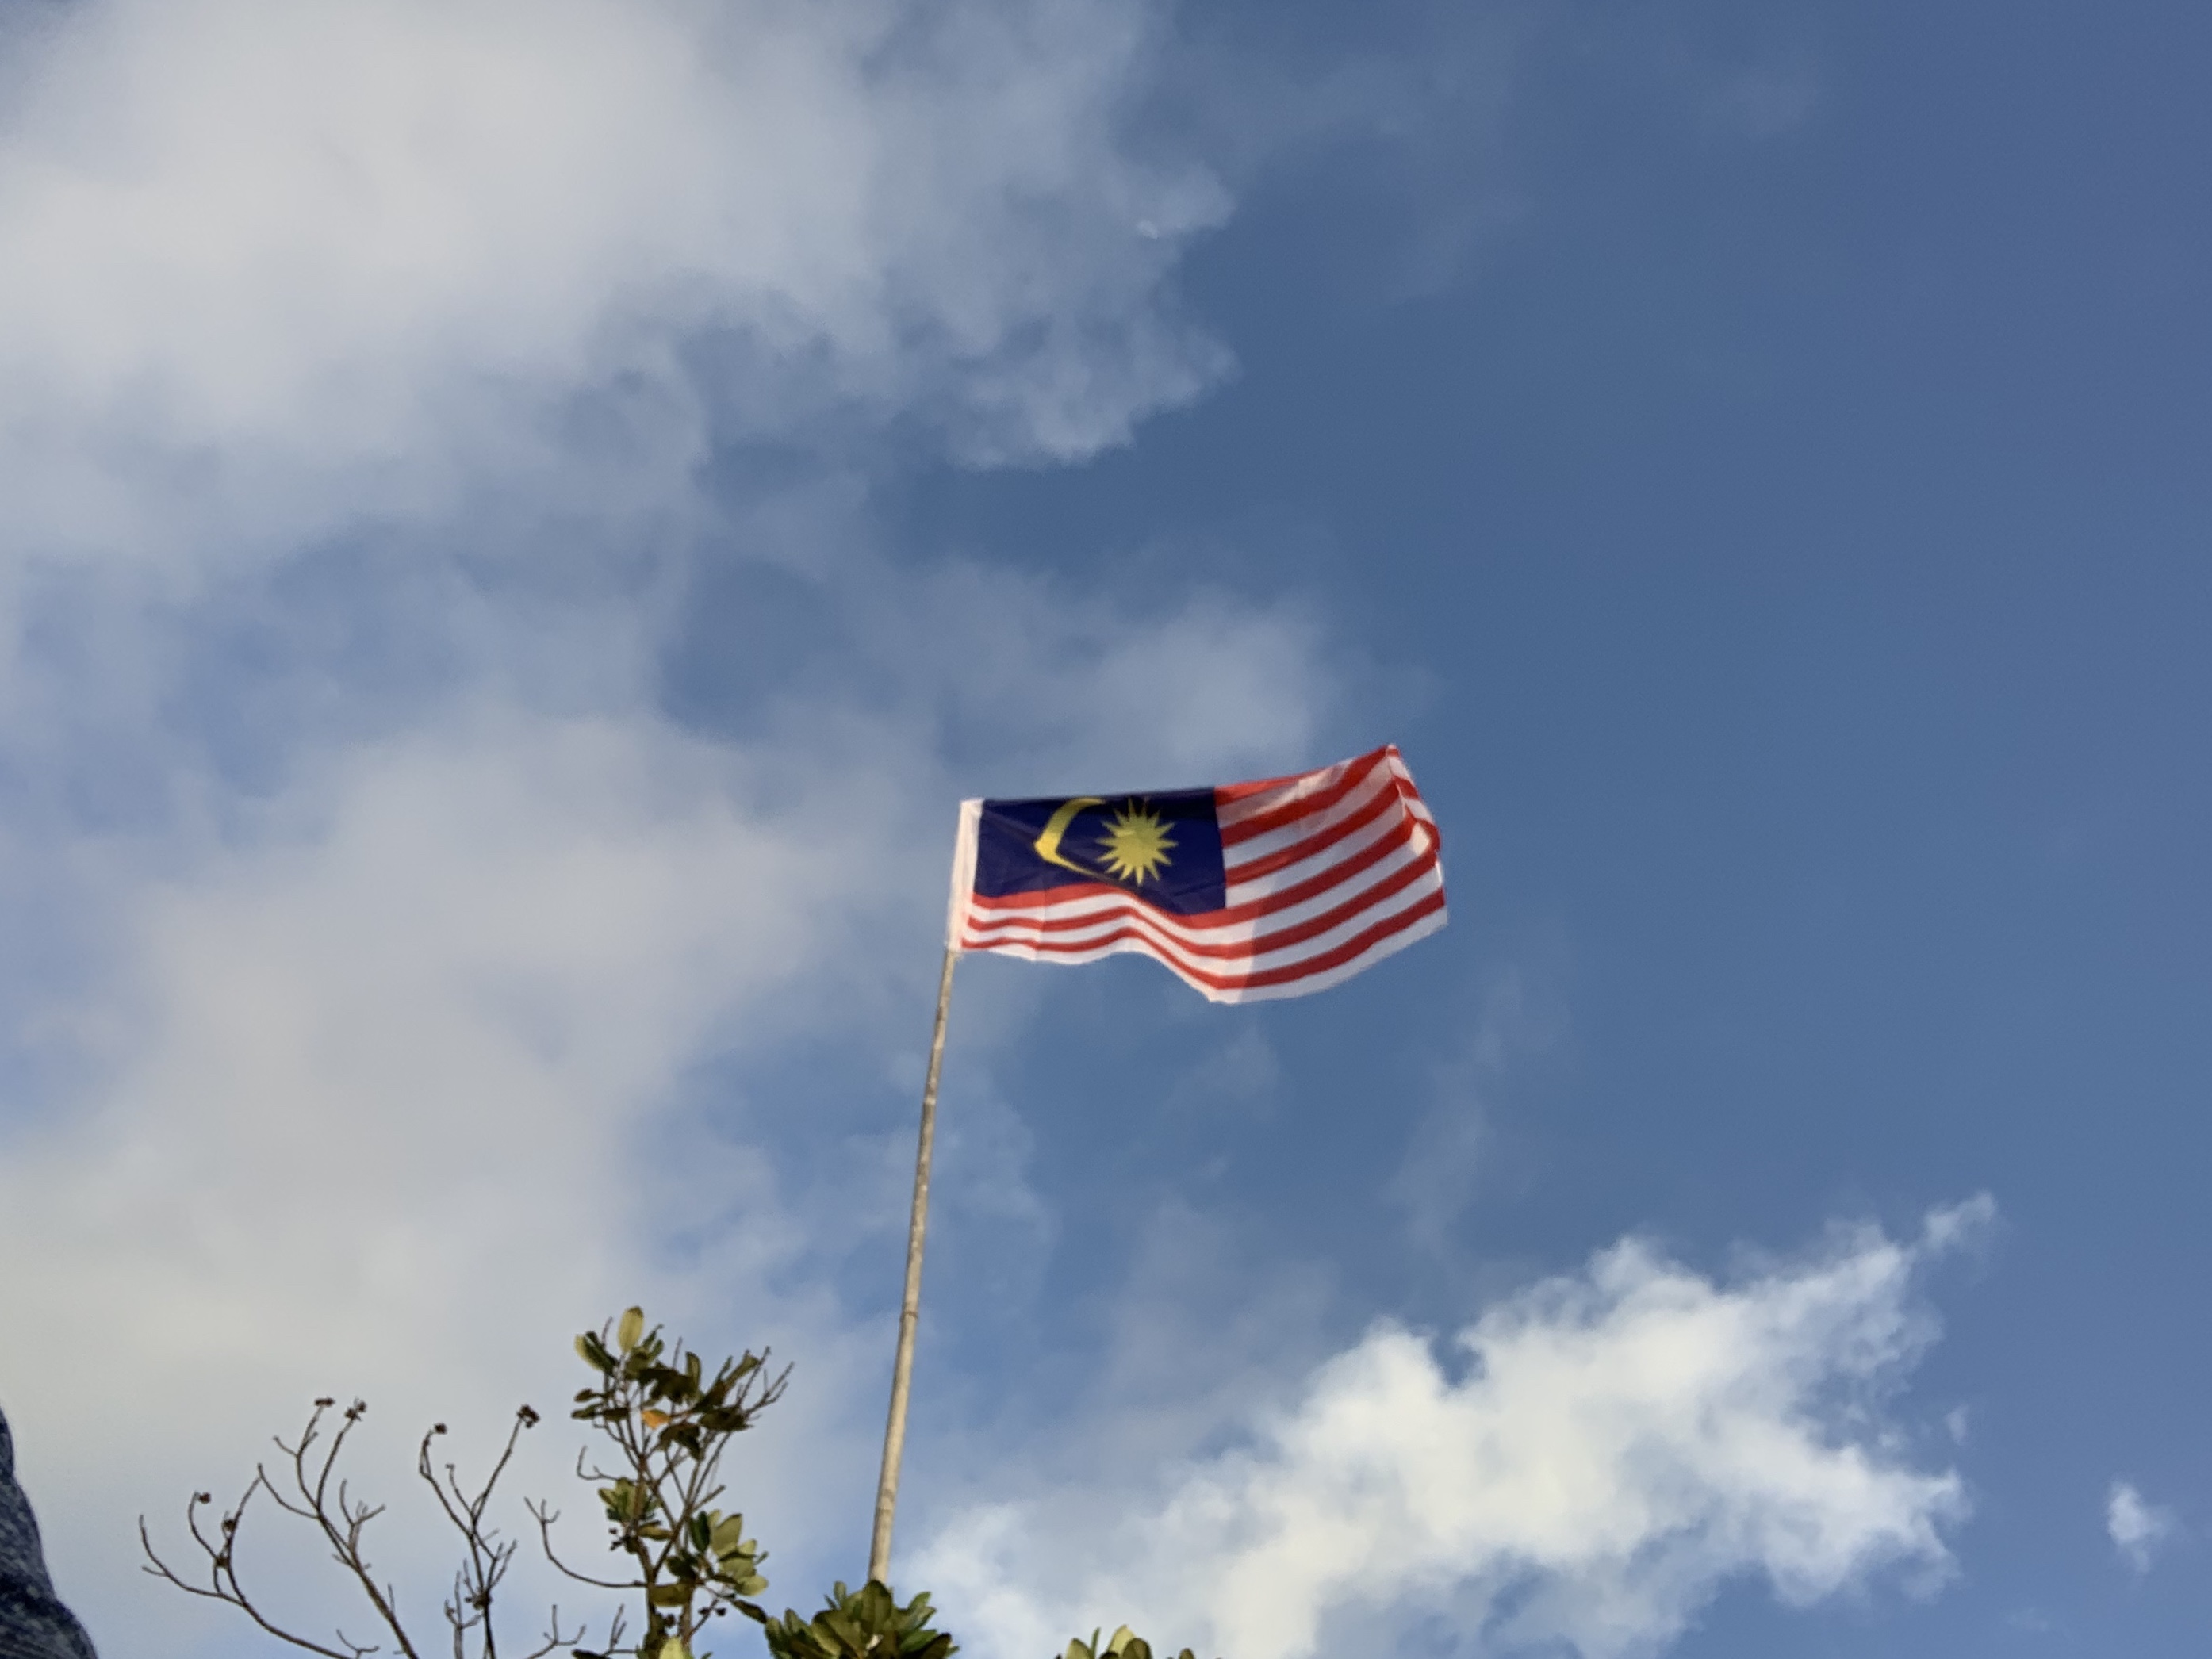
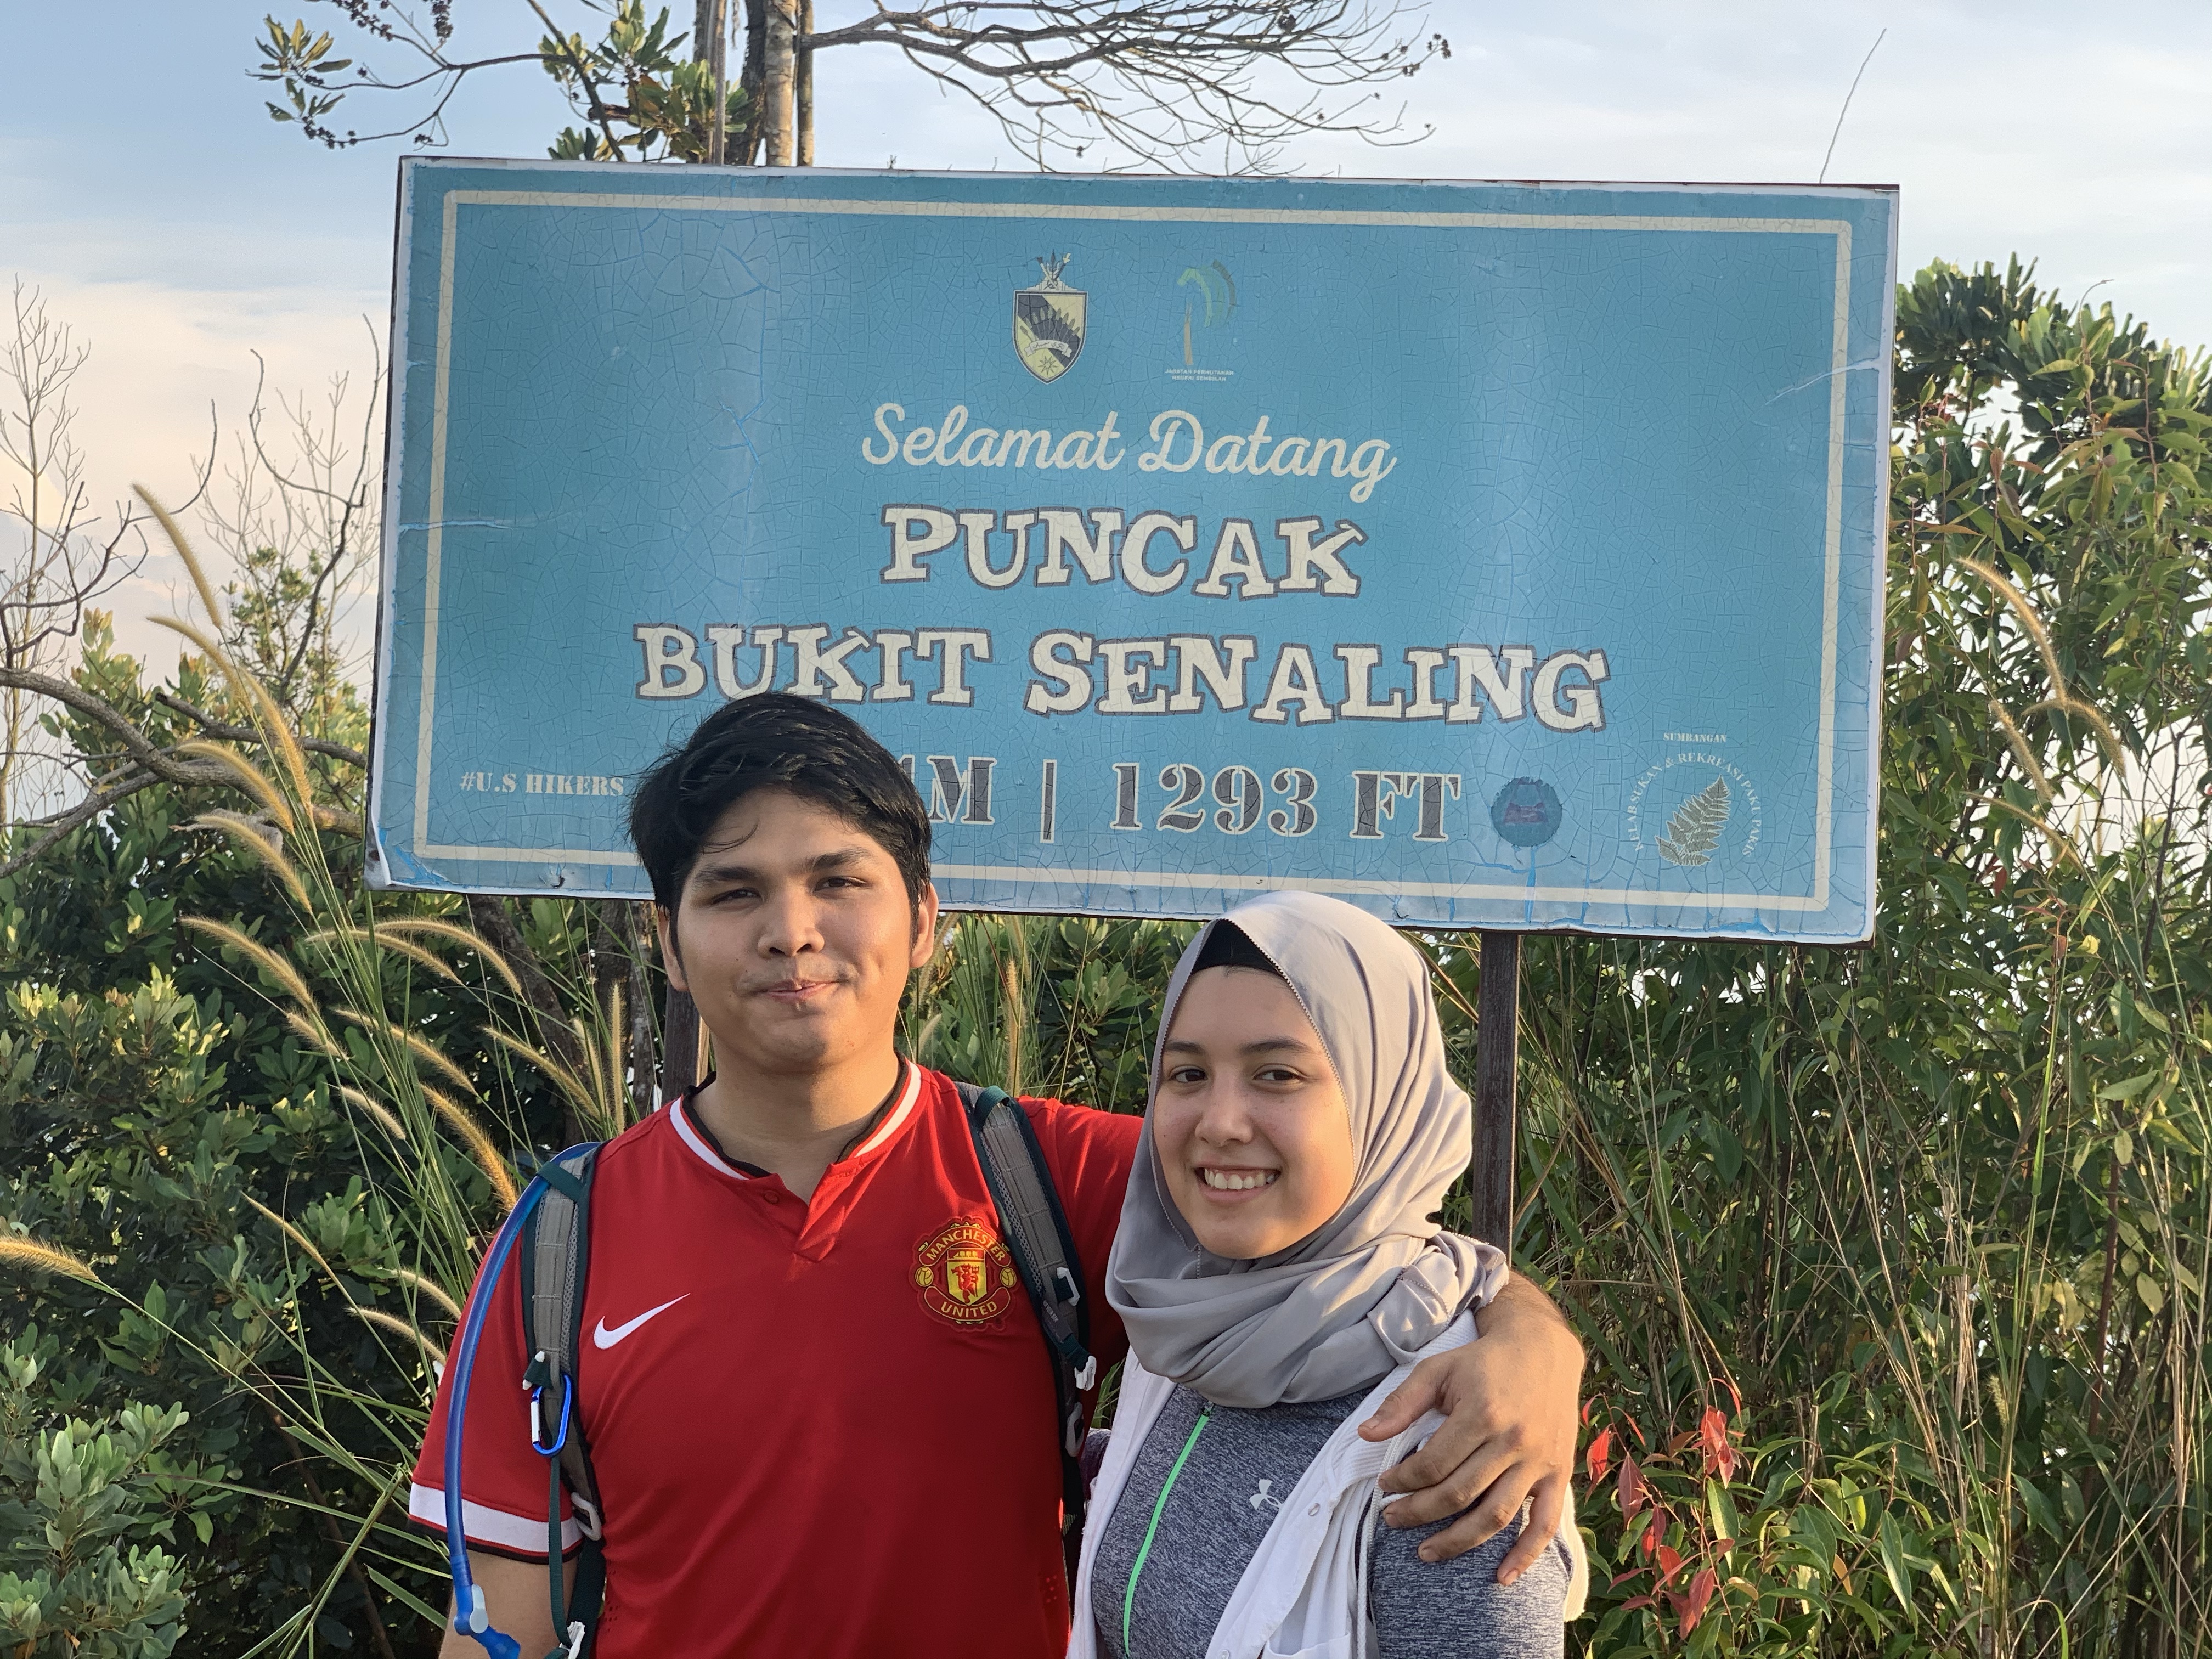
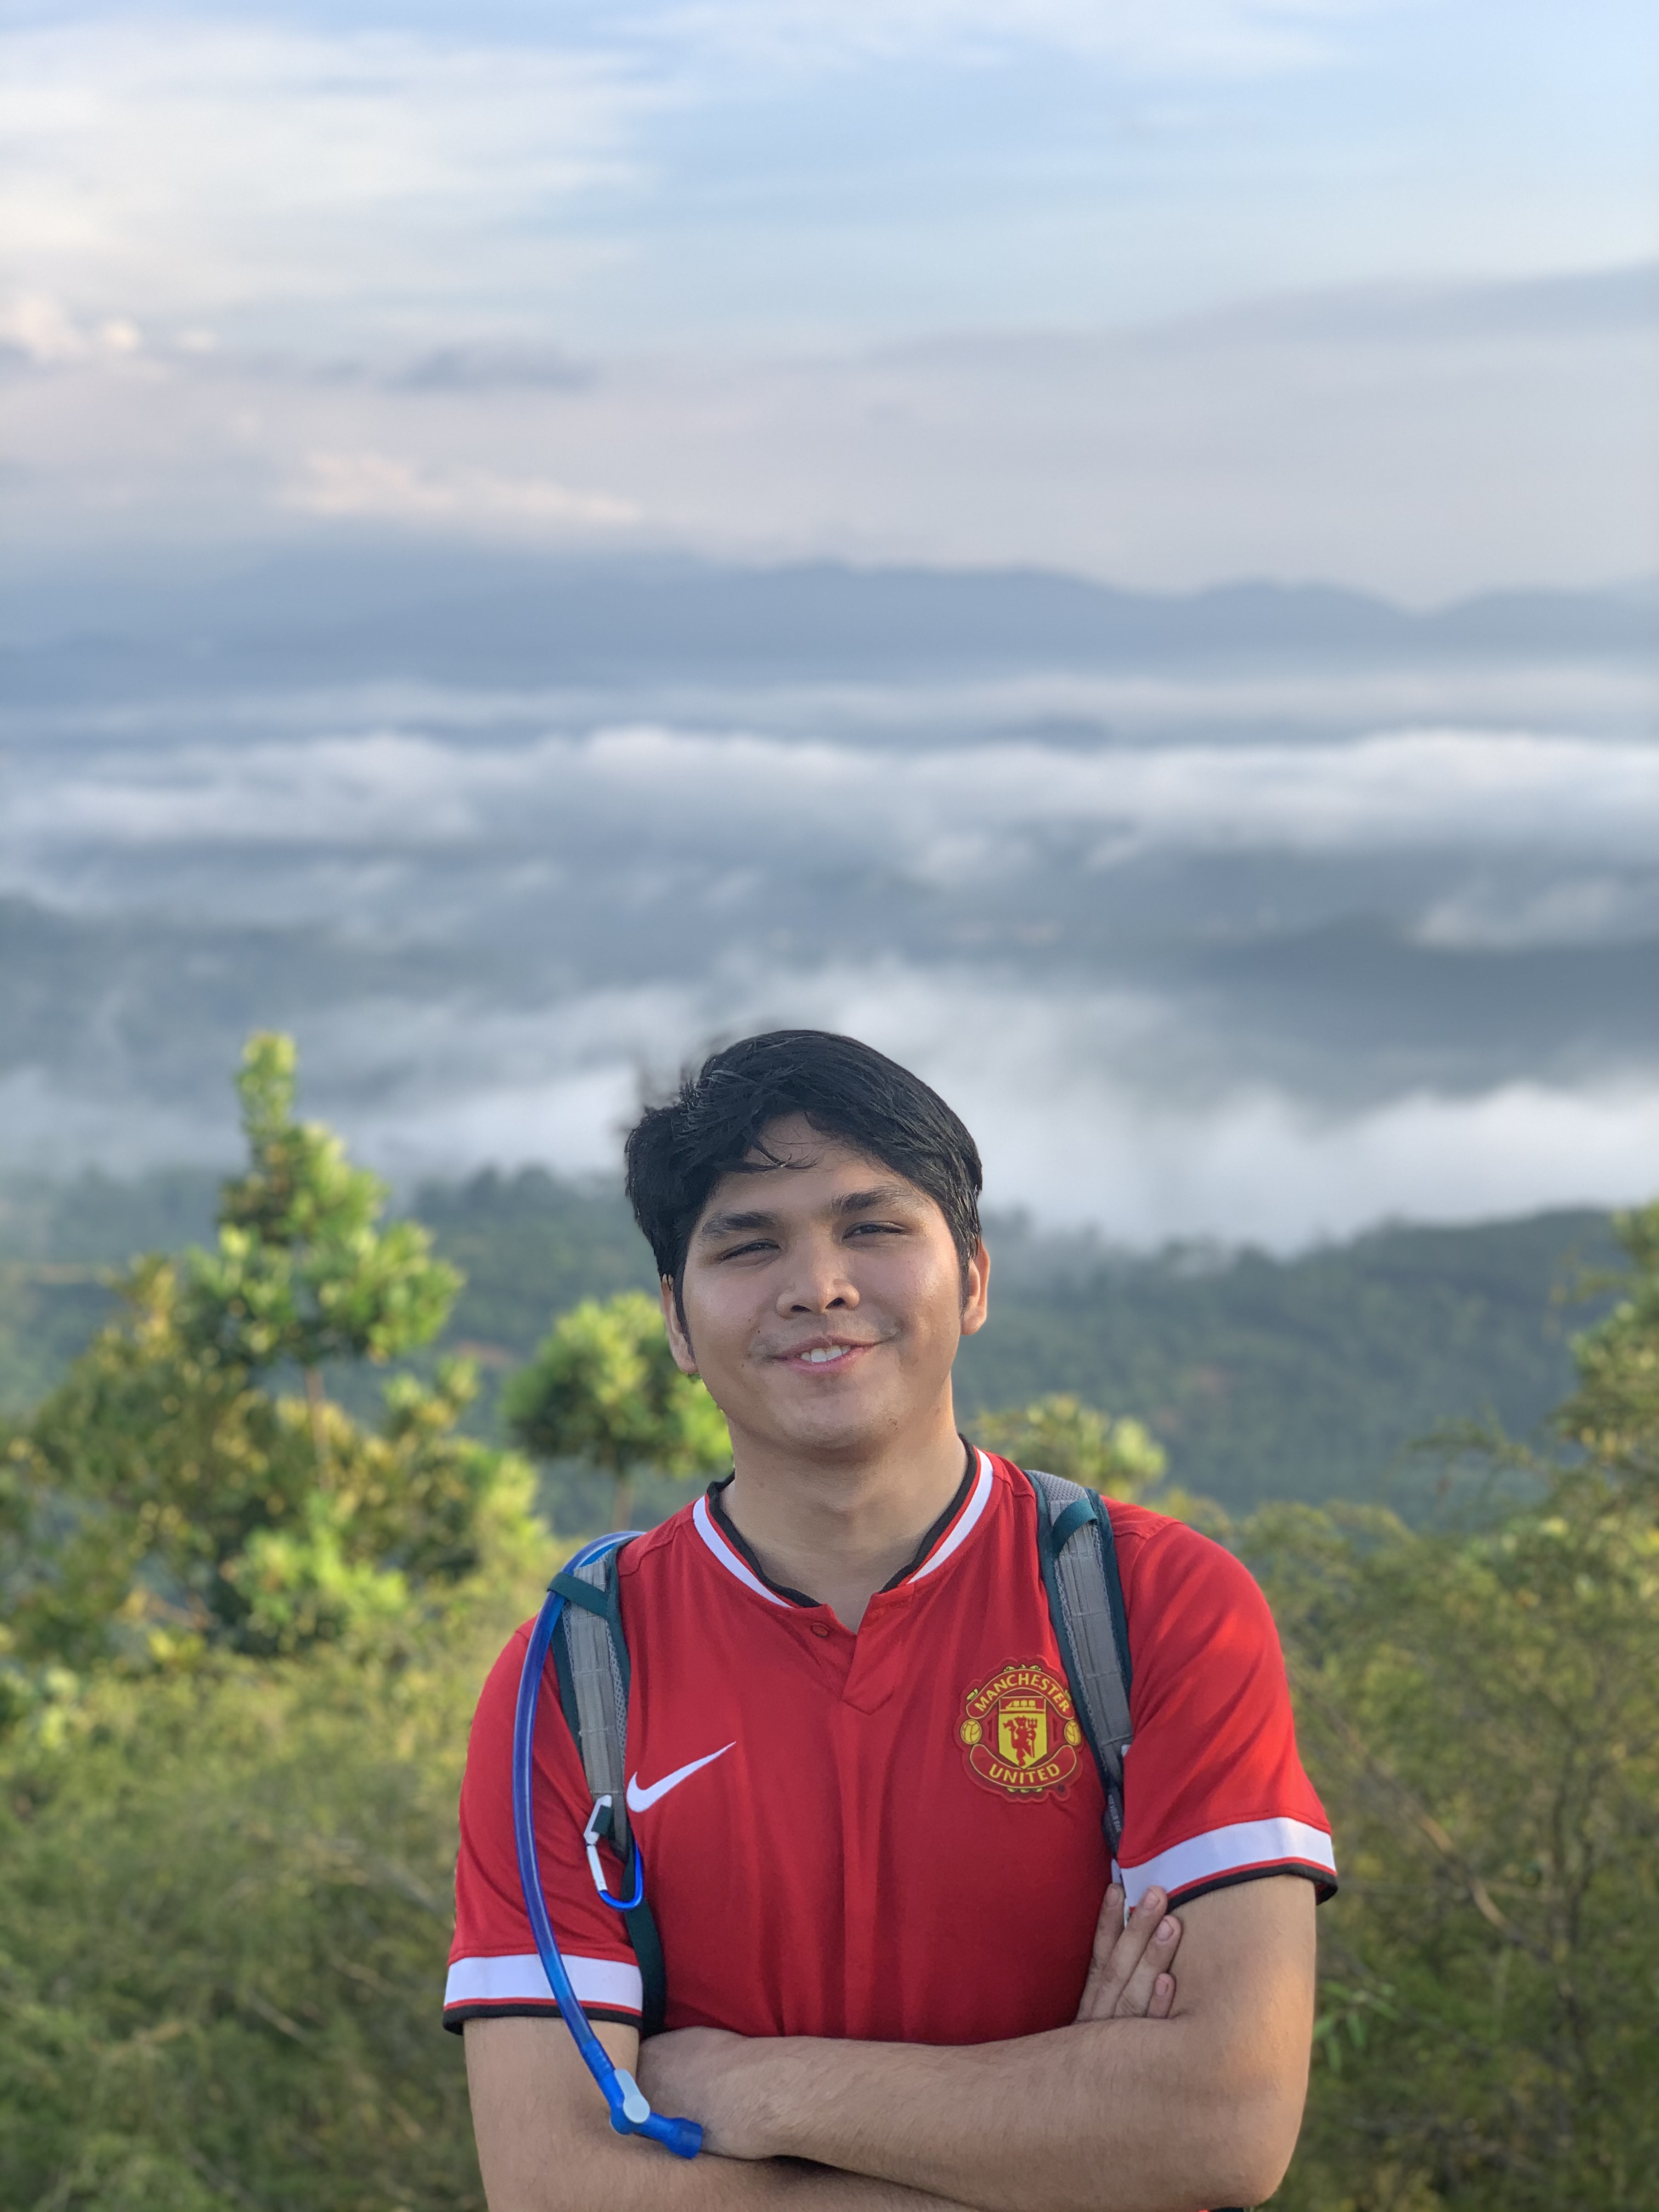
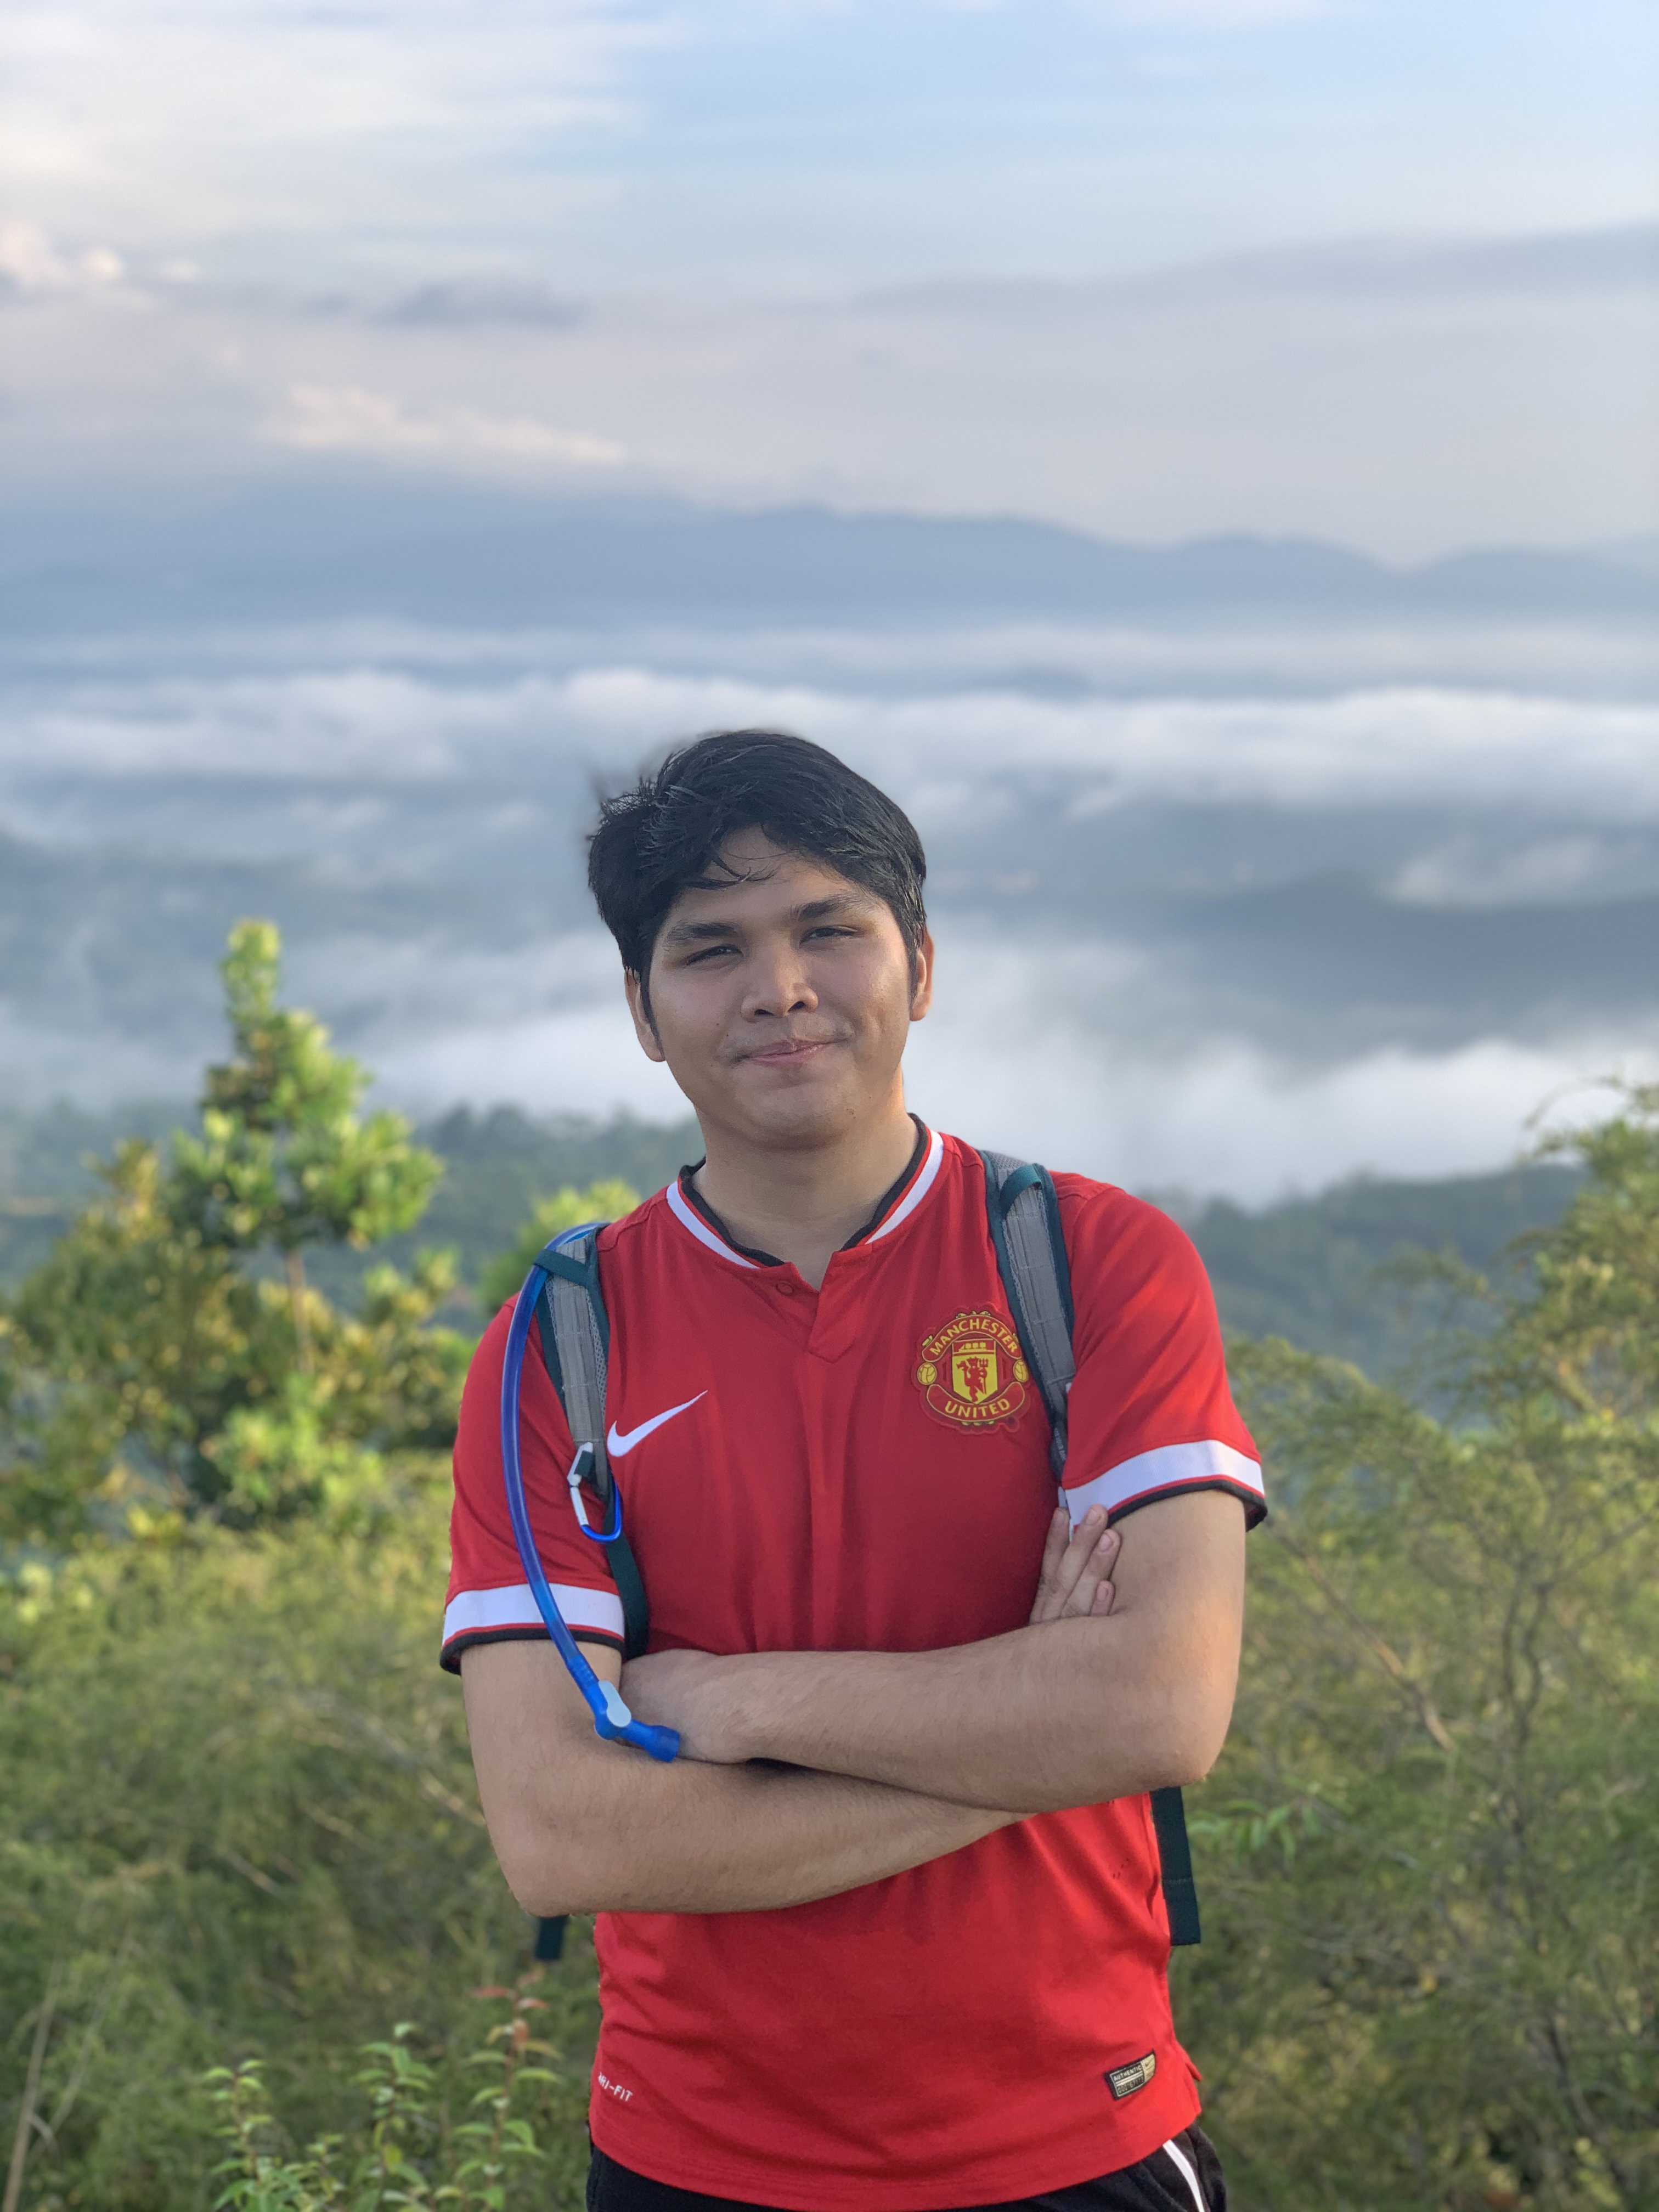
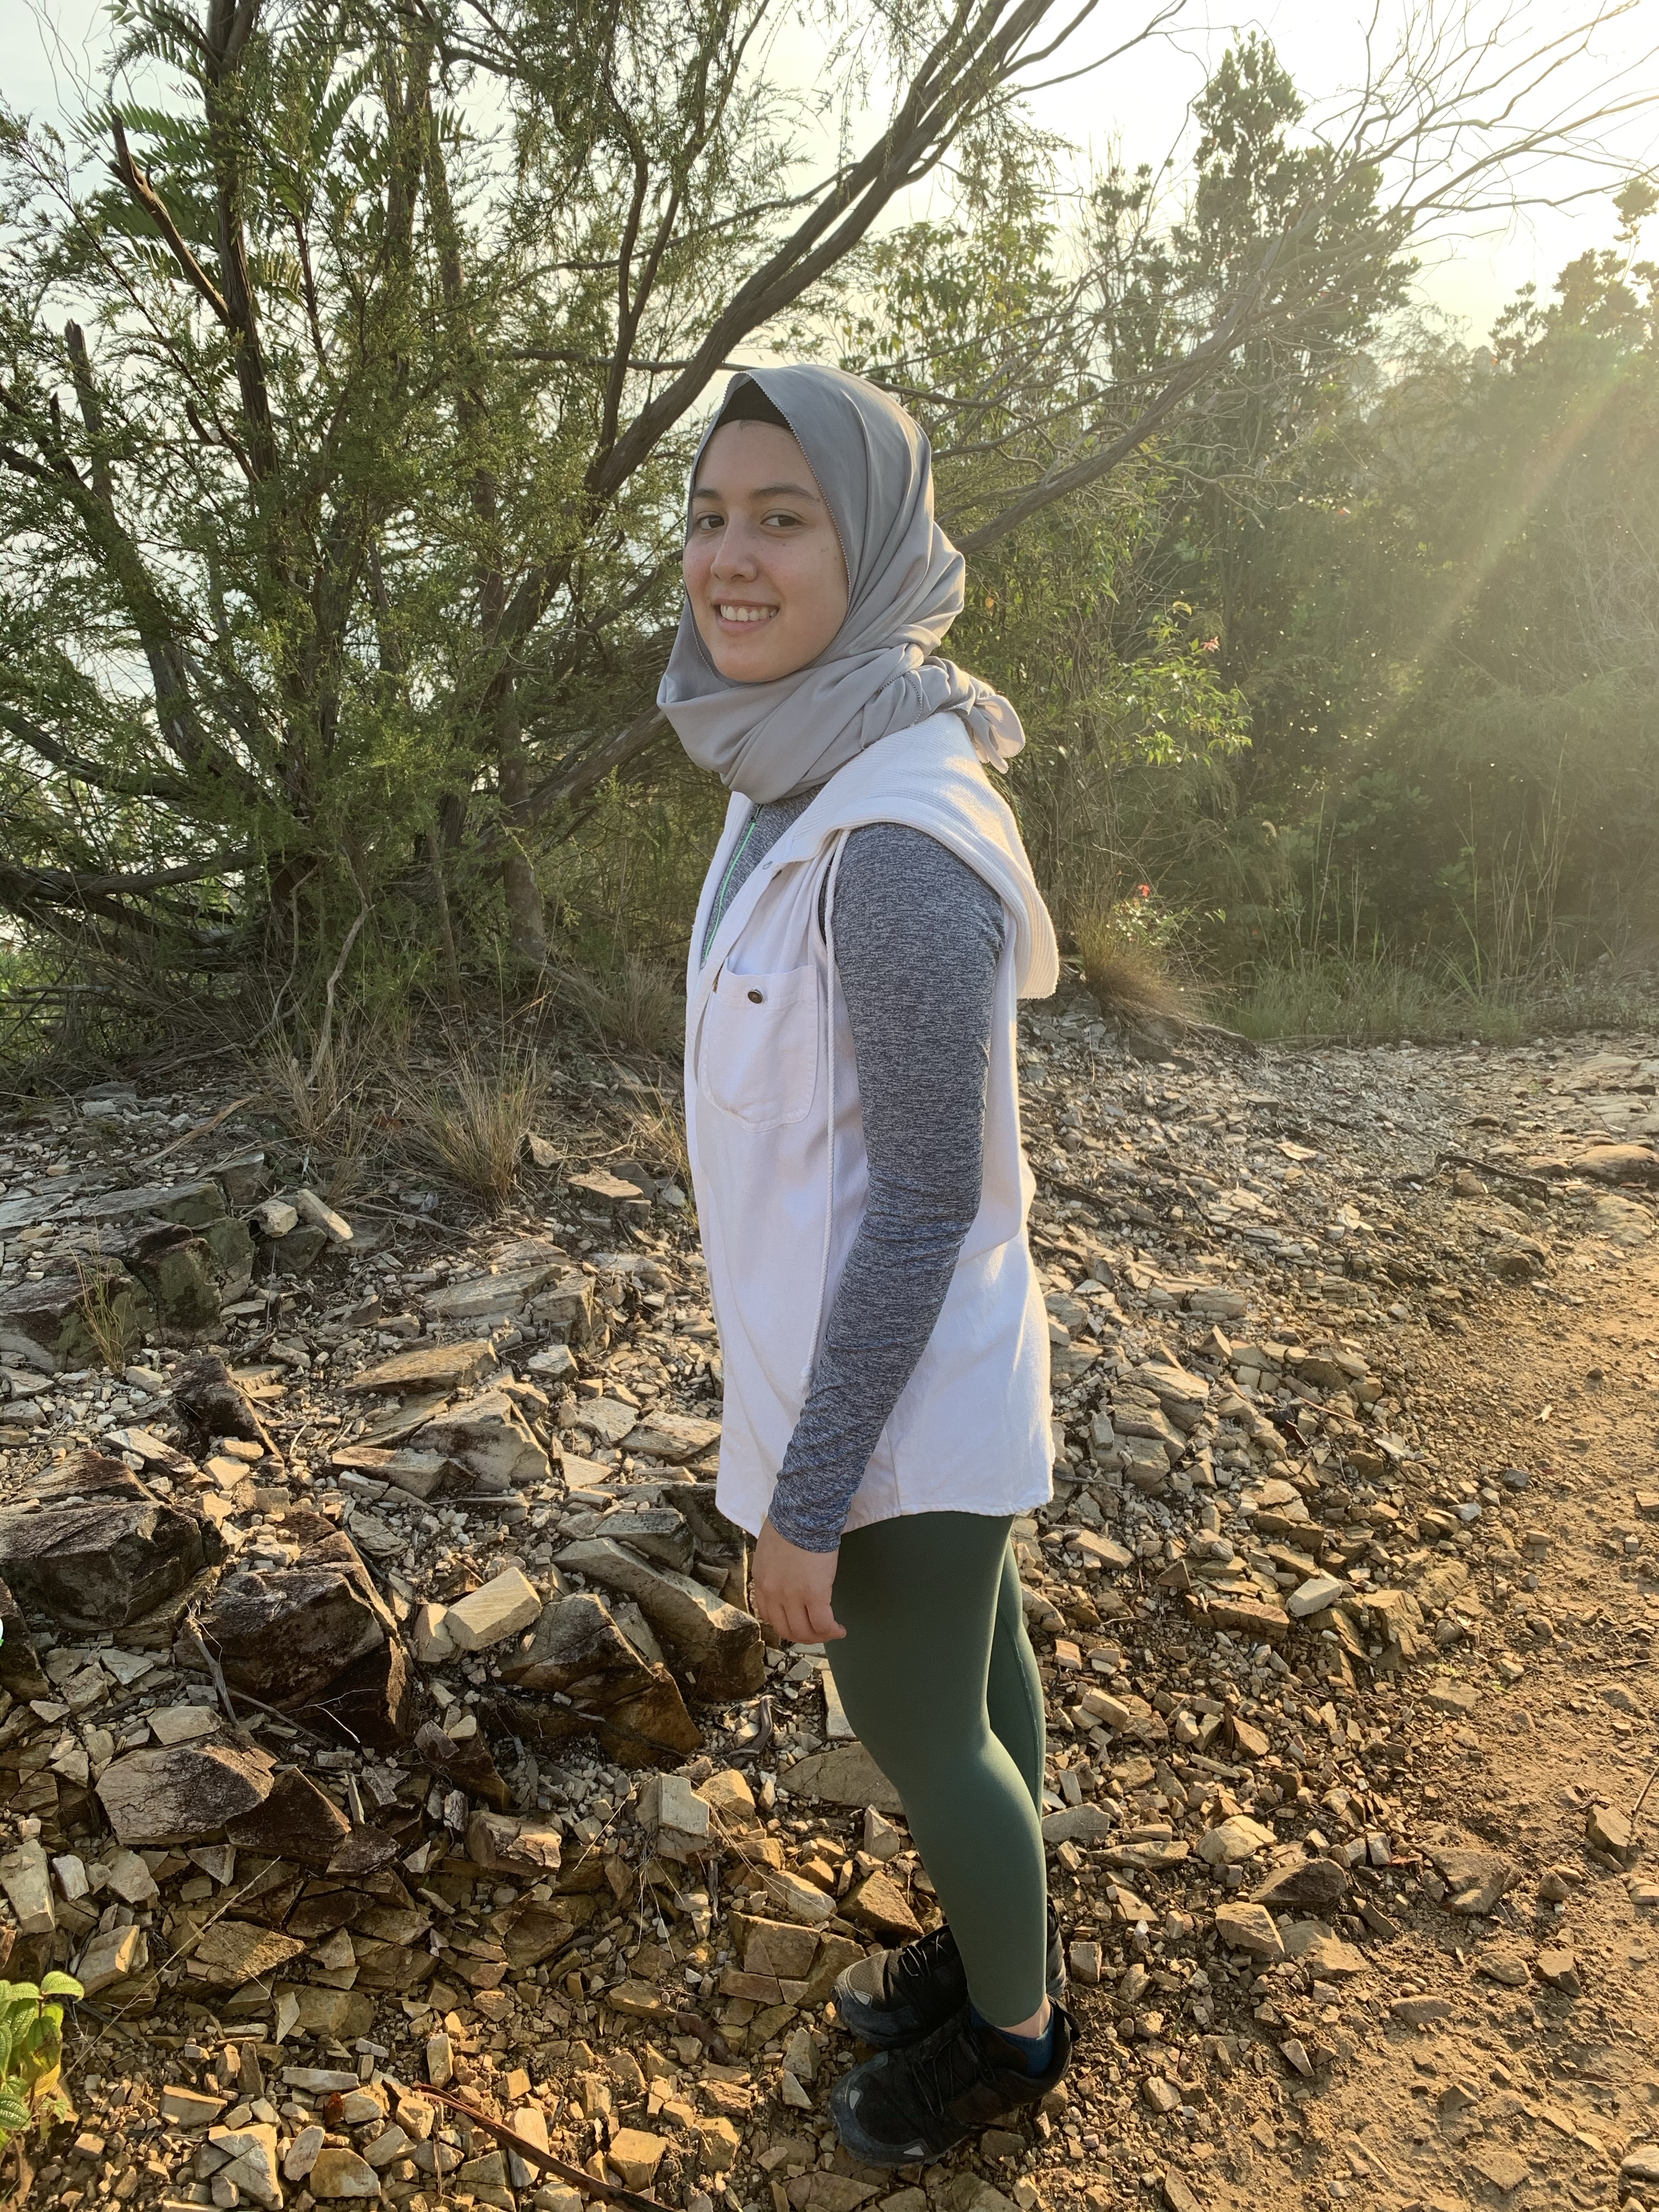
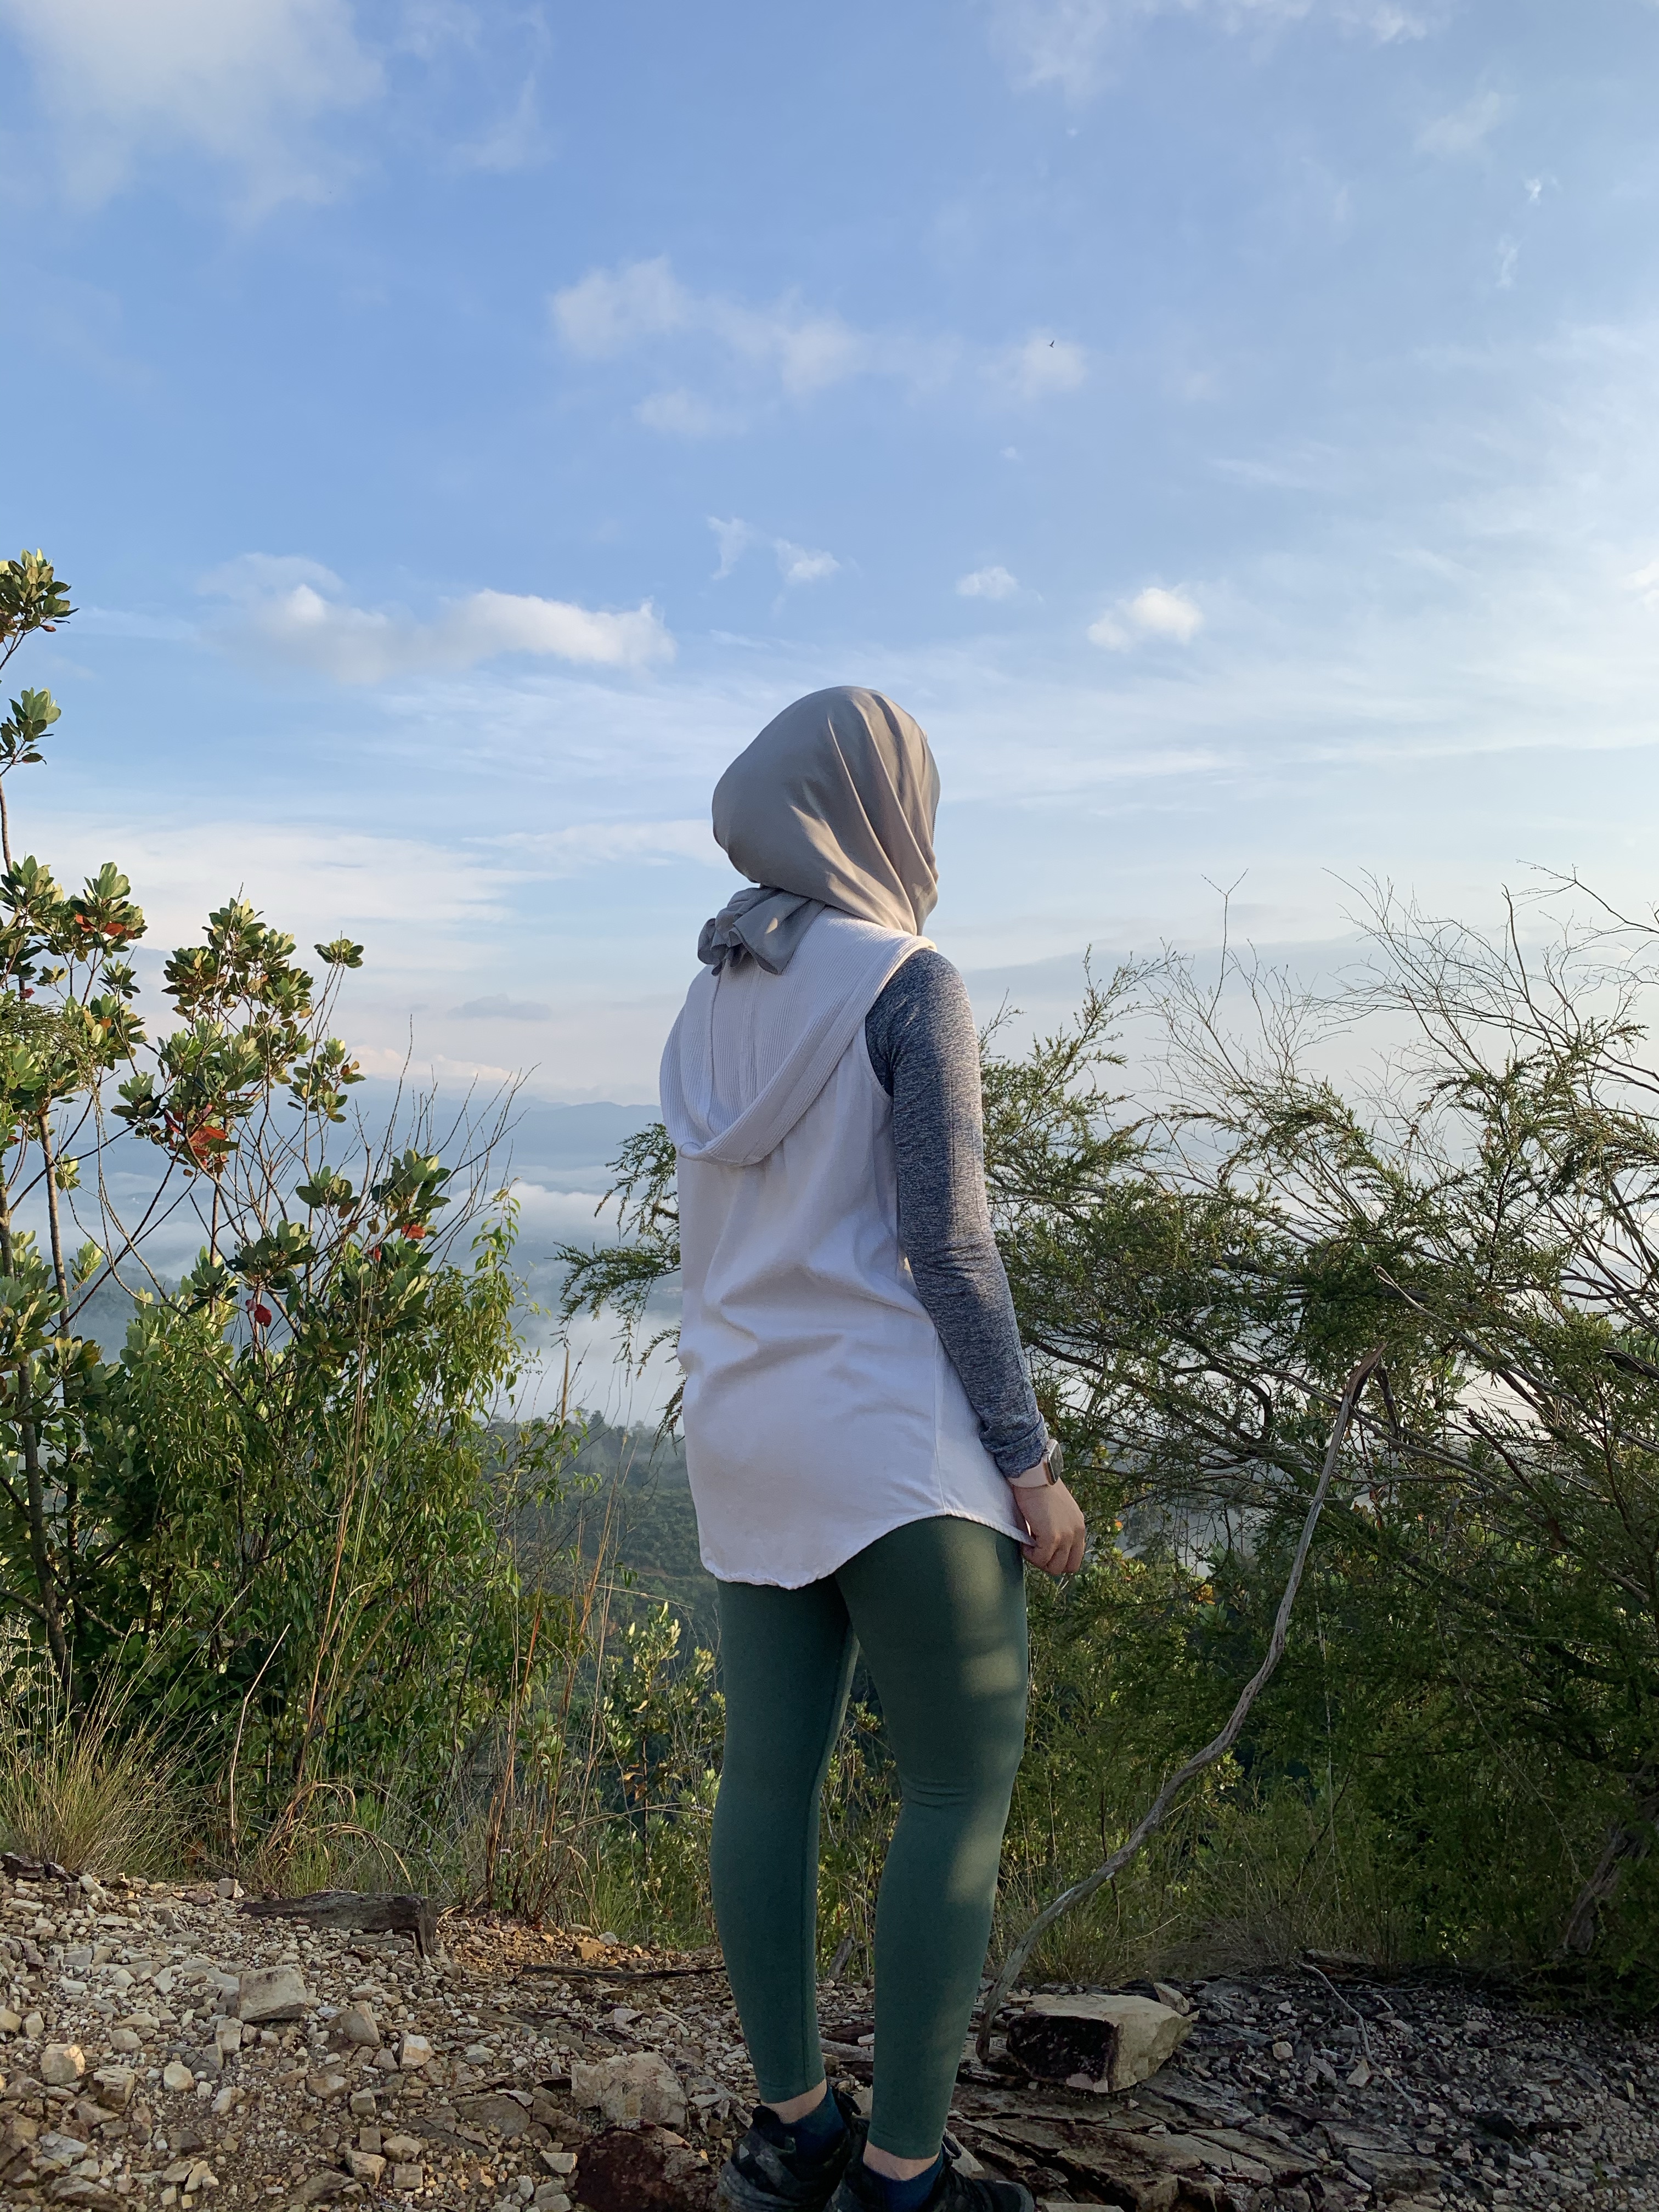
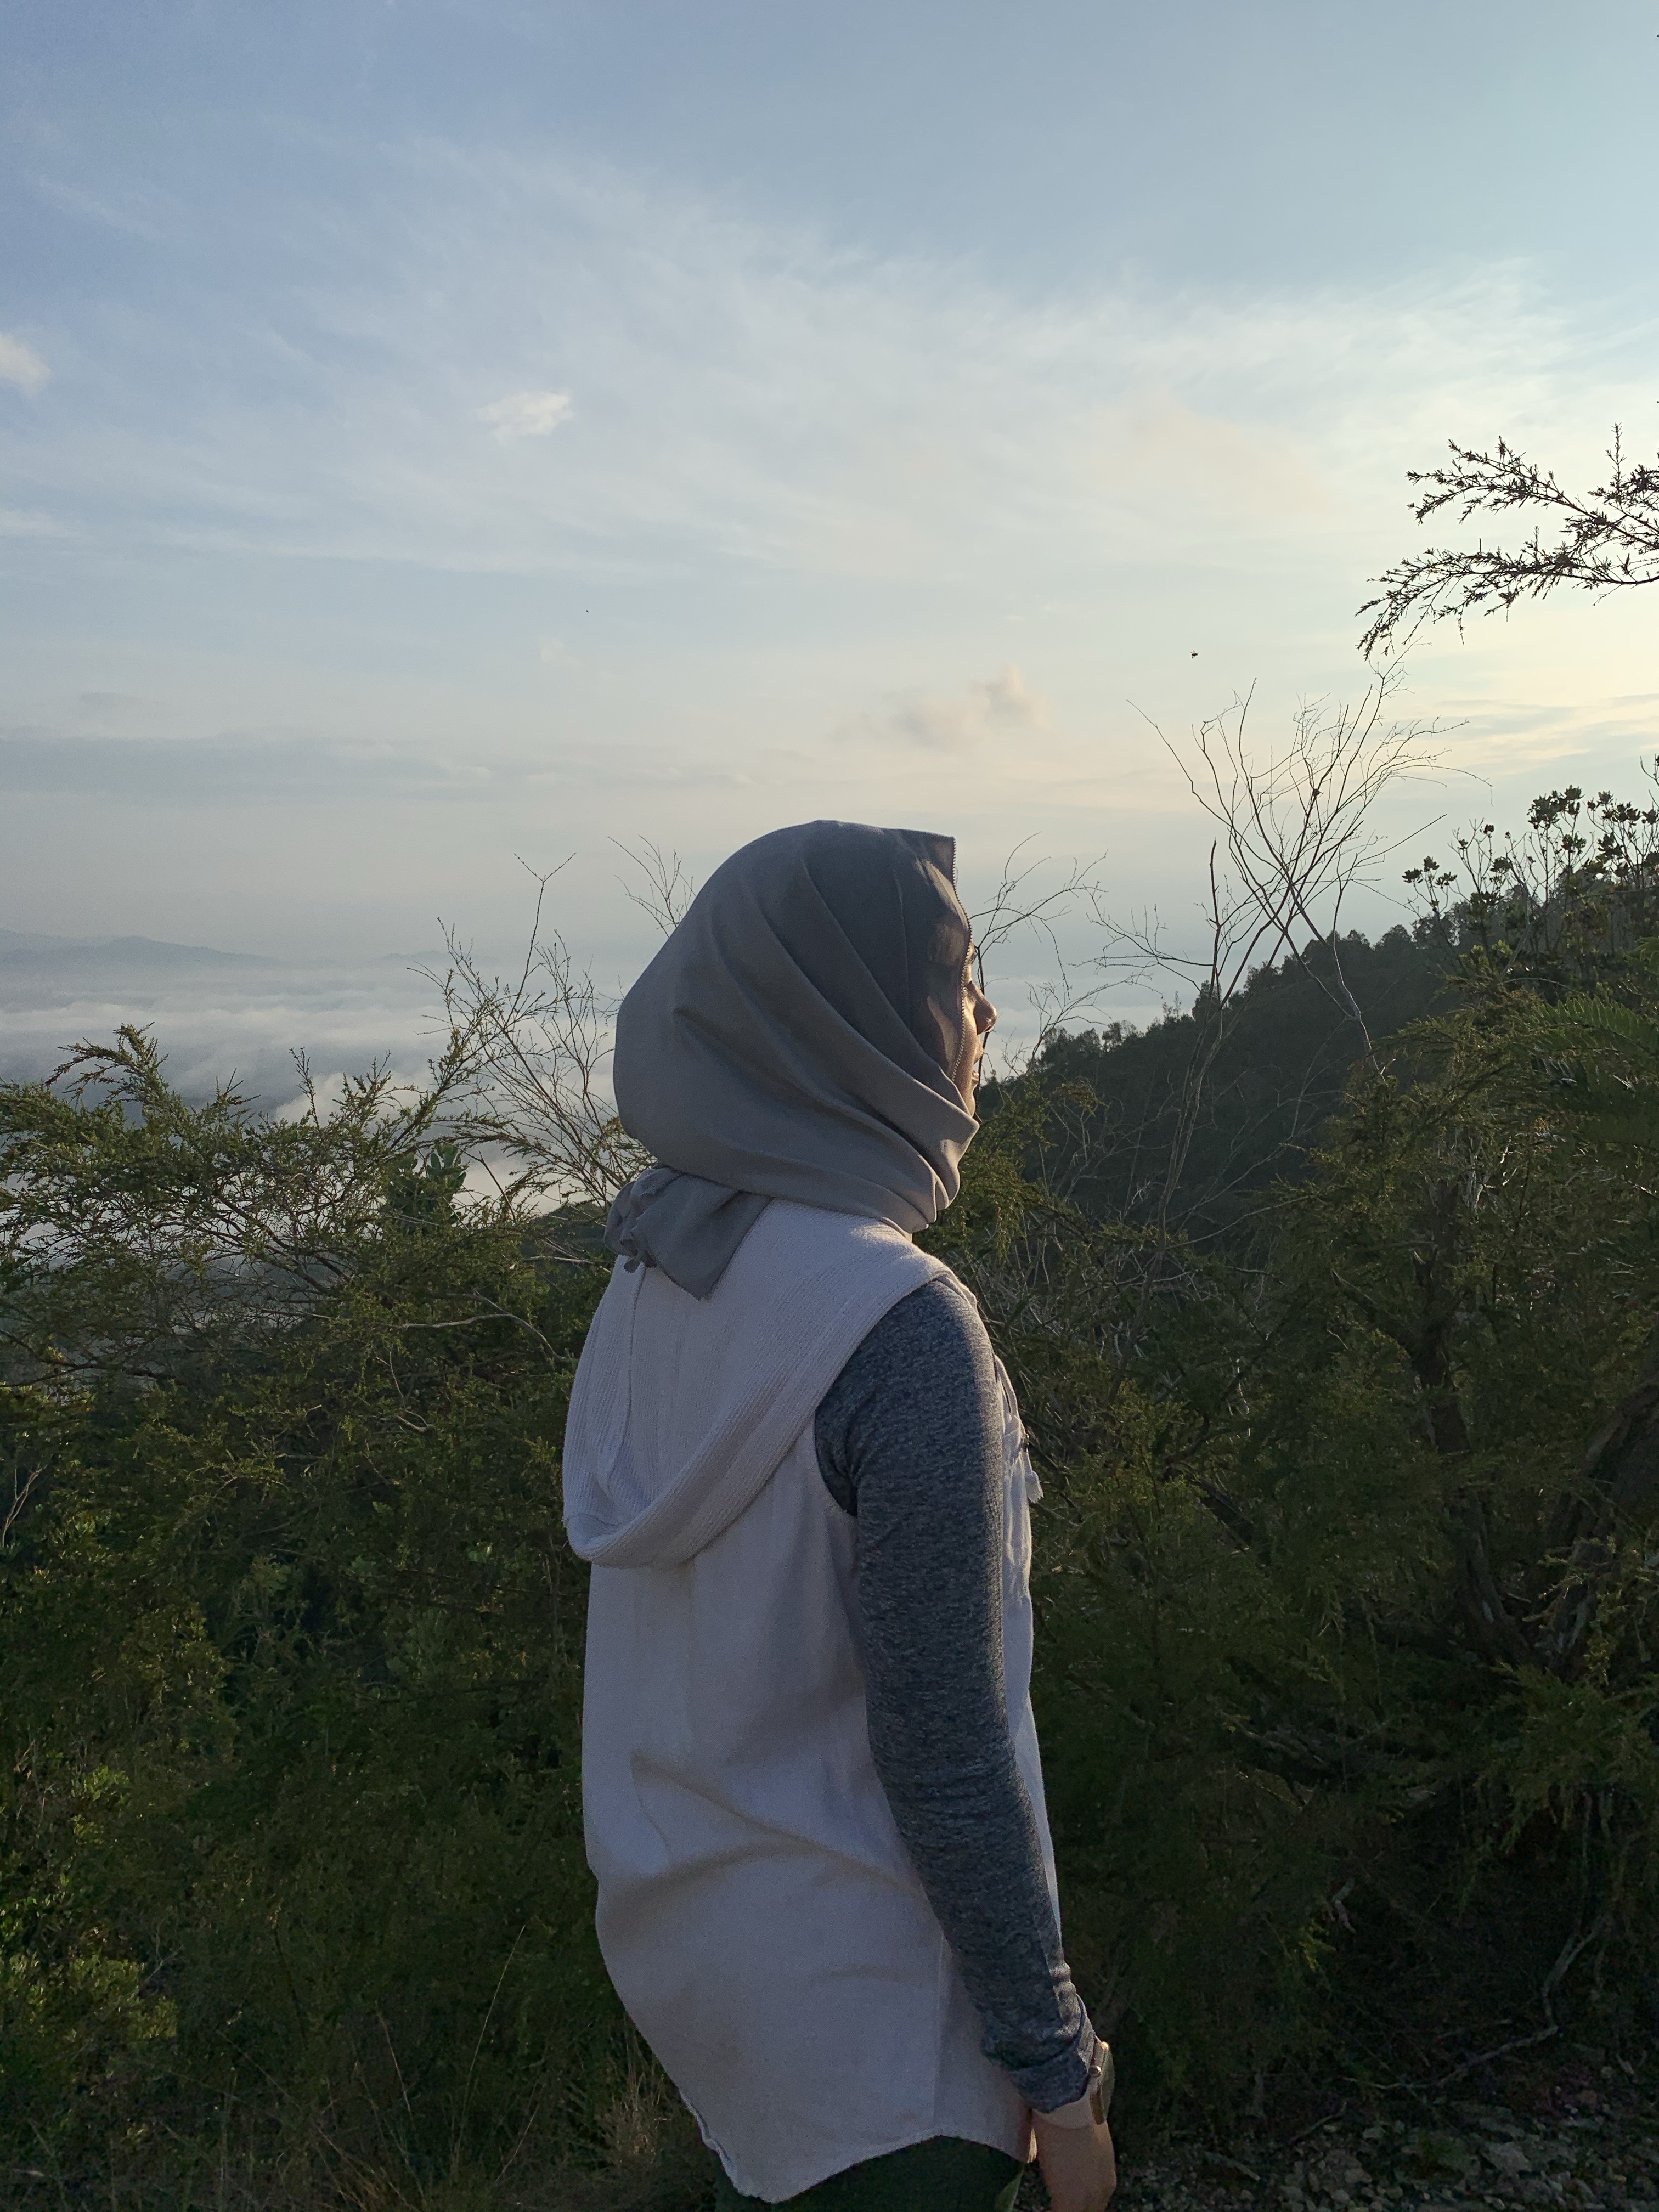
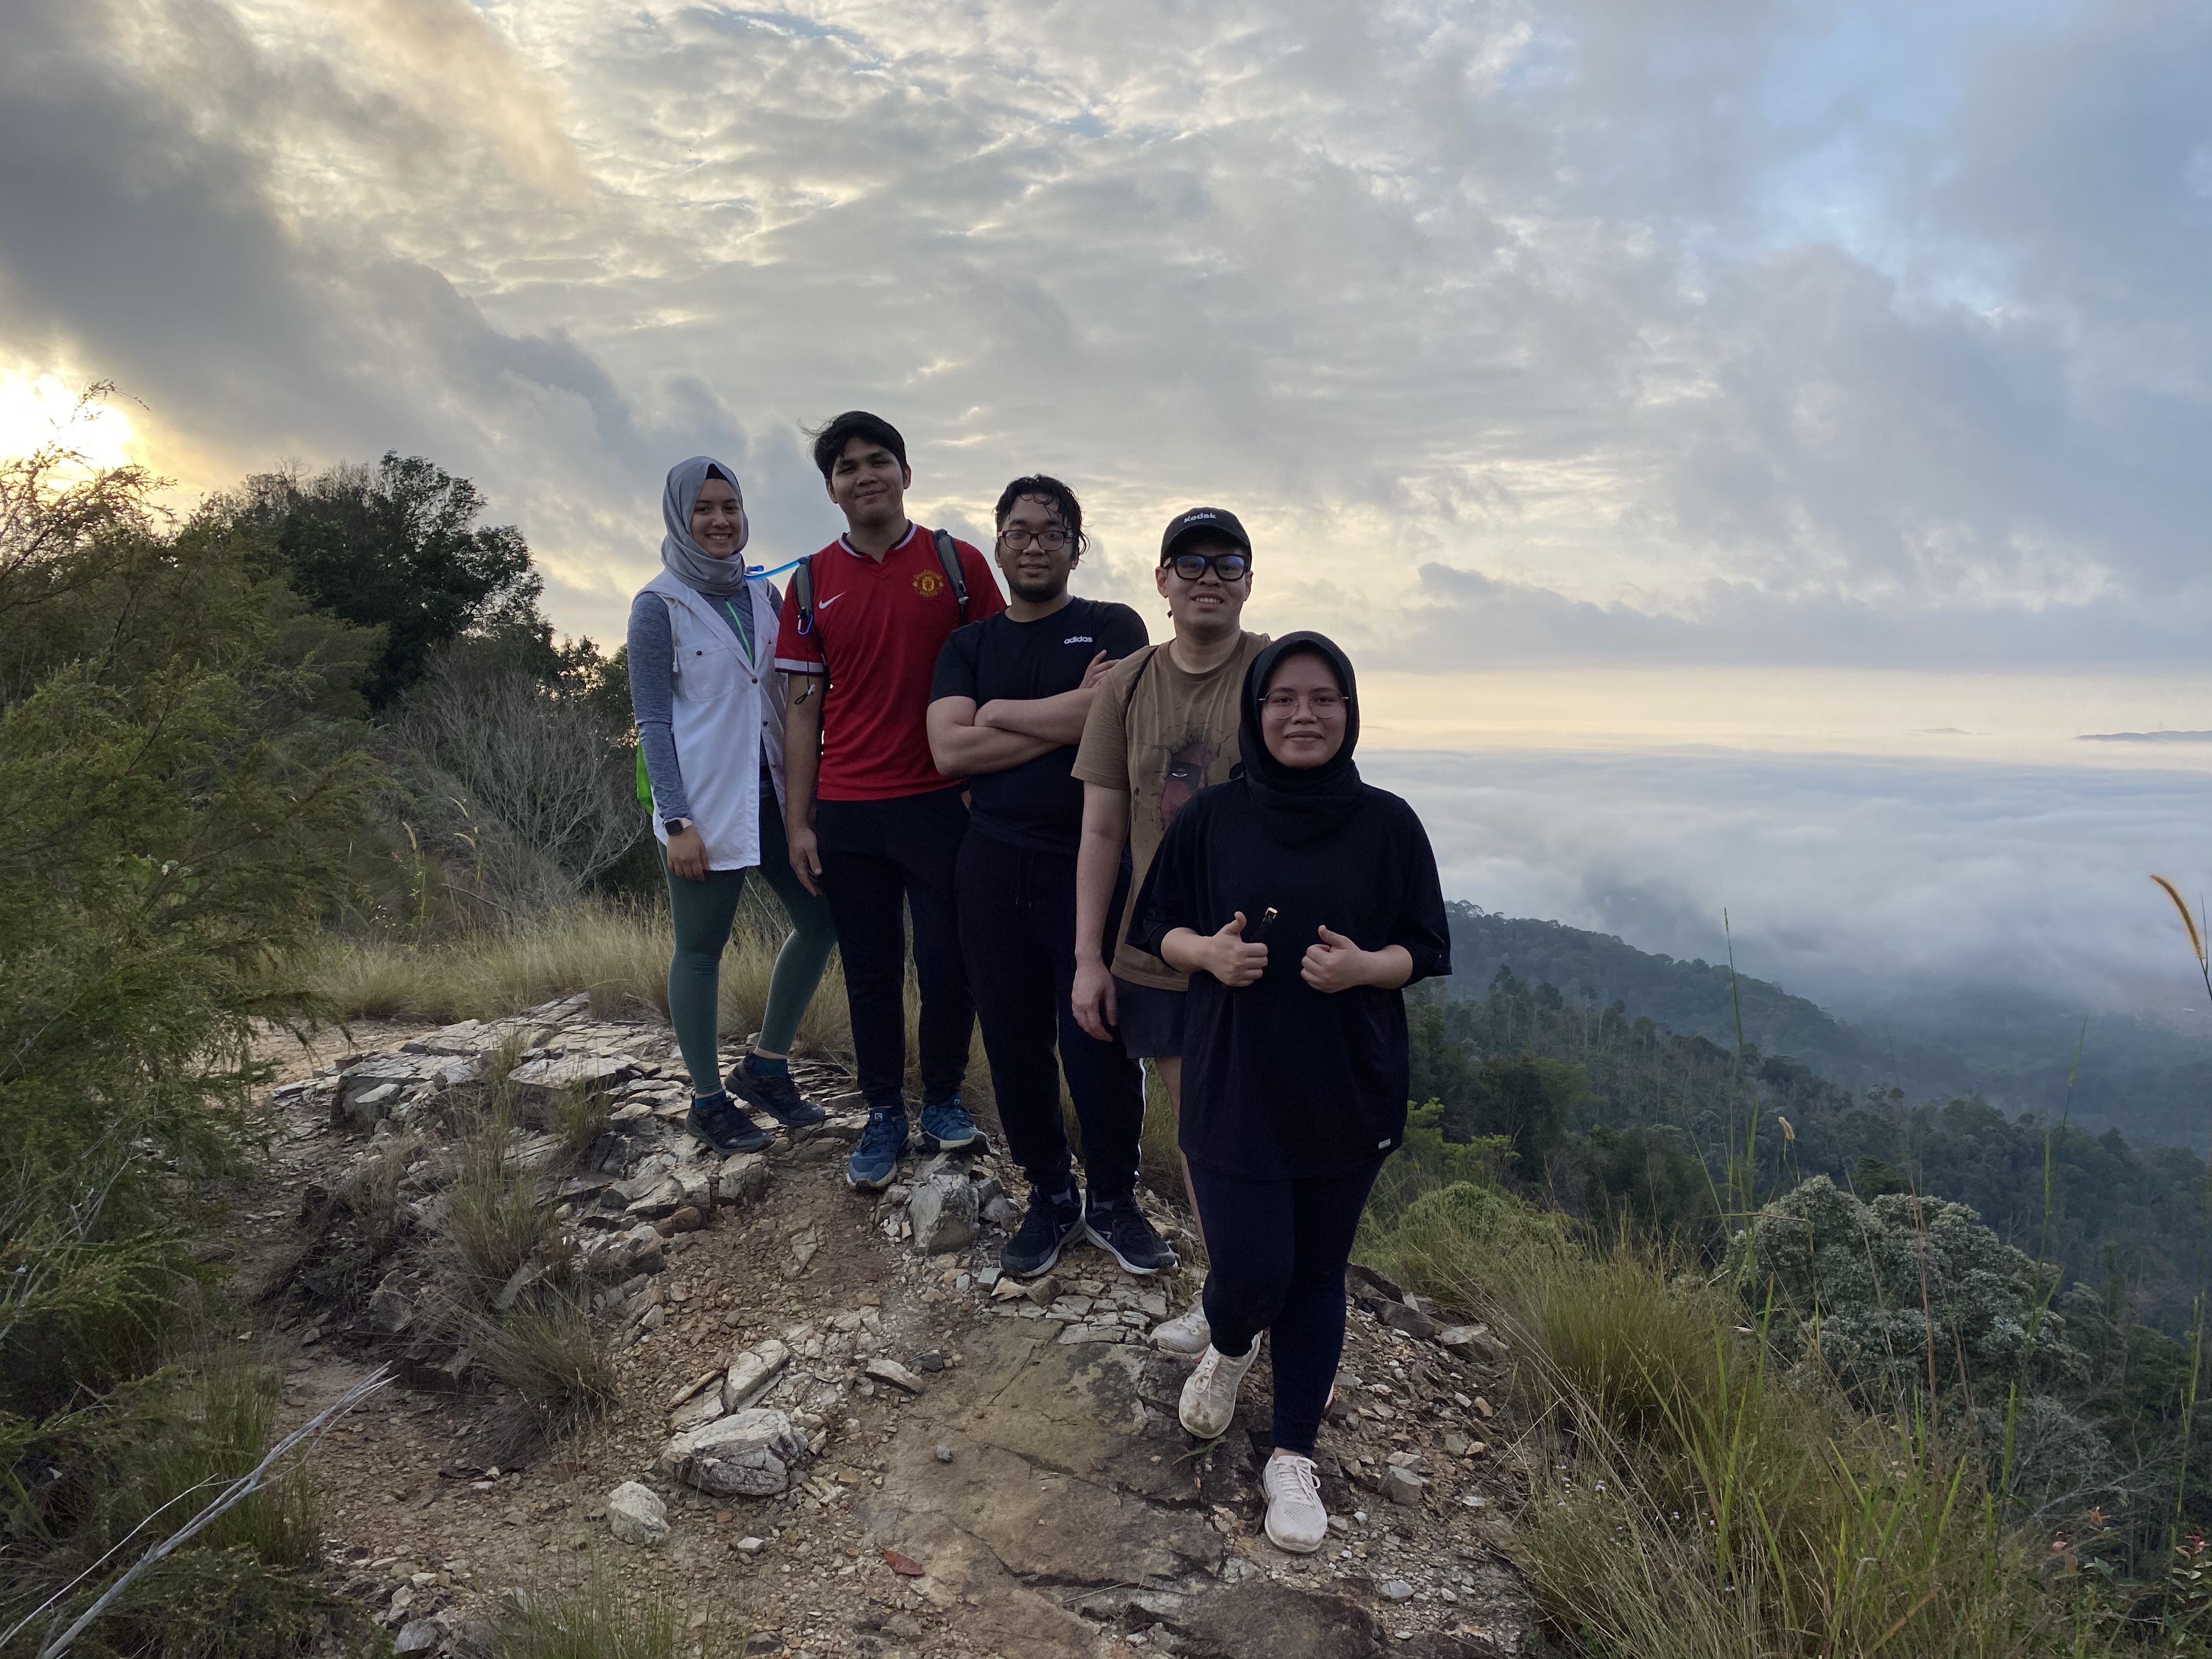
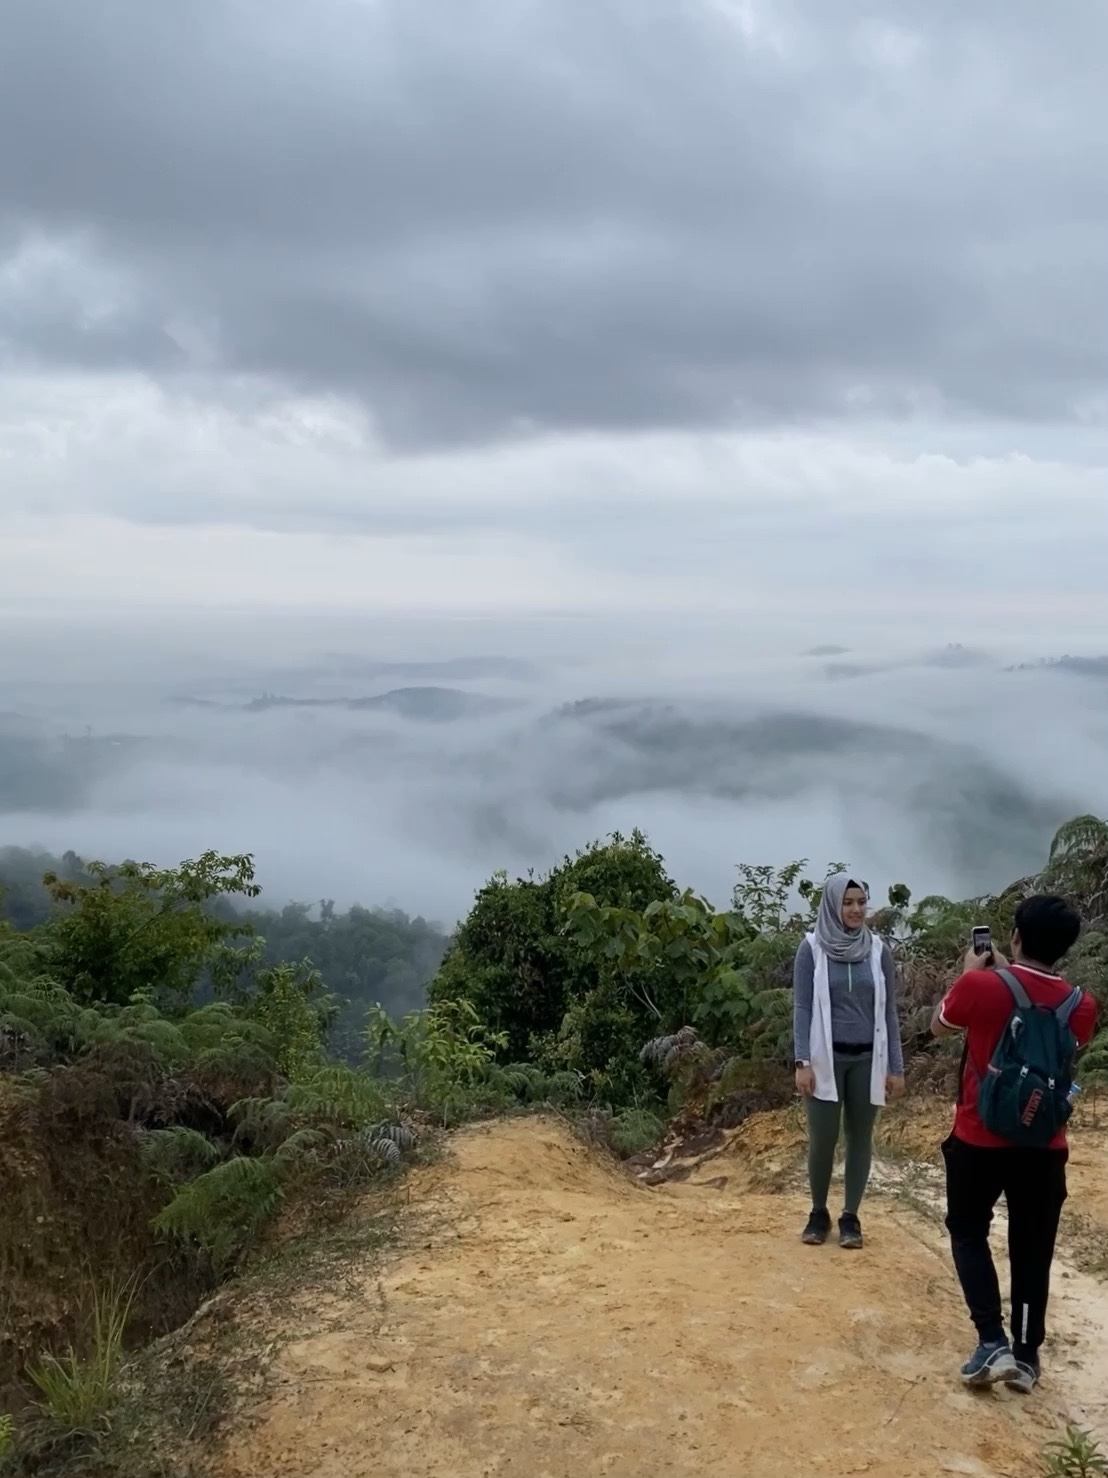
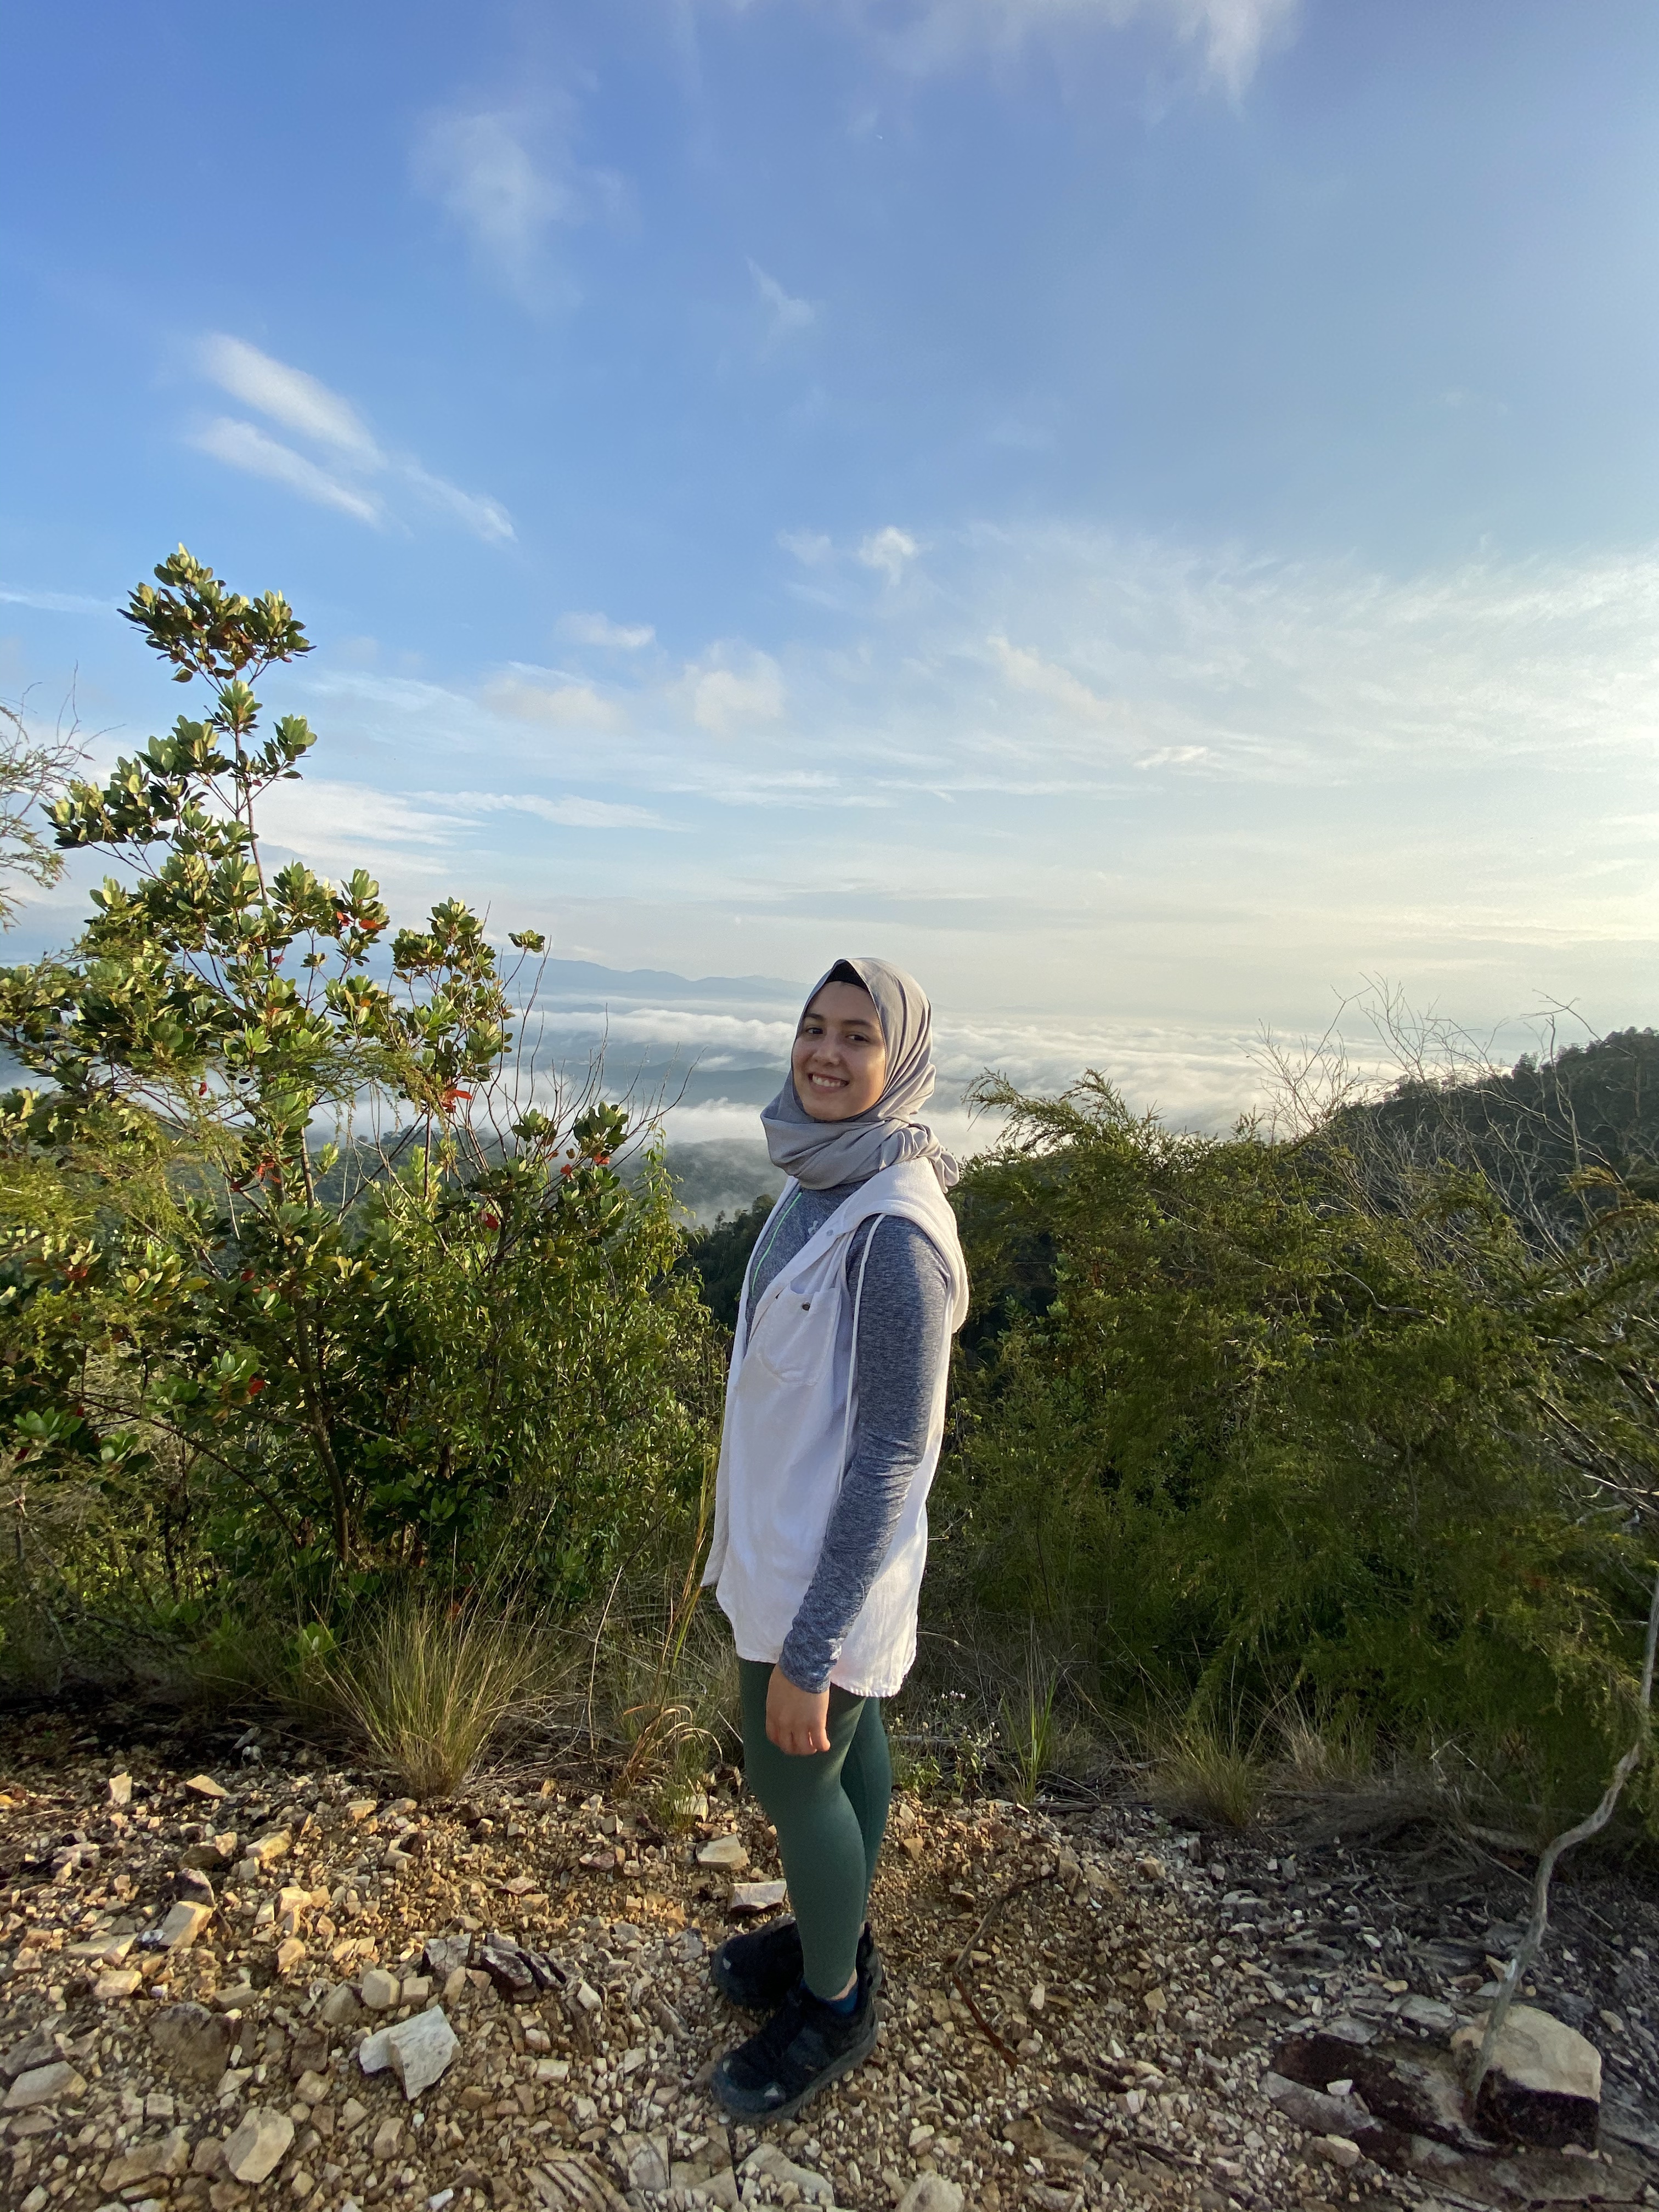
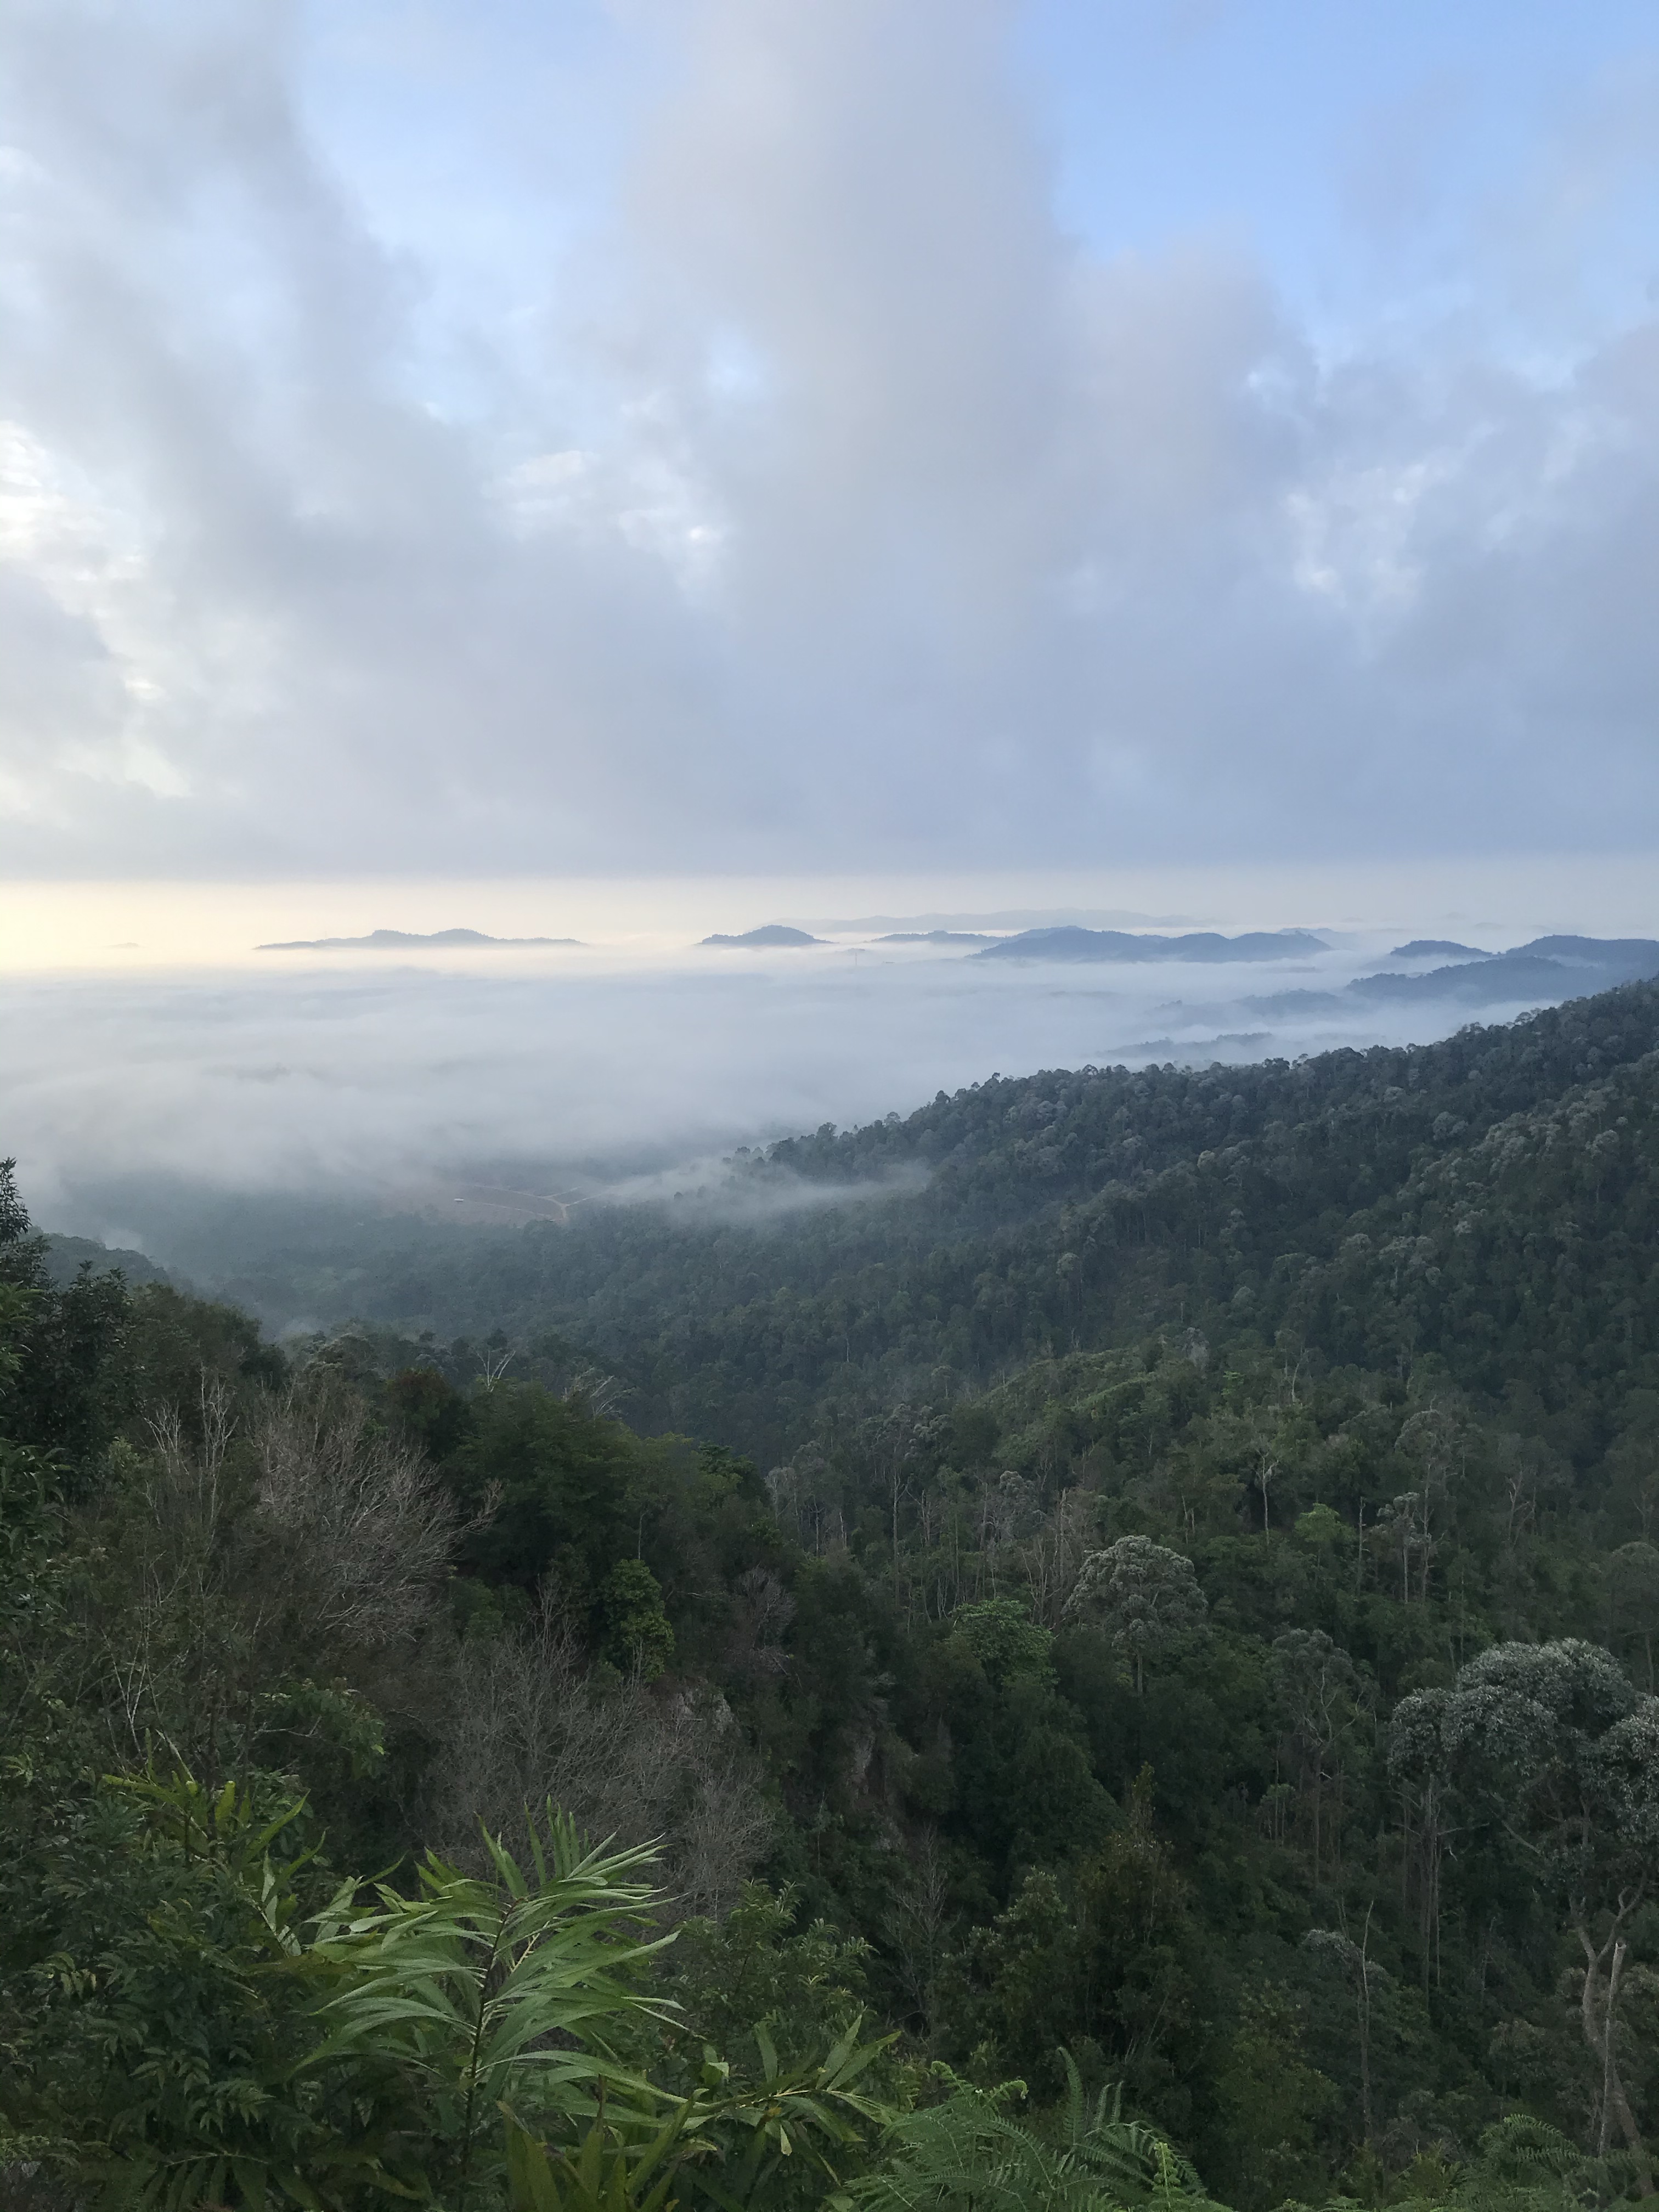
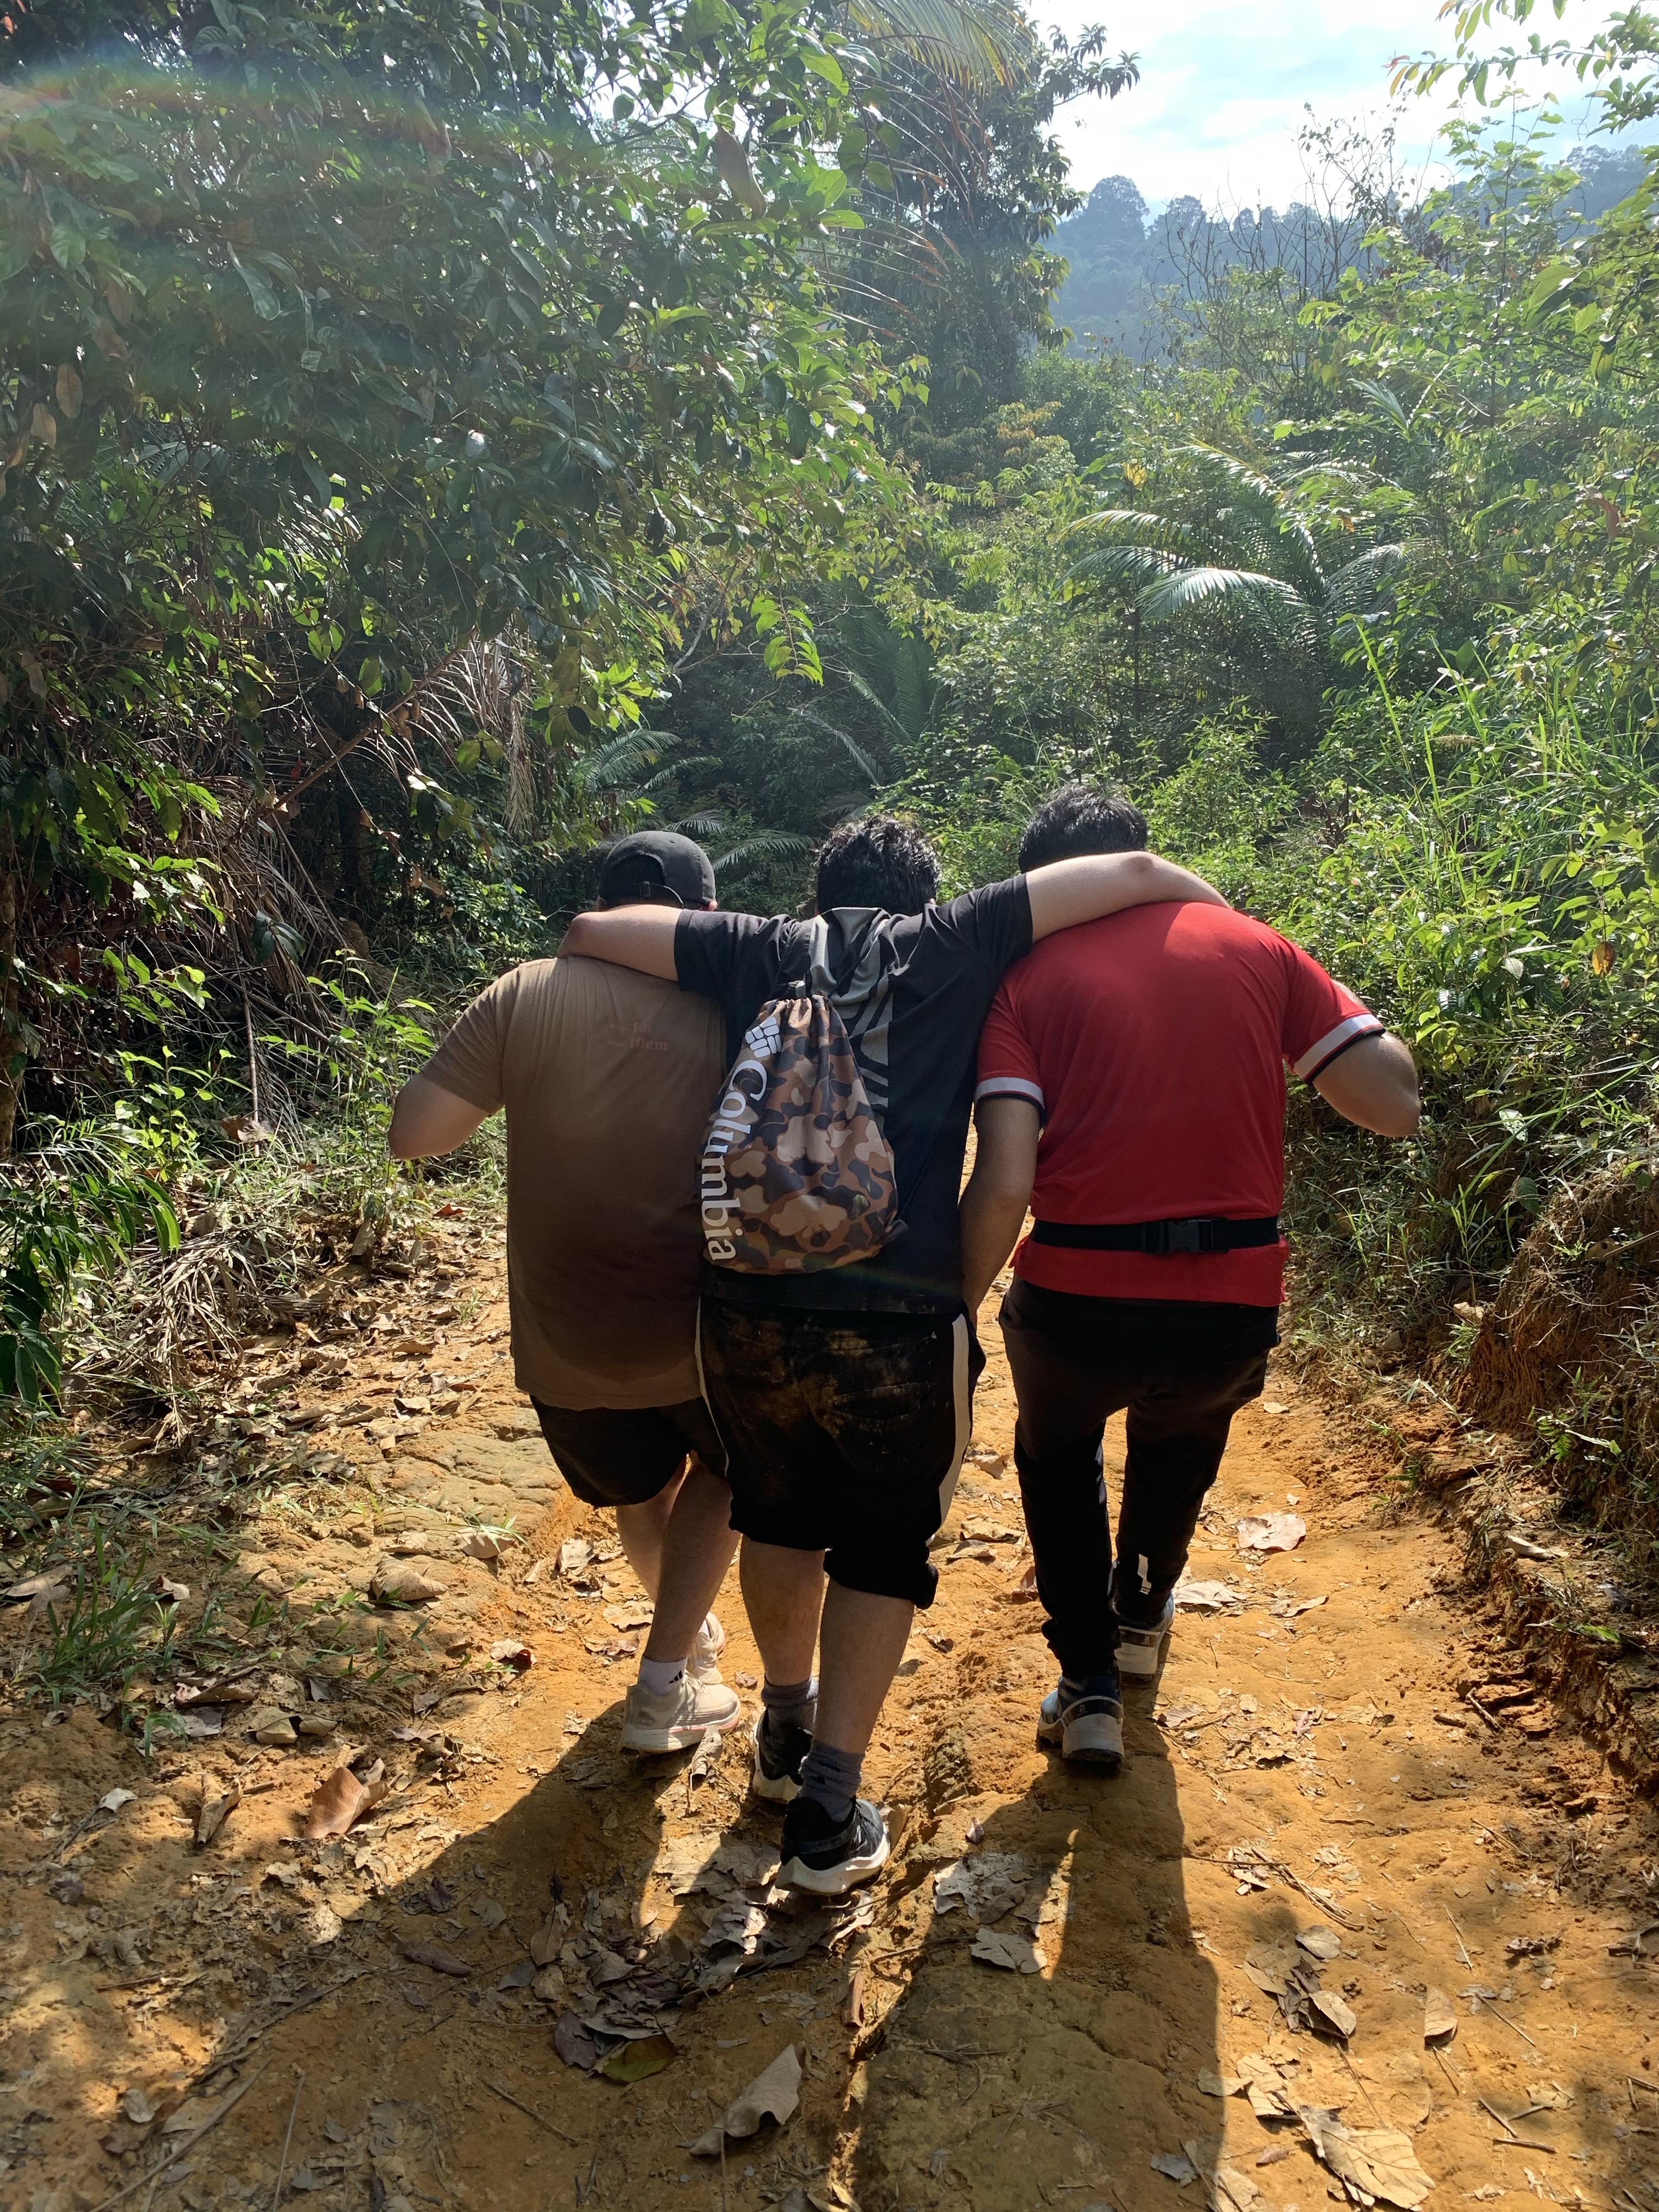
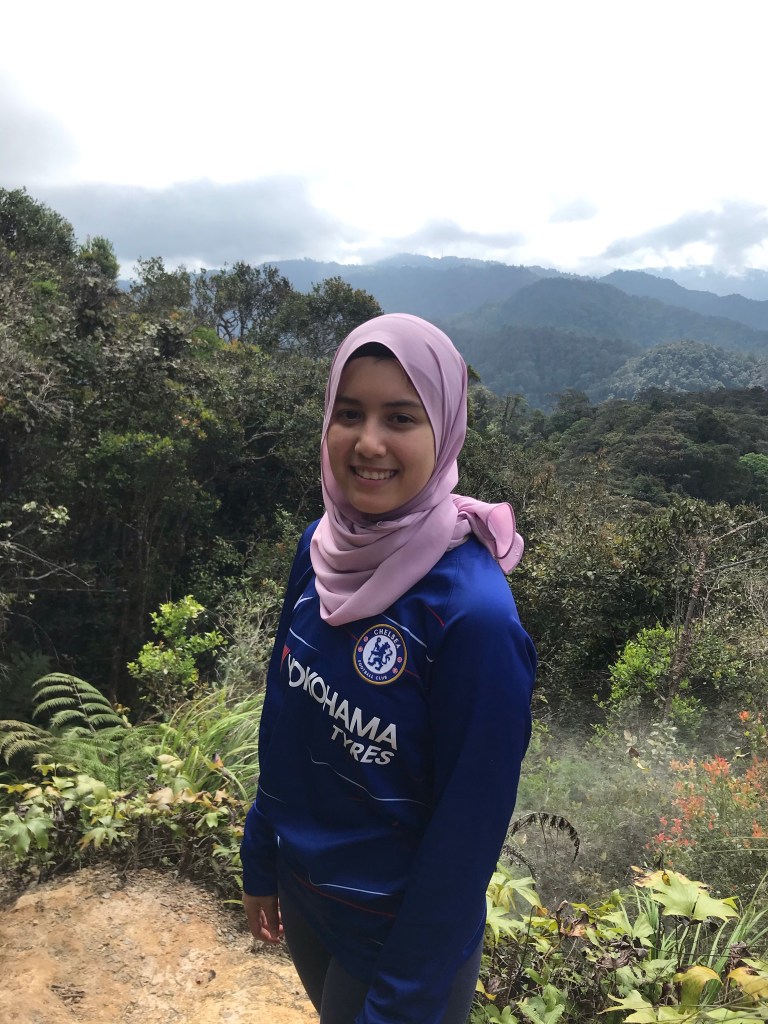
Last Sunday, both of us, joined by our college friends have decided to hike Bukit Senaling of Kuala Pilah, popularly known for her panoramic views above the clouds.
The hike up is a lot less challenging than her neighboring counterparts, namely Gn. Angsi and Datok. The route is less steep and of average distance. However, Senaling offers you a trail through different landscapes and plantations, and personally for us, the best way to learn your topography.
Info:
Location: Pekan Senaling, Kuala Pilah
Trailhead coordinate: 2.690491N, 102.264534E
Summit elevation: 394 meters (1, 293 ft)
Elevation gain: 341 m
Distance: 3km one way
Duration: 45 mins — 1hr one way
Permit fee: RM15 per head
Parking: Provided
Road condition to trailhead: Tar road, thru a residential area. You will park at a designated parking area prepared by the locals, just a walk away from the trailhead.
Facilities: Surau is provided. Food and drinks available. Toilet is provided.
Trail route:
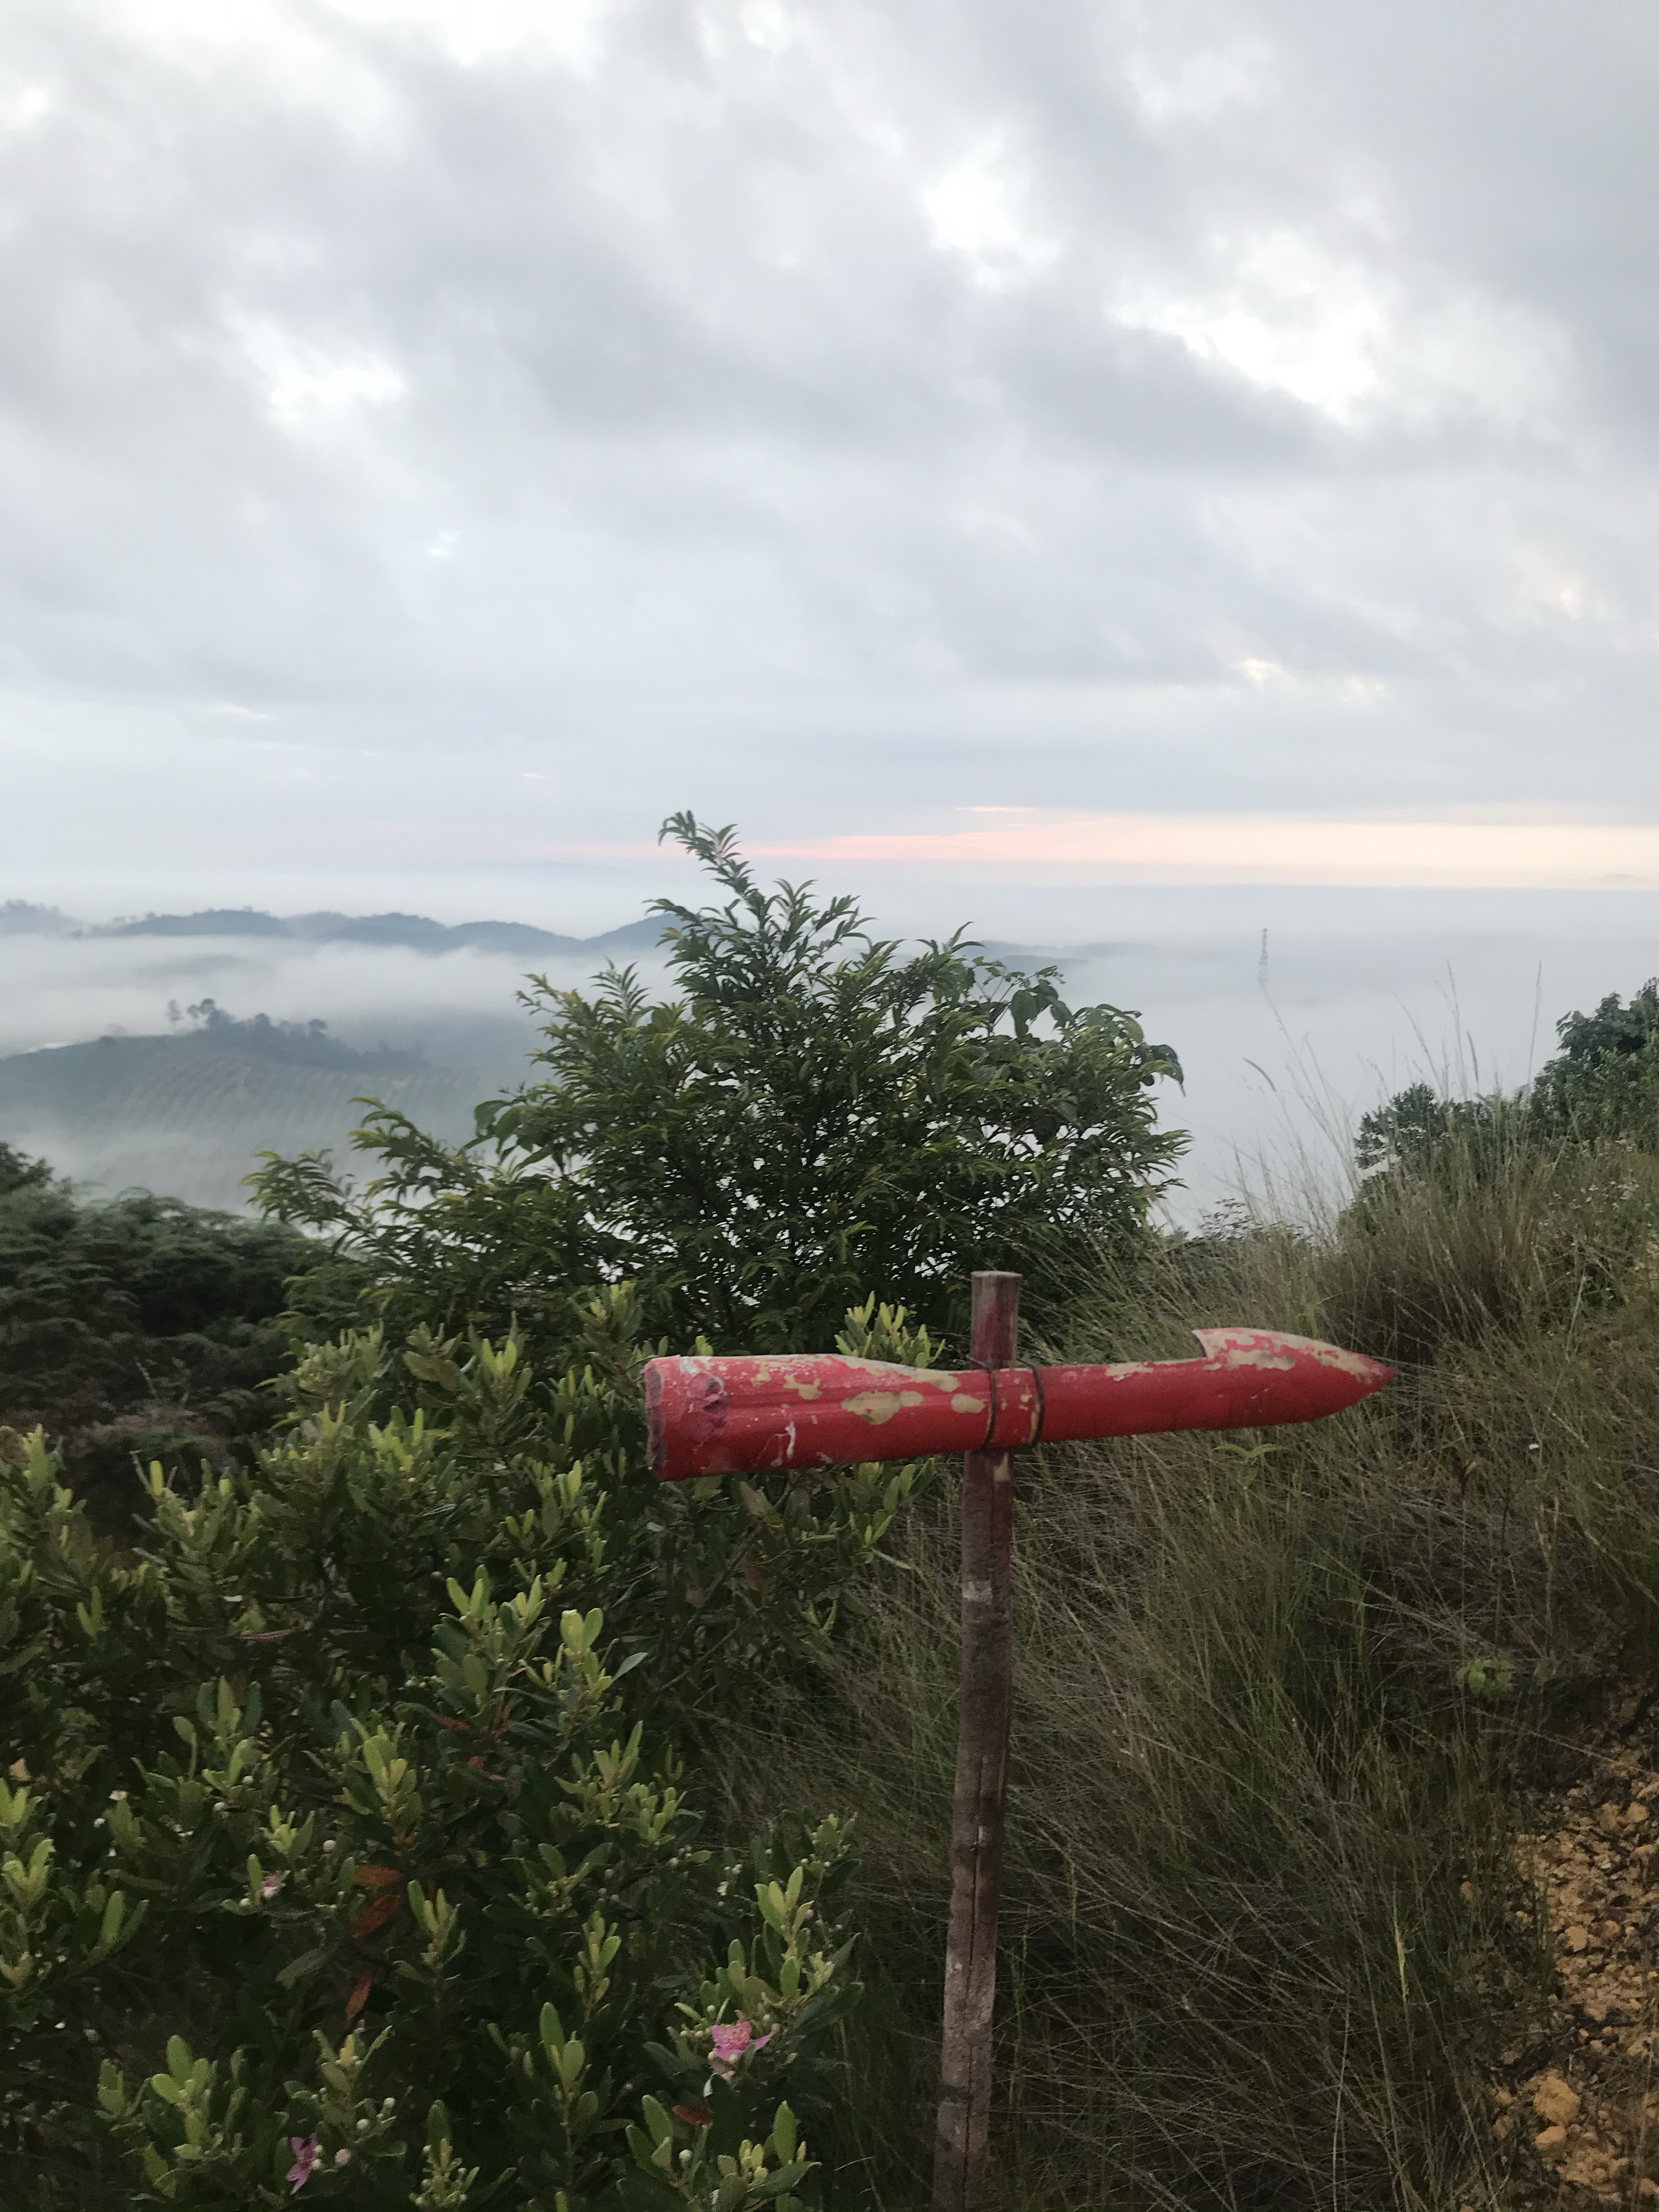
The trail is actually very easy to follow. You will see red arrows at every 0.5 km or so, and follow them exactly (even if you doubt them when its leading you downhill instead of uphill, just follow them).
Start of the trail —> walk uphill till you see a pondok (hut) —> rubber plantation —> follow the arrow that leads downhill —> palm tree plantation —> cross a mini creek (anak sungai) —> trek uphill which you may now observe the clouds engulfing the panorama —> steeper trail, going thru an open forest —> wooden staircase —> flat trail (400m) to the panoramic point.
If you’re looking for a decent hike to enjoy the greenery, not so the scenery, and to somewhat test your endurance but not so challenging — then this is the perfect hike.
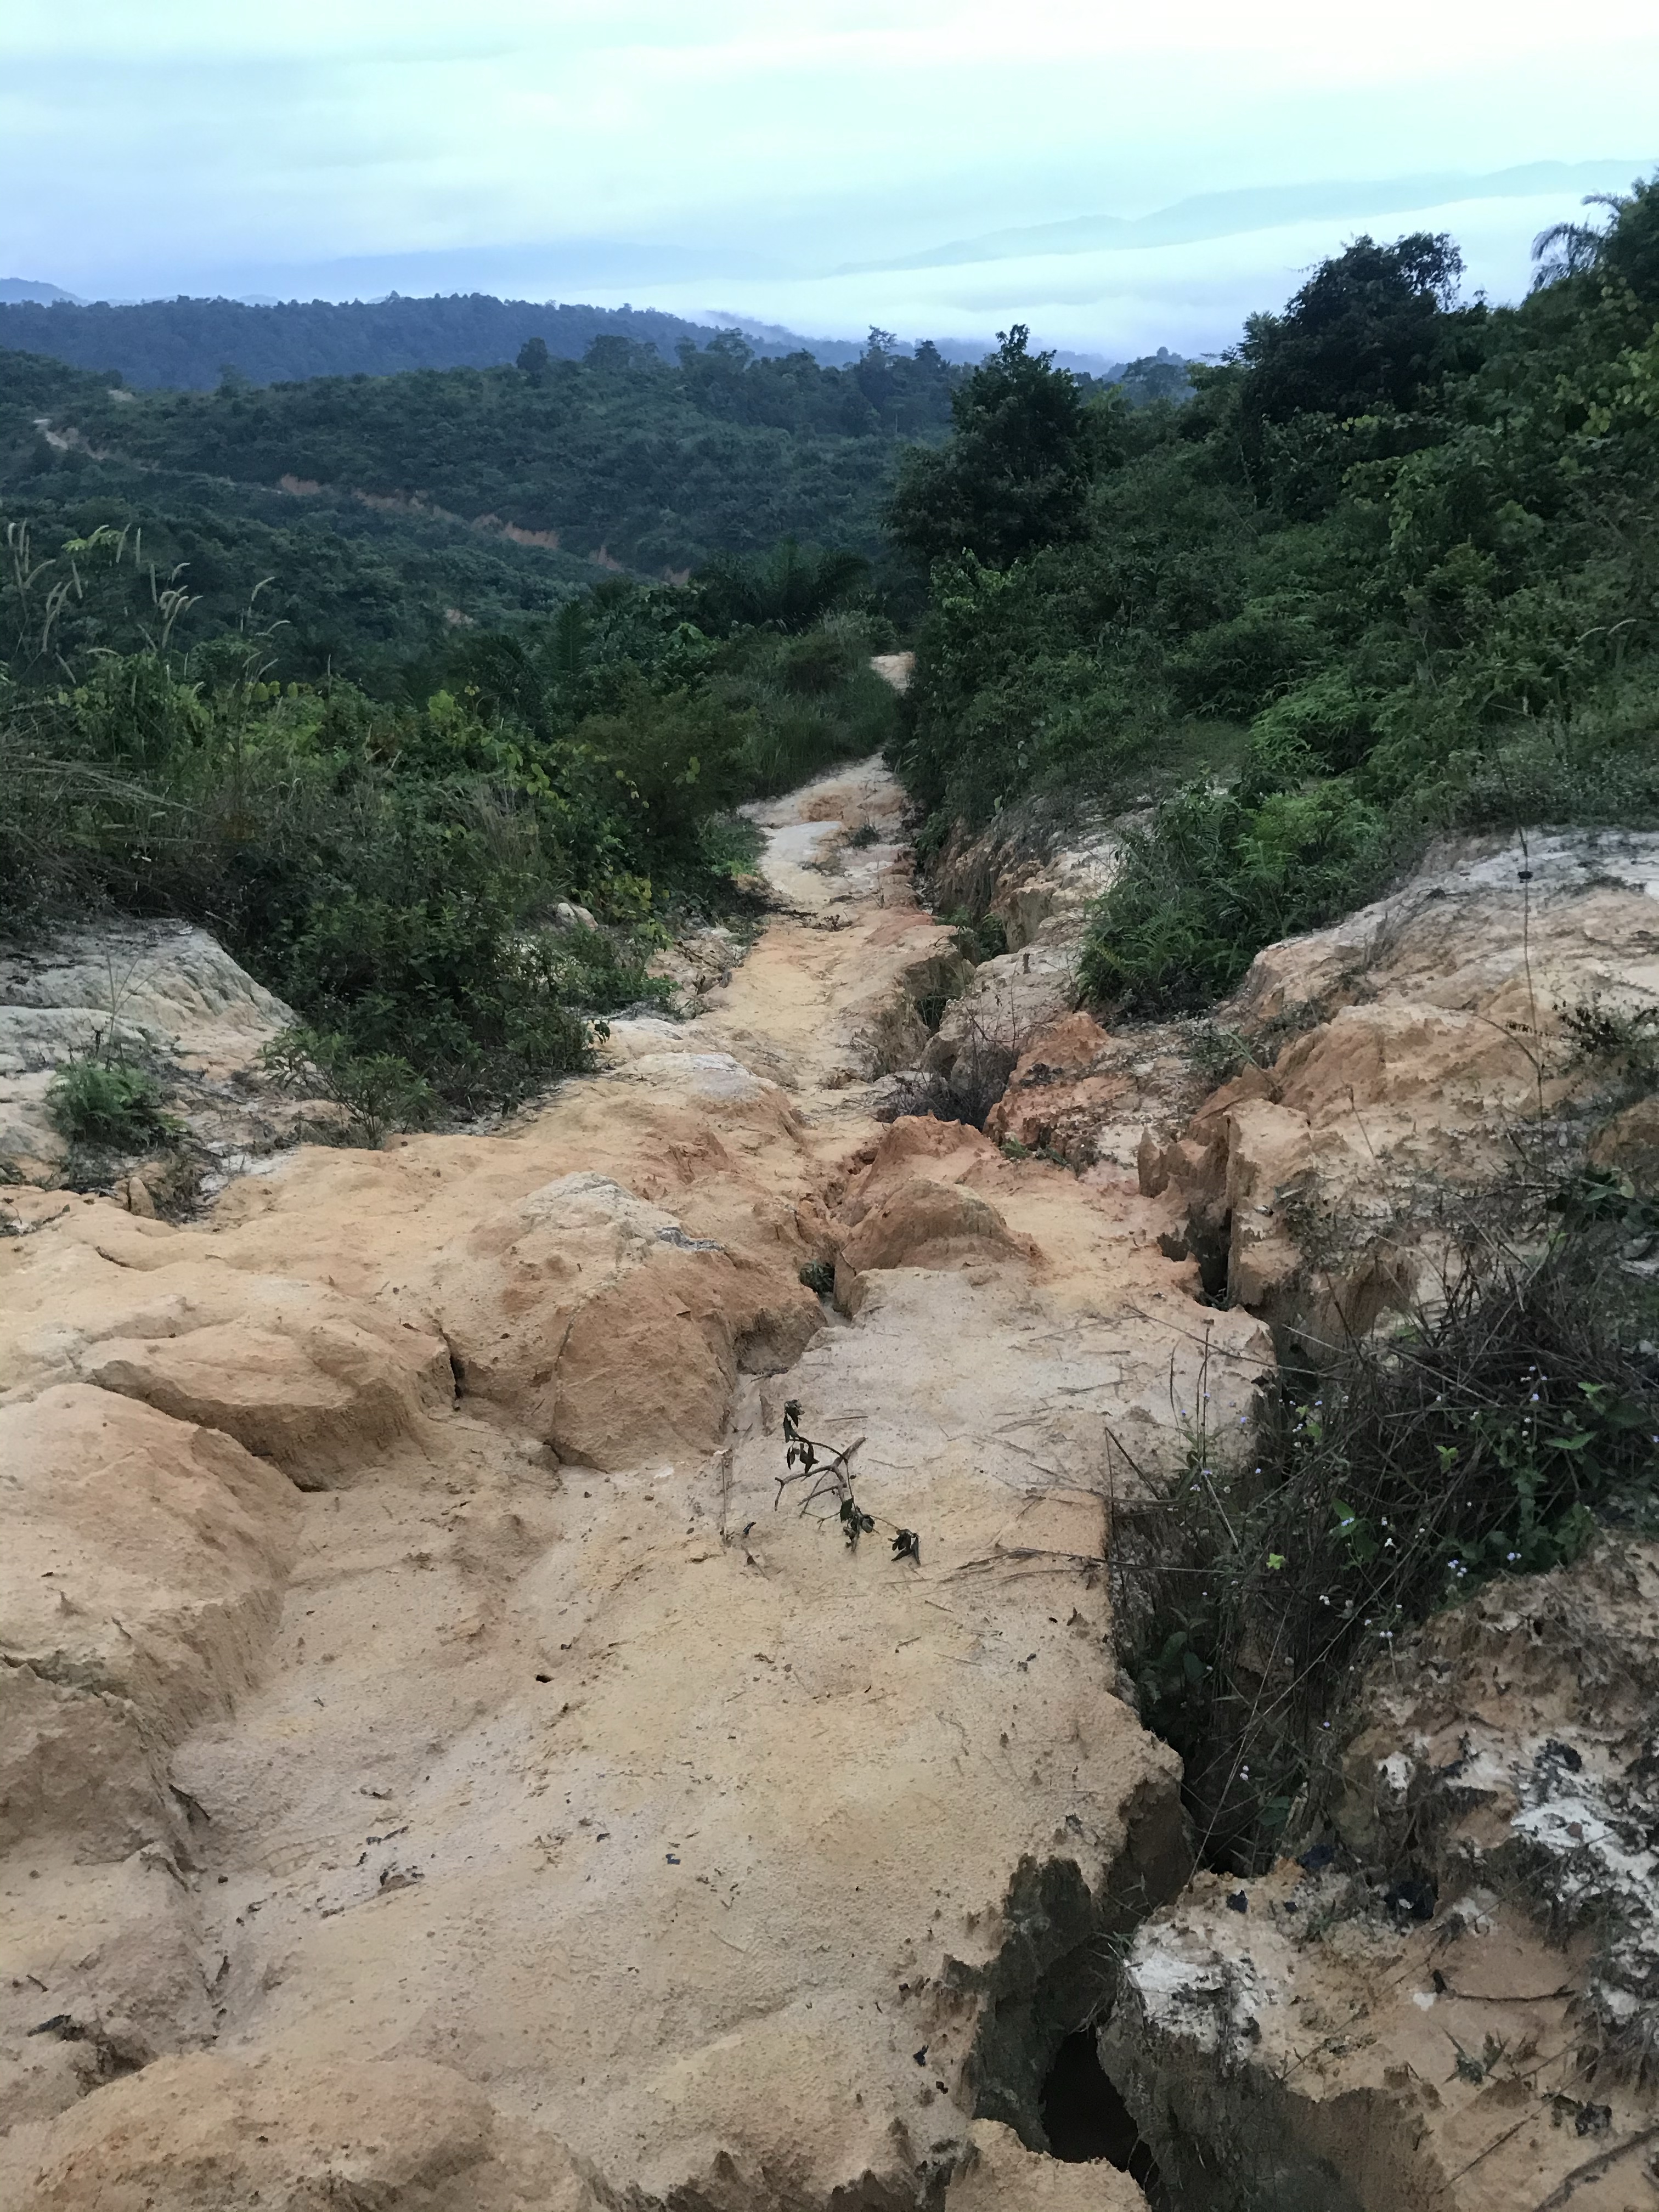
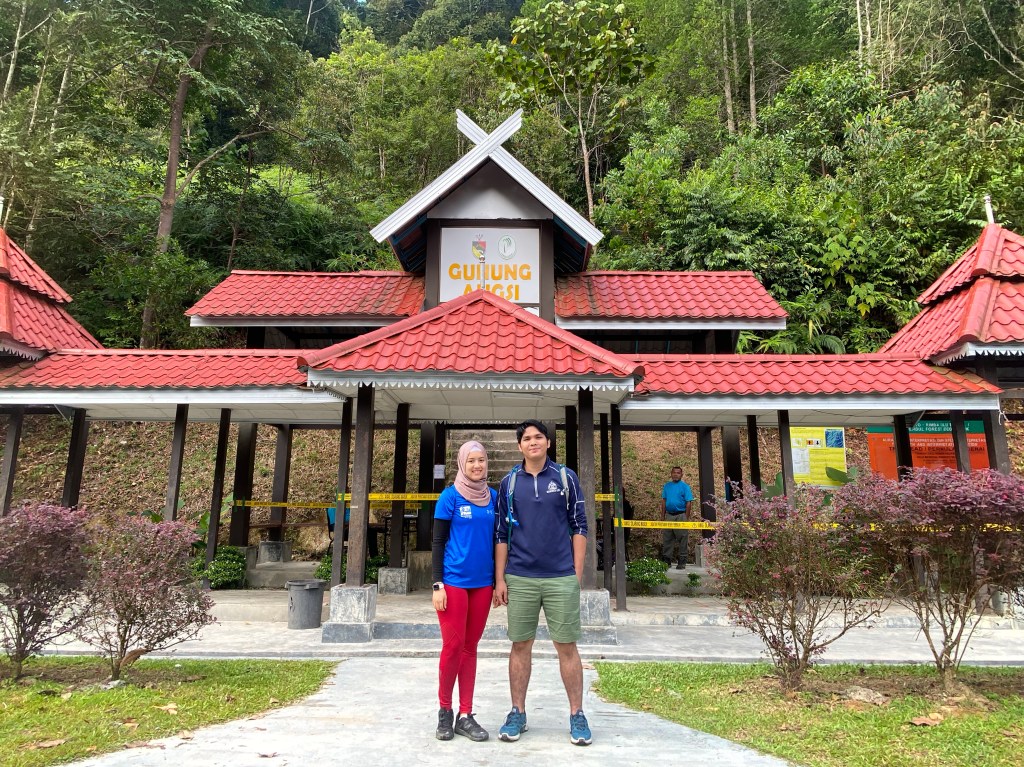
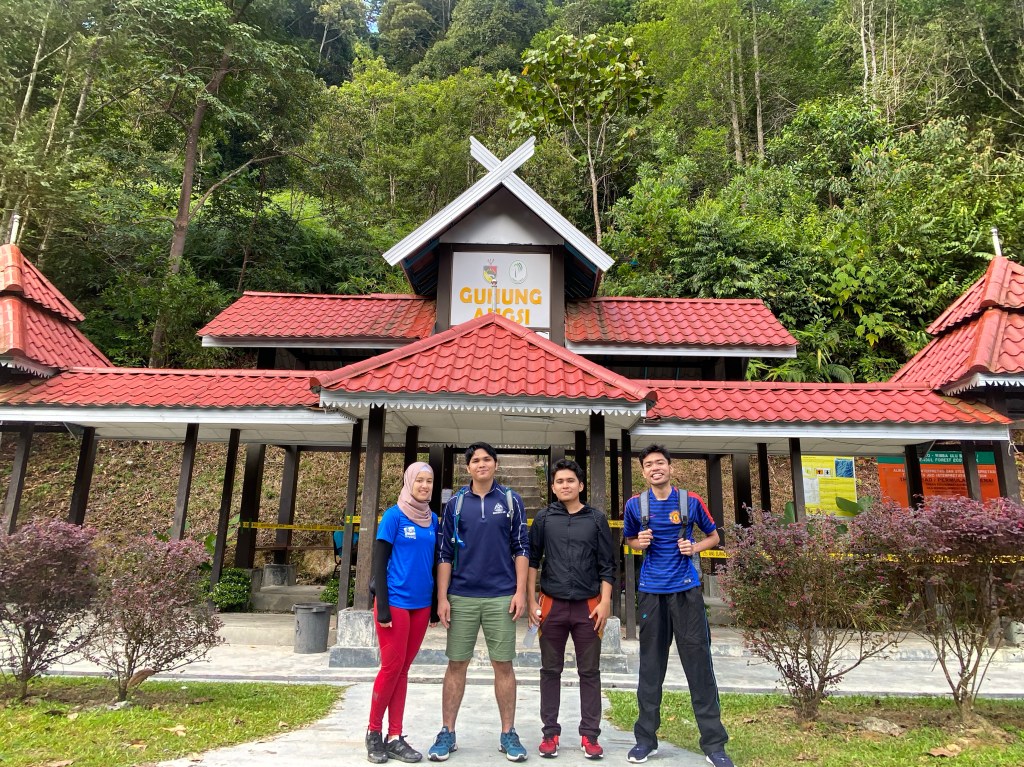
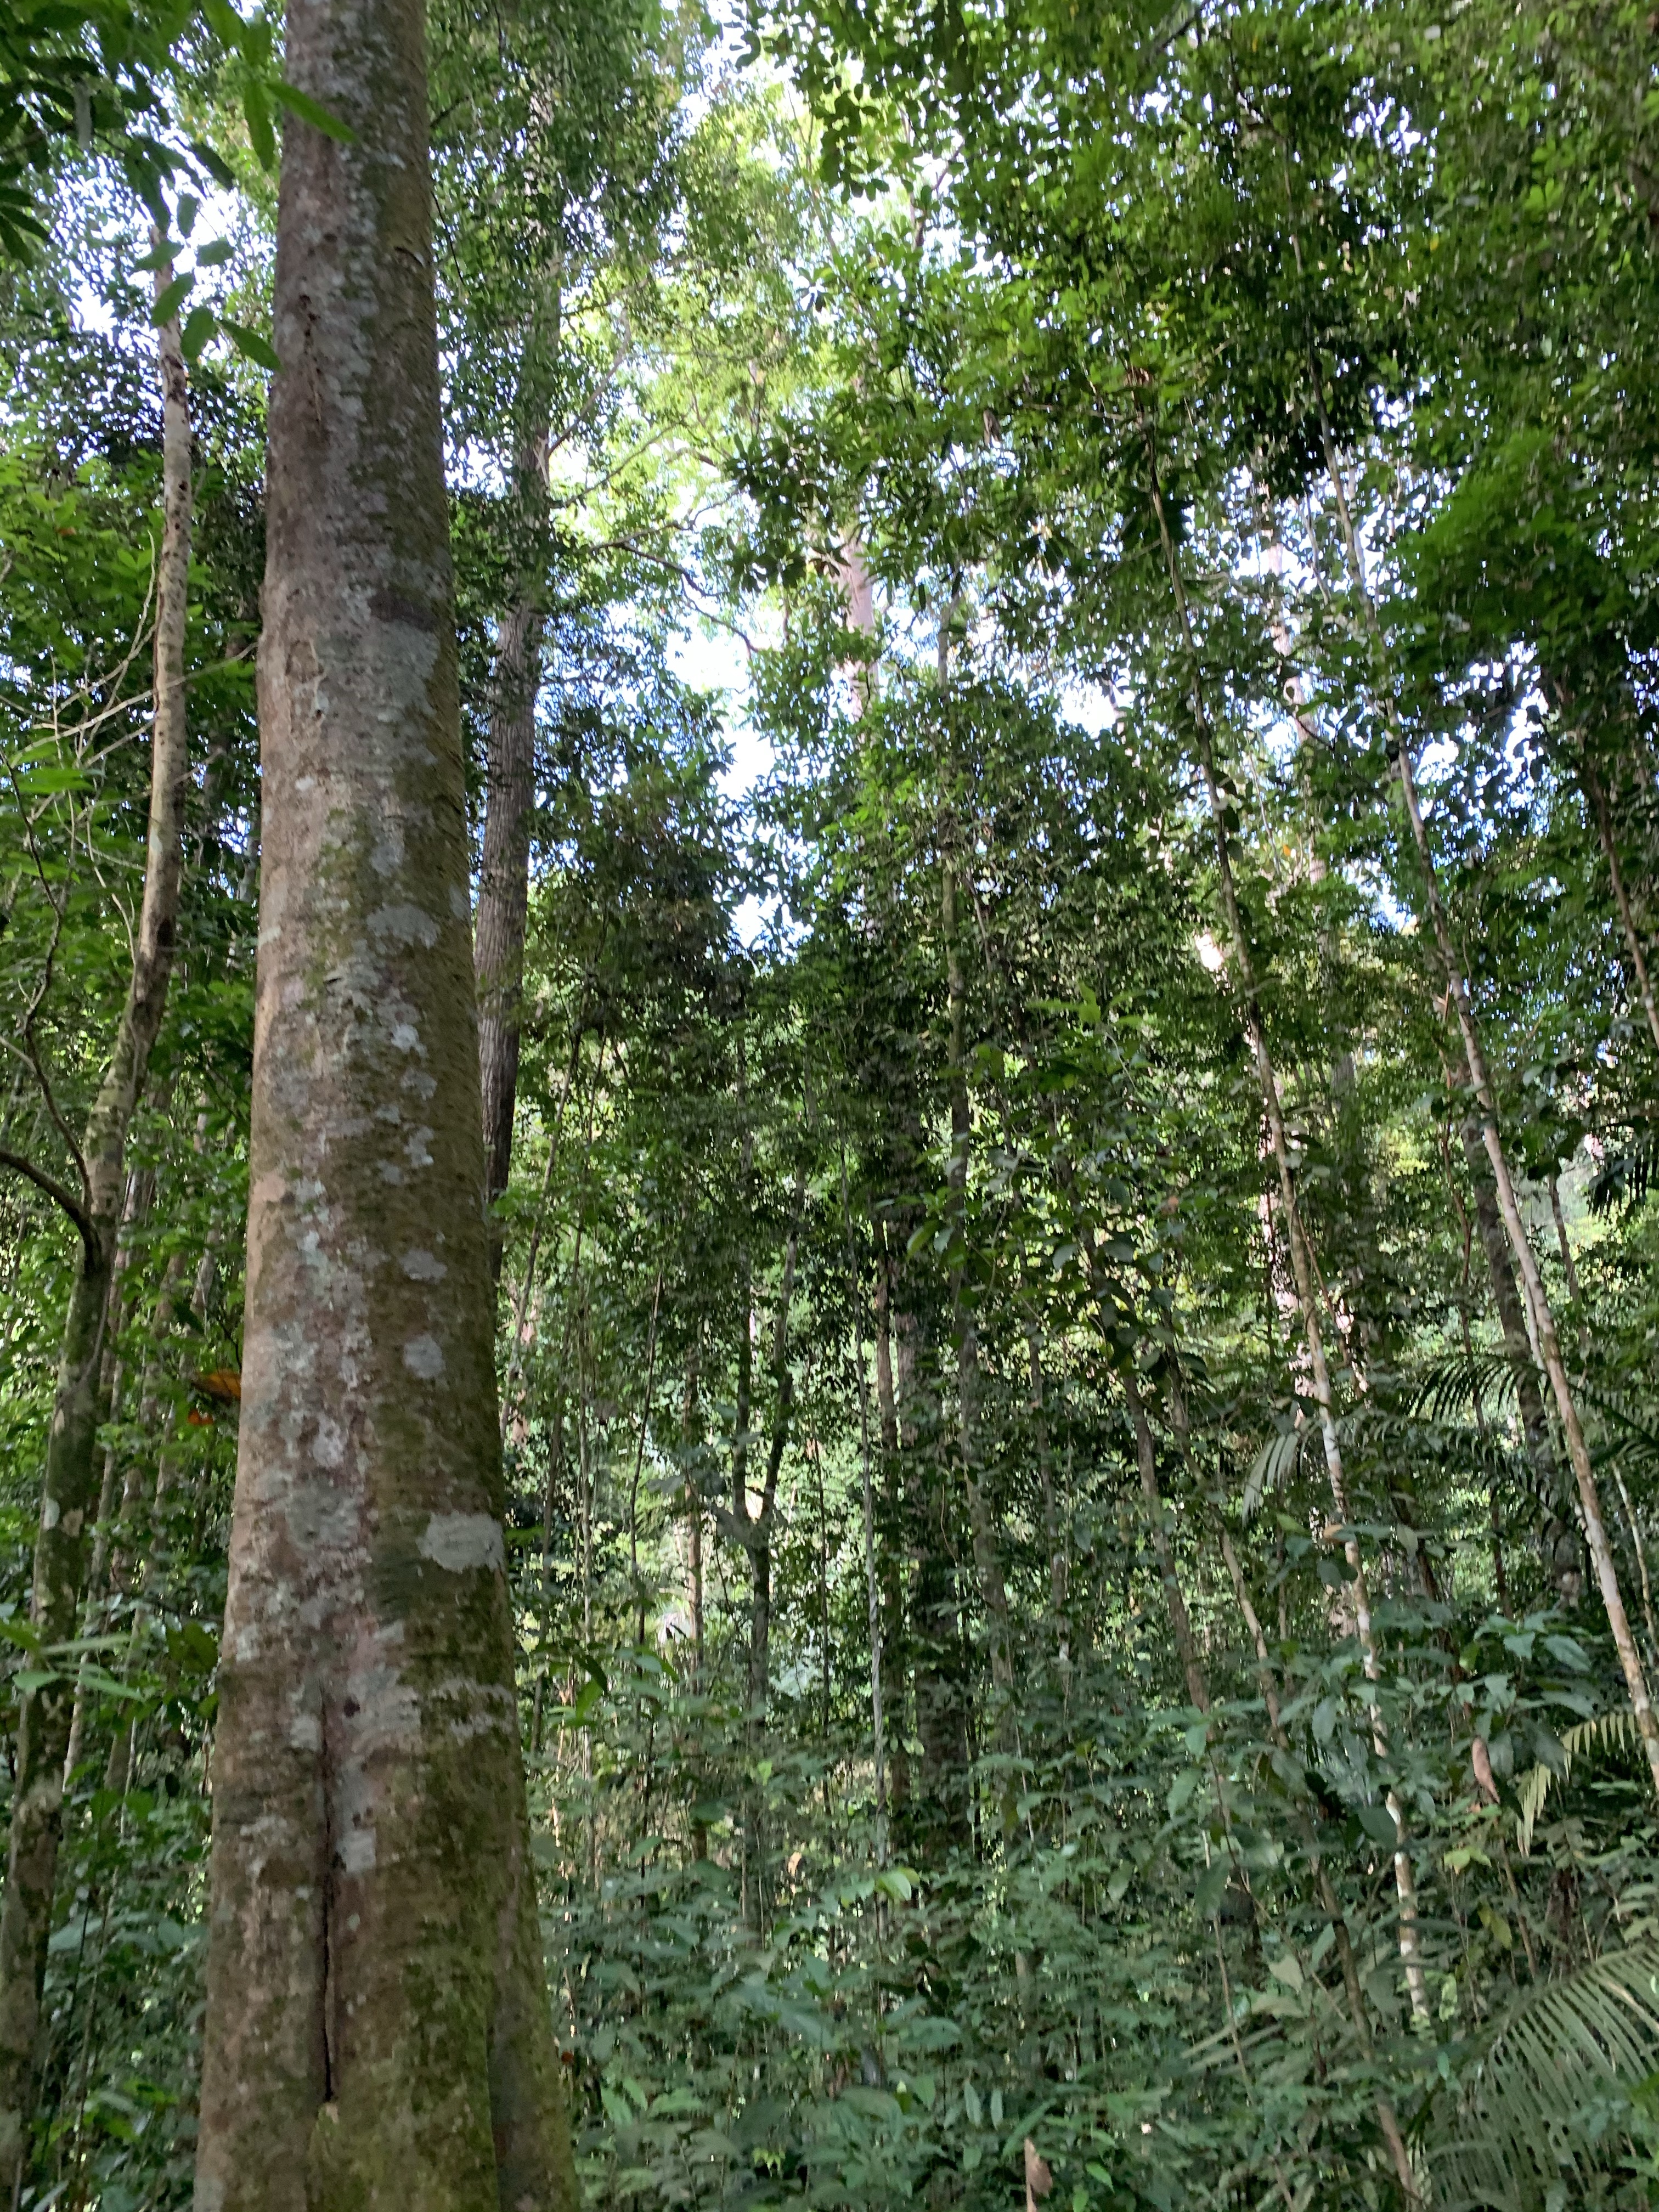
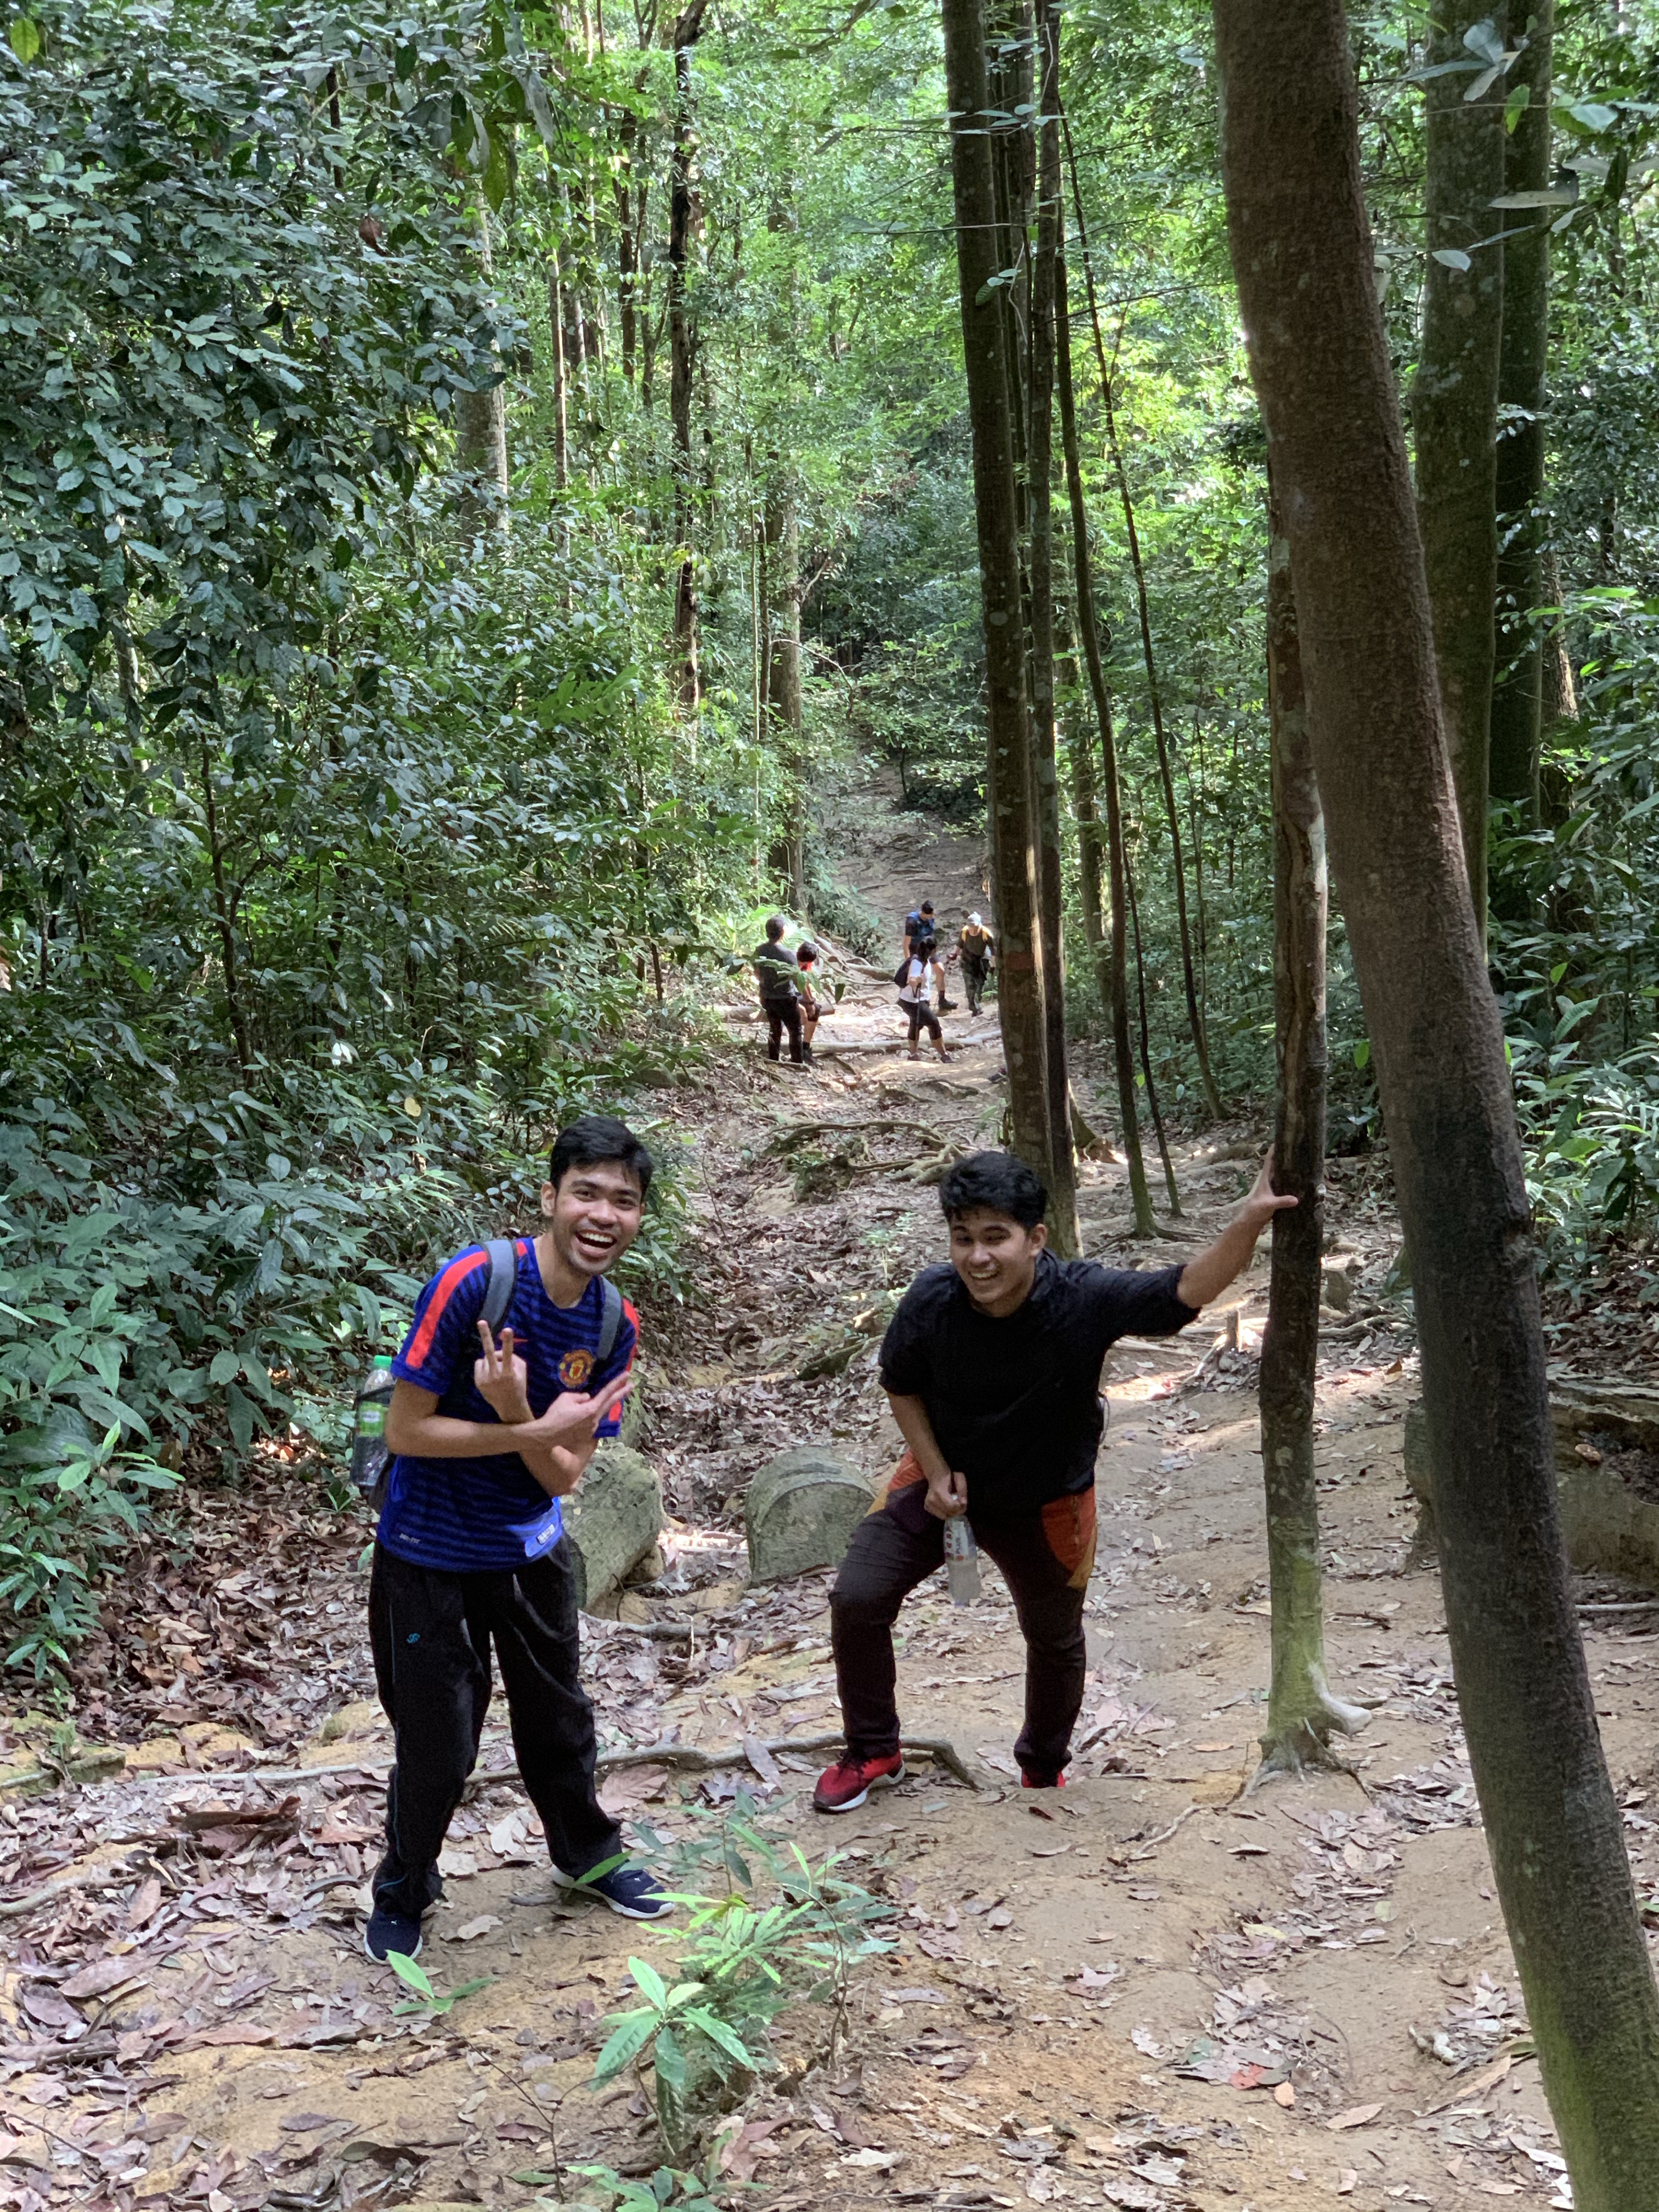
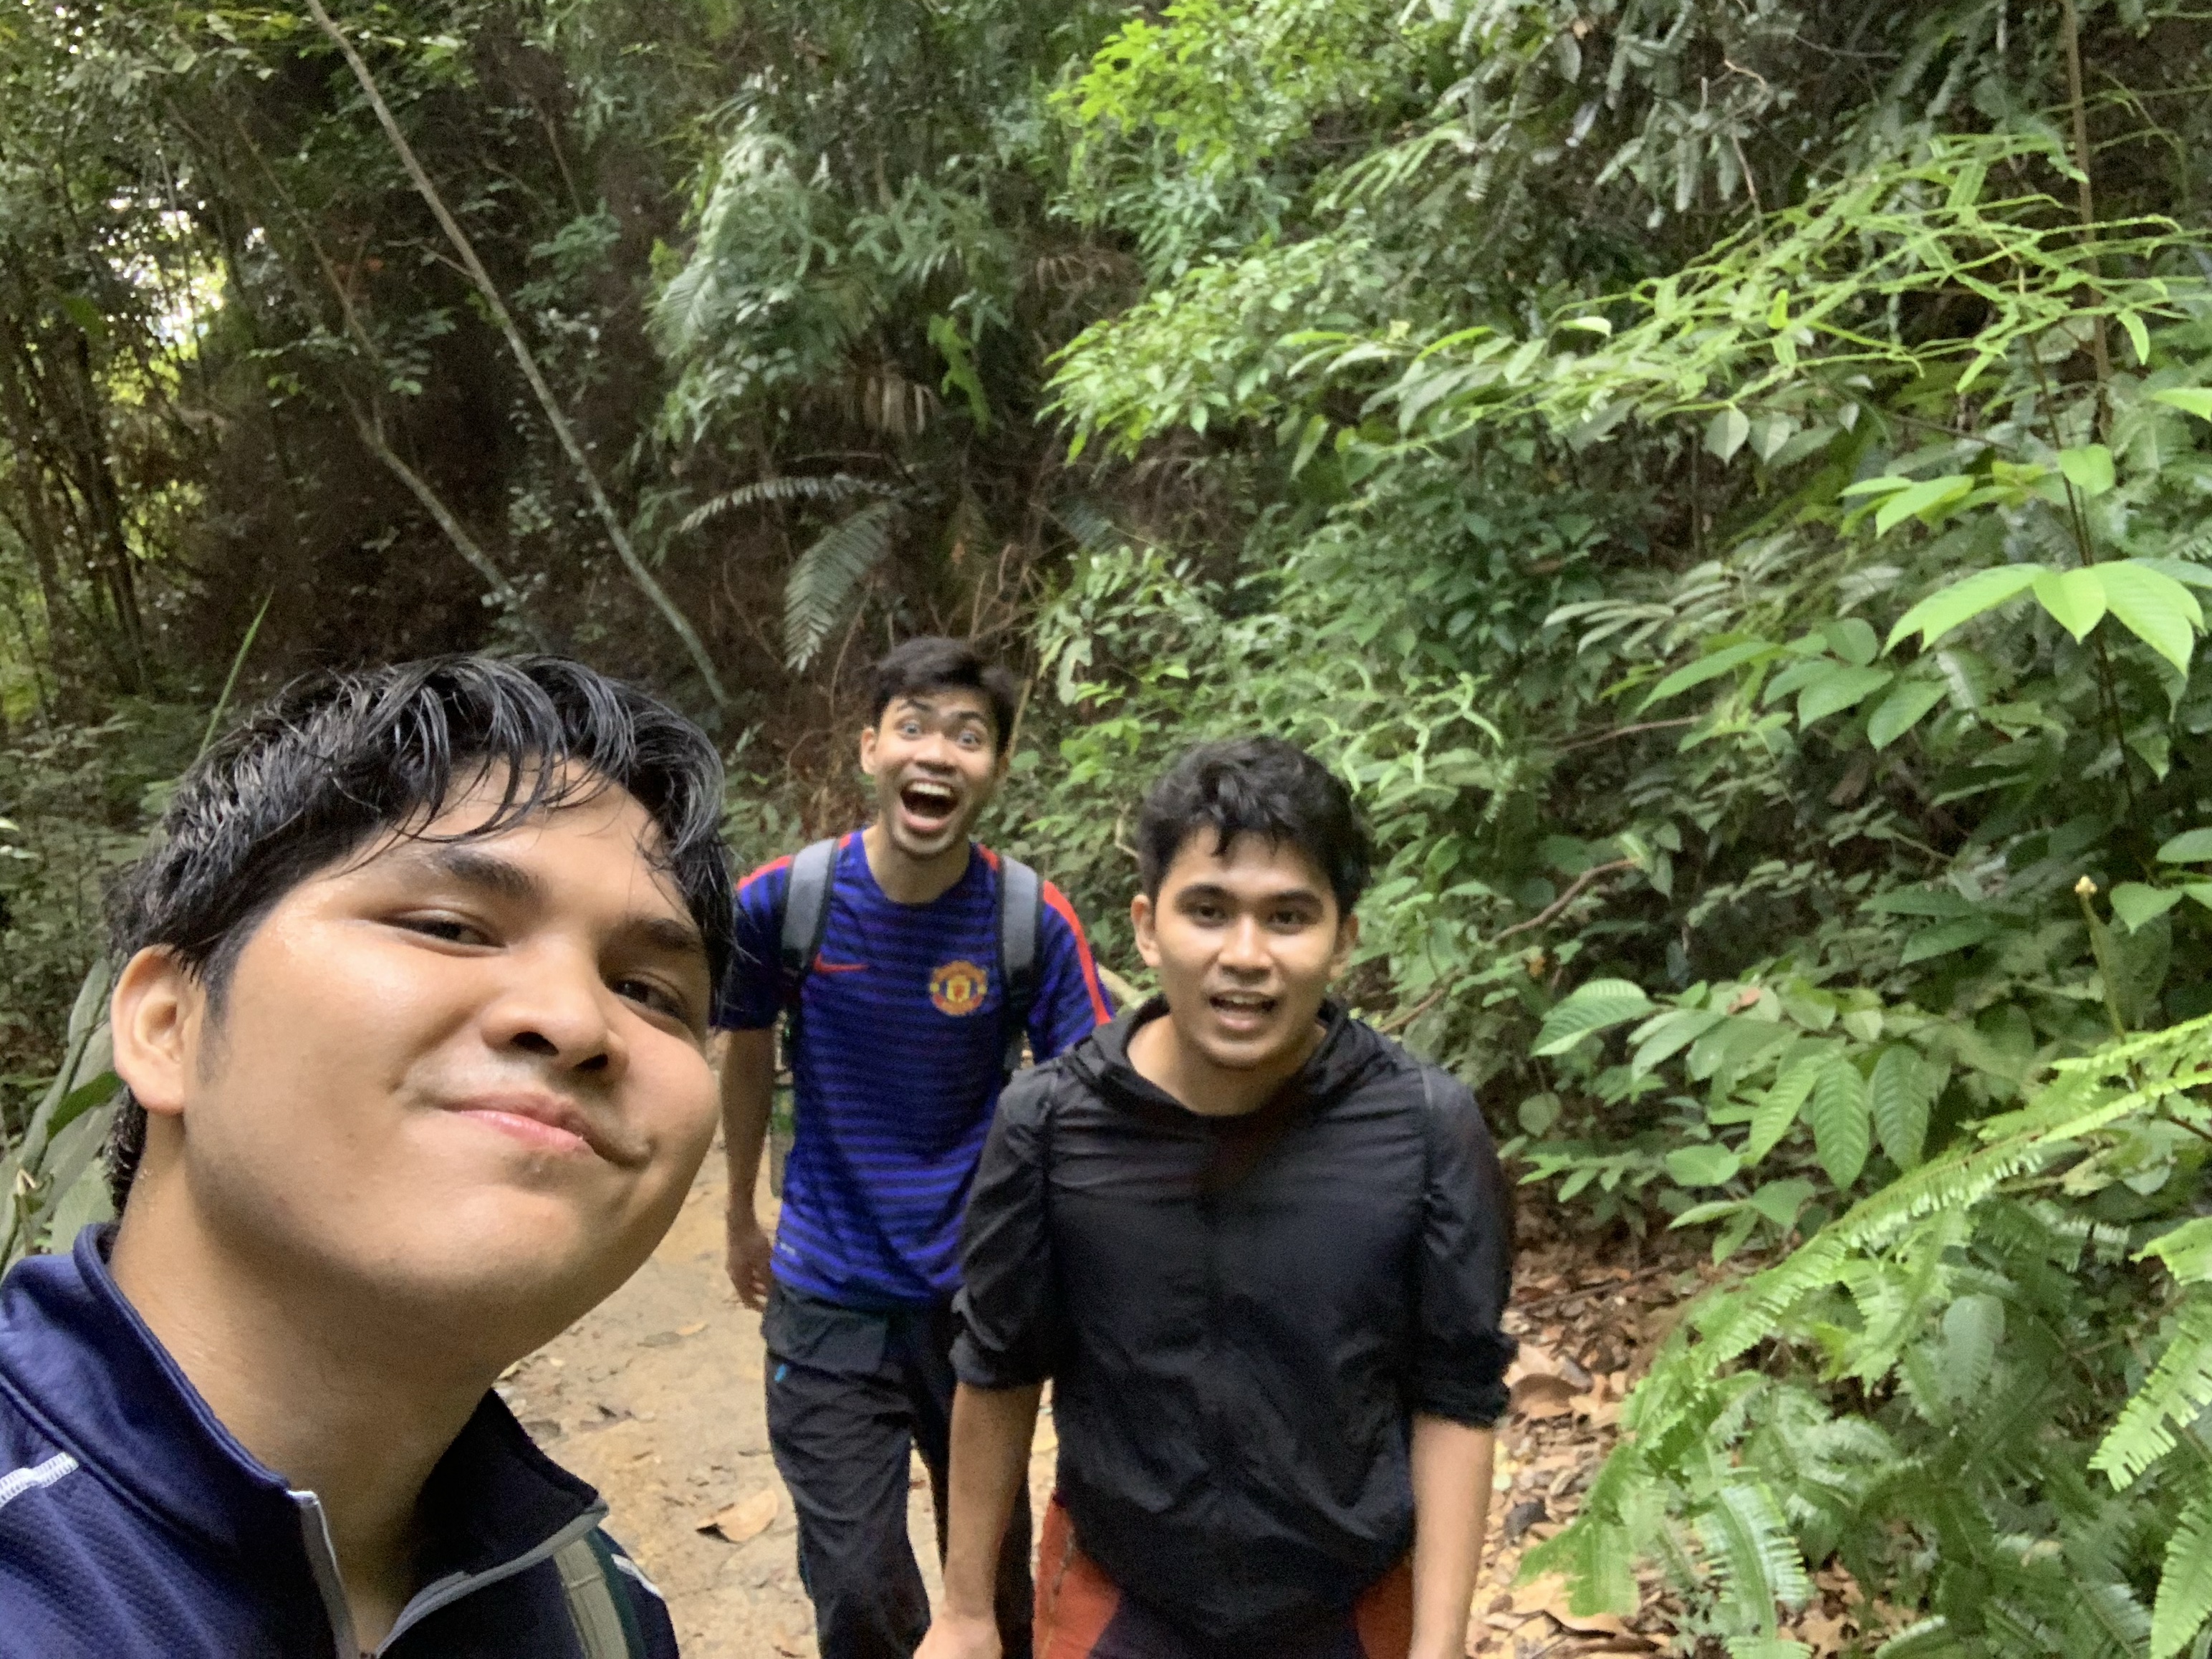
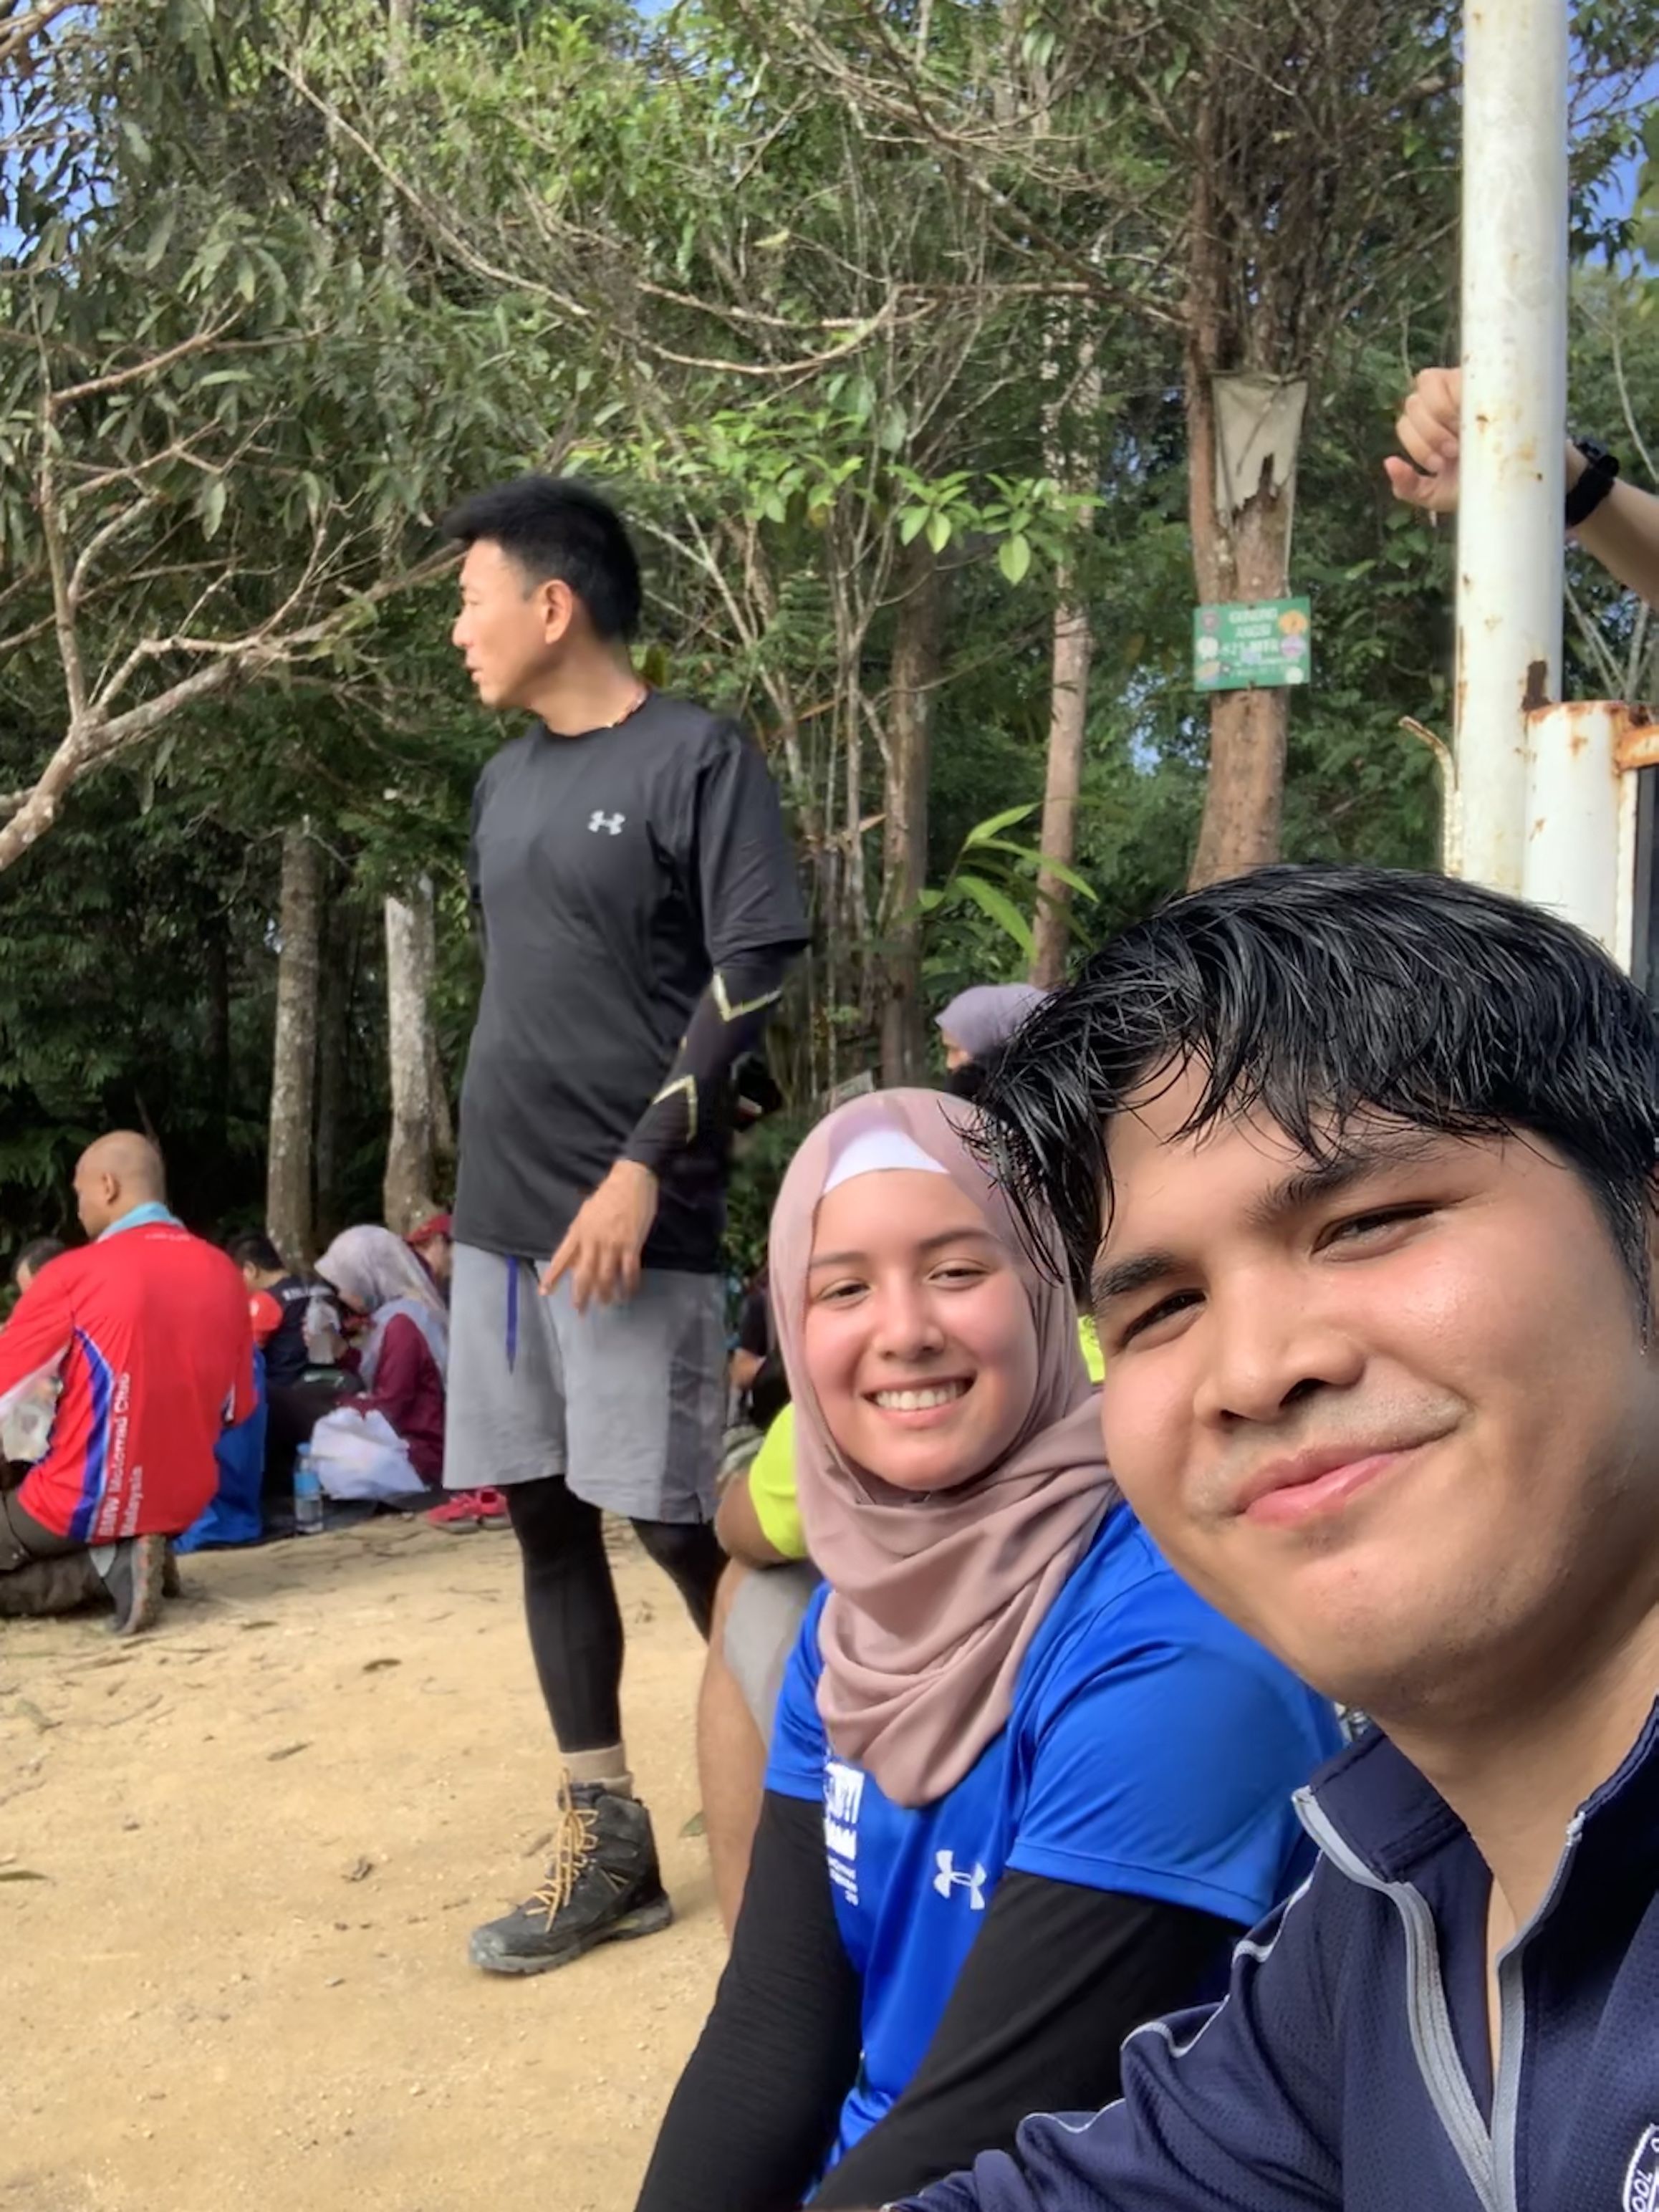
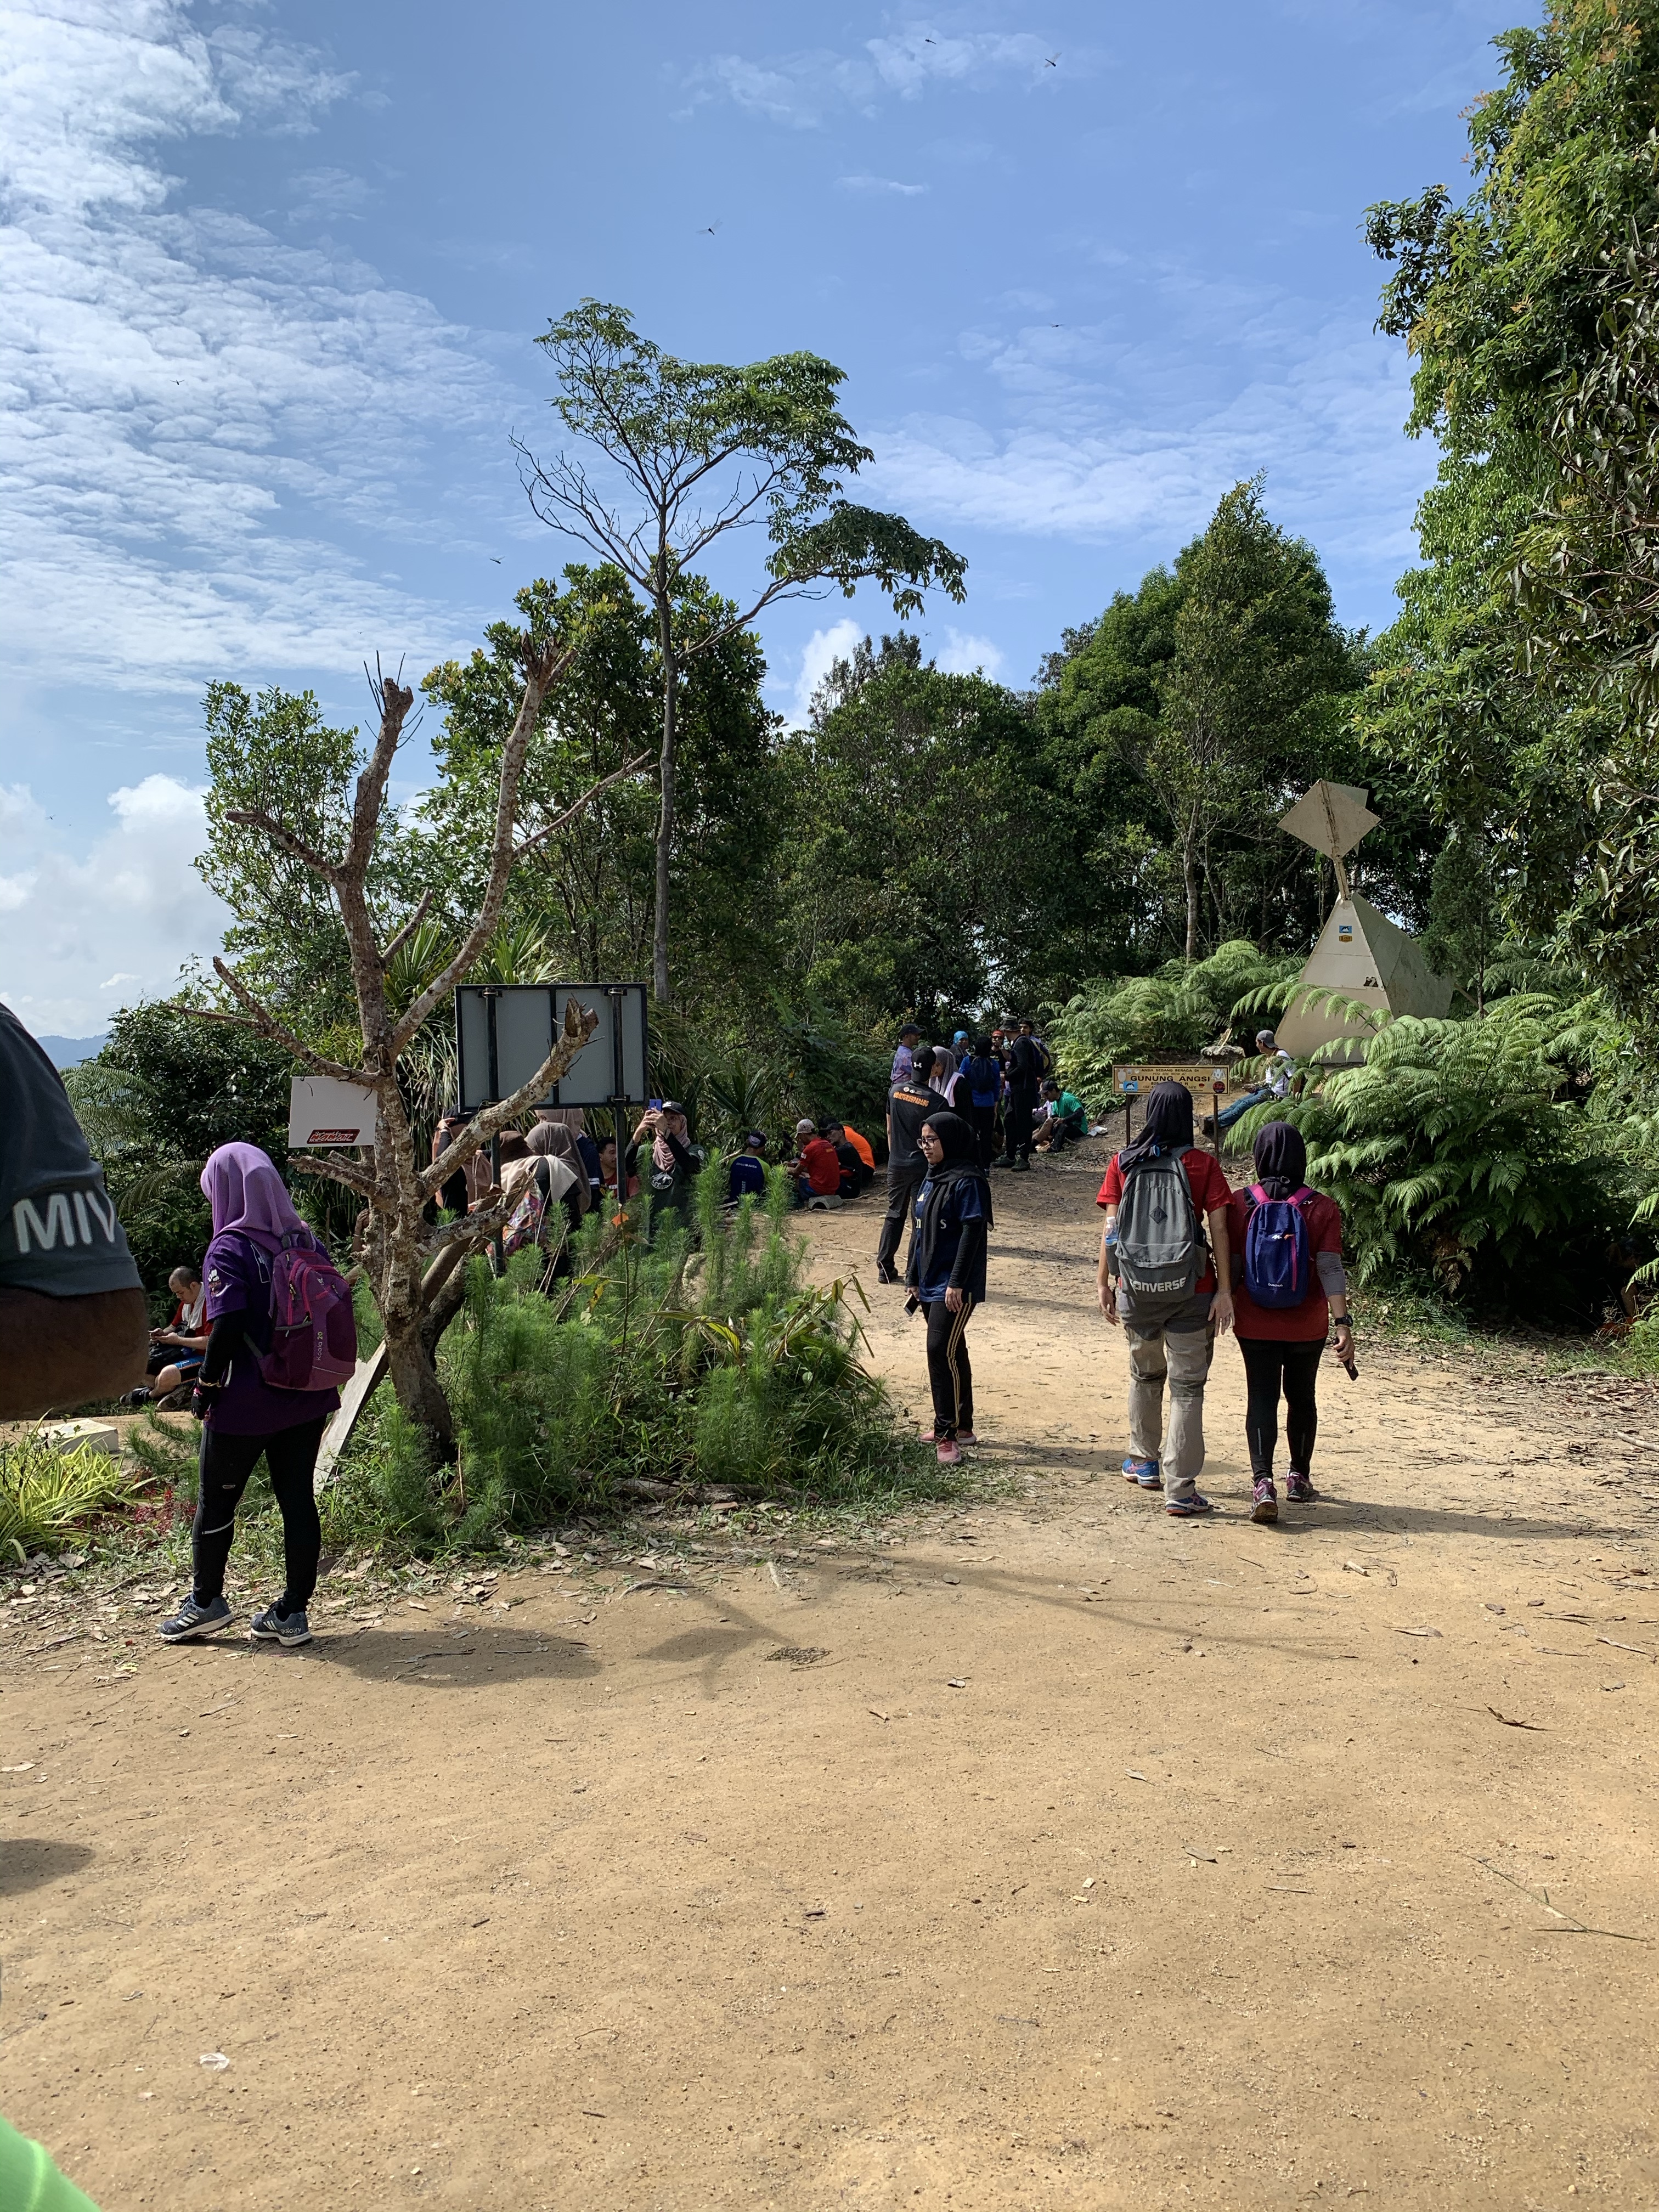
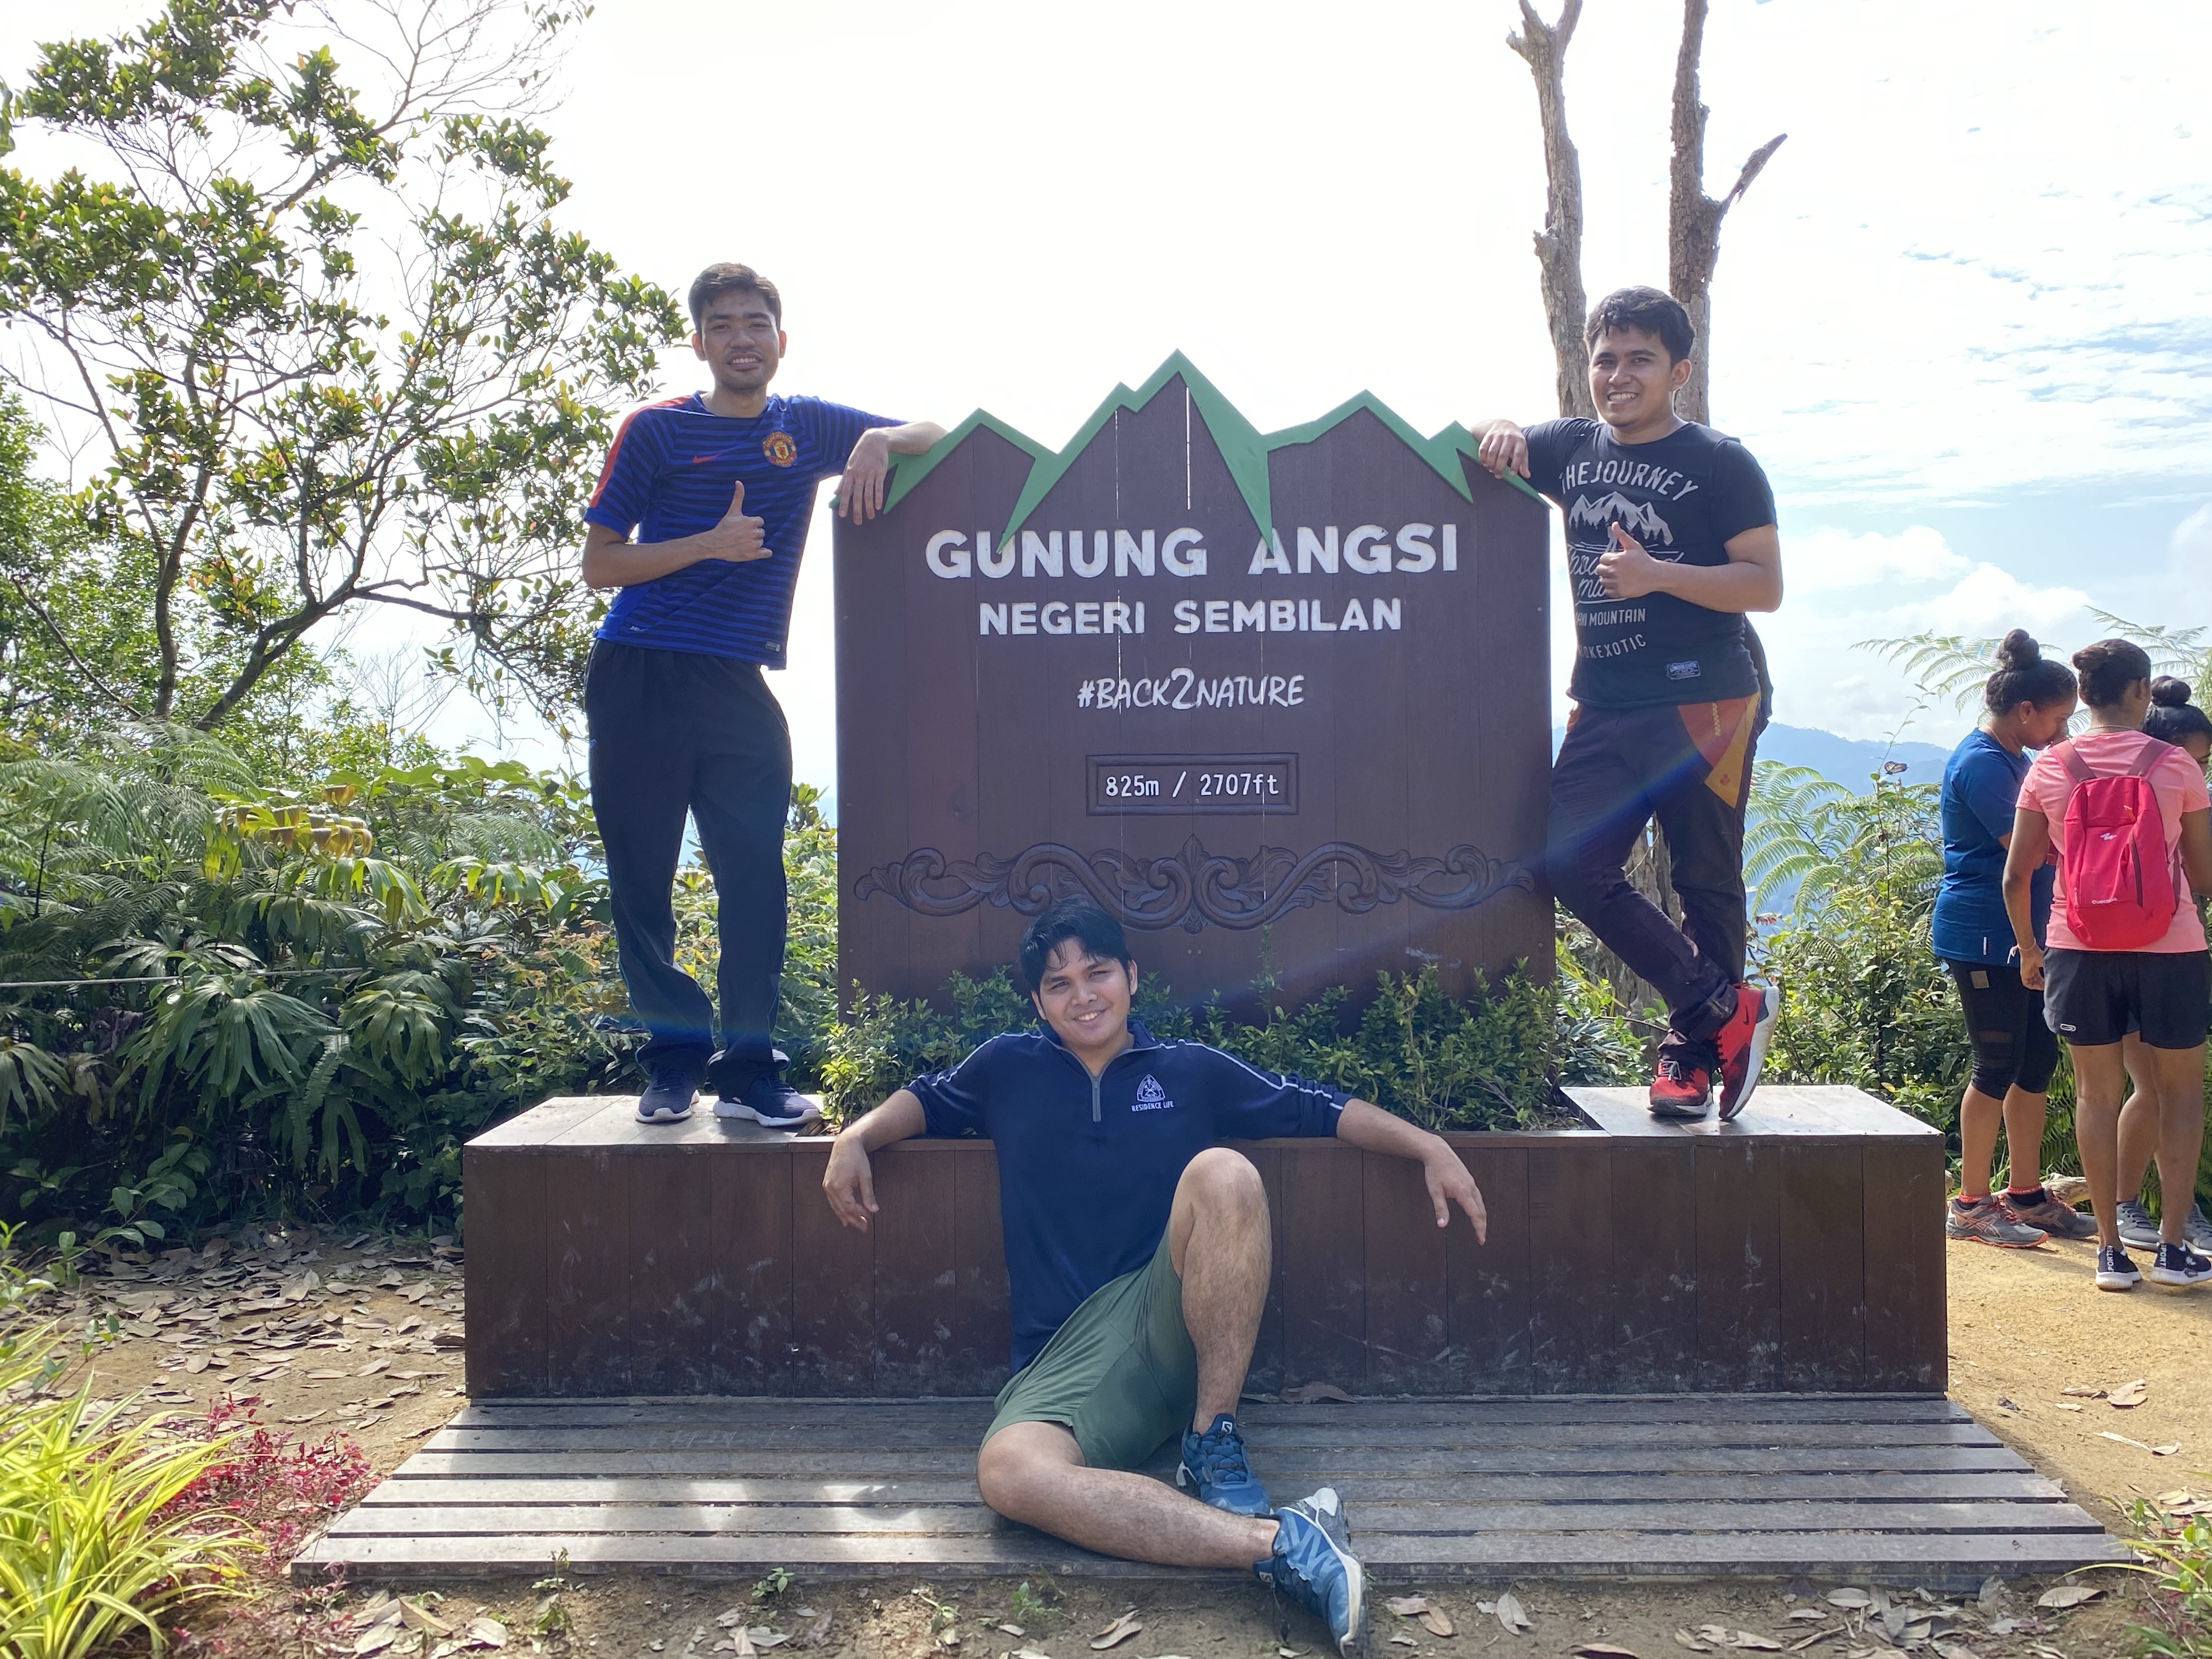
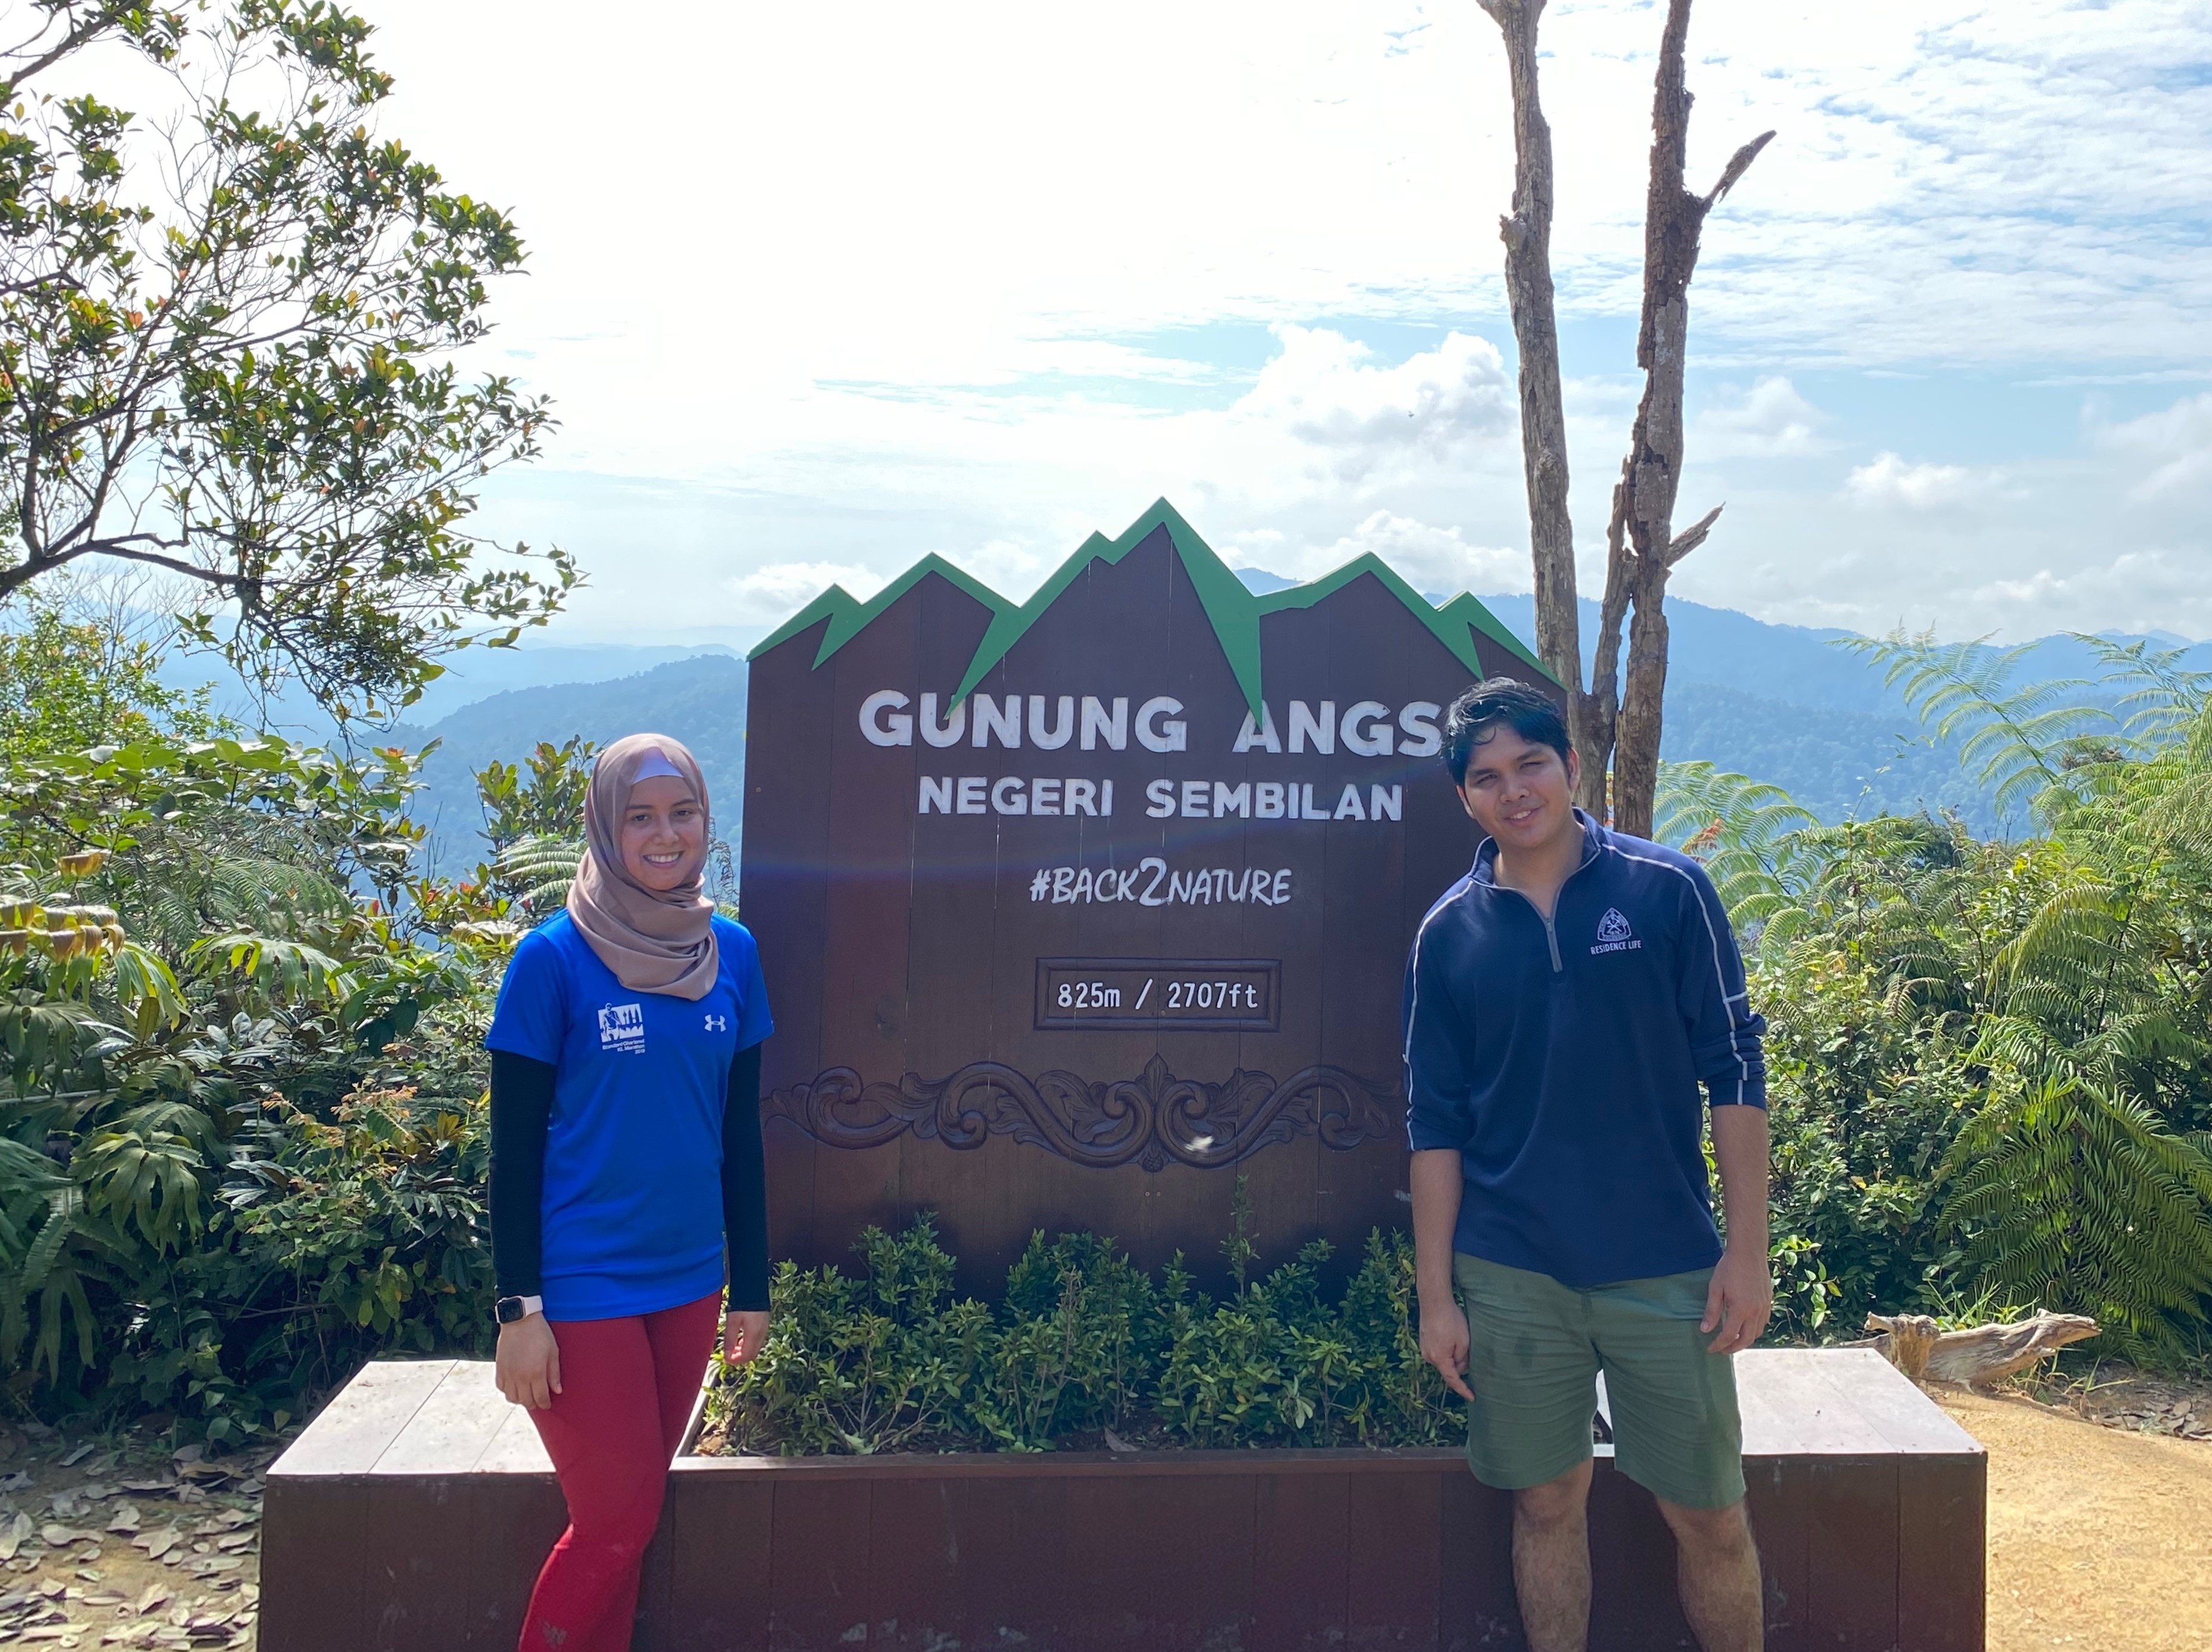
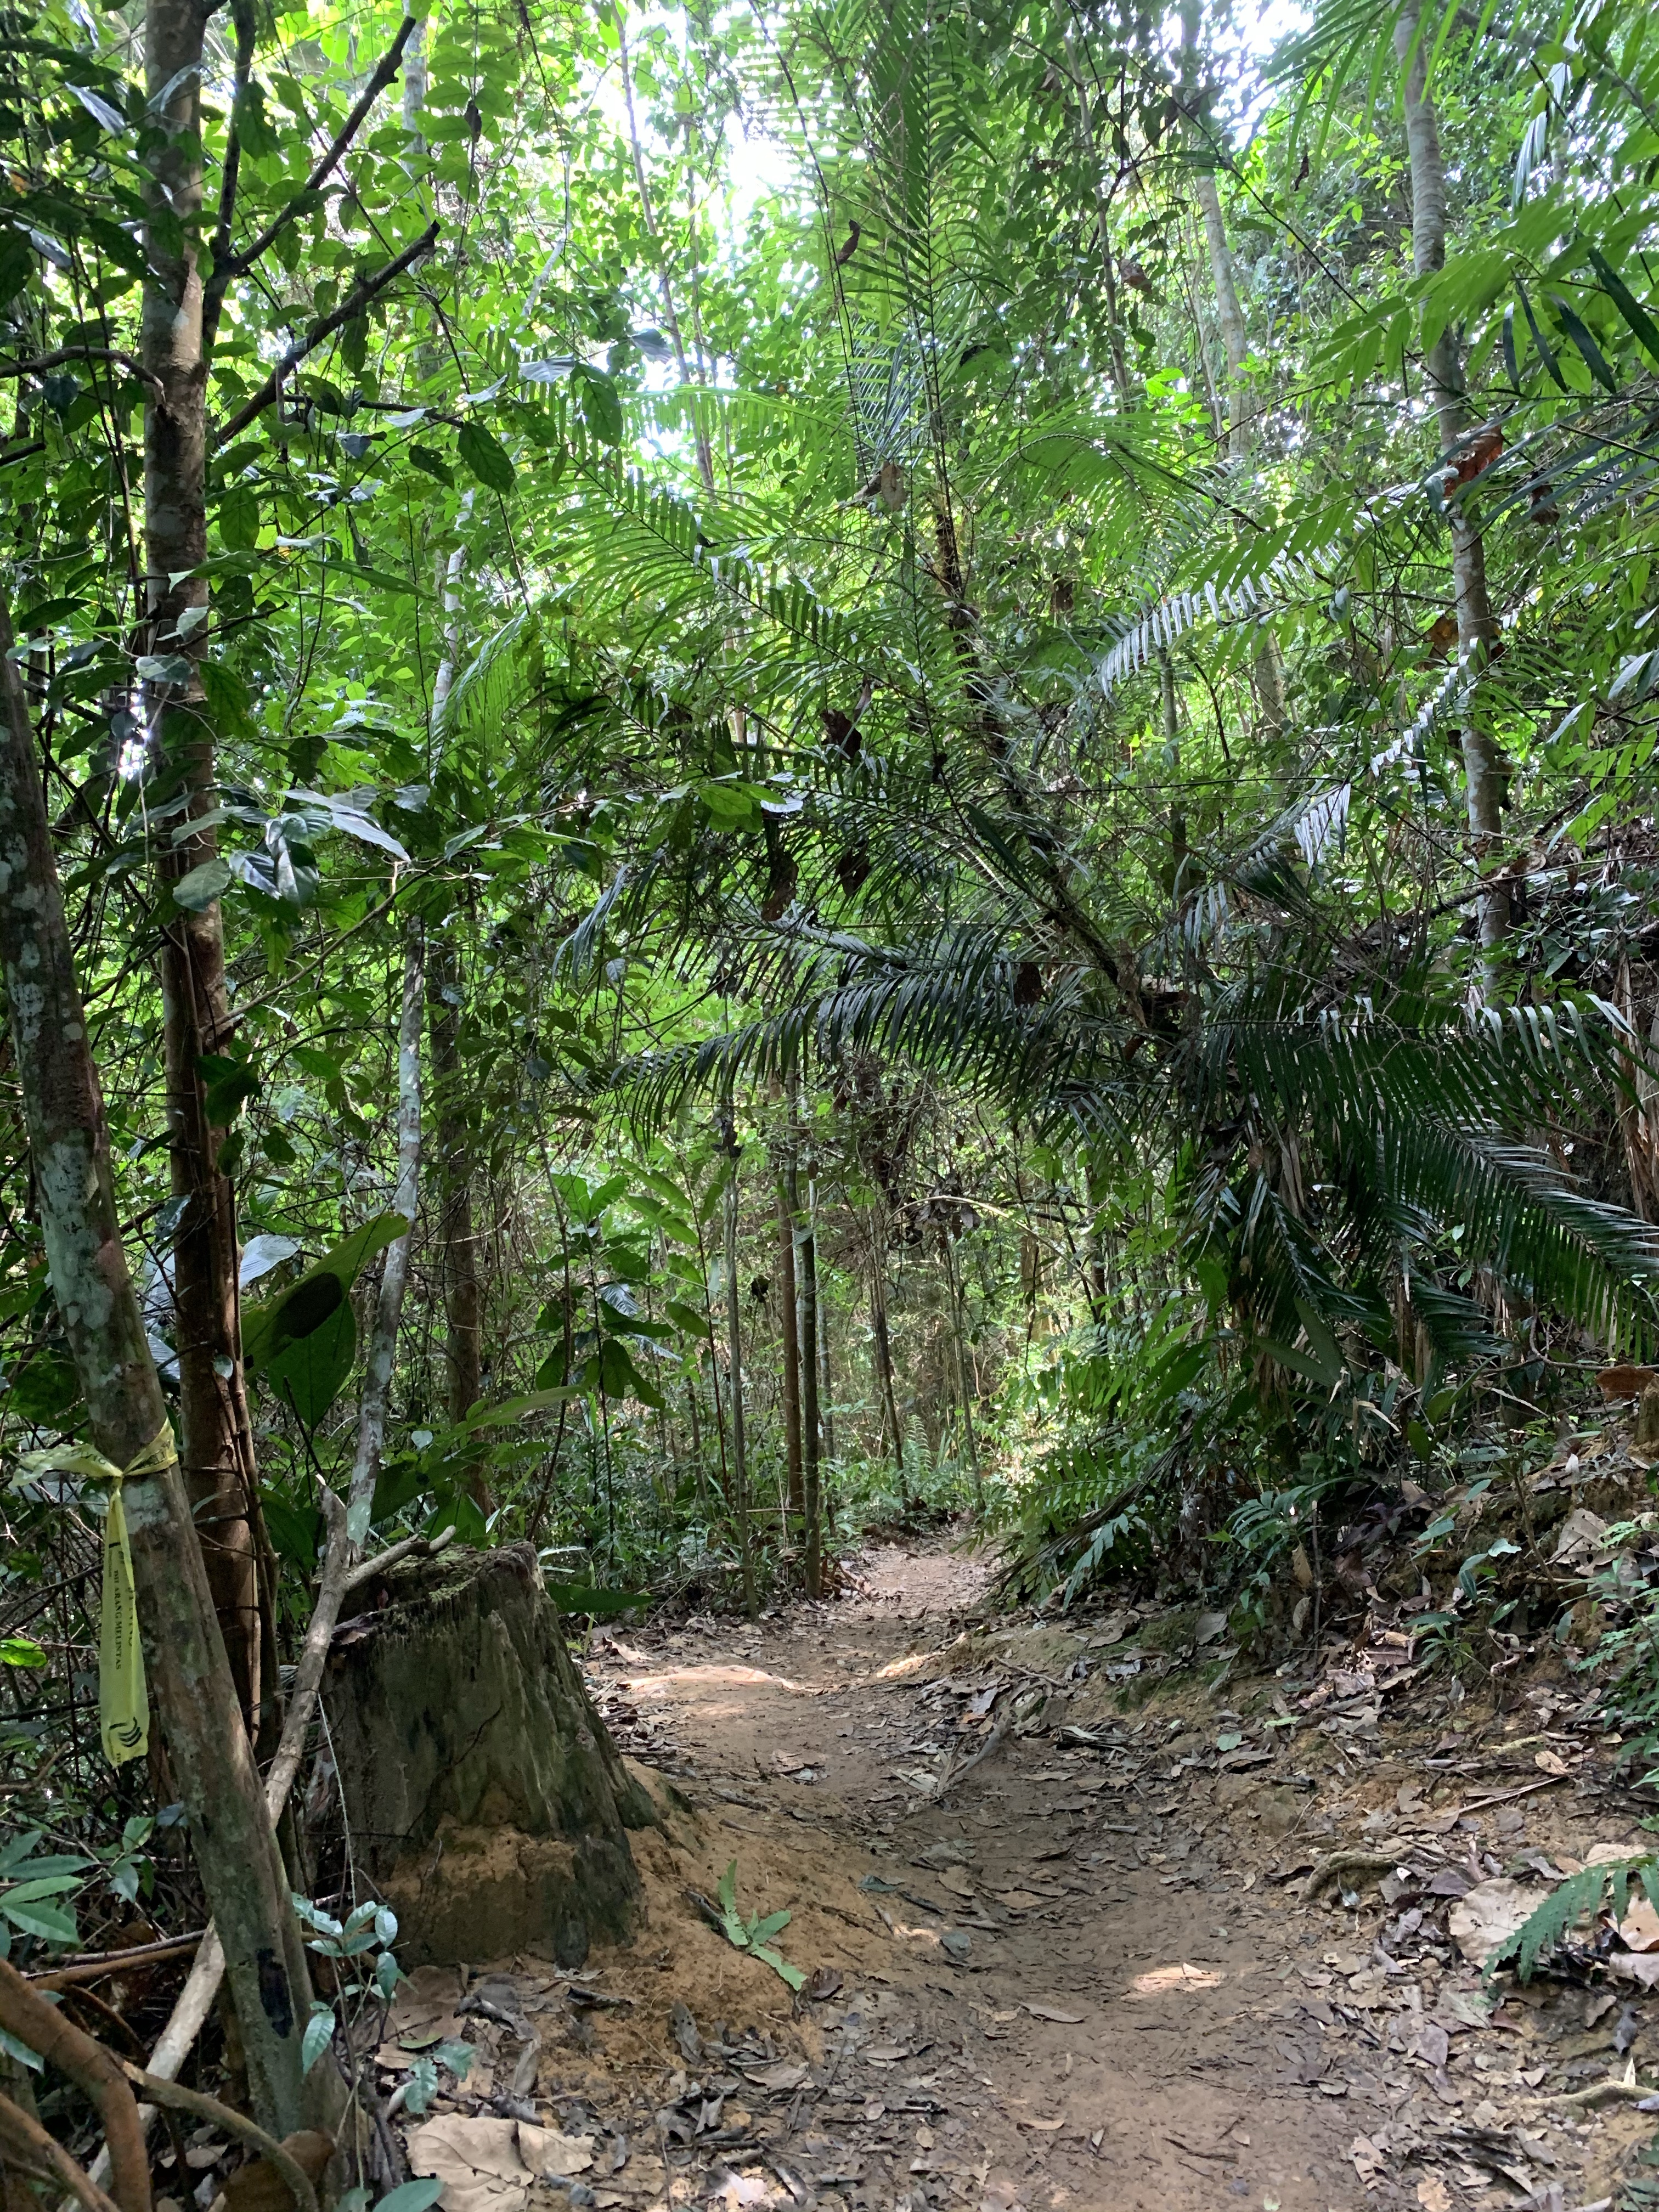
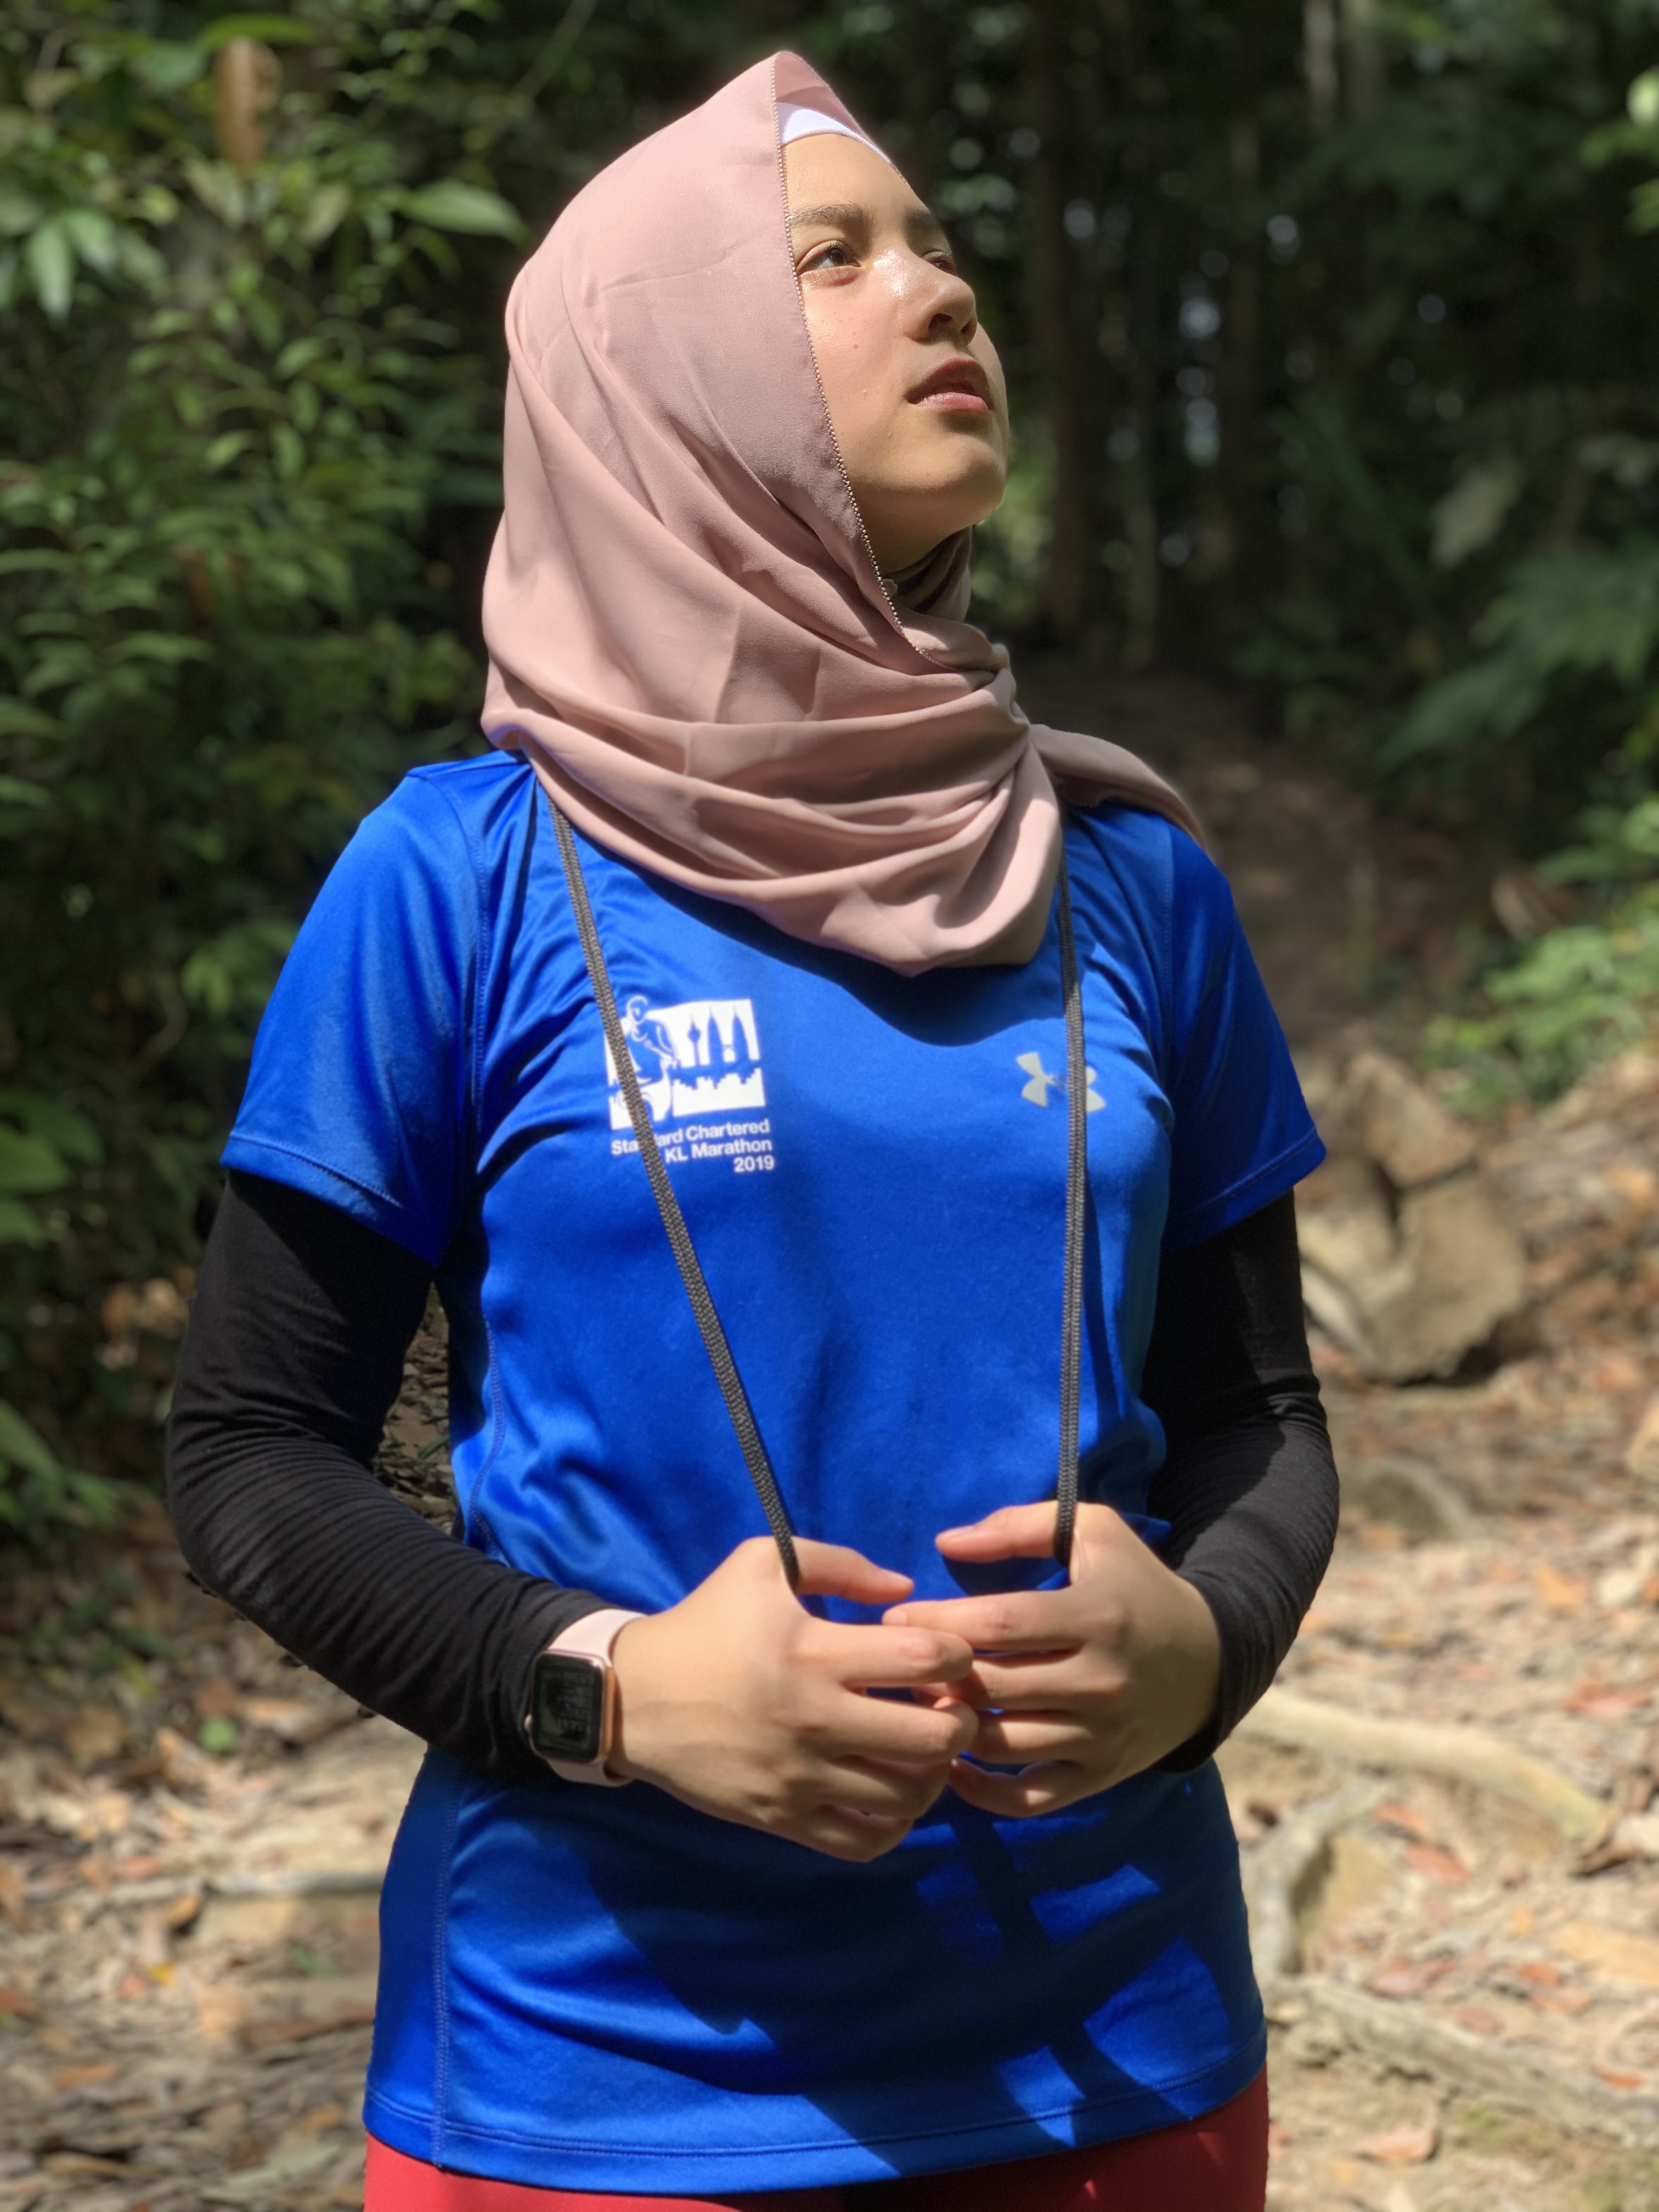
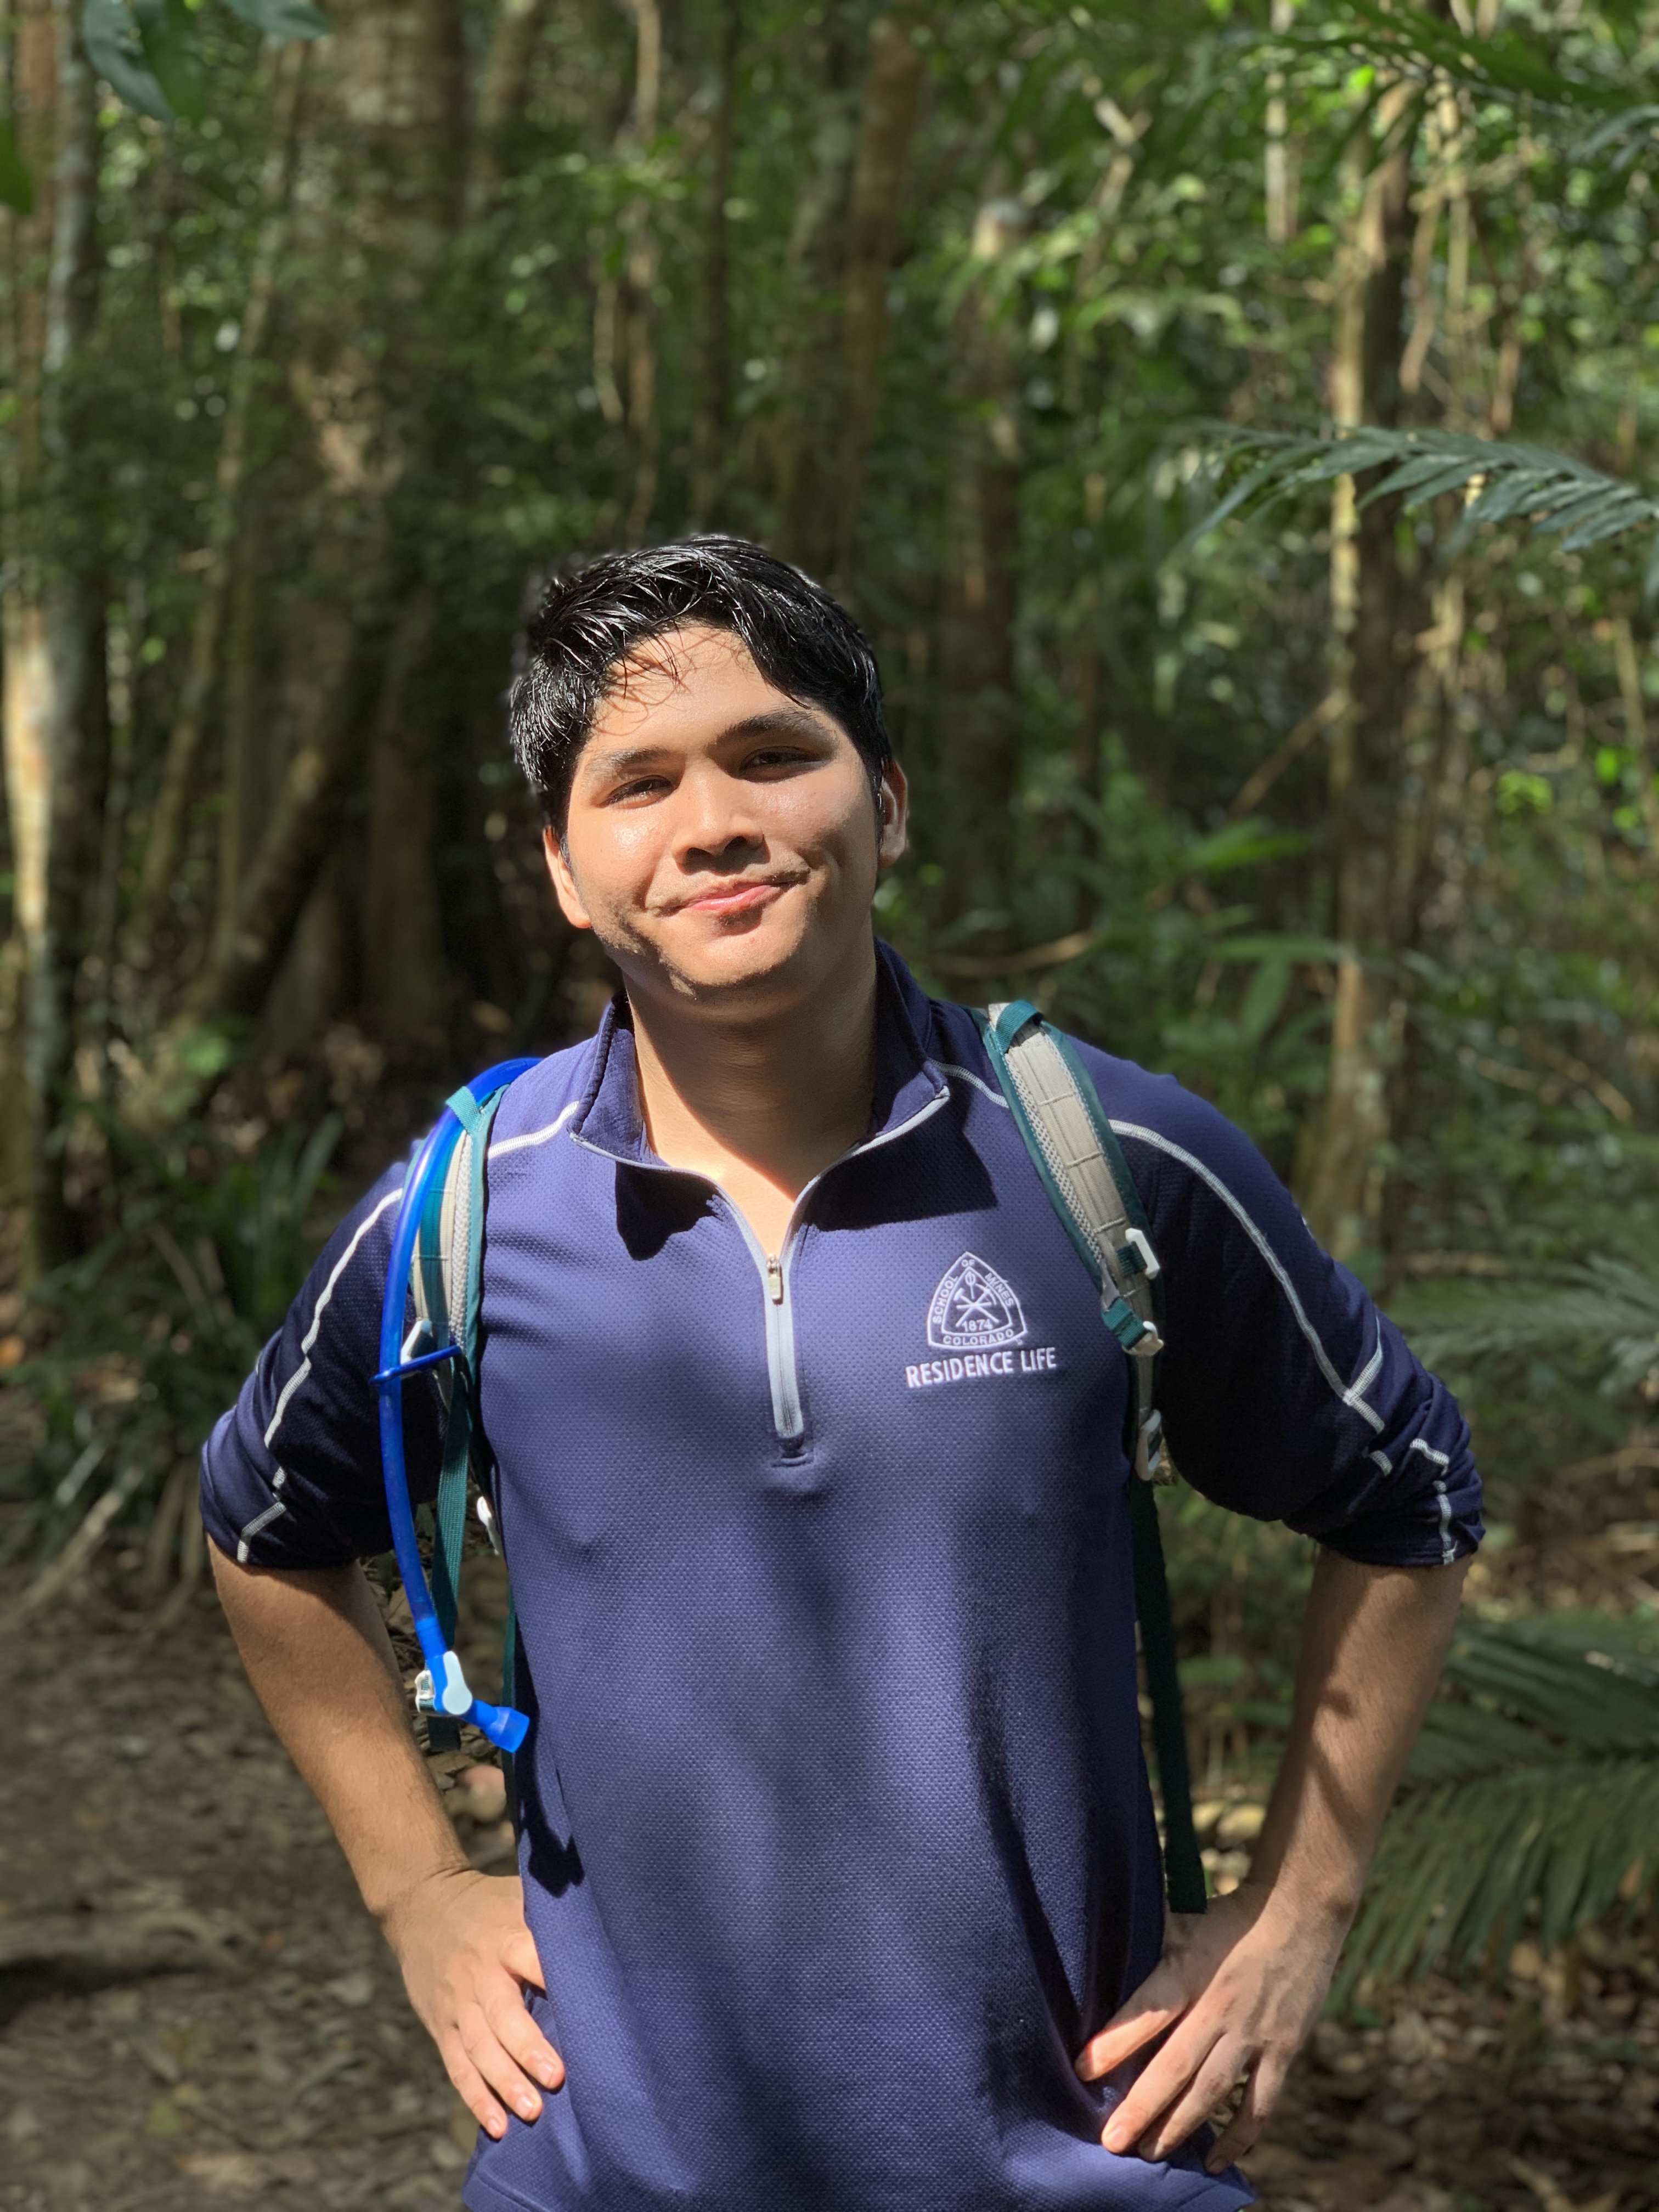
Gunung Angsi challenges you at the beginning portion of the hike, where she welcomes you with a steep ramp that you have to overcome, then going through about 1 kilometre of what seemed an endless yet manageable inclination, then finally leaving the rest of the 4 km or so of a fairly gradual trail throughout… but not exempting the up-and-down passage, hurdling through blockade of trees, and a few muddy sections. Nevertheless, offering you the temptation of a challenging hike, and rewarding you with a peek of only a stretch of the Titiwangsa Range on its jungle-covered summit.
Info:
Location: Hutan Rekreasi Ulu Bendol, Daerah Kuala Pilah, Negeri Sembilan
Summit elevation: 824 meters (2, 702 ft)
Elevation gain: 536 m
Distance: 5km one way
Duration: 1.5 – 2.5 hours one way
Permit fee: RM 5 per head
Parking: Free
Road condition to trailhead: Tar road all the way.
Let’s be real, most of us are not productive at home. Home, for a lot of people, are a sanctuary or a place to relax and to be permissibly lazy without getting judged at. However, that has to turn around now that most of us are quarantined at home due to CoVid-19.
We are still expected to stay at home at least for the next one week. For those with a spacious living area, a backyard, or even a pool, being quarantined is probably the least of your worries. But for those of us who are living in a confined space, say in a condominium, staying healthy and keeping a sane mind can be tough.
We’re just going to share a few things we have been doing at home to maintain a healthy lifestyle:
Set a daily schedule and what to achieve on that day
This is so important to keep yourself feeling productive throughout the day. Aside from your WFH (working from home) hours, maybe set a to-do list of what you want to achieve by the end of the day. This can be as simple as doing laundry, cleaning your room, finishing a chapter, etc.
This is also one way to avoid locking yourself on your phone all the time since we tend to be using our phone a lot now that we’re at home.
Drink plenty of water
Although you’re not moving a lot, hydration is still important. You still have to remind yourself to drink every now and then.
Practice intermittent fasting
This is something we both agreed on, since we are not moving as much as usual. We would skip breakfast and start eating in the late noon until 8pm or so. You can do the 16/8 or whatever time that you prefer, but you know… be practical. The purpose of doing this is to keep your weight from getting heavier due to limited movements at home.
Experiment new recipes
Now that you’re stuck at home, don’t tell me you’re just getting GrabFood the entire time? This is the chance for you to work on them cooking skills, even if you don’t know how to boil an egg. Start with simple recipes, and work your way through. Who knows, by the end of this Covid-19, perhaps you decide to start your own catering business?
Also, I learnt to make my own smoothies and different brownies recipes using whatever ingredients I have at home during this time. Safe to say, I have my own Boost juice bar at home. Makes one a money-saving expert now, don’t you agree?
Figure out a new hobby
Having plenty of time at home gives you the luxury of being able to grasp somethig new, something that you may have wanted to try for a long time. Maybe like learning a new language? or painting? crocheting? poetry writing? gardening? but please not hoarding… or shopping since a lot of things are on sale nowadays….
Daily workout routine
This is so important! You need to sweat. One thing that your body may be missing out.. is sweating. I know that sounds disgusting but it’s so true. Being at home makes one really hard to workout, but you really have to for the sake of your body. It doesn’t have to be a tough workout, just a 30-minute simple workout daily to make you feel good about your body. We’ll give you some simple homeworkout routines we’ve been doing throughout this quarantined period:
Hot yoga
Hot barre
Hot pilates
Low impact/high intensity workout, such as:
Sit ups
Squats
Burpees
Plank
Push ups
Side kicks
Etc.. so many ways to do it
You can do them in like 2 sets of 10, just do them at your own pace.
Also, we like to follow PopSugar Fitness onYyoutube which gives out really cool yet effective home workouts for only 30/45 minutes..
Jogging in your backyard/living room (if you don’t have a threadmill)
Meditation
A lot of people may think this is unnecessary, but meditation is important to give yourself a positive mindset, especially if you’ve felt anxiety or just simply overthinking about this whole being quarantined issue. To some, praying is a form of meditation, but to others, giving yourself merely 5 minutes during the day to just sit and reflect on yourself, focusing on your breathing is also a form of meditation. Different people, different approaches. You do you.
Open your windows during the day
We know what you’re thinking… seriously? But yeah, this is to give yourself and your space some fresh air.
Wake up early and dress up
This is probably the hardest to do. Being at home means laze around in our pajamas and waiting til noon to shower. However, in order to be absolutely productive, you need to shower the minute you wake up, and dress appropriately. Maybe not as fancy as you would for the office, but just as appropriate. Gives you a fresh mindset and it keeps the mood going throughout the day.
There are of course, other ways to keep yourself a healthy and positive outlook while staying at home, but these are just some of the things we think may be important to address.
Stay safe, stay healthy, and let’s survive this pandemic together!
Hello! Welcome to another episode of….. ‘What Did We Do Last Weekend?’
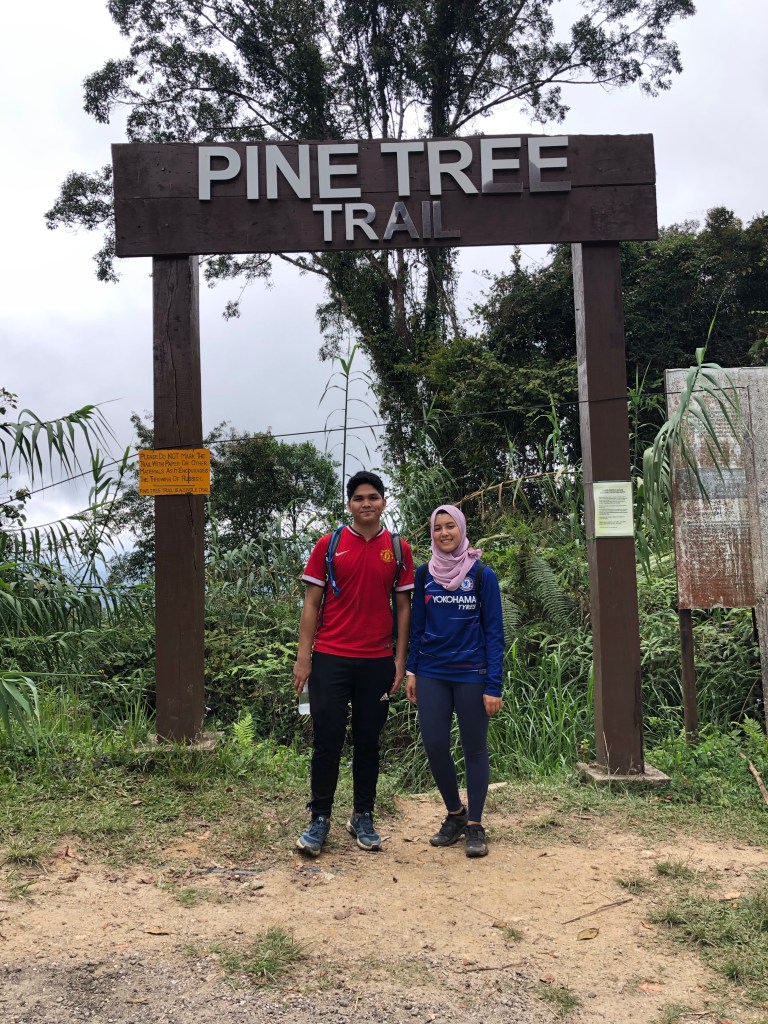
Last Sunday, both of us were joined in with Yasmine’s brother, Qayyum and his friend, Asyraf to hike Pine Tree Trail, located in Bukit Fraser.
Apart from Pine Tree, there are several other trails that are available in Bukit Fraser for you hungry hikers alike:
Hemmant trail
Bishop’s trail
Kindersley trail
Abu Suradi trail
Rompin trail, and etc.
Anyway, the drive to Bukit Fraser is a bit of a pain and a lot of winding left to right. Heads up to those driving up Bukit Fraser: Please fill up your tank before taking the exit to Route 55 (if you’re coming from KKB) because there is no gas station along the way or on Bukit Fraser! However, there is a ‘gerai’/ road side stall that sells petrol for like RM 20/ 5 liters, which is pretty costly, if you ask us.
Finding Pine Tree trail is quite straightforward, and very easy to spot. You can easily Google Maps the location, which leads to a narrow road uphill, where you will pass by Istana Sri Pahang, and once you’ve seen TM Resort’s Bungalow on your right, you shall now find a parking spot along the road because you’ve arrived.
Pine Tree trail leads to two peaks: (1) Pine Tree hill and (2) Twin Peak. We were also told that ultimately, if you venture further into the trail, you will reach Gunung Semangkok. However, that is a strenuous 30++ km journey which would take almost one whole day for a round trip.
Here are some facts on Pine Tree Trail:
Location: Bukit Fraser, Pahang
Summit: Pine Tree hill
Summit elevation: 1524 m (5000 ft) above sea level
Distance: 5.5 km one way
Duration: 2-ish hours (one way)
Trail difficulty: Moderate
Parking: Free, park at your own risk by roadside.
Road condition to trailhead: Flexible pavement/tar road, so you’ve nothing to worry about.
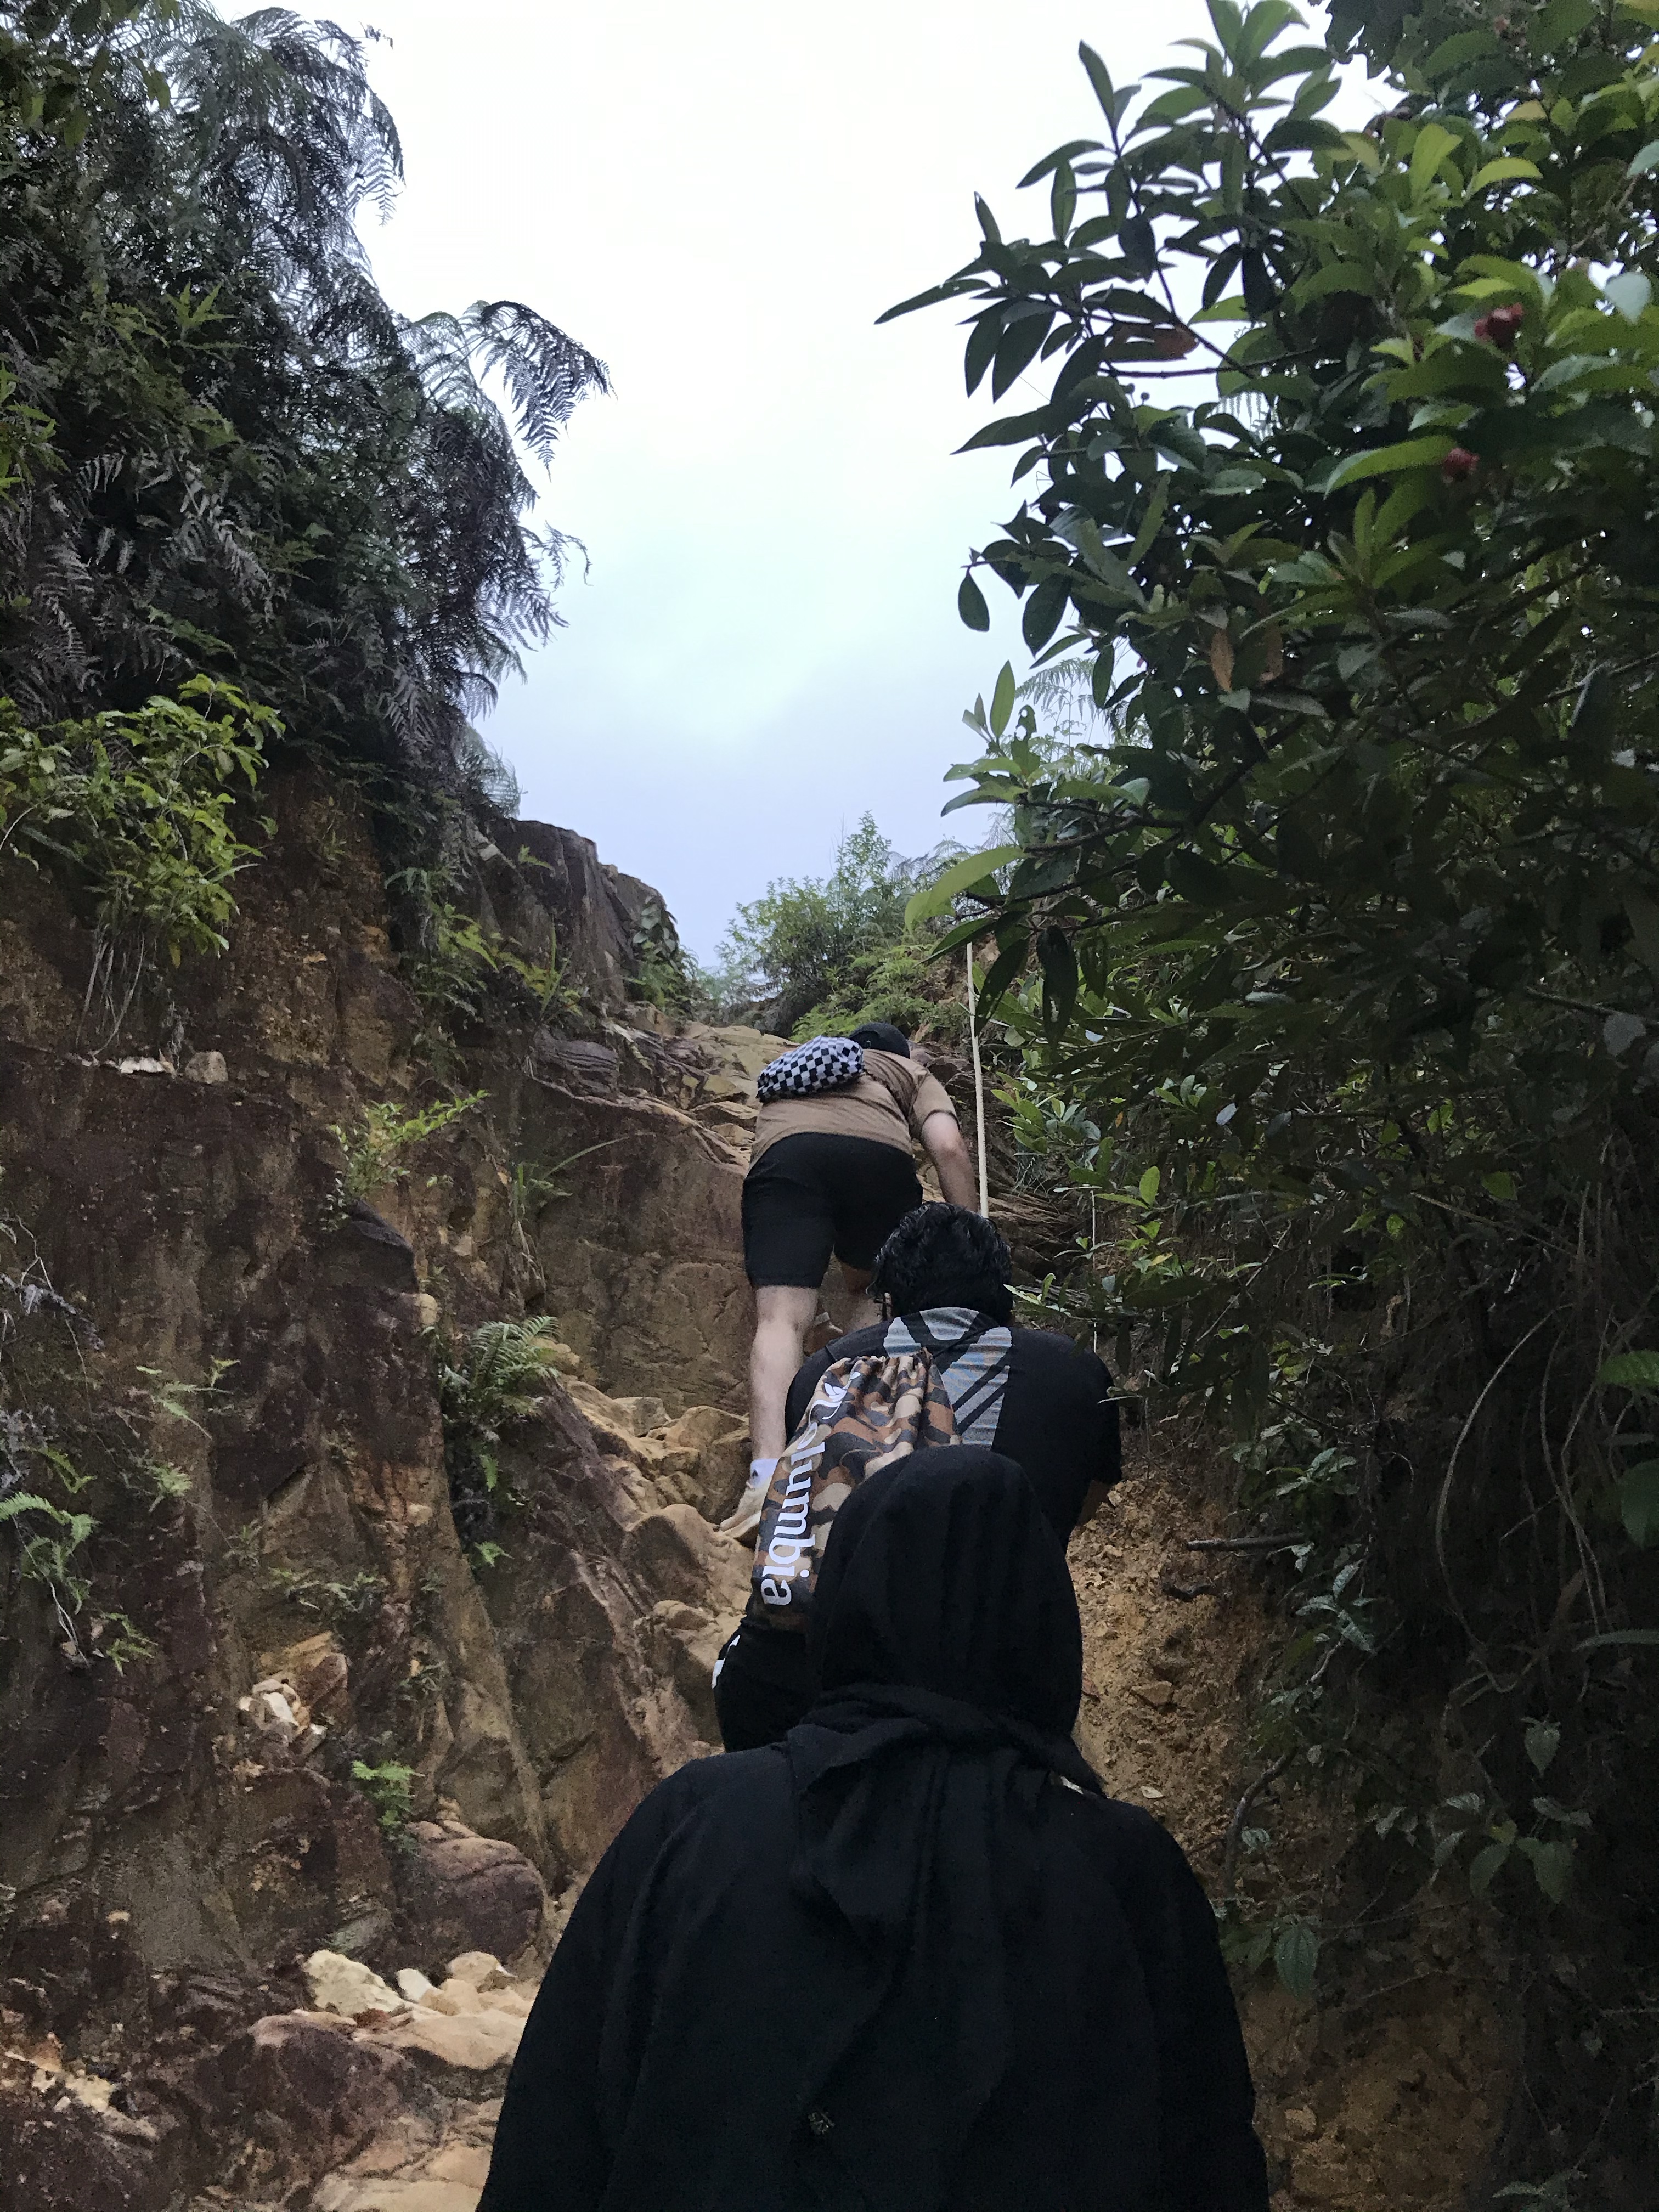
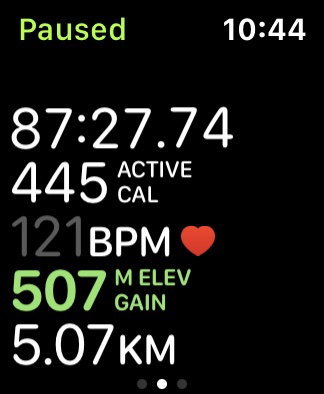
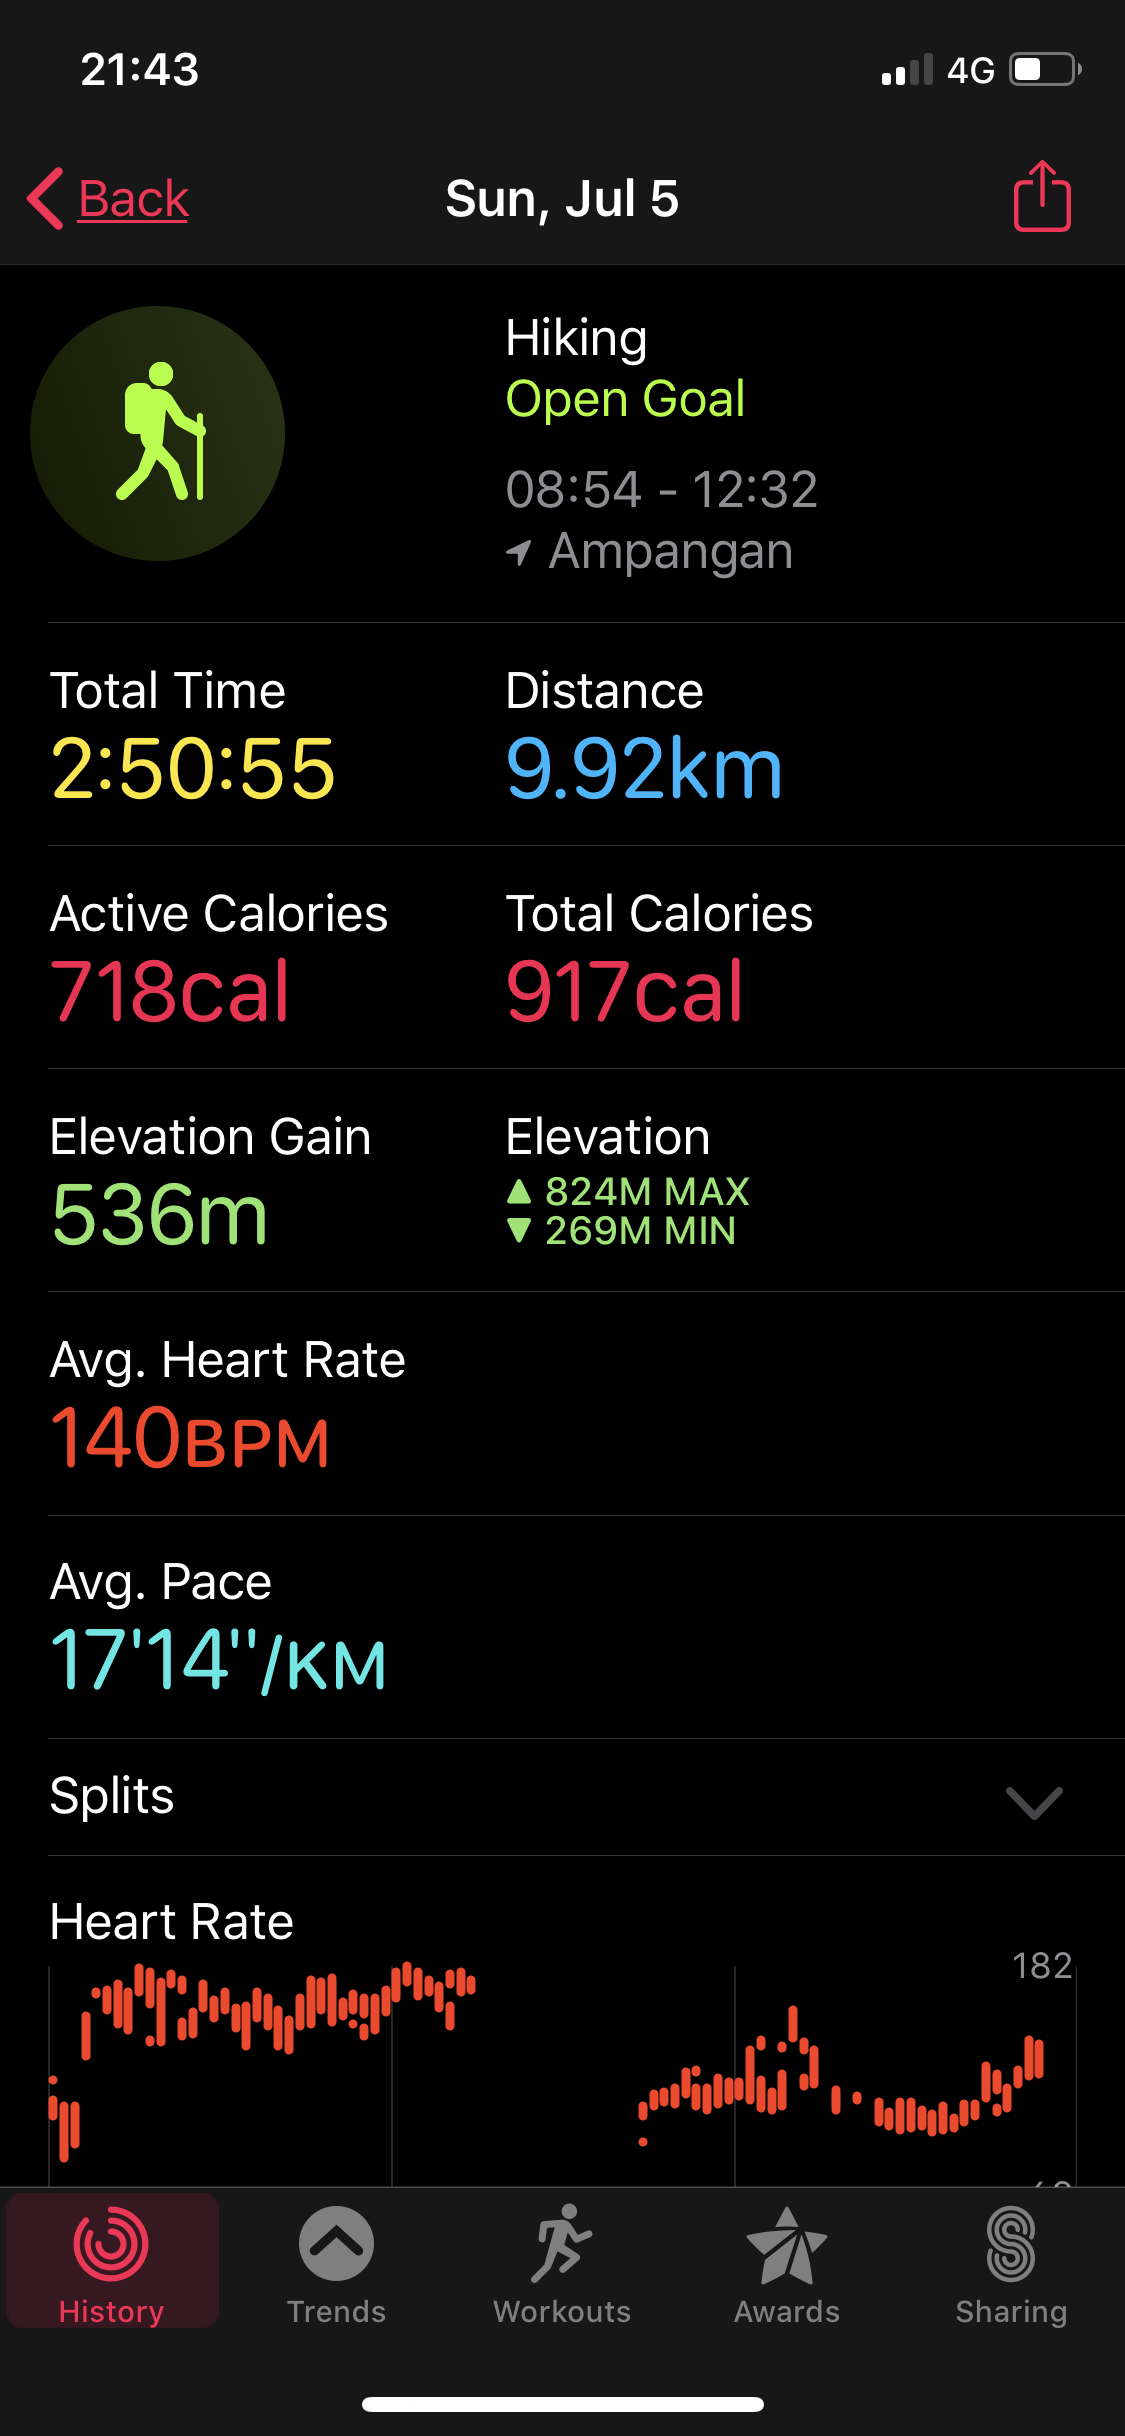
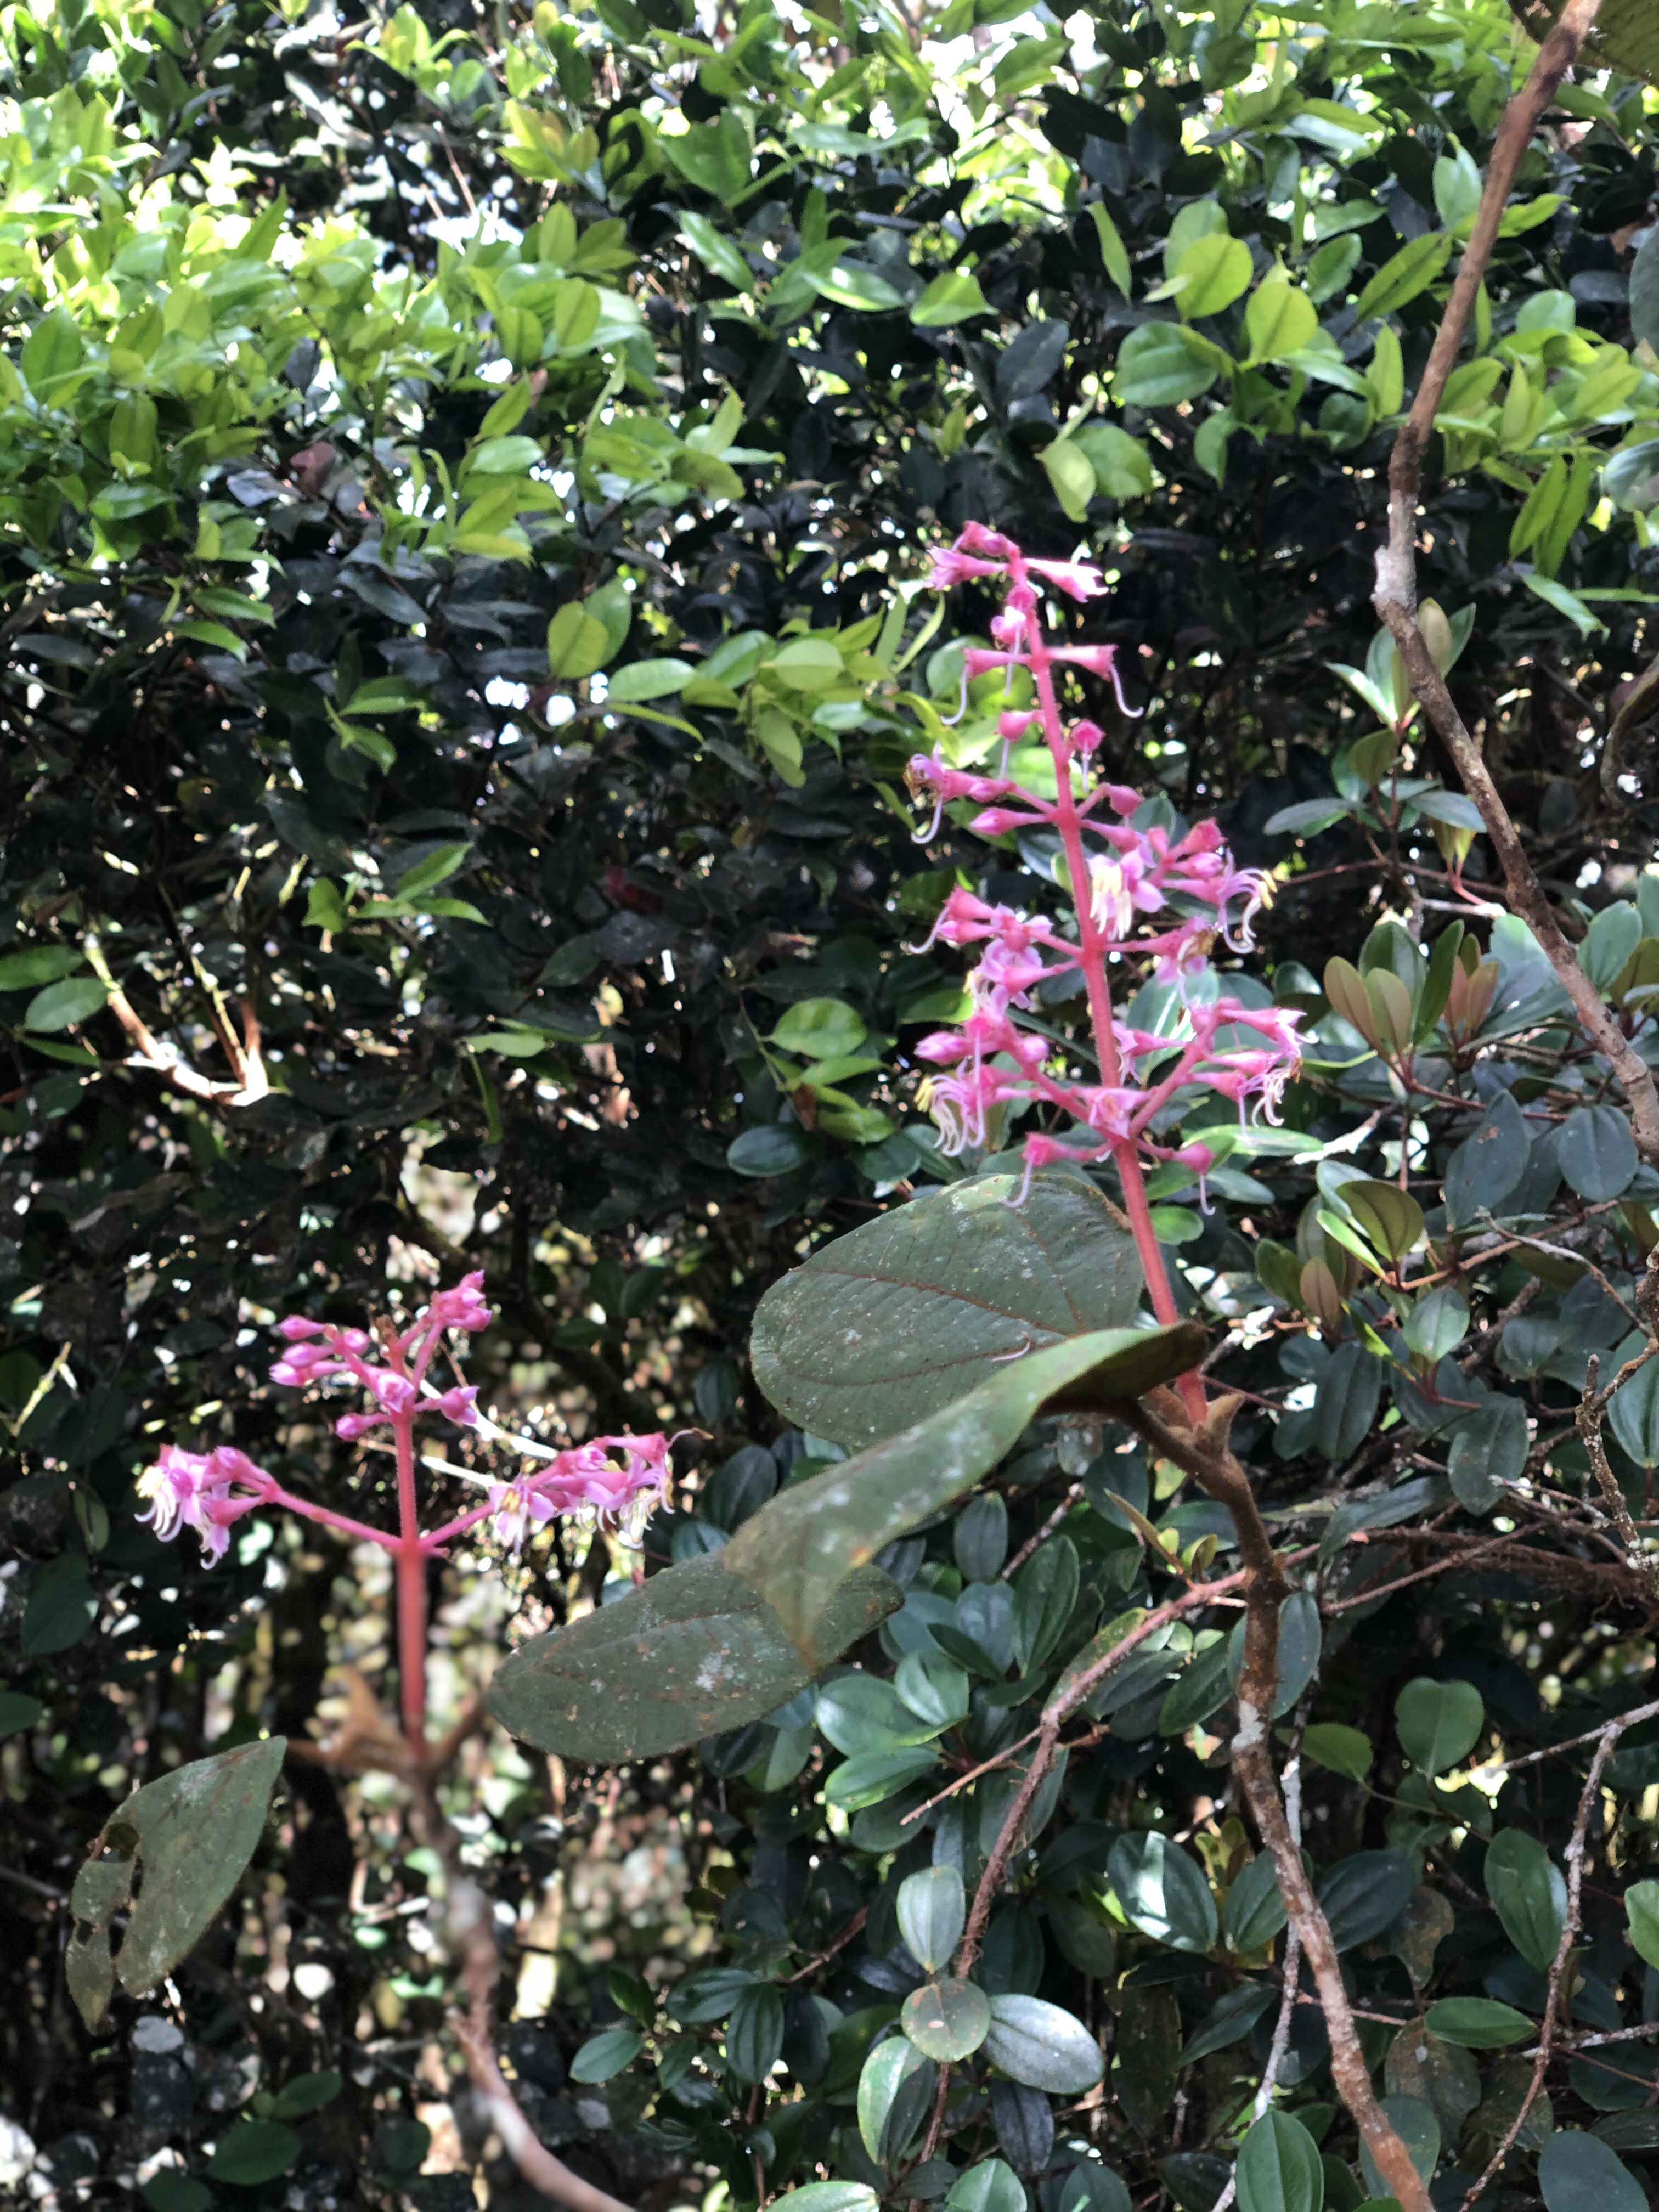
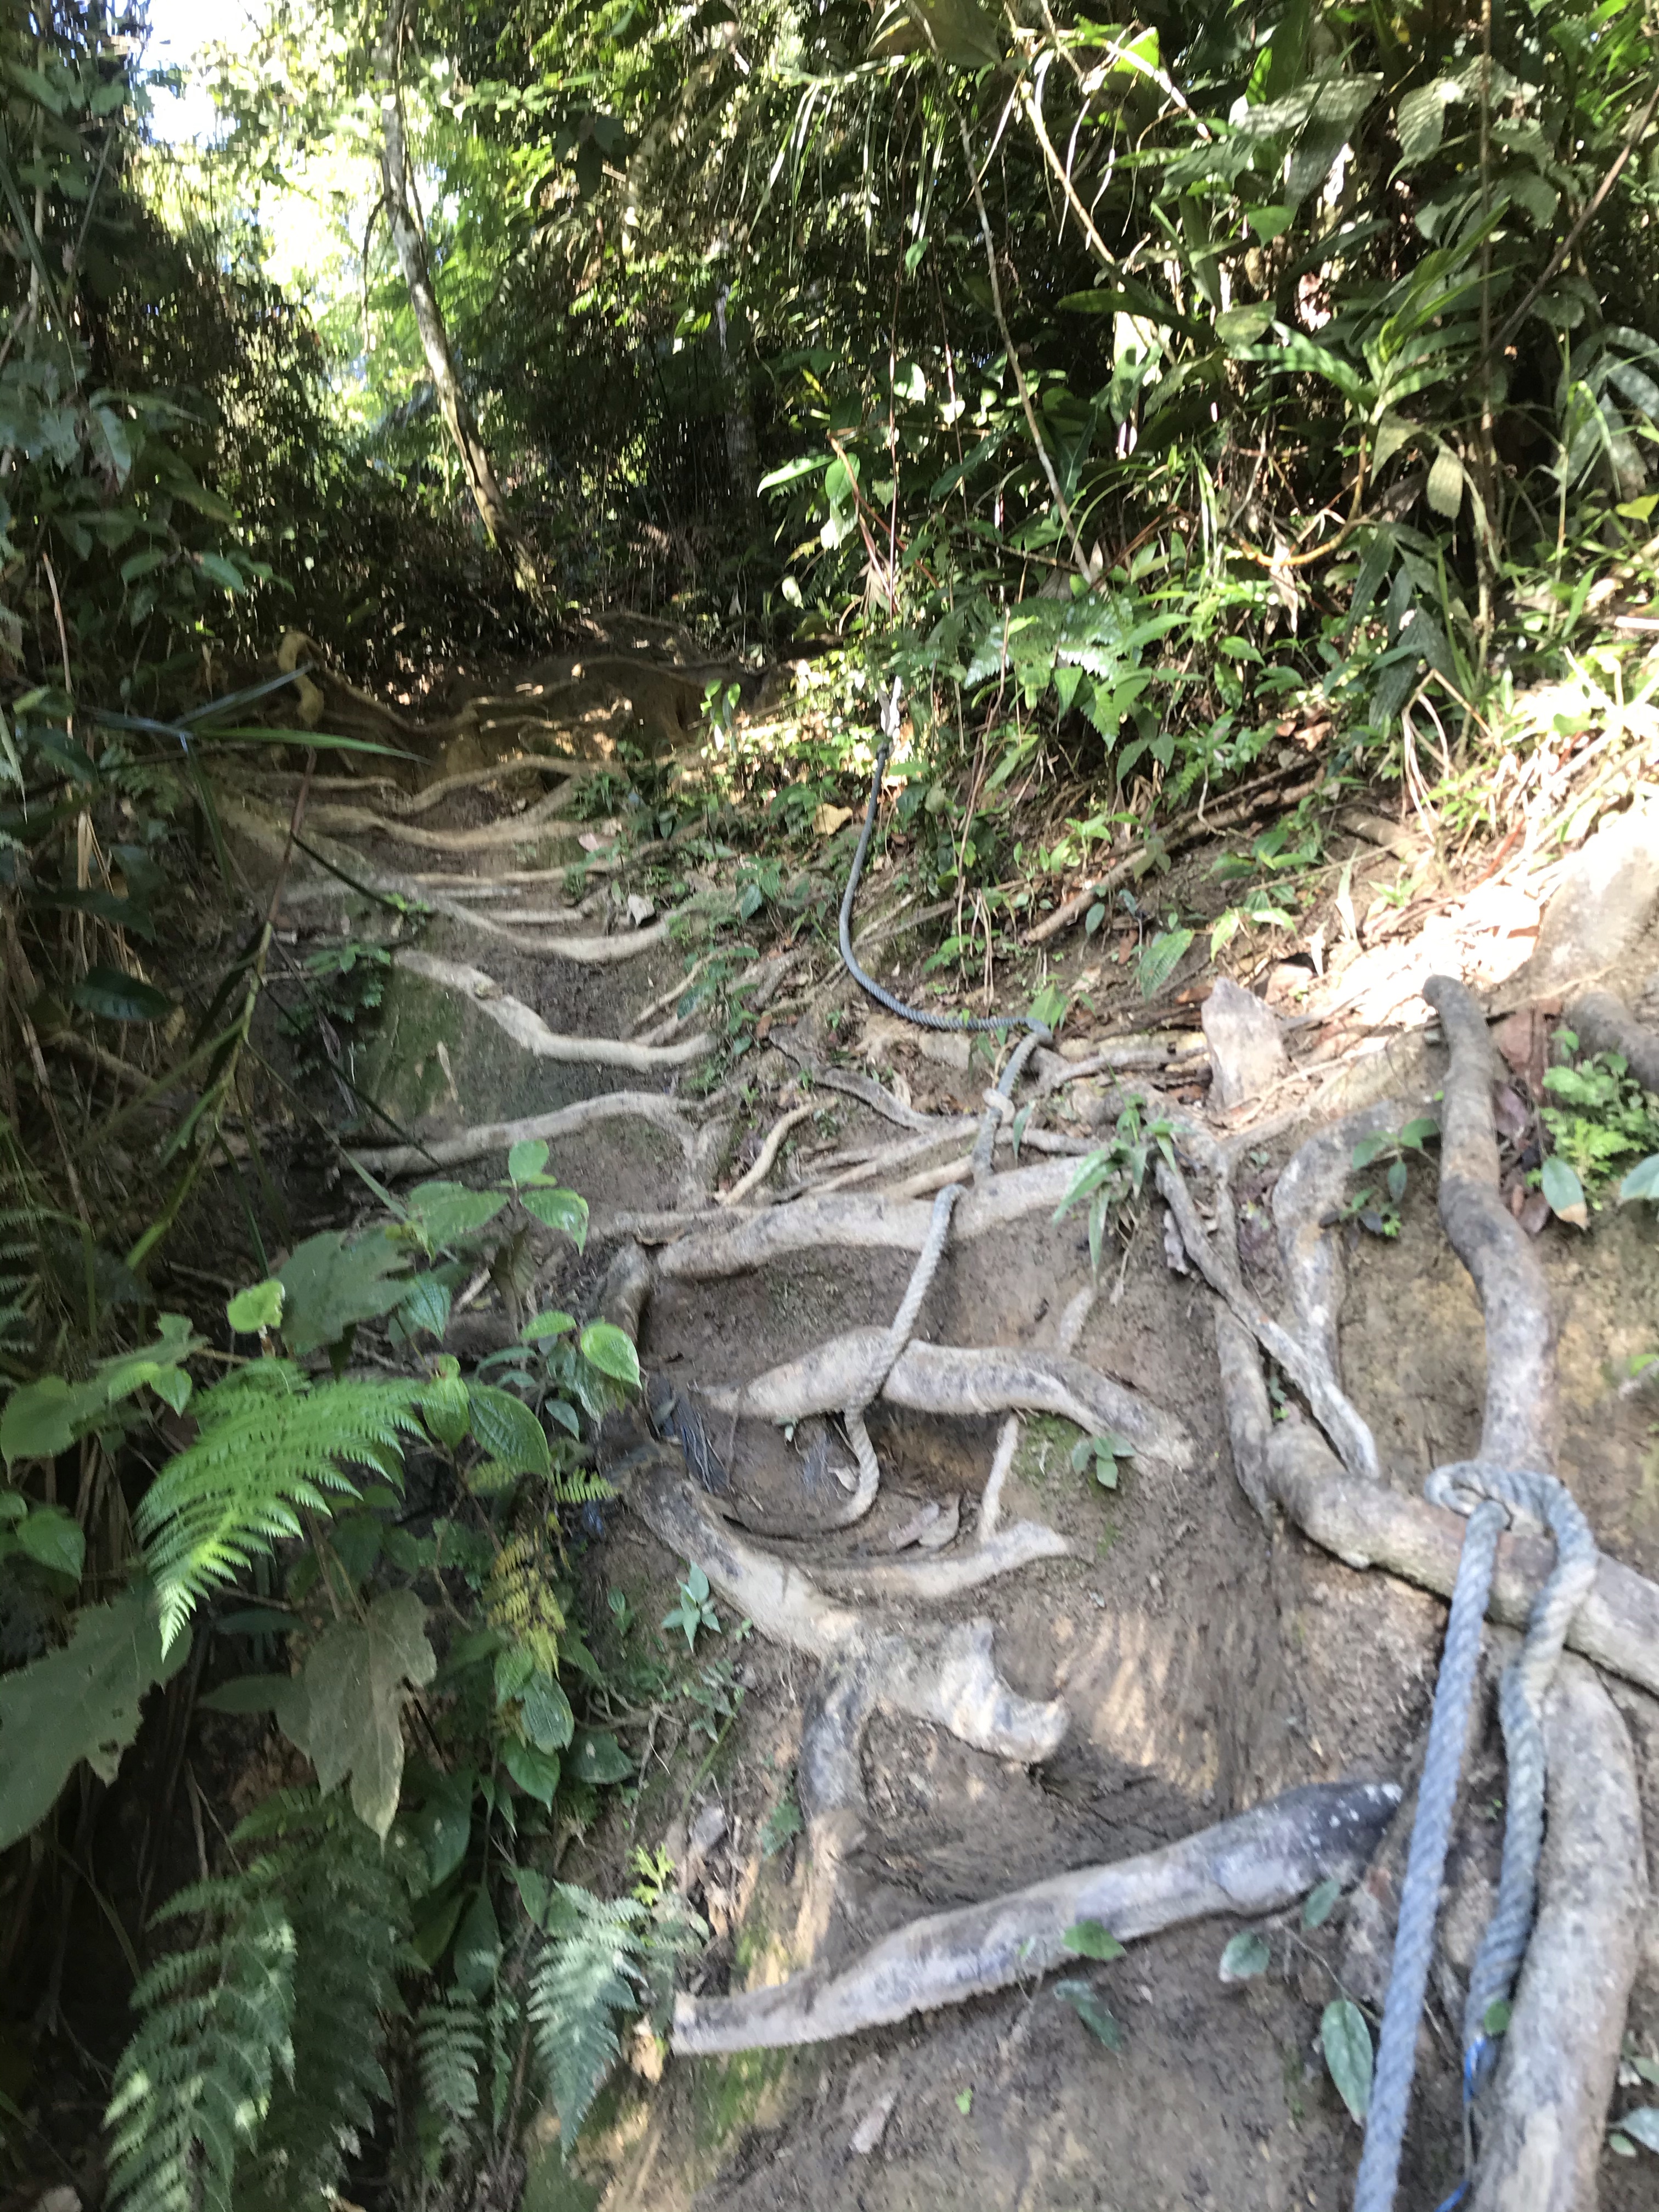
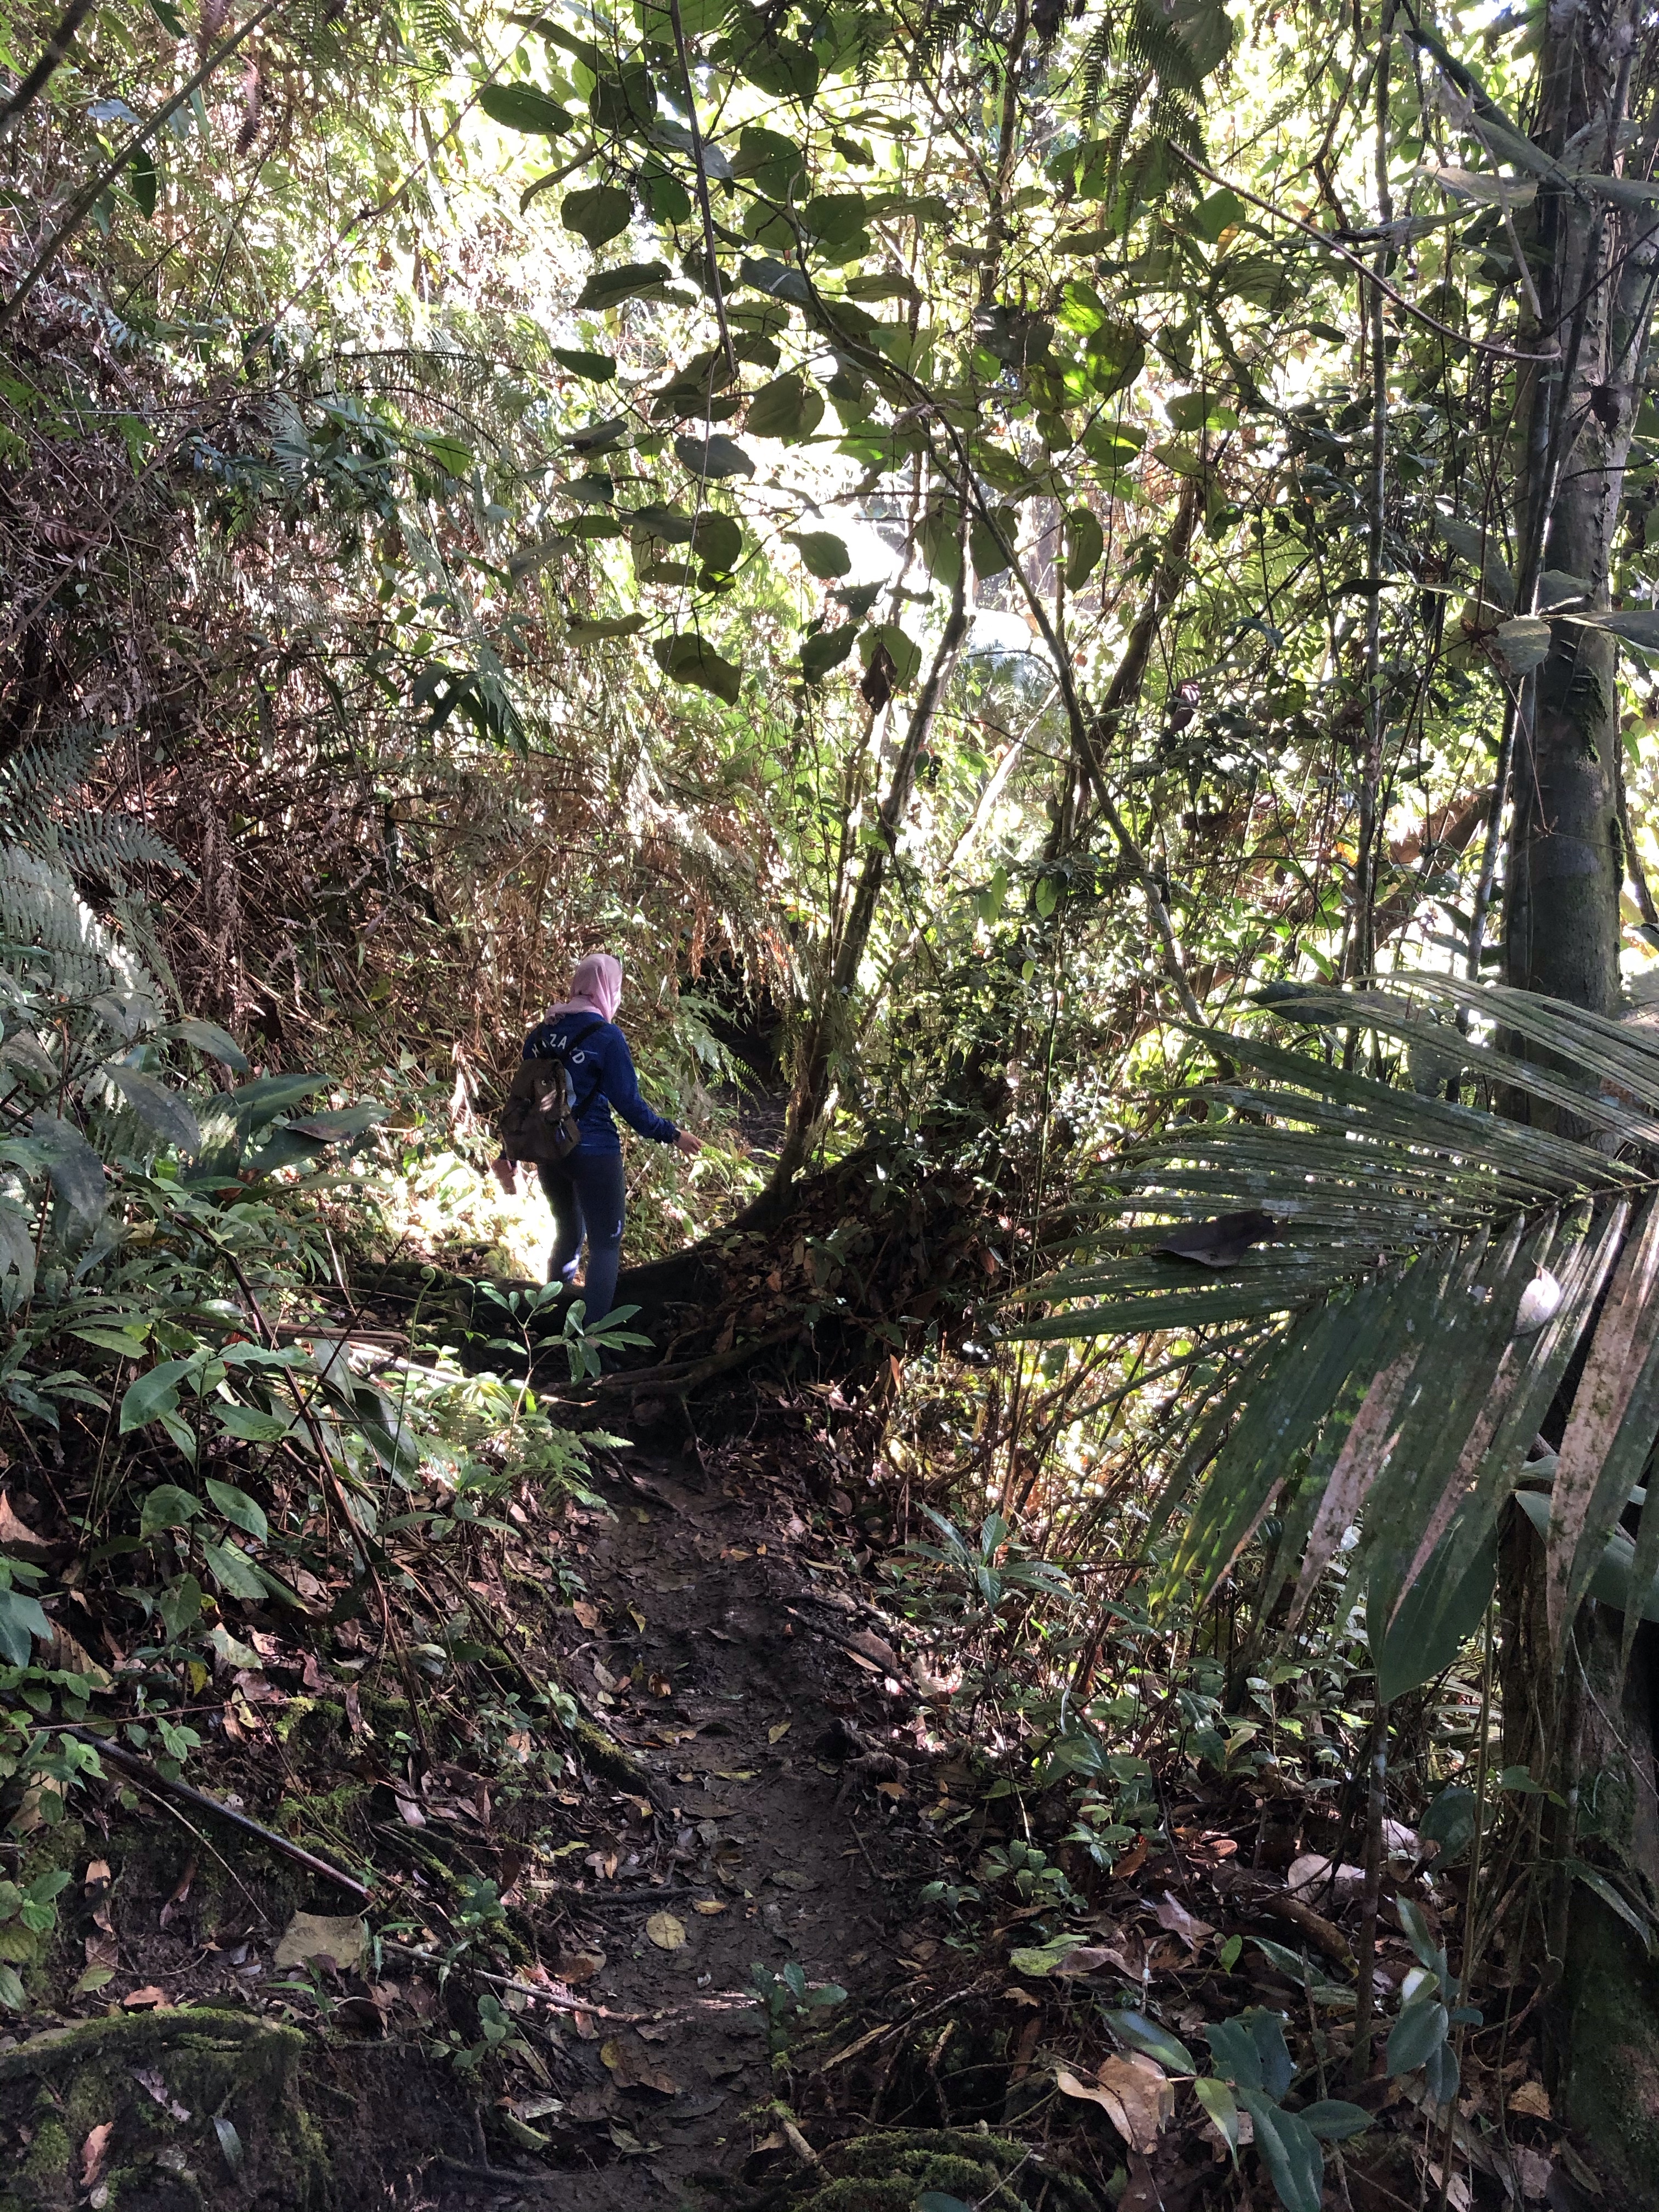
Hiking Pine Tree trail has its ups and downs. However, is it worth the 1.5 – 2 hrs drive (depending on where you’re coming from) to hike this trail? Well, let’s see. While Pine Tree is not your typical Broga hike, we would say that it’s definitely worth the drive and time spent. Pine Tree offers a very scenic view of Titiwangsa range, and gives you a glimpse of that Mossy forest feels as you reach certain heights. We say that it’s not a ‘Broga’ hike and ranked it a moderate because it is not straightforward hike — which means that it is not a consistently uphill trek to the peak. The 5.5 km trail is an up-and-down trail, some of which are steep, some of which are the staircases kind, and these are usually the ones that test your mental strength.
The trail is mostly like this throughout.
Some flatter areas along the way.
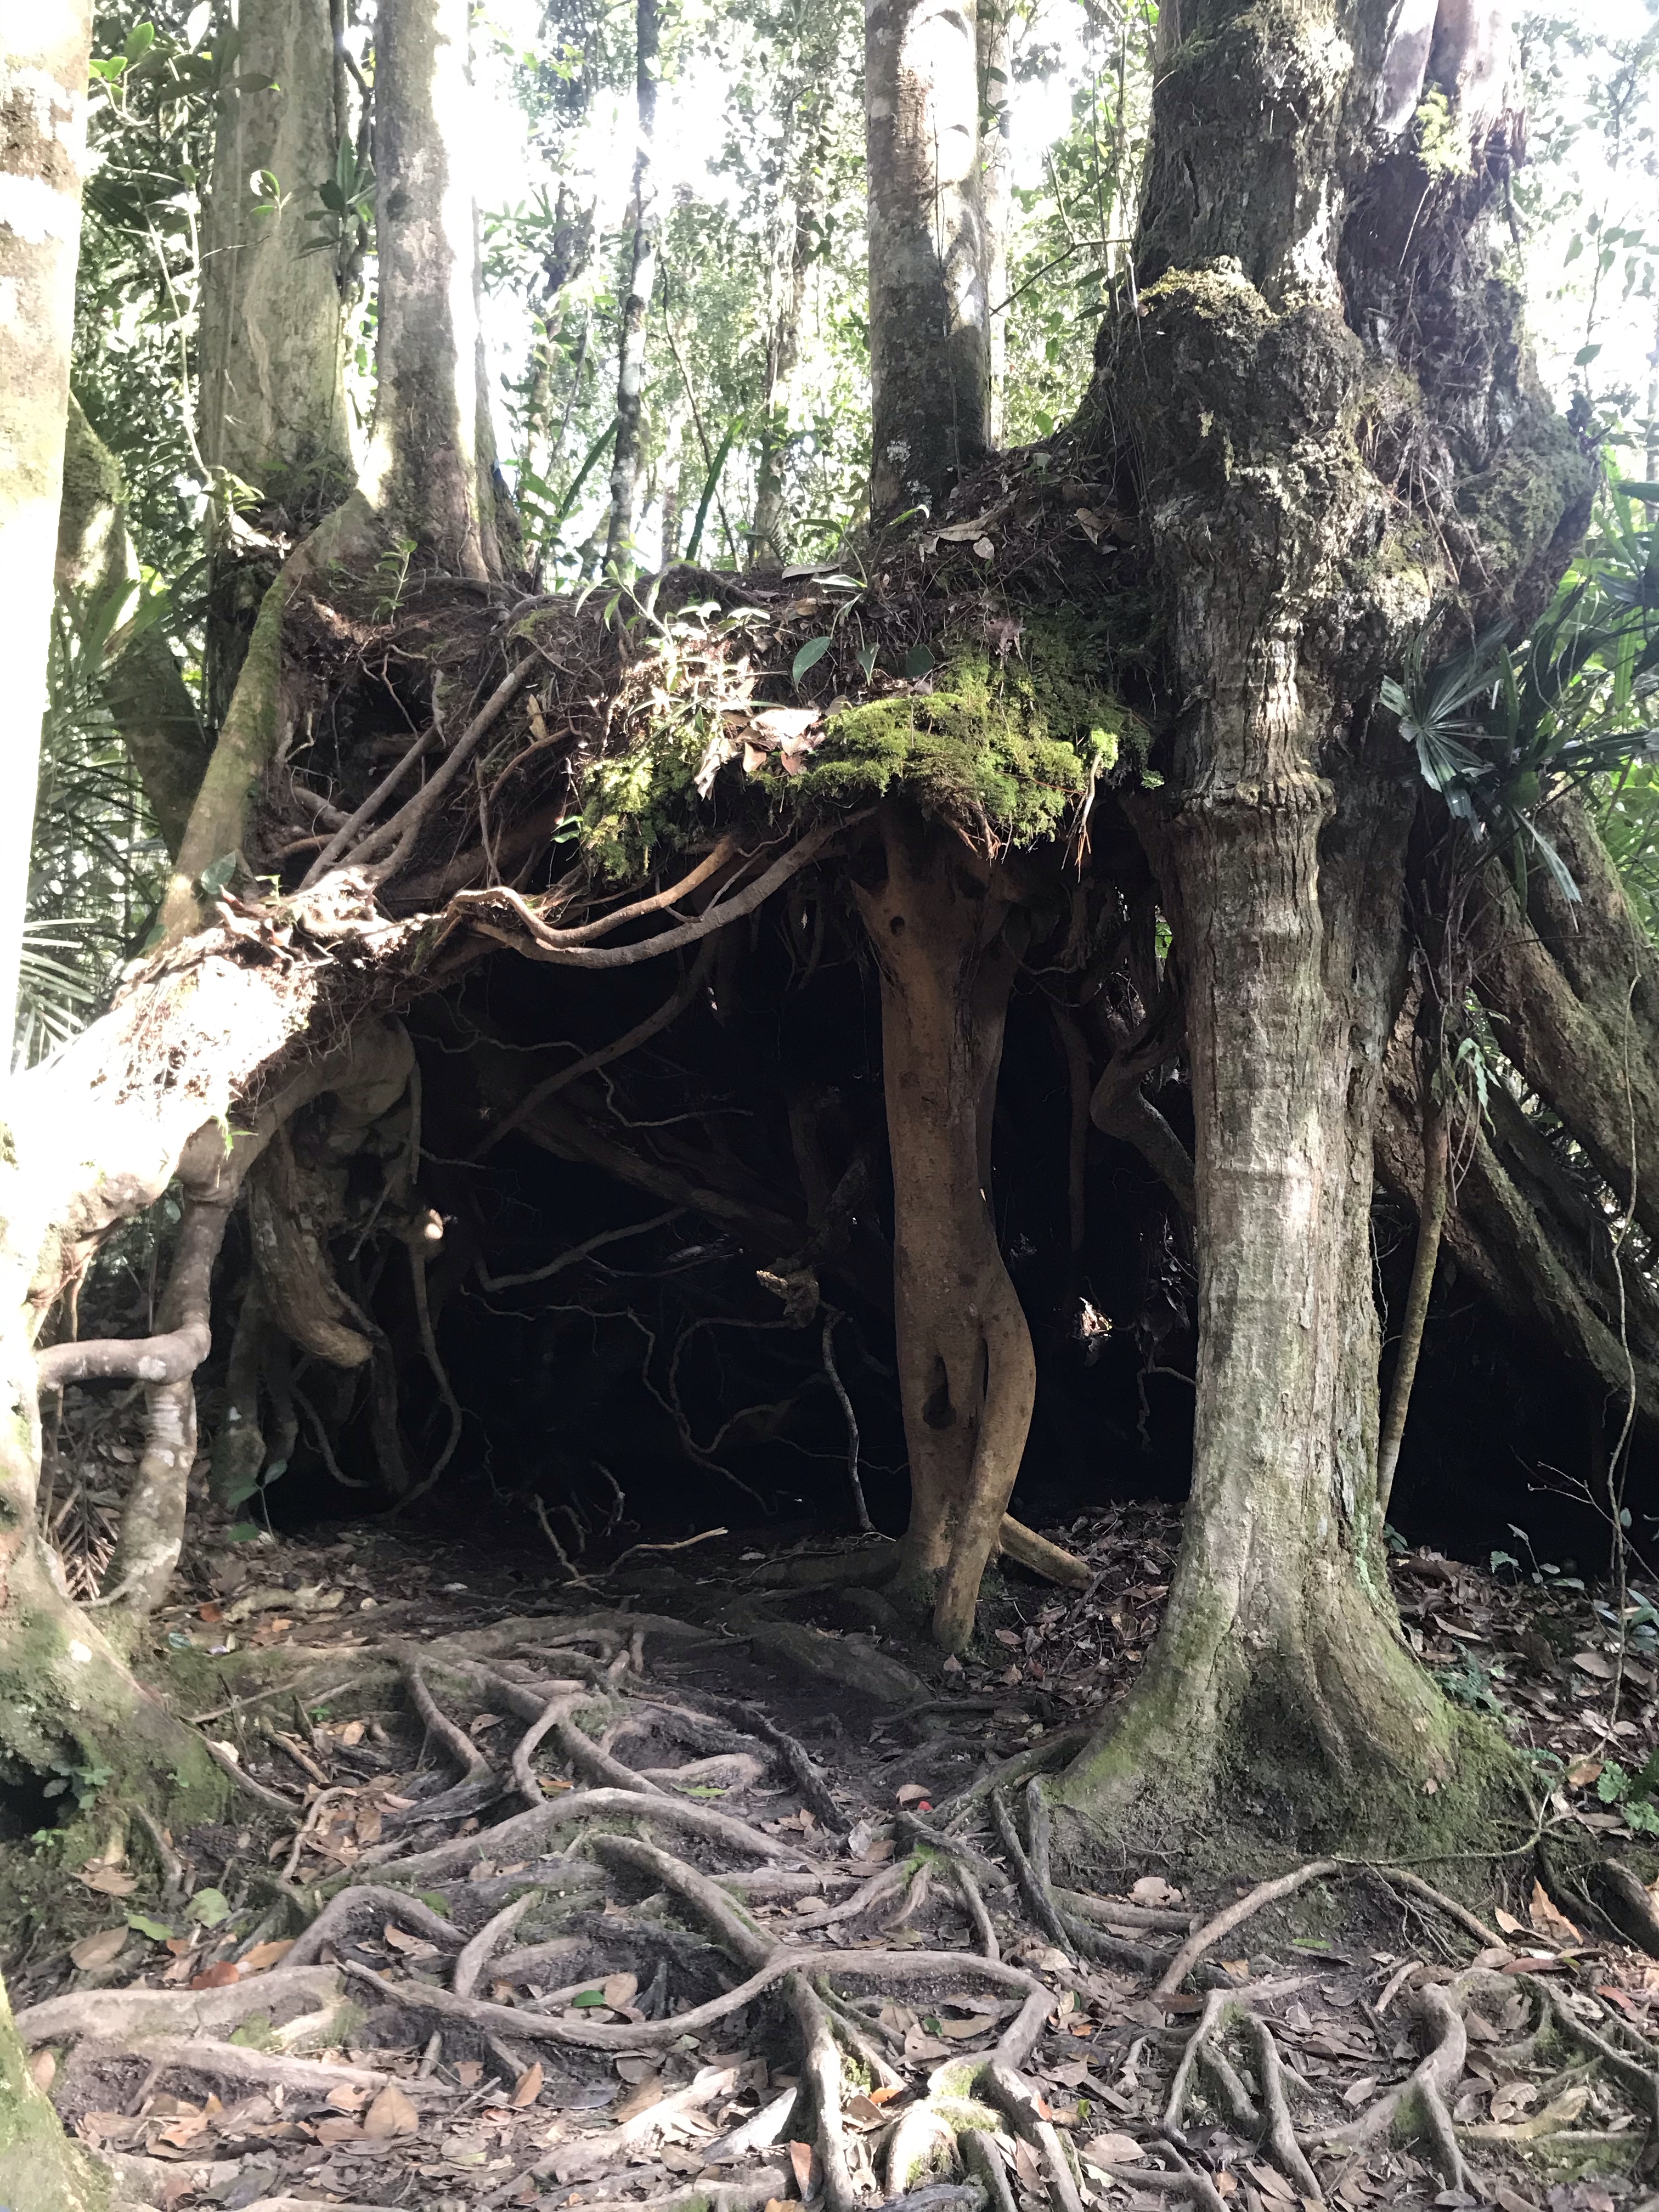
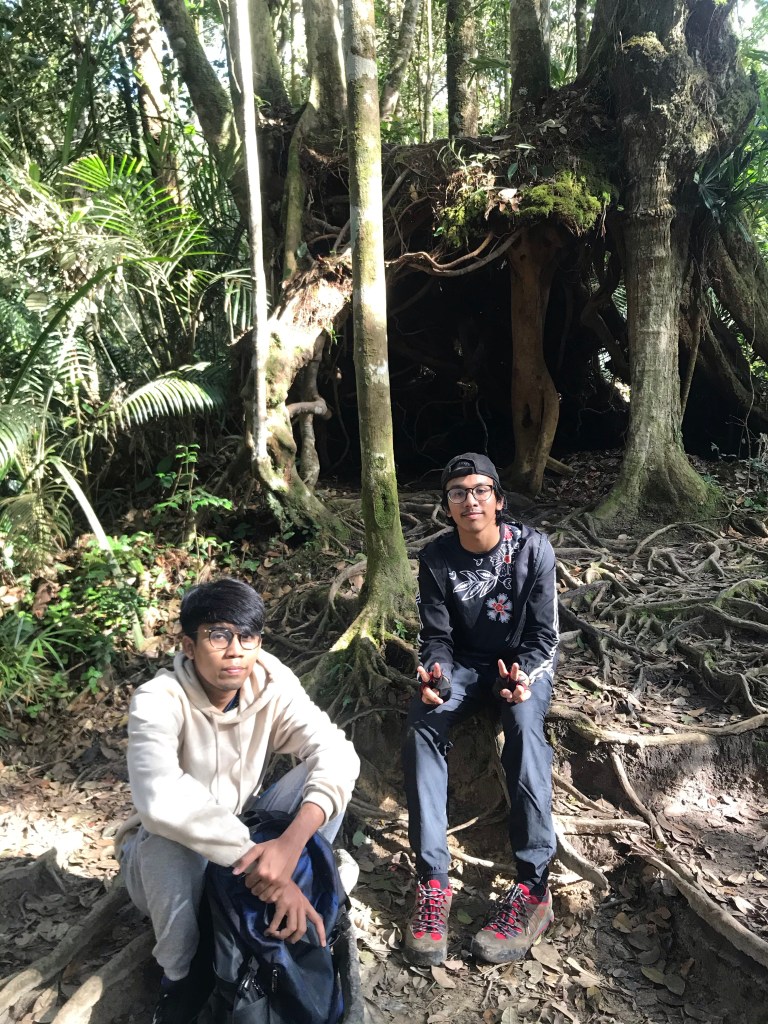
This spot is a checkpoint. You will come across this ‘cave’ after about 1.5 km.
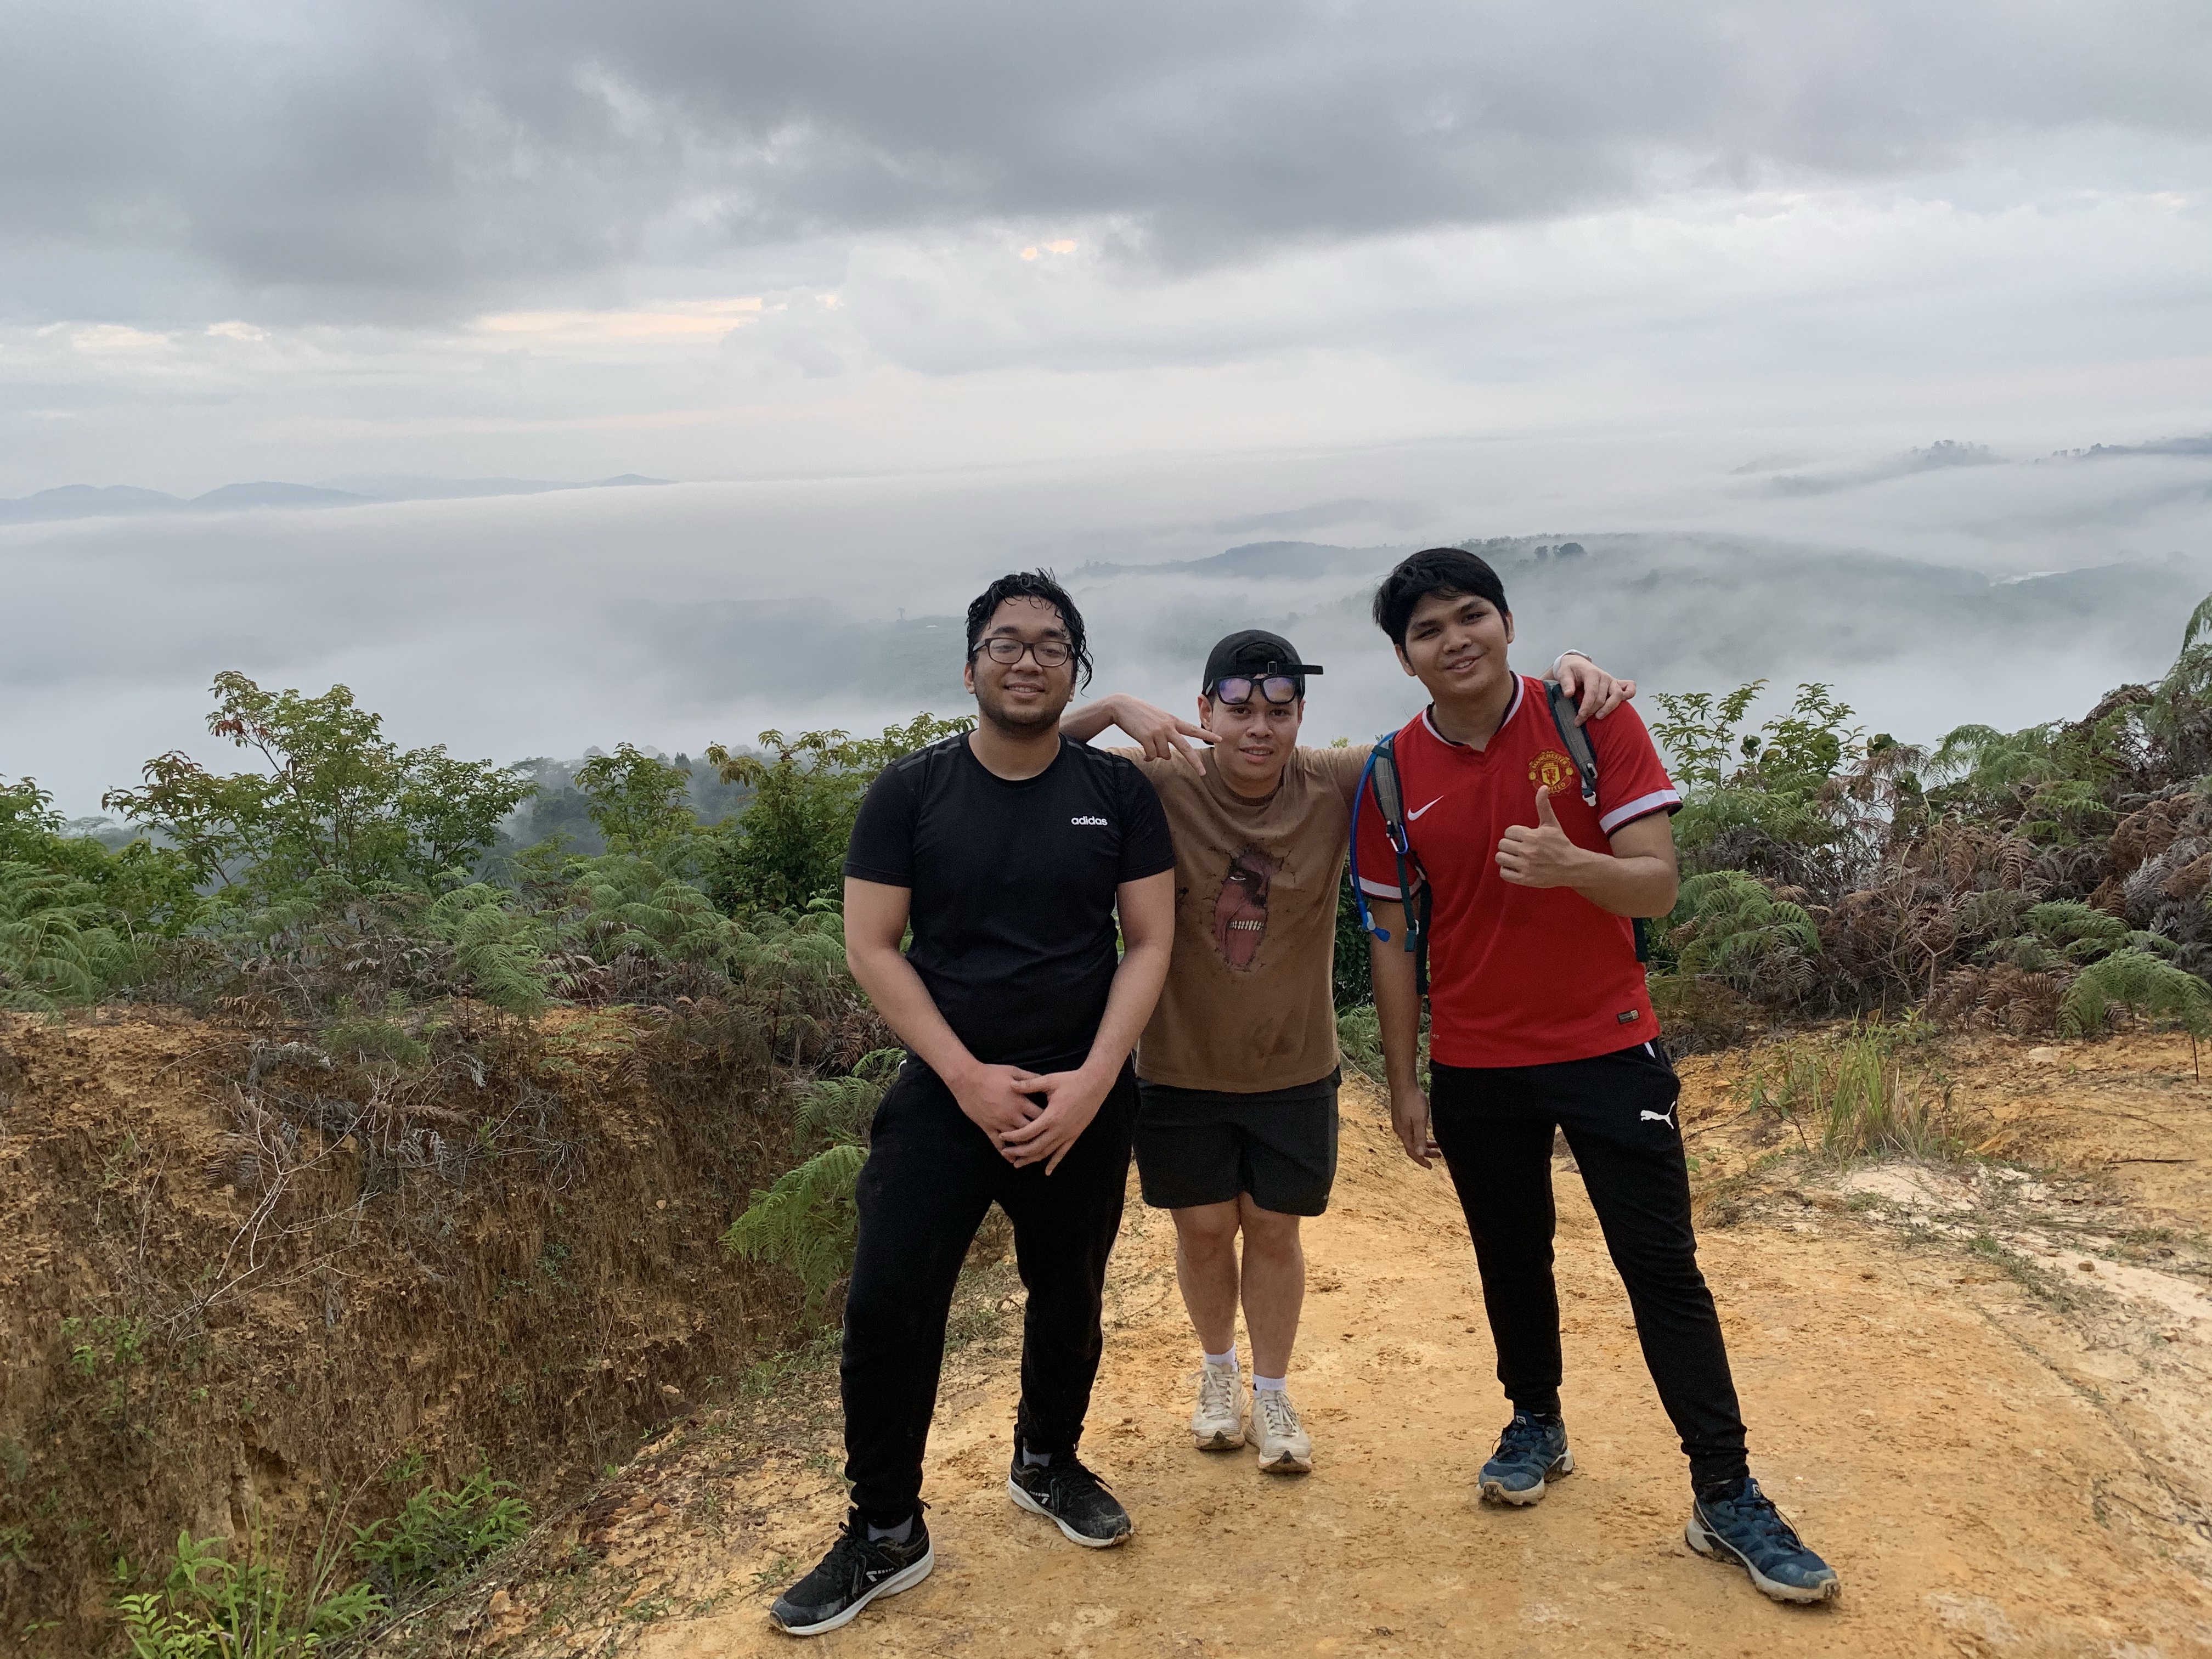
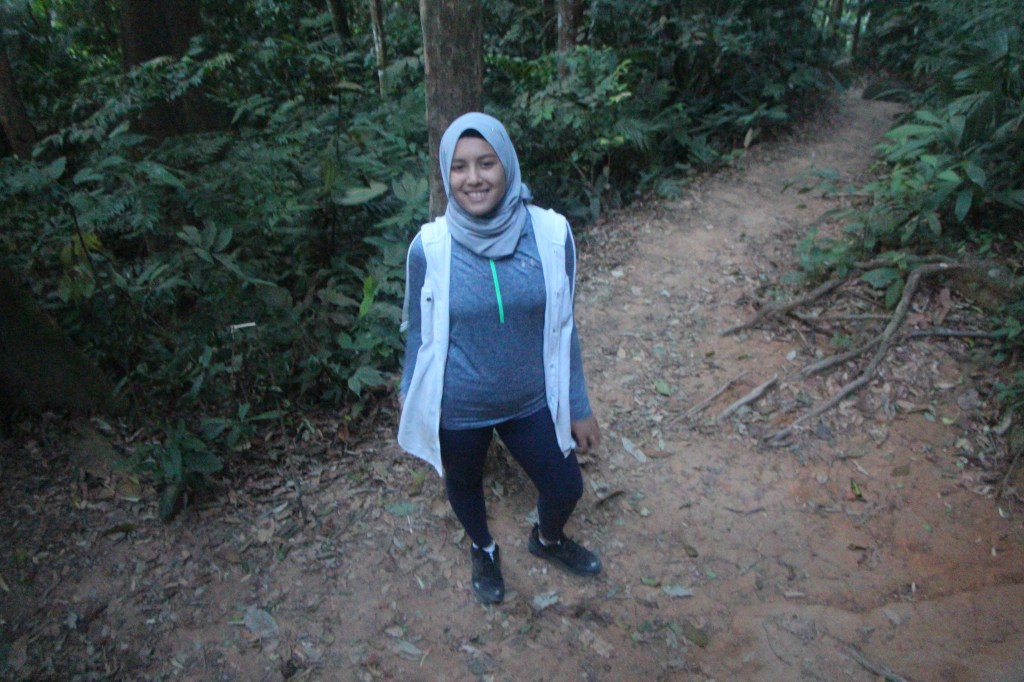
Qayyum and his friend, Asyraf who tagged along this time.
However, fret not, as the journey to the peak is of undeniable beauty. Not many people trek this trail, so you’re surrounded by deep-rich, organic, timeless dense forest. For us, the real fun begins as you’re about to reach the summit, because you have to scramble (ropes available to help you) your way through a 25-m drop of vertical wall. Careful your way up here, especially if you’re scared of heights.
Once you’ve passed through the hardest part, congratulations you’ve made the peak! Feast your eyes for a great view, and if you’re wondering what those tiny looking civilizations ahead are, that’s Bukit Fraser, and yes, you’ve practically hiked all the way from there.
If you have the strength and time to go on, proceed for 1km (30 minutes) for the Twin Peak. We were told that the view is just alike, although at a slightly lower elevation than Pine Tree Hill. Unfortunately, for us, we didn’t really have much time as clouds were moving towards us, and so we were afraid that it was going to rain soon.
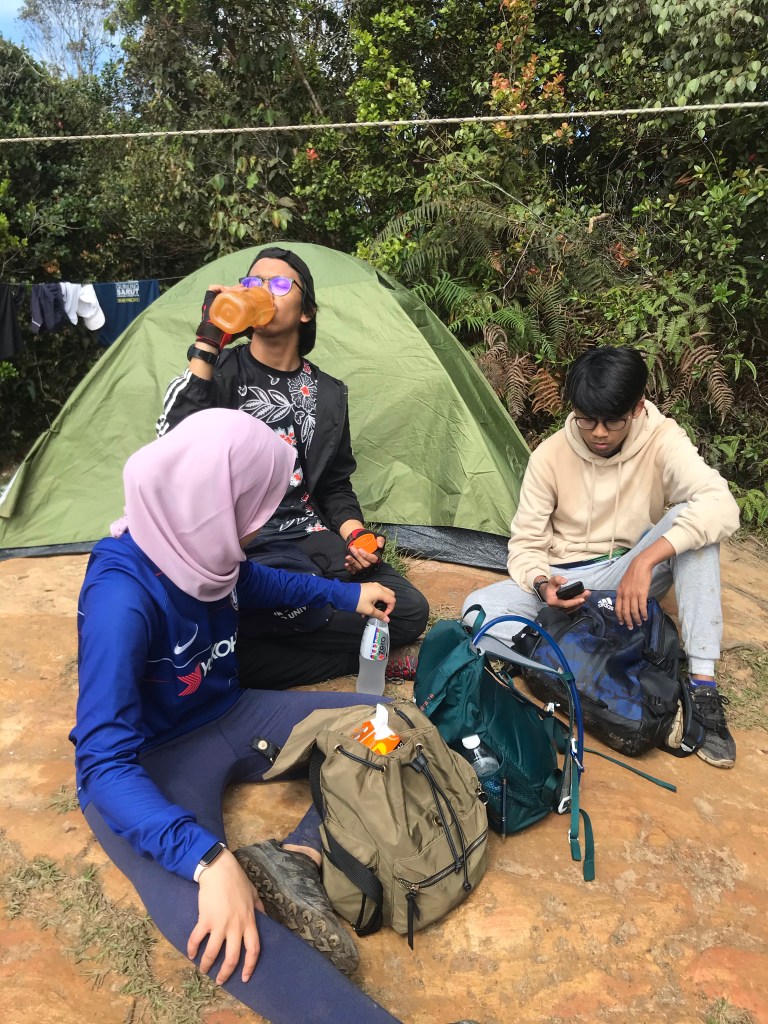
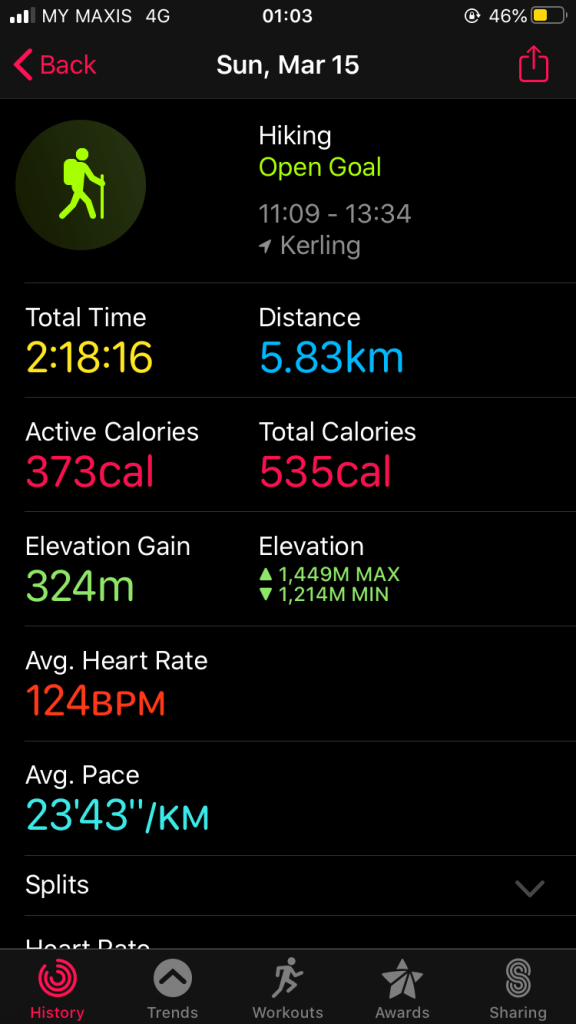
The peak also serves as a camping ground, utilized by the folks we met when we reached the peak.
Some statistics on our journey back recorded using Apple Watch, in case it may be useful for you.
Just to recap on the pros and cons of traveling/ hiking here:
Pros:
Beautiful view (aren’t they all?)
Mossy forest feels
Cooler air (high altitude)….
Which brings us to less sweating (but you will sweat nonetheless)
Less human traffic
Cons:
Long drive to trailhead
Steep/ up-and-down hike
Costly town
We say this because of the expensive petrol, and also for the meals that we had.
Unavailable proper gas stations yet
All in all, we think that staying overnight for a weekend trip to Bukit Fraser is a more reasonable option, because you’ll be able to cover more trails than we did since most of these are relatively shorter trails throughout, except for Pine Tree. Pine Tree, as we’re told, has the longest distance among other trails. Plus, it makes a perfect getaway from your busy schedule for a quieter ambience that is only 2 hours away from Kuala Lumpur. However, if you’re like us, not really in the budget for a stay in, Pine Tree is still worth the day’s trip because the view while hiking and at the peak is just amazing.
Today, we’re going to tell you about our recent trip to Gunung Datuk, which is located in Rembau.
We woke up pretty early in the wee hours of Sunday morning as the drive from KL to Rembau took about 1 hr 35 minutes. We reached Gunung Datuk at 5am in the morning.
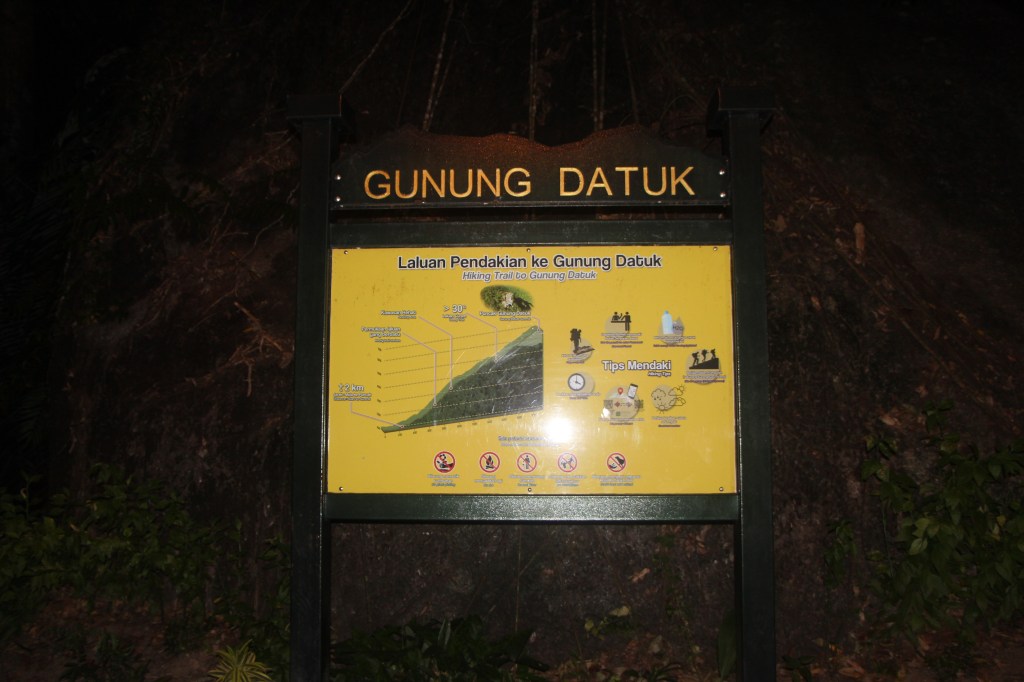
This is a signboard you’d not miss, which is located right at the registration hut.
Typically, you’d have to pay a permit fee of RM5 and to write down names before entering the premise. However, the registration hut was still closed at 5am, so we were only able to queue for that after our hike.
Climbing Gunung Datuk was, in our honest opinion, is challenging yet manageable.
This is because, Datuk is consistently steep all the way, in which we prefer, because it’s not like those mountains where you’re going up and down crossing hills to get to summit. It is a fairly straightforward hike, and not that long as well. But, in order to summit Gunung Datuk, one has to be mentally ready for a strenuous leg day and to be physically fit, as the hike down may tire your legs.
Here are some facts on Gunung Datuk:
Location: Rembau, Negeri Sembilan (part of Banjaran Titiwangsa)
Summit elevation: 884 m (2, 900 ft) above sea level
Distance: 3.06 km one way
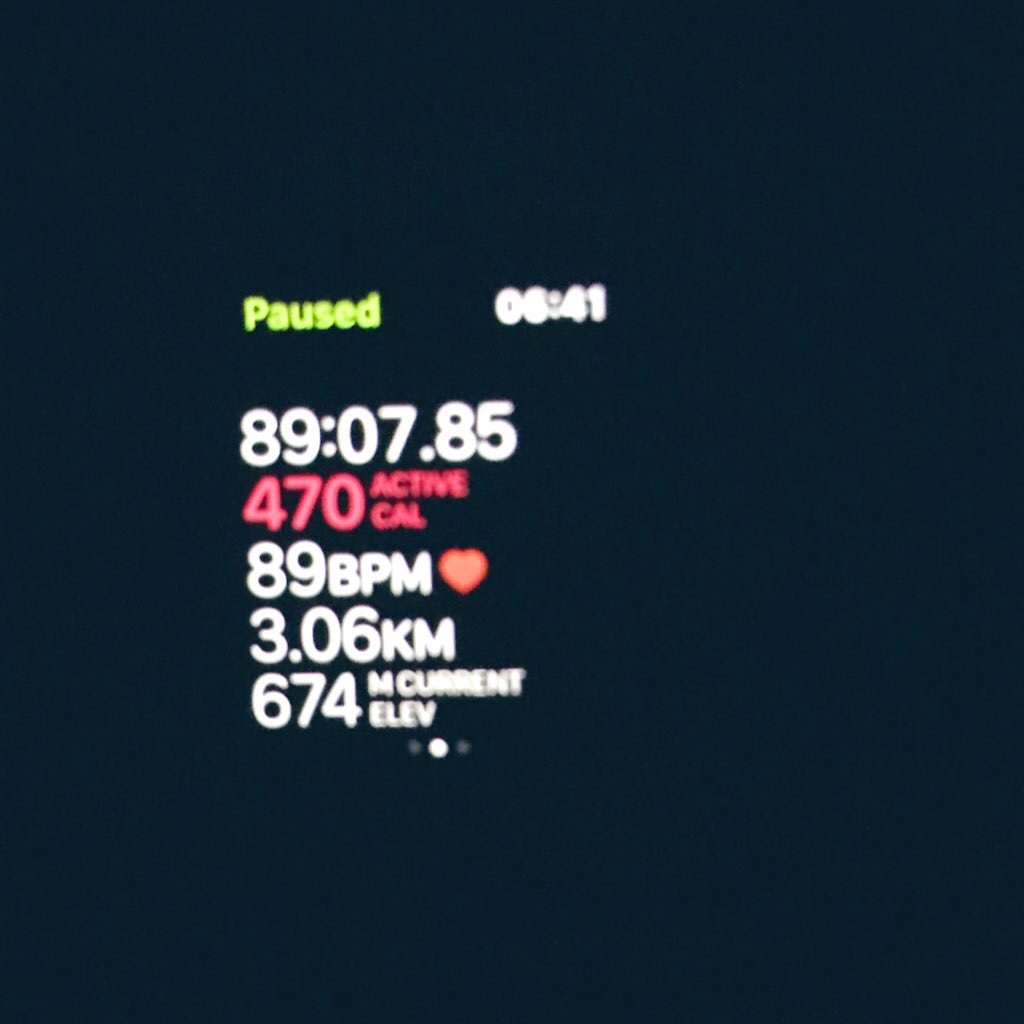
Duration: Typically 2-3 hours. We took about 89 minutes to reach summit.
Permit fee: RM 5 per person
Parking: Free, but gets filled up very fast
Road condition to trailhead: 2WD is permissible, but there are rough tracks which you may want to be careful with.
Honestly, we wouldn’t mind paying the fee at all because the trail was very well-maintained. We have to admit, the trail was very well-kept and has accessible, stable staircases at the boulder summit, which has a similar feel to the trail in Gunung Kinabalu, except — of course– for its distance and panoramic view. We were convinced that there were less trash around (except for one Kinder bueno wrap that we picked up on our way down), which is very impressive. We just love clean trails 😉
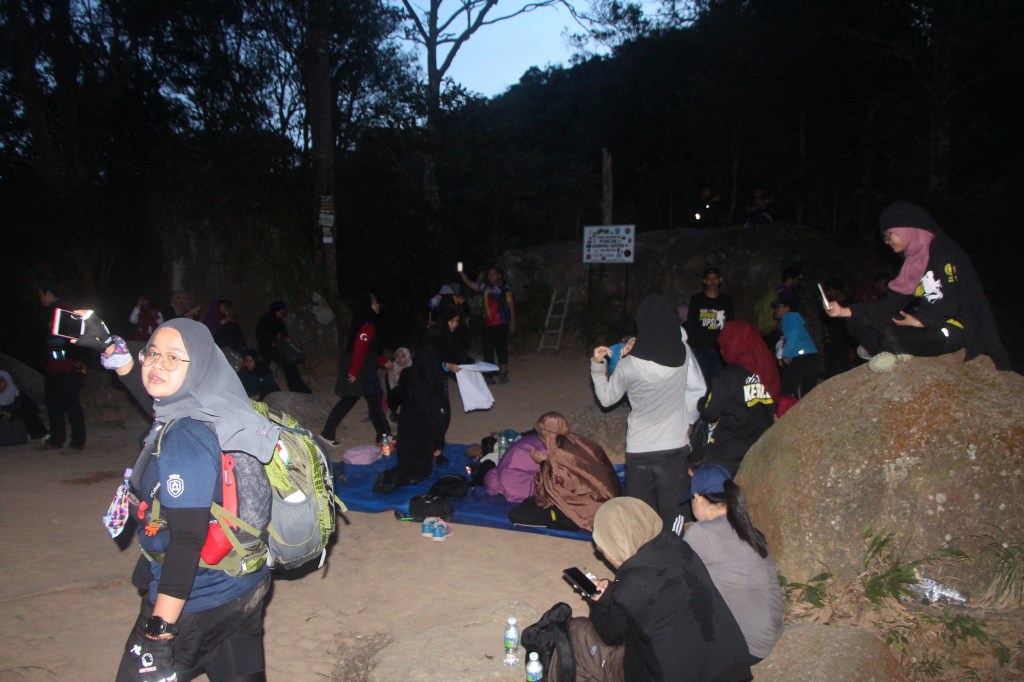
Anyway, summiting a sunrise hike is just like a regular hike, except that it requires headlamp for you to see in the dark. We were honestly quite surprised to see so many groups of people on our way up, also trying to catch the sun. But, we were even more surprised to see a lot more groups coming up on our way down. Gunung Datuk is a very popular hiking spot during the weekend, so you may want to come up a little earlier to avoid traffic.
There are many benefits to sunrise hiking, which we are very sure why there are others who have opted for this too:
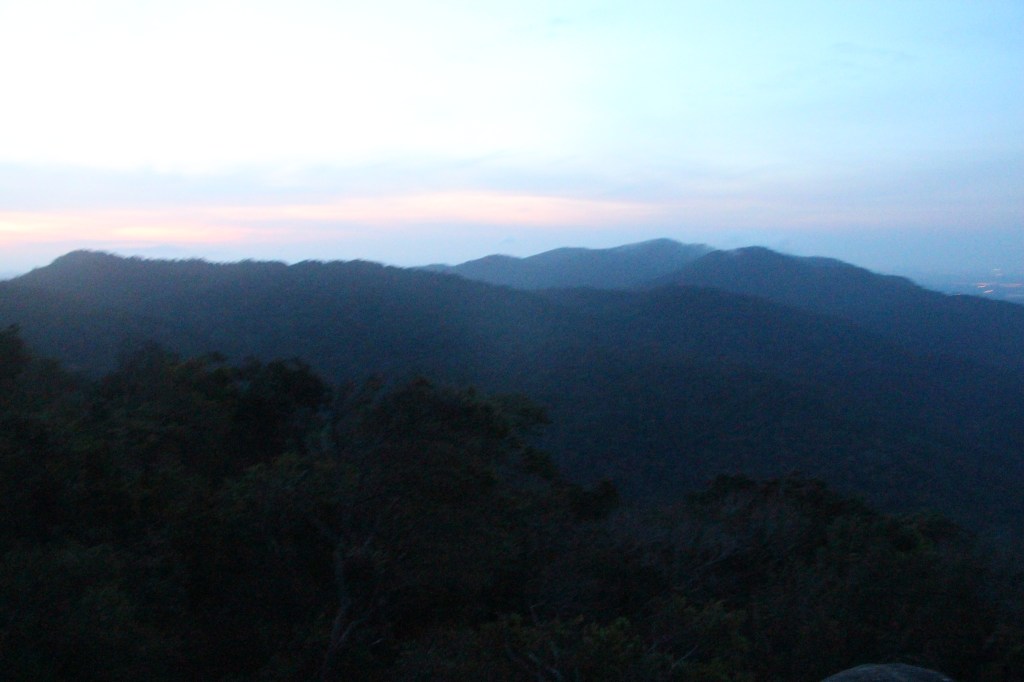
Sunrise view is amazing. Gunung Datuk offers a 360 panoramic city view of Rembau district.
Cool temperature. Although this does not make you sweat less, but going early in the morning gives you less respiration because of the low temperature.
You’re more motivated because you don’t know how steep the trail is in front of you. Some people get demotivated easily when hiking steep trails, so this is definitely a major plus point!
Here’s how the entrance looks like from the parking lot. Registration hut is located ahead of the staircase. Bear in mind, our pictures are taken mostly during our hike down, so these pictures are backwards.
The trail situation right after entrance! Not steep yet as of this moment.
Ropes are available throughout the steep areas, so you’re pretty much in good hands.
There are a few signboards indicating the distance towards summit, which can either be motivating… or demotivating. Your call.
Trail gets steeper after the first 0.5 km or so. Time to work on them legs! Or… getting some hiking poles can be very helpful too.
But, fret not! There are flat areas to help you recover… although, just for a short distance.
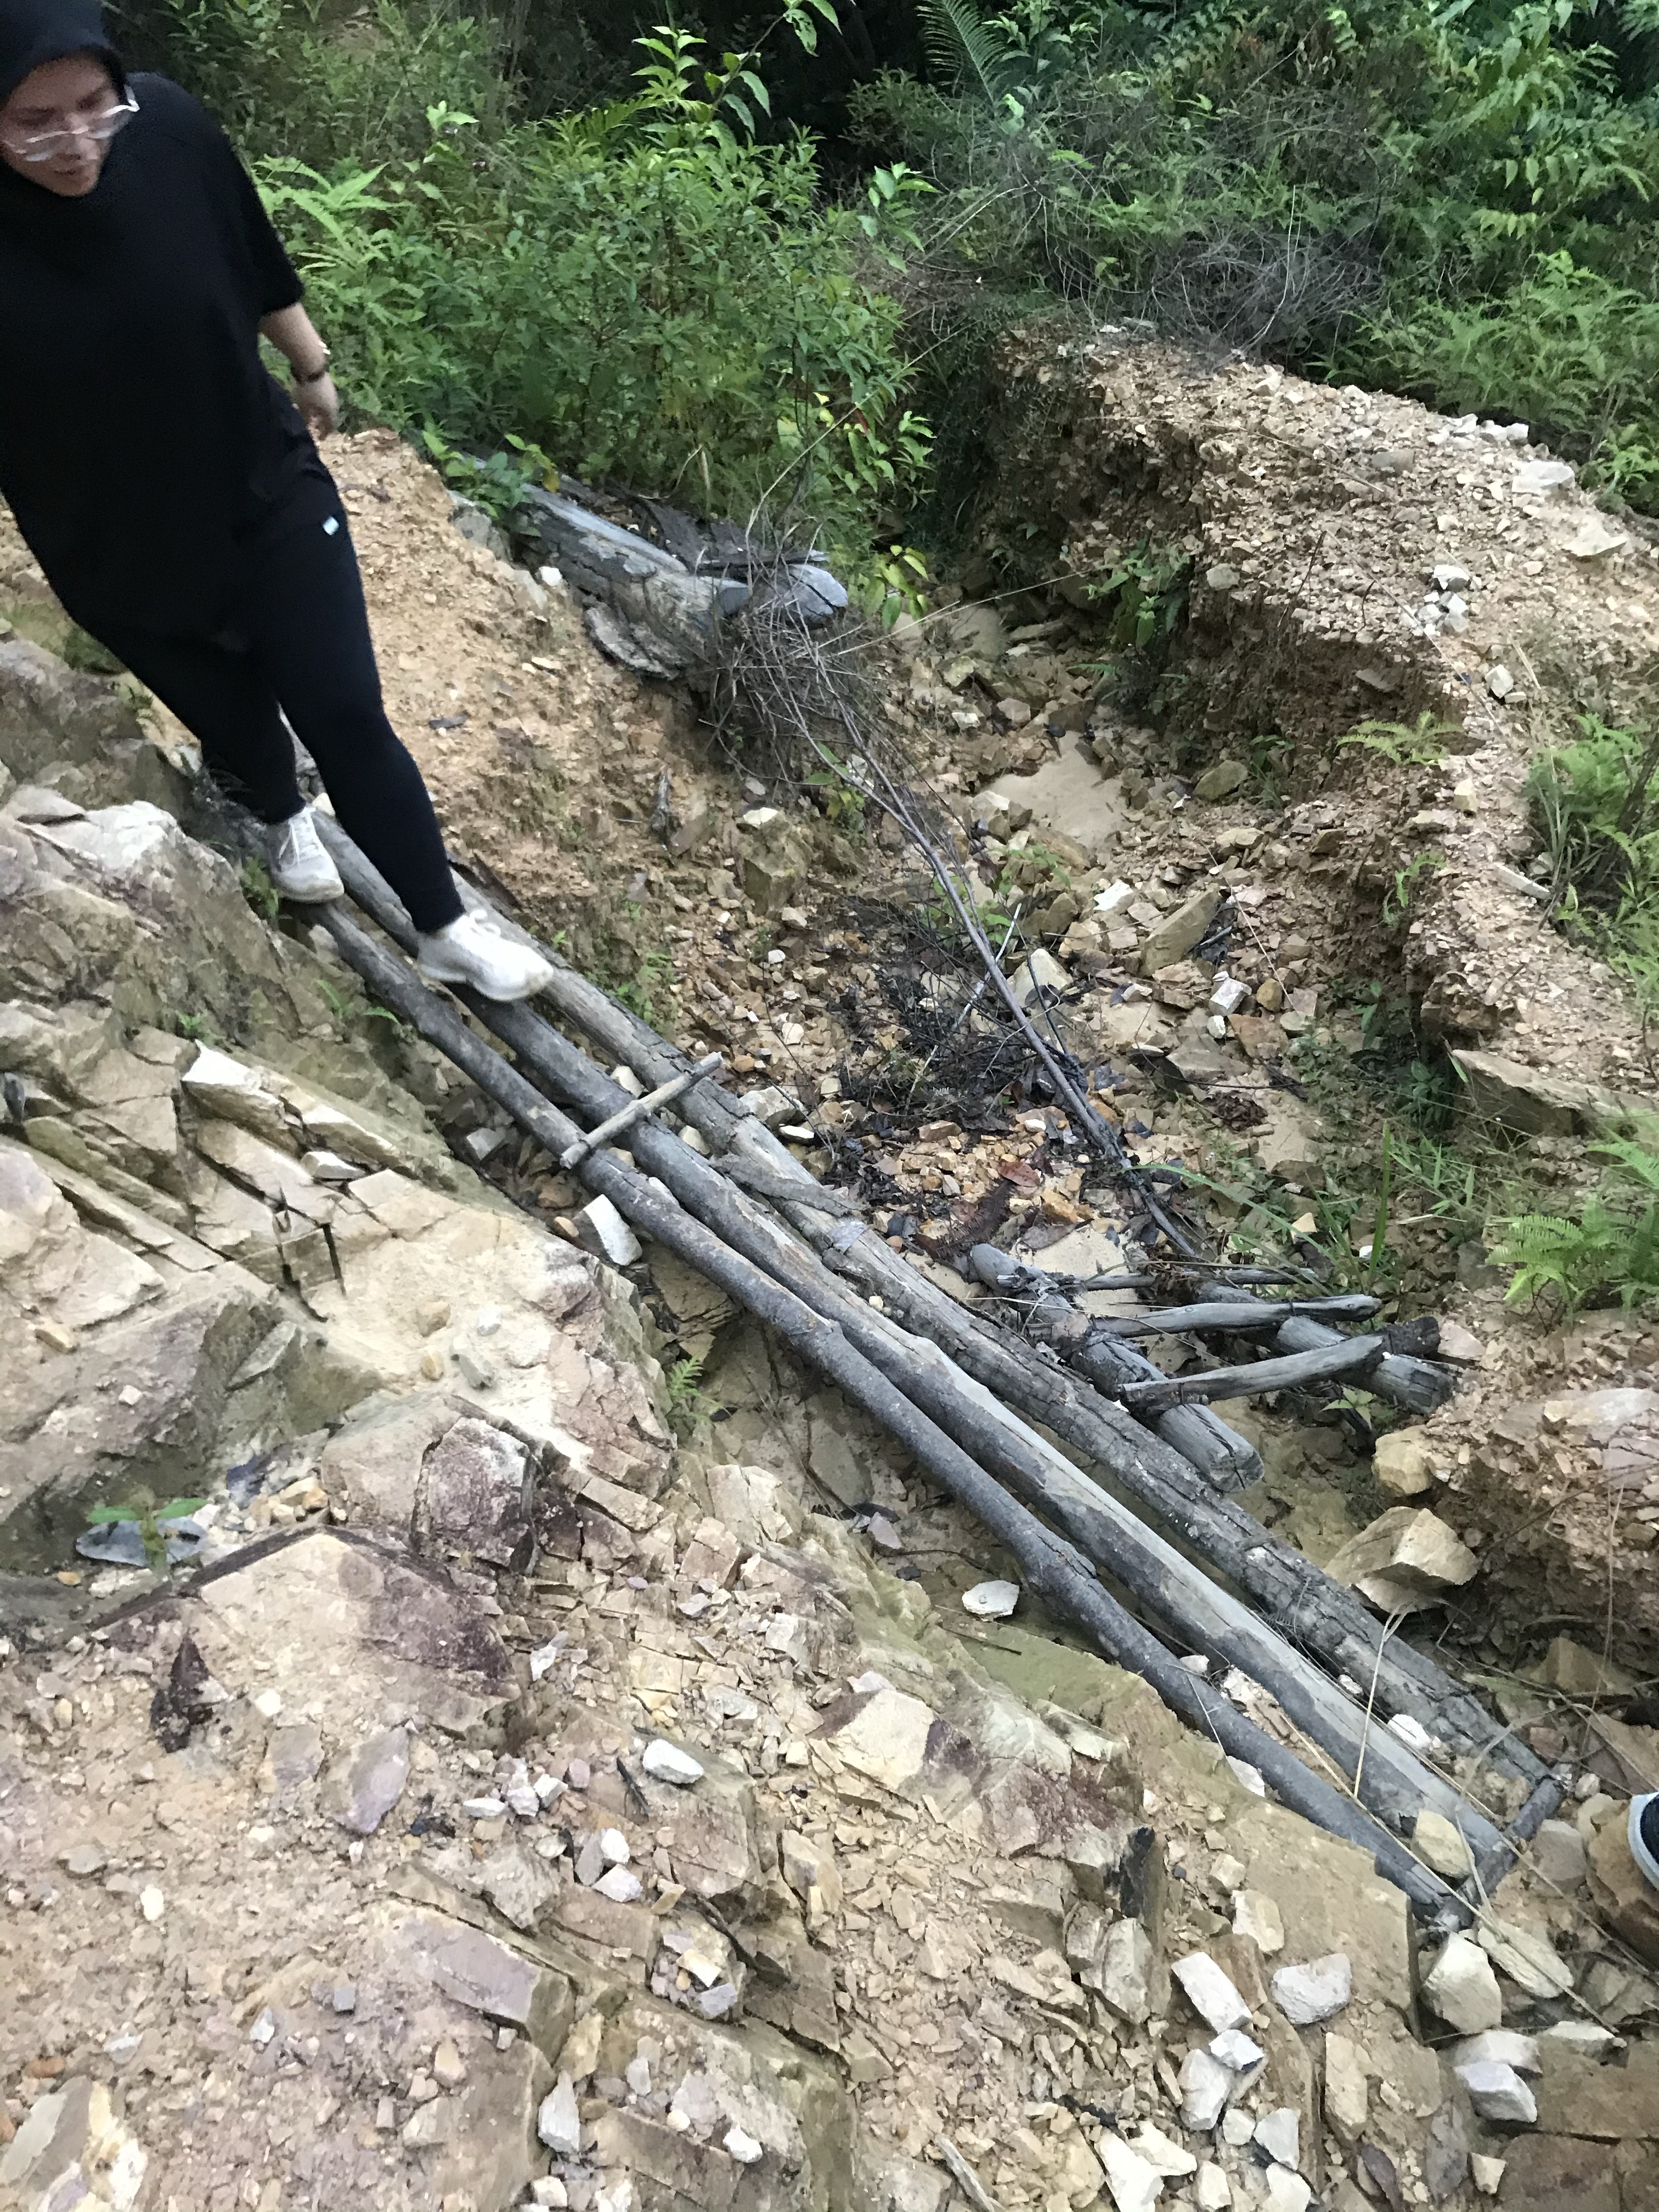
You’ll know you’re close when you see this staircase. You’re literally there.. already. Just a few more staircases to go.
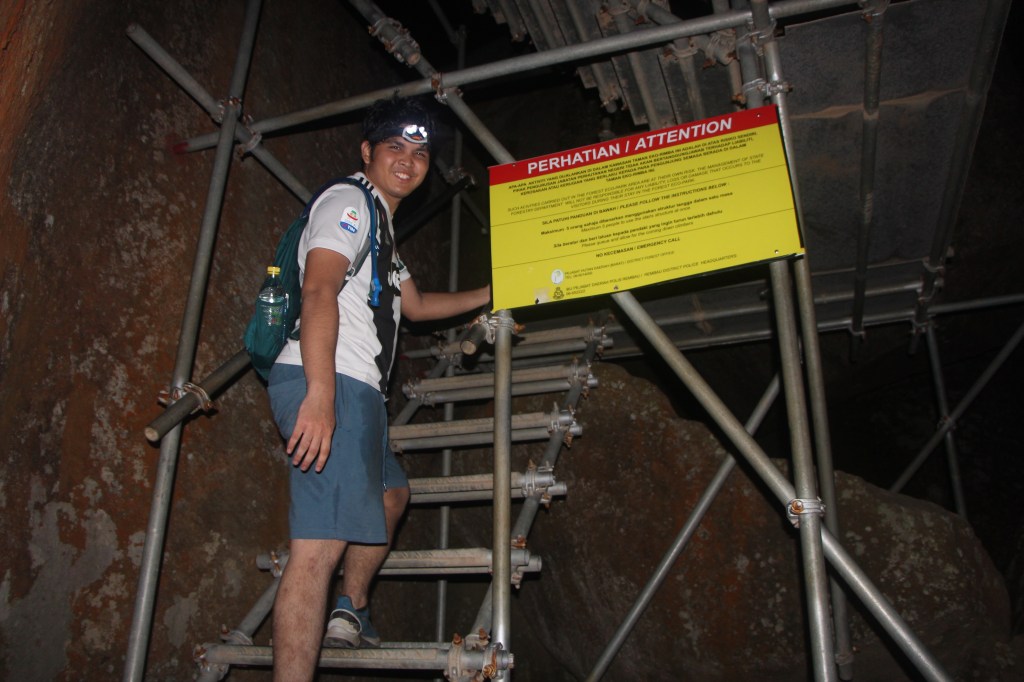
Also, don’t worry on the staircases as they’re very sturdy. We’re told that the staircases were recently upgraded because before that, they were just ladders. Like….whut.
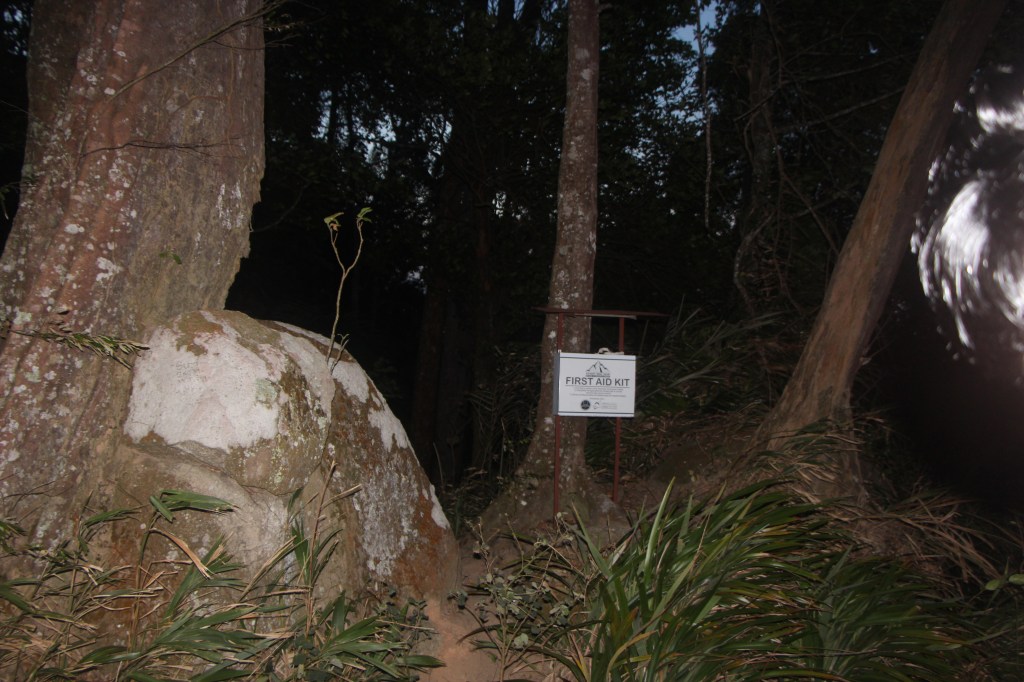
First aid kit to the rescue… for those who are injured. This is located right at the entrance to a campsite area. All just before the summit.
The campsite area. Once you’re here, you’re just a few steps away from the summit.
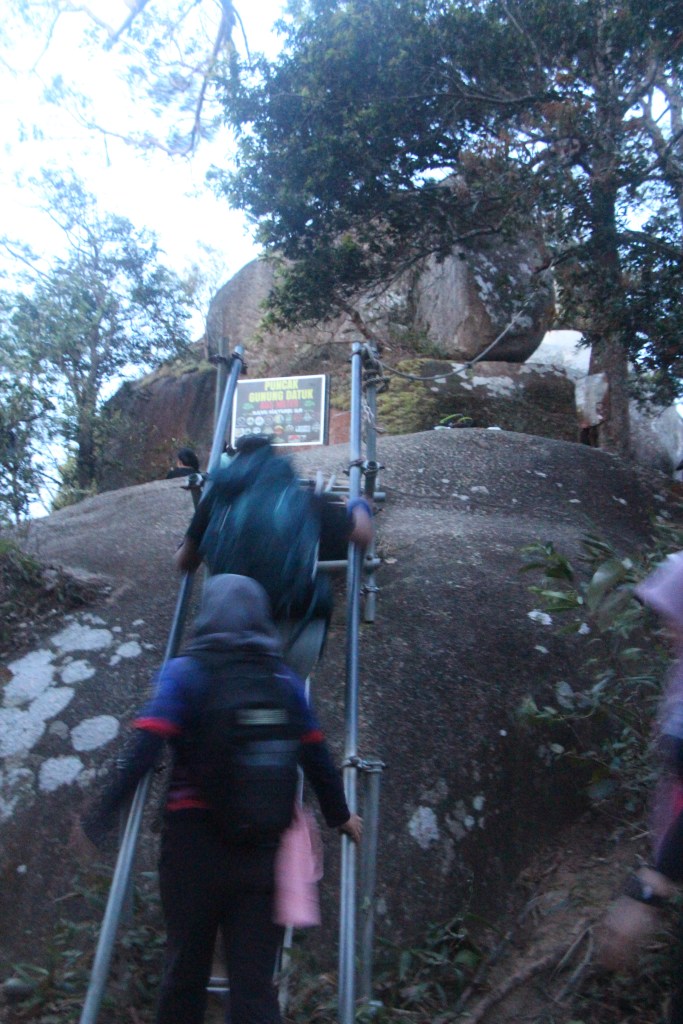
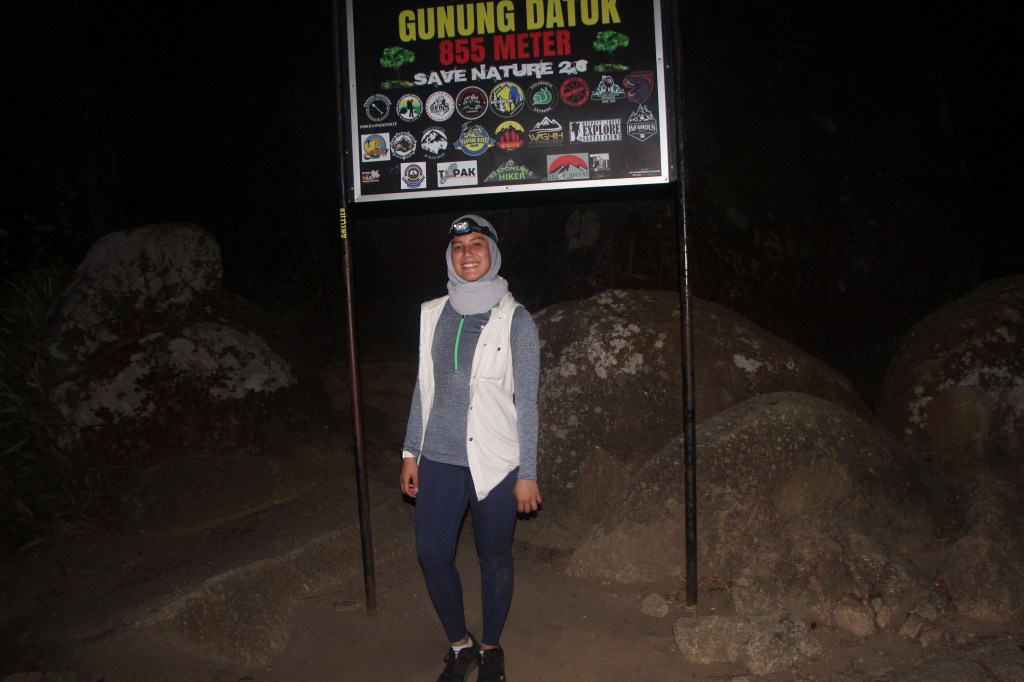
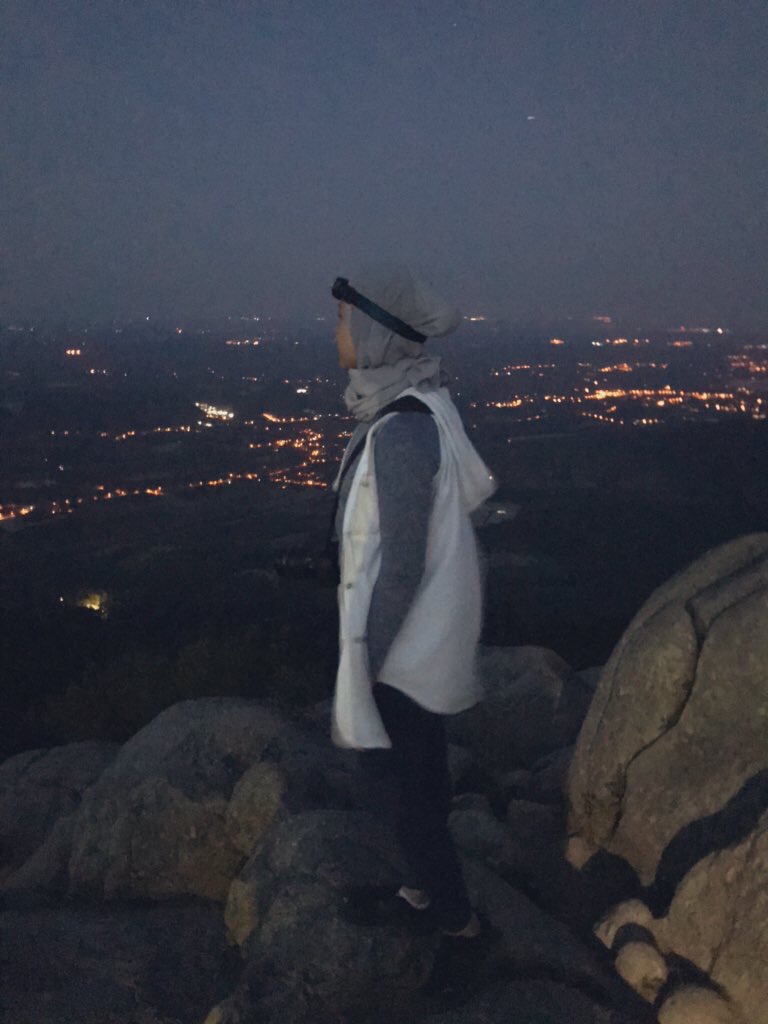
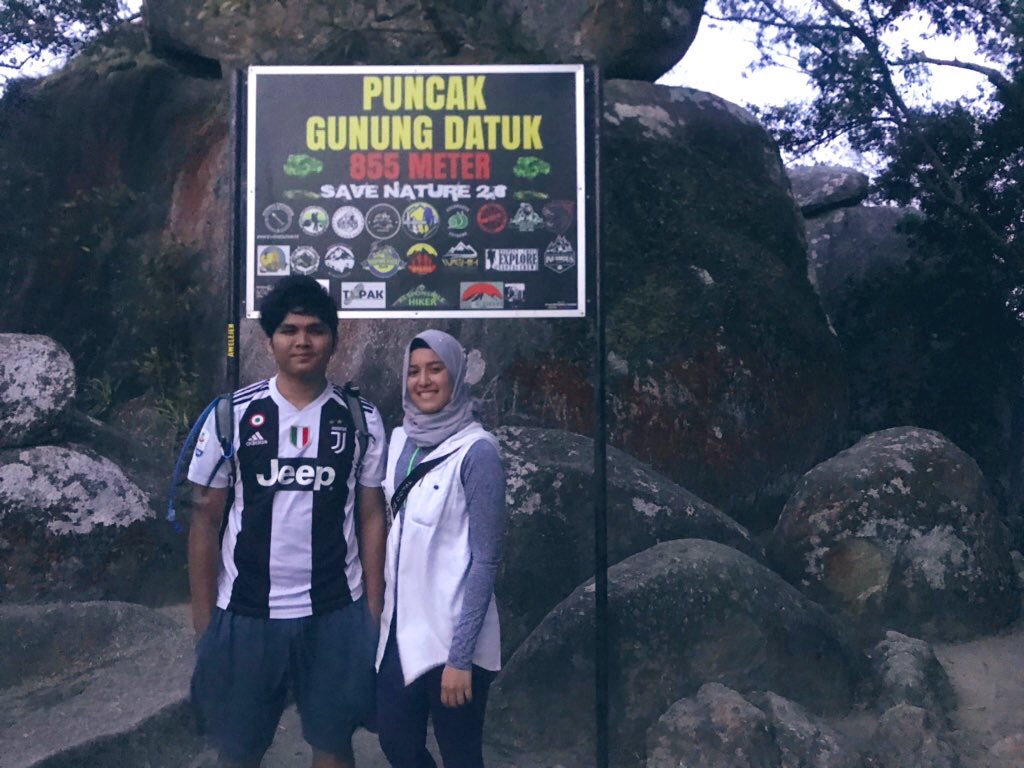
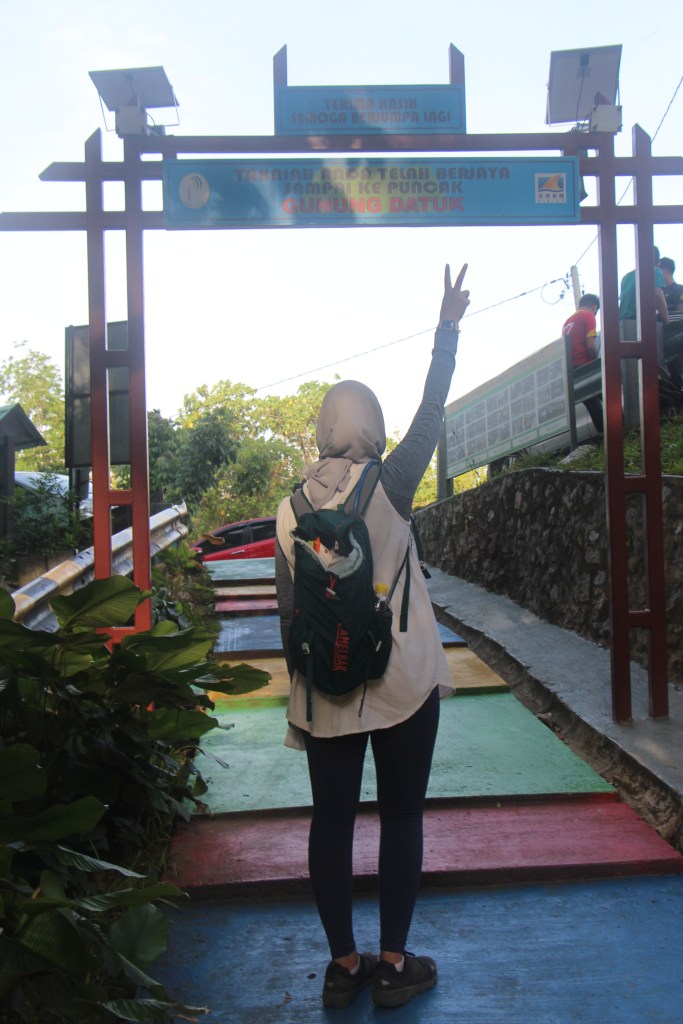
Ta-da! The signboard of dreamssssssss. However, this is not really the the ‘peak’. The highest you can stand on is on one of the Boulders located at the back of this signboard. However, hiking out of the jungle and into this exposed area can be a little dangerous during night time and even sunrise as the wind is very, very strong. So, please be careful when hiking around this time.
On our very last staircase towards the boulder peak.
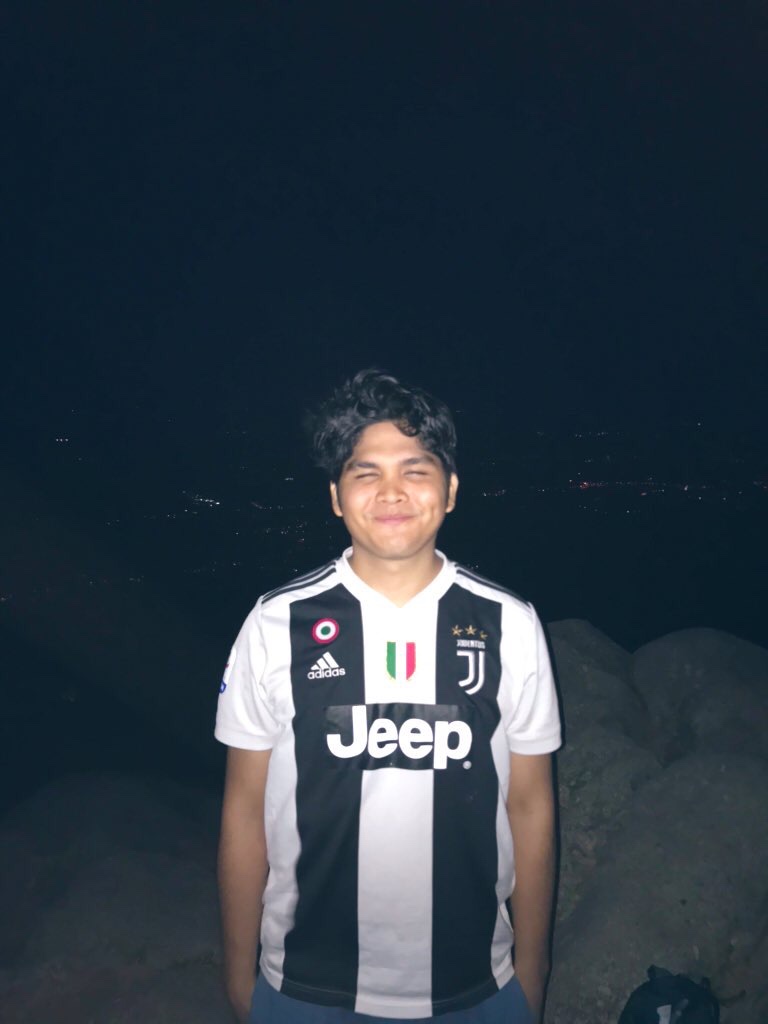
Spamming some summit pics!!!
Then, after enjoying our sunrise view, and taking memorable pictures, we started hiking down at 7am.
And…. the hike is done and dusted!
That’s it for now! Let us know what you think of this hike.
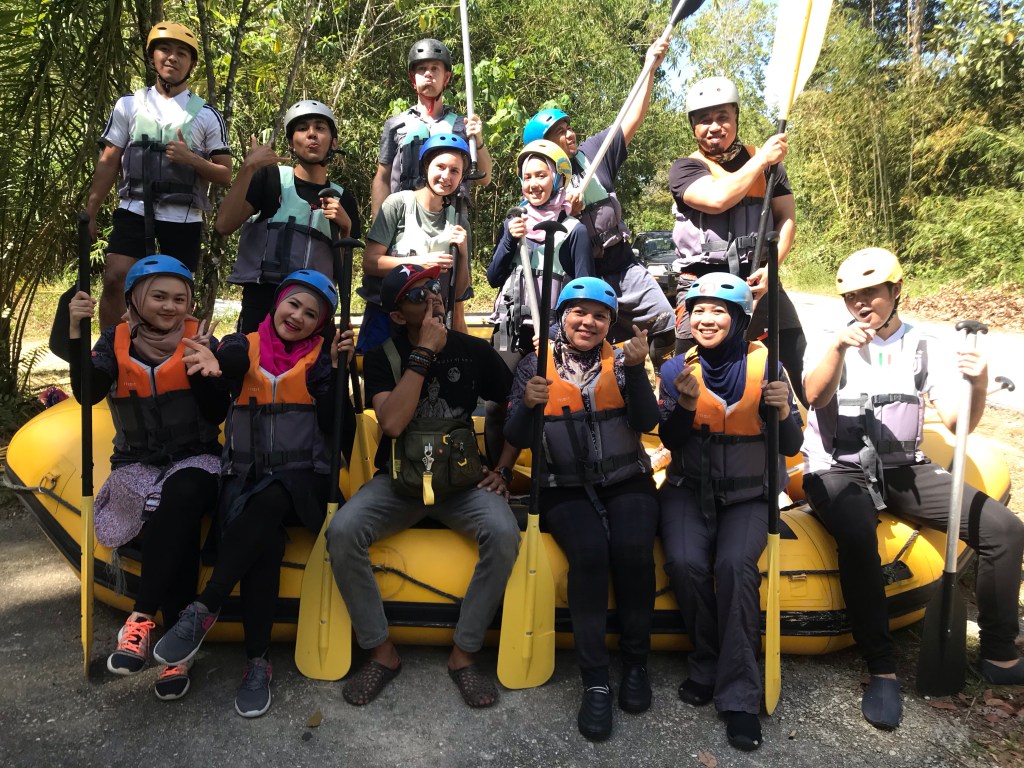
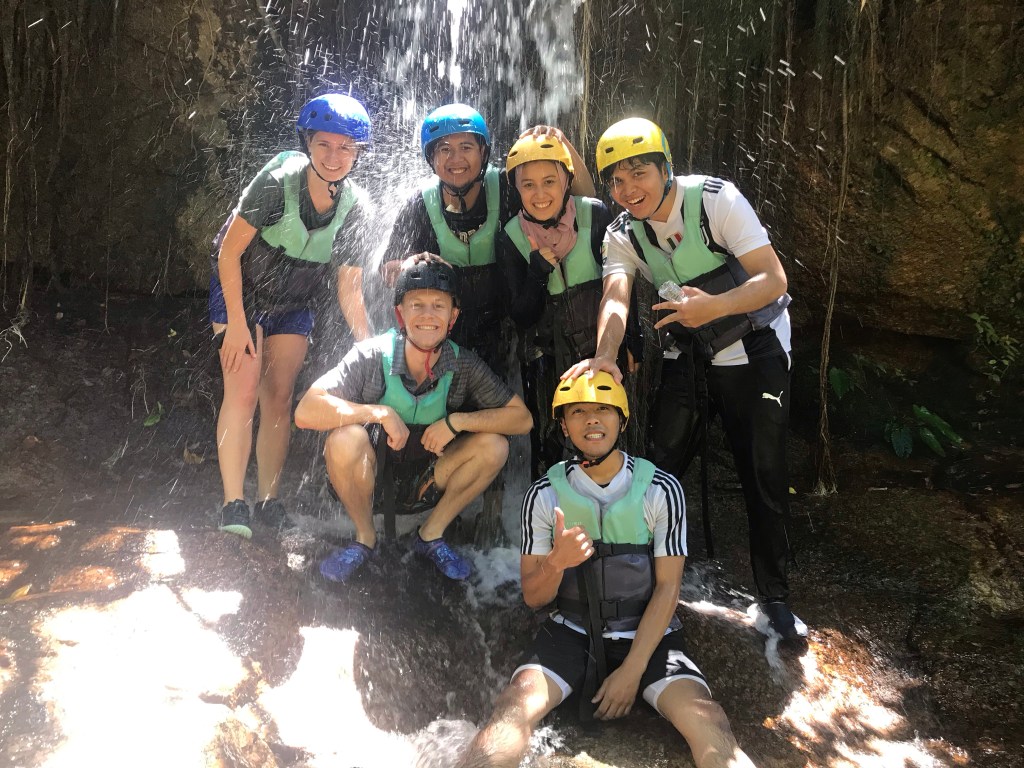
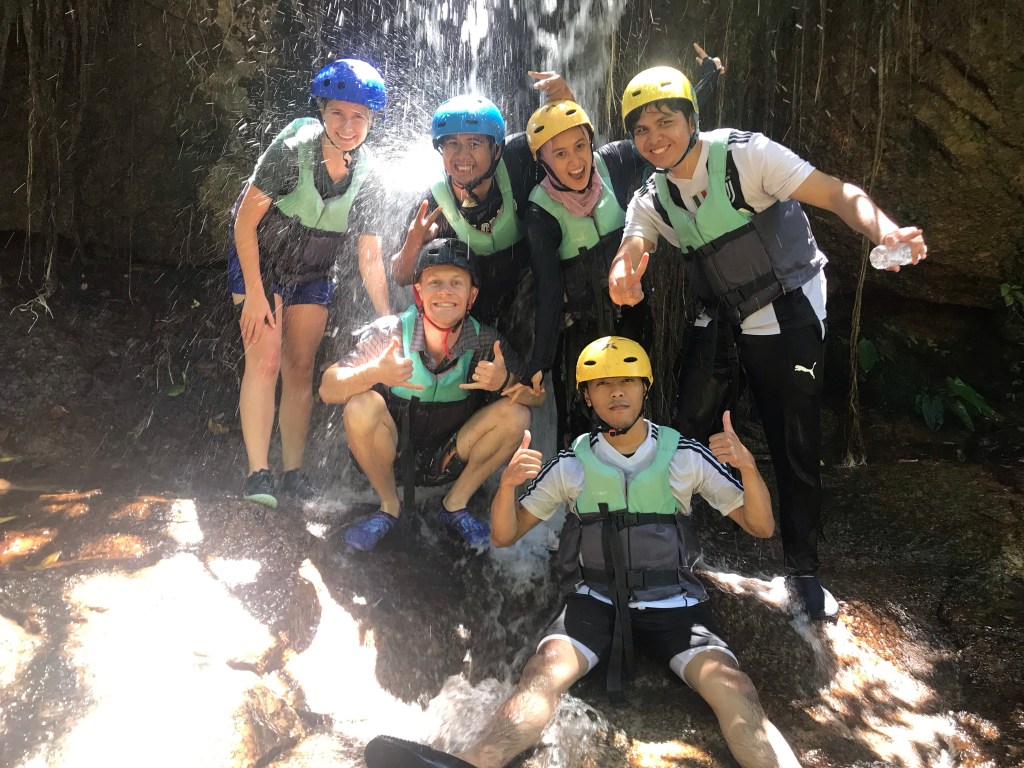
Last Sunday, both of us and a couple of our friends (Luqman Aidil and Hariz Rokman) decided to try out white water rafting at Sg. Selangor, Kuala Kubu Bharu with Xventure Mind tour group.
There are several other locations that provide commercial white water rafting trips across Peninsular Malaysia, namely in Ulu Slim, Gopeng as well as KKB. But, the Selangor River in KKB is among the best if you’re one of those daredevils that want to go for the hardcore straight away.
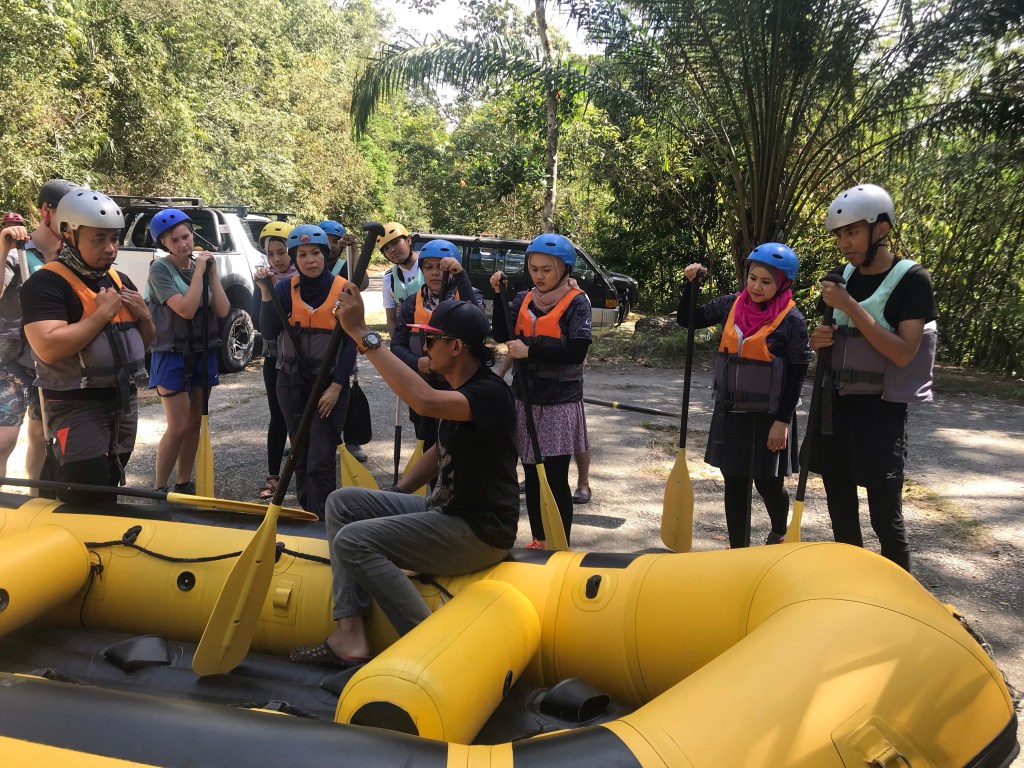
Kuala Kubu Bharu is located in Hulu Selangor, about an hour-ish drive from Kuala Lumpur. Honestly, our trip was pretty last minute, but fortunately, there wasn’t a lot of crowd particularly on that Sunday, so we managed to join in with a couple of foreigners on our raft. There were two groups including ours, and each raft was filled with 5-6 people, as well as a guide (steerer) and a captain. The guide and captain were part of the tour group, yet they were professional and very reliable so we were pretty much in good hands. Both of the guides and captains make us feel really safe in this somewhat dangerous sport, so even as first-timers, you should not worry a thing.
Essentially, for a price of RM175 per head, this was what we got:
Duration of rafting: 2 hrs
We didn’t really expect it to be long, but it was definitely tiring as we were expected to be alert at all times, and to heed the orders of the designated captain in which we were briefed on what to do during the safety briefing.
Rafting difficulty: Class 1 – Class 5
We experienced different difficulty levels from easy, straight forward rapids to some violent rapids. Bear in mind that the water was very fast-moving, although this may depend on the season.
Lunch provided
Snacks provided during our rafting break, where we stopped at a waterfall.
Without further ado, let’s get right into the pictures and videos:
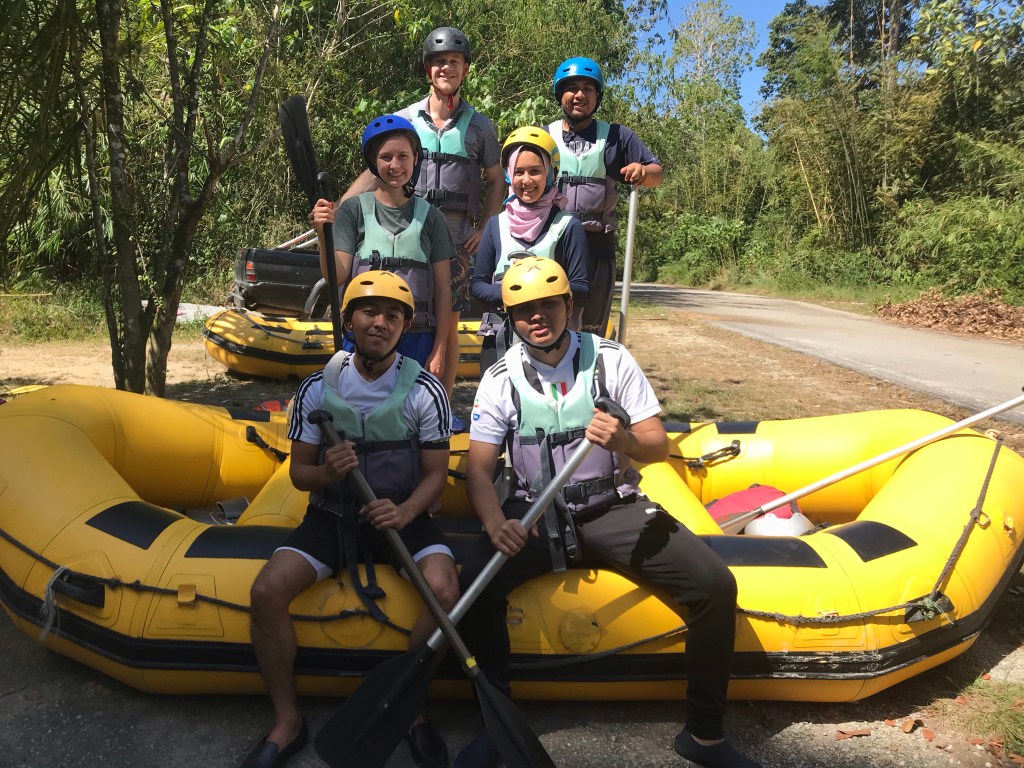
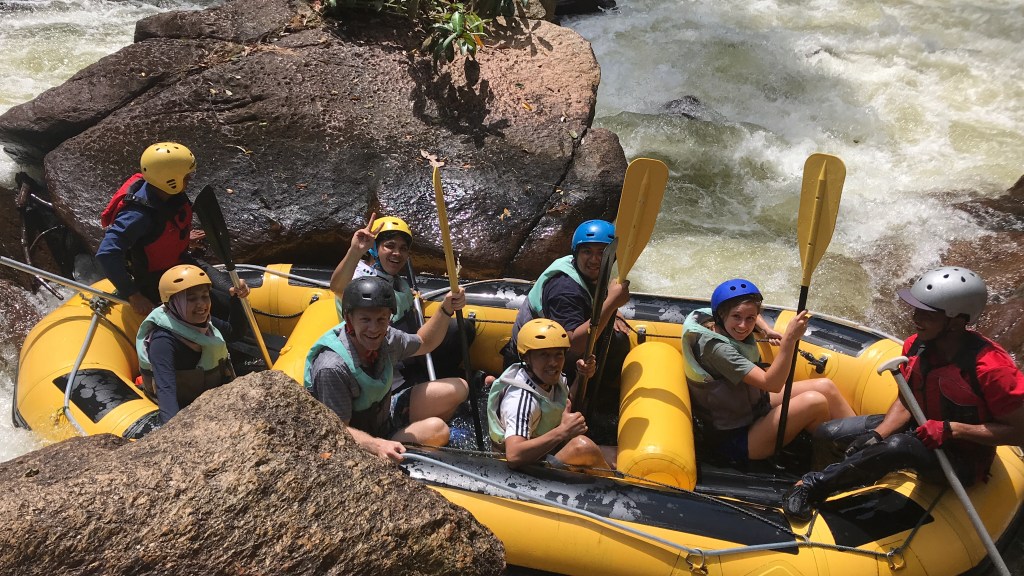
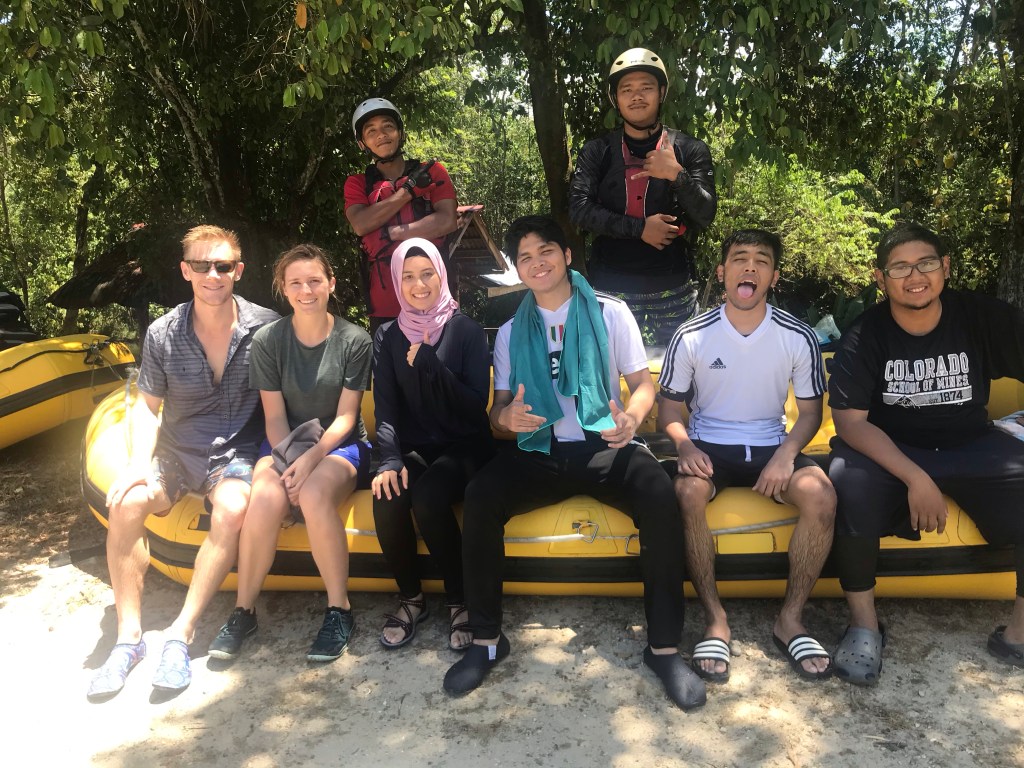
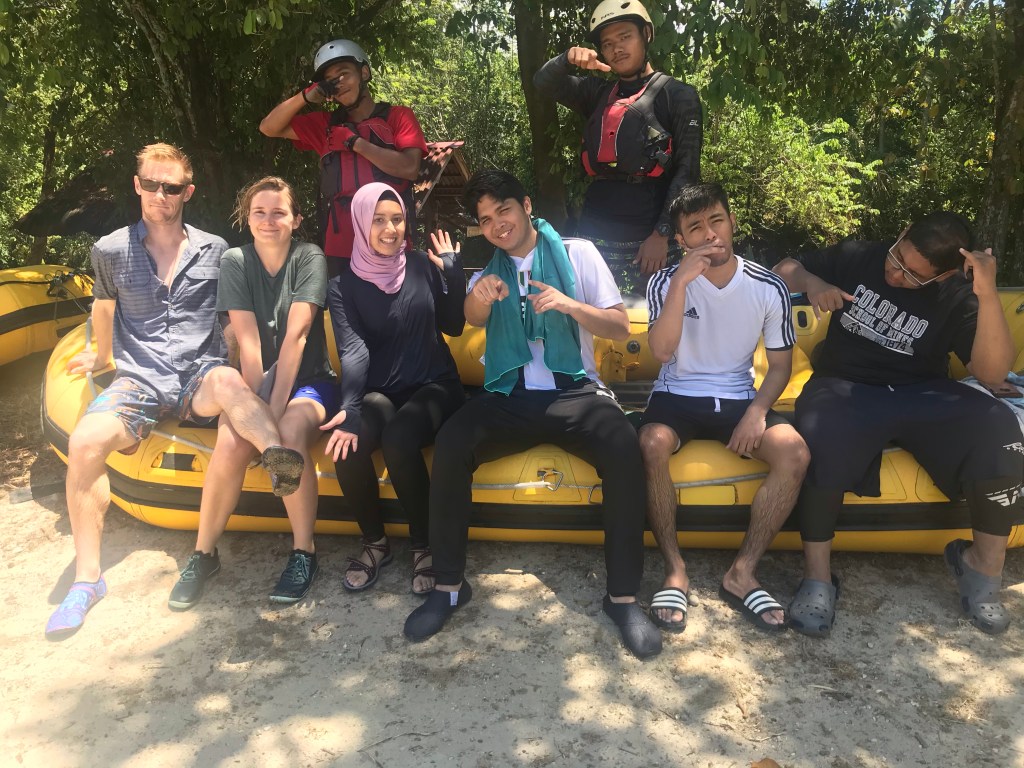
This is everyone in the 10 am slot!
Rafting mates
During our safety briefing
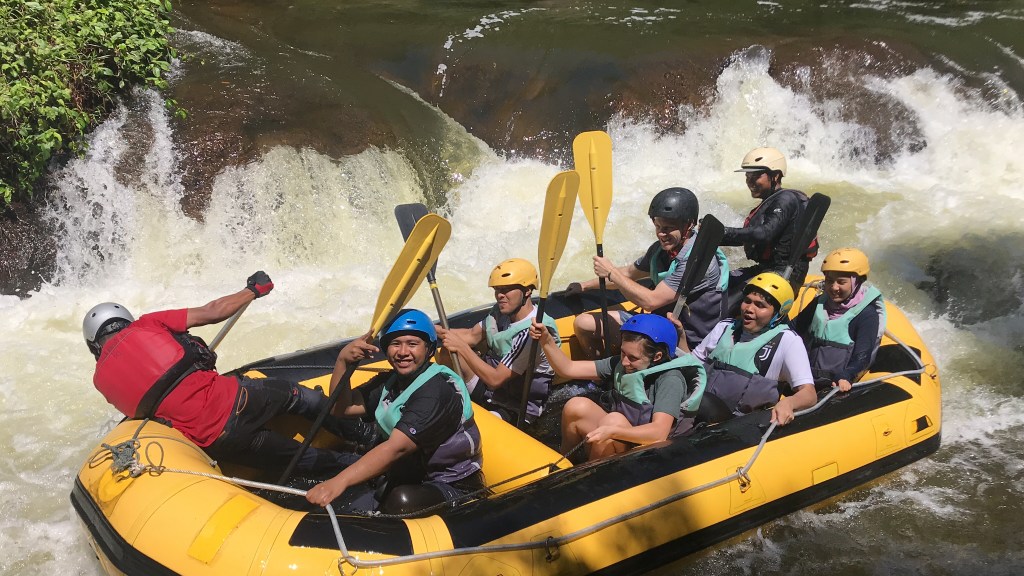
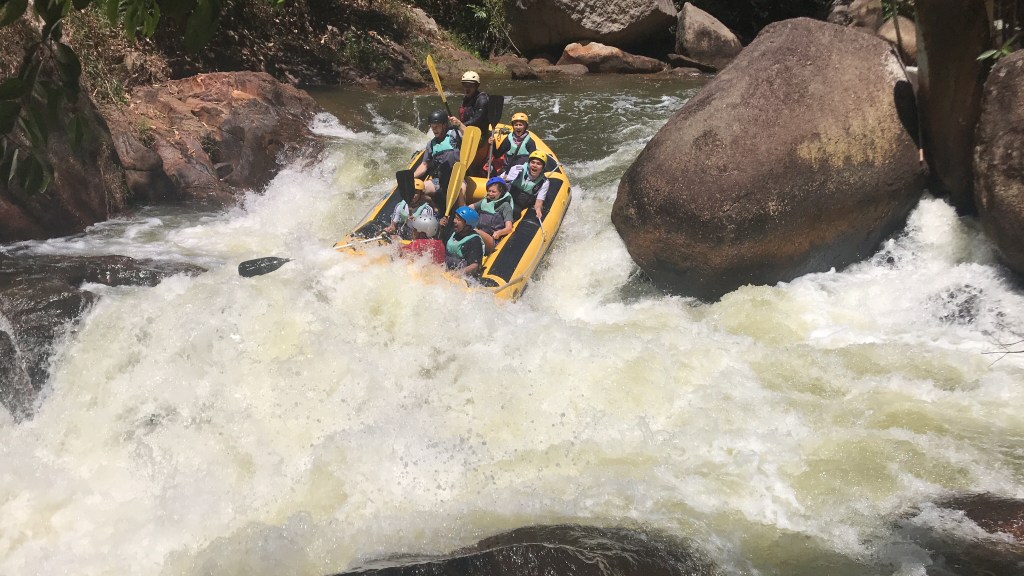
In the midst of a Class 3 rapid.
Honestly, our guide was doing most of the steering and we’re just always looking out for cameras!
The guides from each boat will alternately take turns to continuously take pictures and videos throughout the rafting session, so fret not about not getting your photos.
Going into a Class 5 rapid.
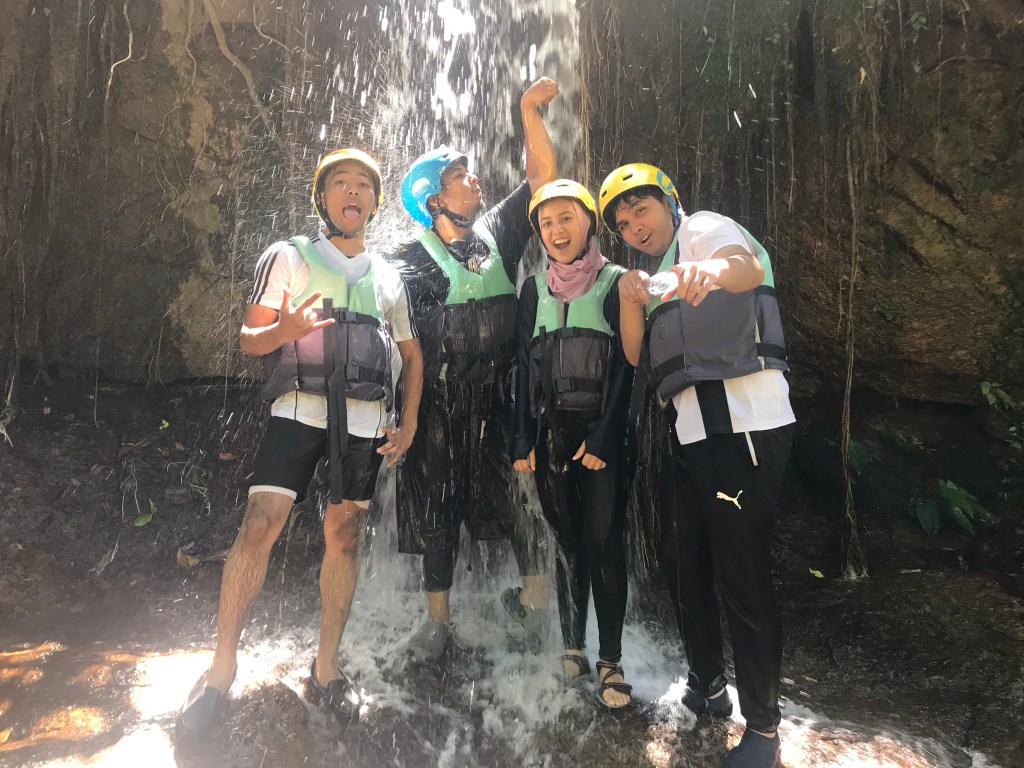
In the middle of our rafting, we took a break to a nearby waterfall somewhere along the Selangor River. We were provided biscuits and water here.
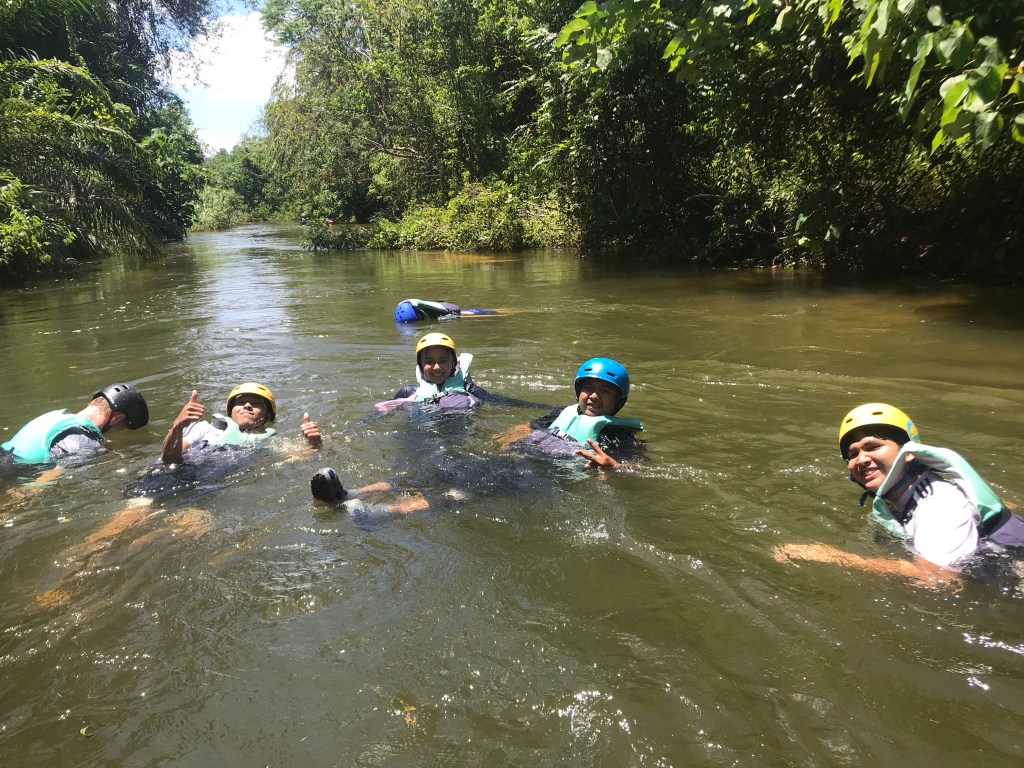
Towards the end of our rafting session, our captain purposely capsized our boat, and we swam all the way until the end point. It felt really nice tho, to be floating in the water.
And… we’re done! Here are pictures of our rafting mates and our guide and captain.
Overall, we had a great time. We honestly recommend you thrill-seekers to try rafting at Selangor River, especially if you haven’t. Even our foreigner buddies said that this was the best water rafting experience for them despite having done 4-5 water rafting in the US prior to this. As for us, we will definitely try rafting at other places, because it is just too exciting. Believe me, this sport is intense as we all ended up exhausted after paddling through 8-9 rapids throughout our 2-hr session. But, we’re not complaining as it was definitely worth the price and experience!
Today’s post will be interesting because Fahim and I are going to talk about our 2 day/ 1 night hike on the highest peak of Malaysia, Mt. Kinabalu. This trip is very dear to our hearts because we have been talking about scaling it ever since our college days, and that dragged on until sometime in October of last year, when we decided to finally give it a go. The trip became possible when a friend of mine told me that she was planning to hike too, and that she found a guided trip at an affordable price. Safe to say, we were both hooked, registered both our names and bought flight tickets right away!
Firstly, we would like to introduce our extremely skilled yet generous guide, Jaffri from KinabaluBah. We would recommend many others to choose KinabaluBah (ain’t a sponsored post, by the way) because our trip was only RM700 per person! The expenses include your overnight stay at Laban Rata, permit, certificate, buffet meals for the entire 2 days/ 1 night stay (breakfast, lunch, dinner, supper, breakfast next day and late lunch the day after), three local yet expert guides and a ton worth of pictures the whole way. Also, Jaffri is extremely friendly and kind, and would ensure that you get to the peak and back safely no matter what! He would wait for you if you need some time to recover from AMS, or would carry you if you injure yourself, and he has all the supplies needed to help you get back on your feet and to get that colored certificate everyone have been dreaming of!
First of all, here are some important info on our Kinabalu hike:
1. Summit elevation: 4095 m/ 13, 435 ft
2. Route: Timpohon trail
3. Distance: 8.7 KM each way
4. Duration: 2D/1N
Anyway, this was our itinerary of the whole trip:
First day (2nd Feb 2020)
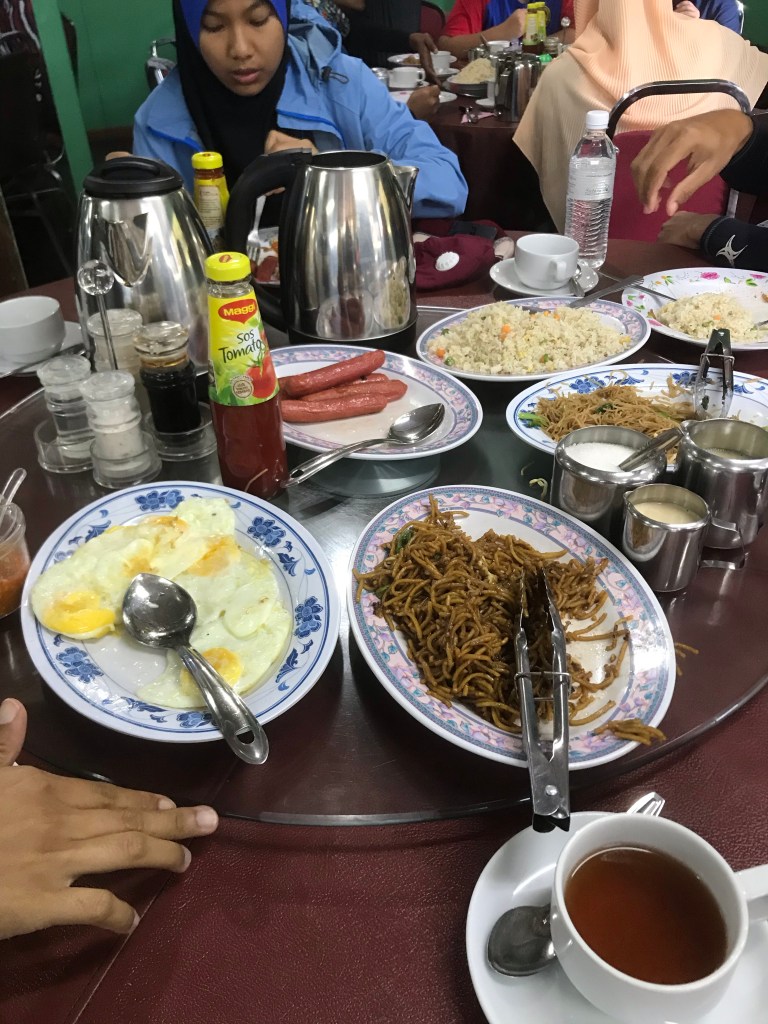
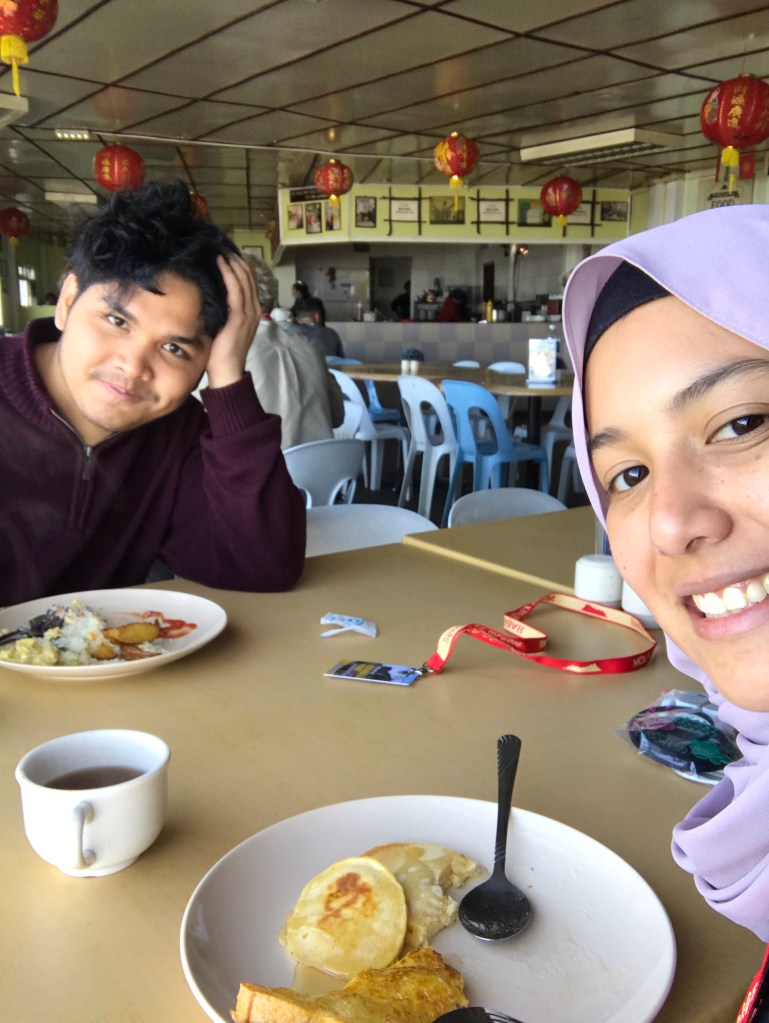
7am: Breakfast at Restoran Panataran
This restaurant sits literally outside of the Kinabalu Park, and the main dining spot for hikers alike. The breakfast was also included in the trip expenses.
Breakfast 🍳 menu. Pretty decent too, don’t you think?
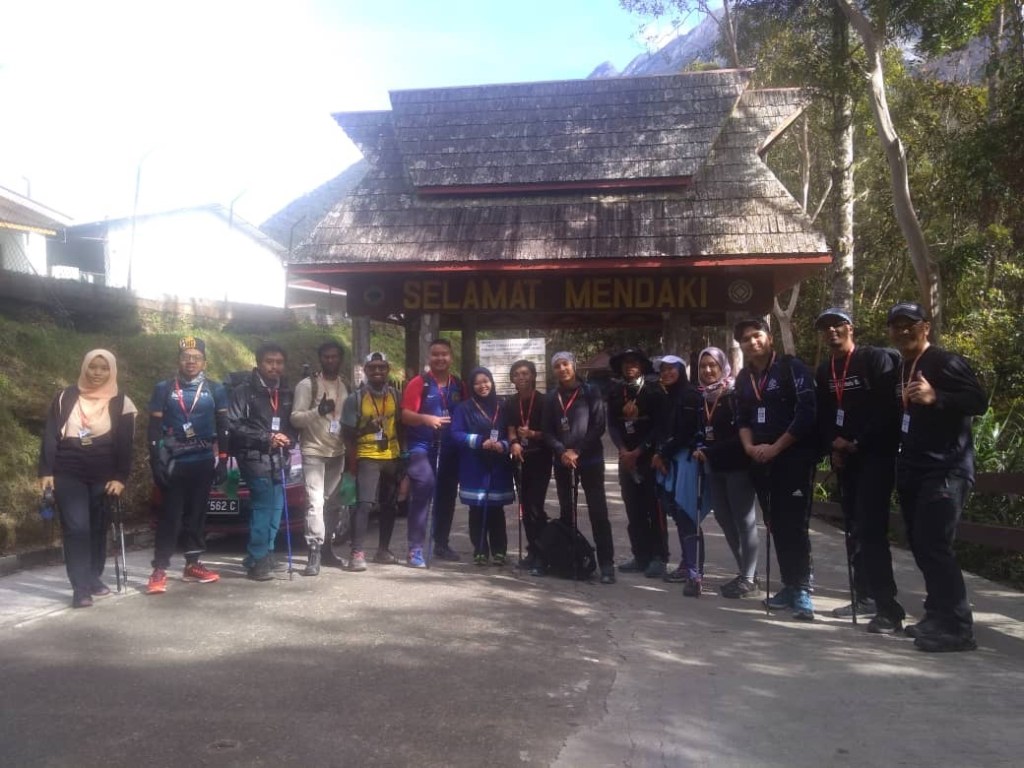
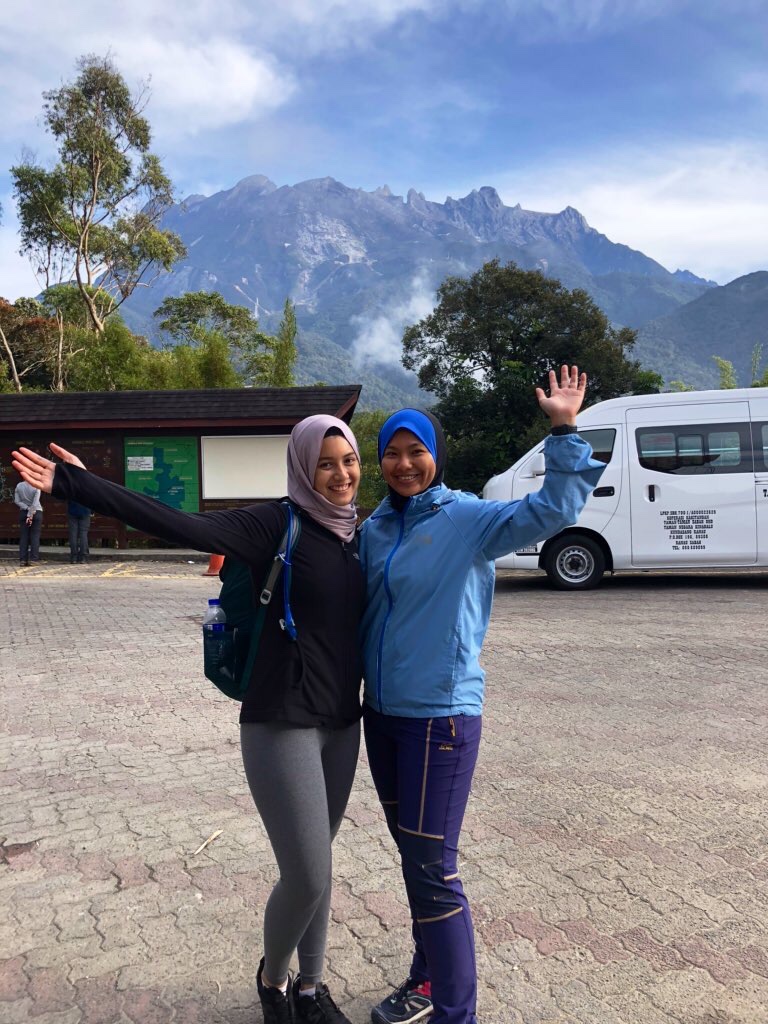
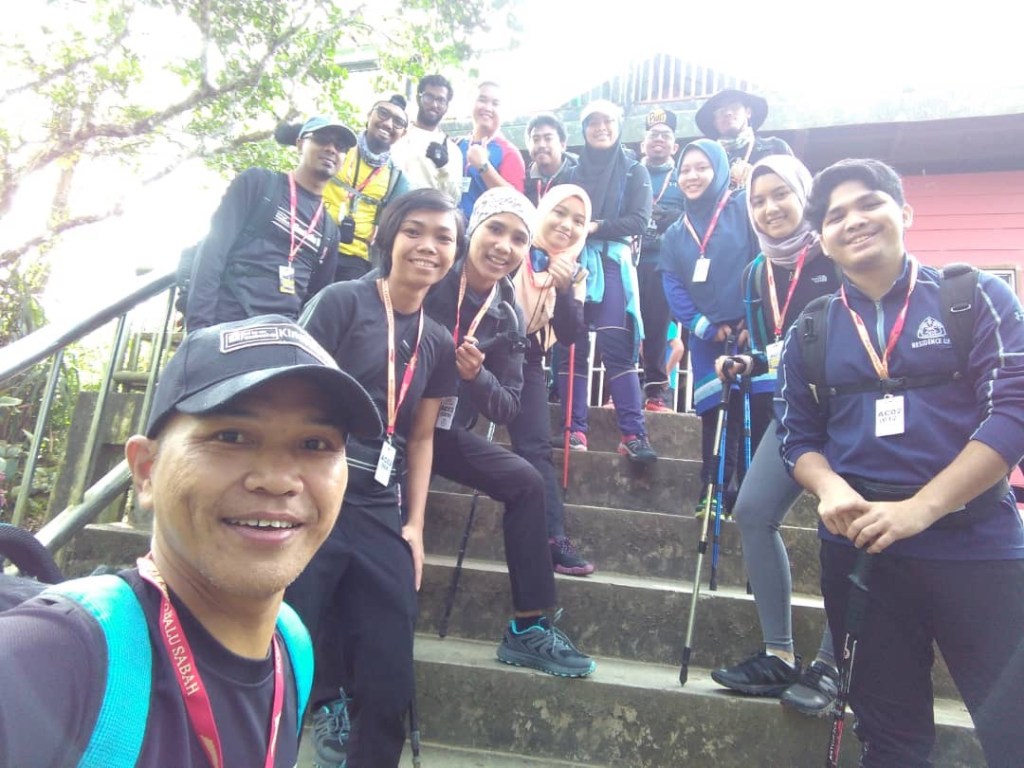
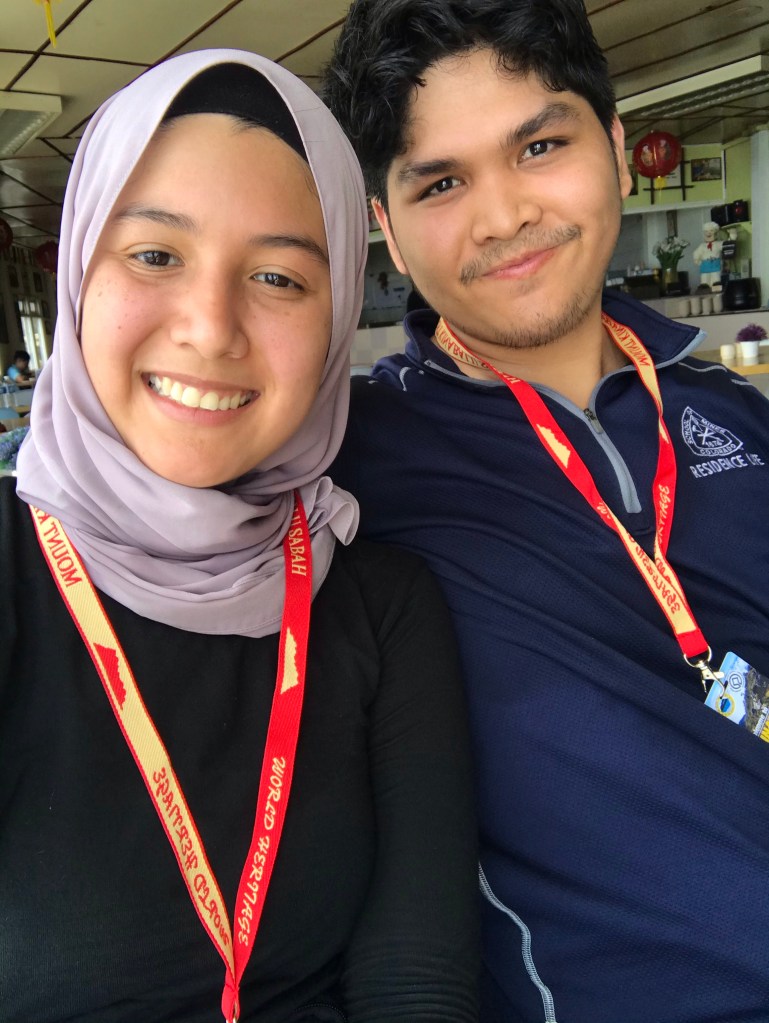
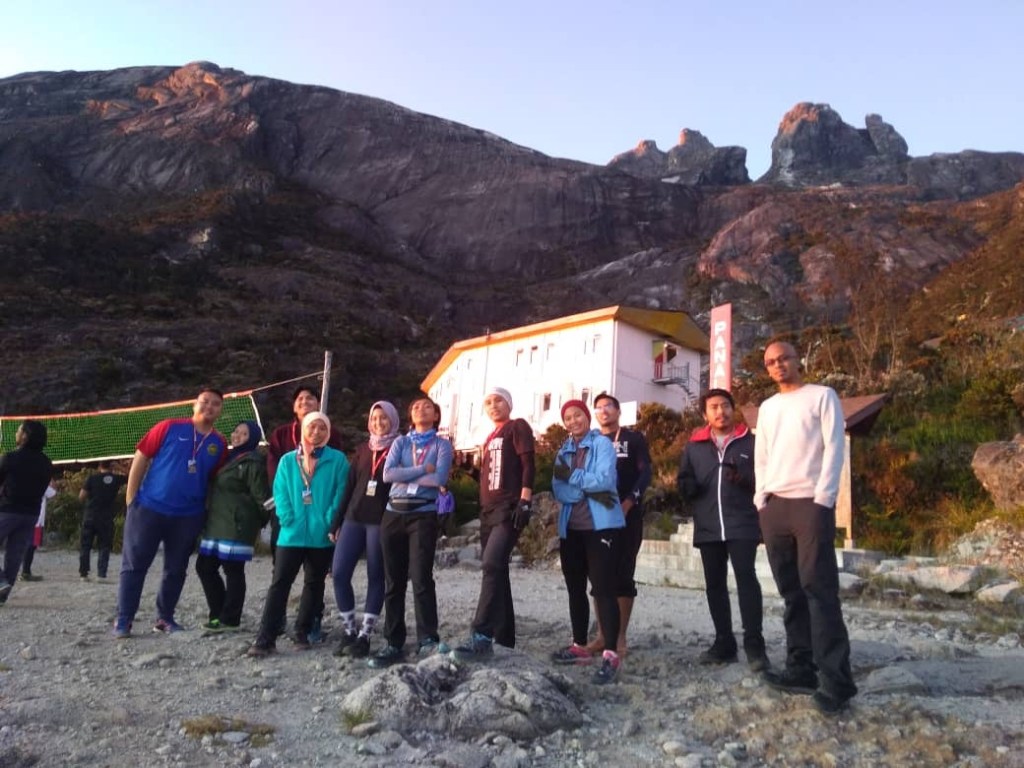
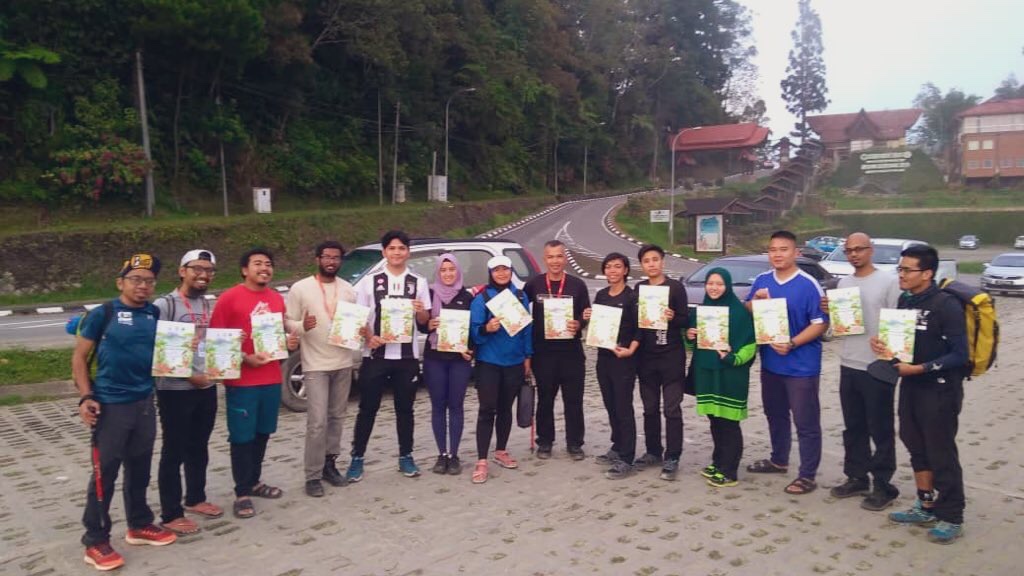
We also met up with the rest of our group members at this restaurant. There were 15 of us altogether.
Group of 15 before hiking 🥾
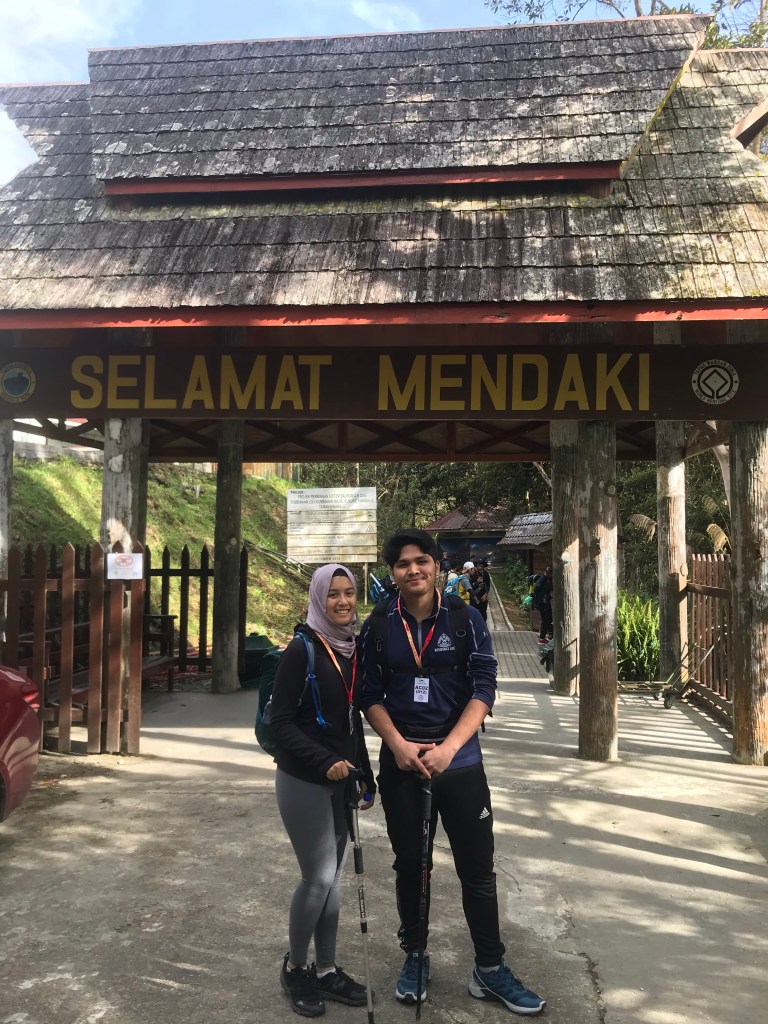
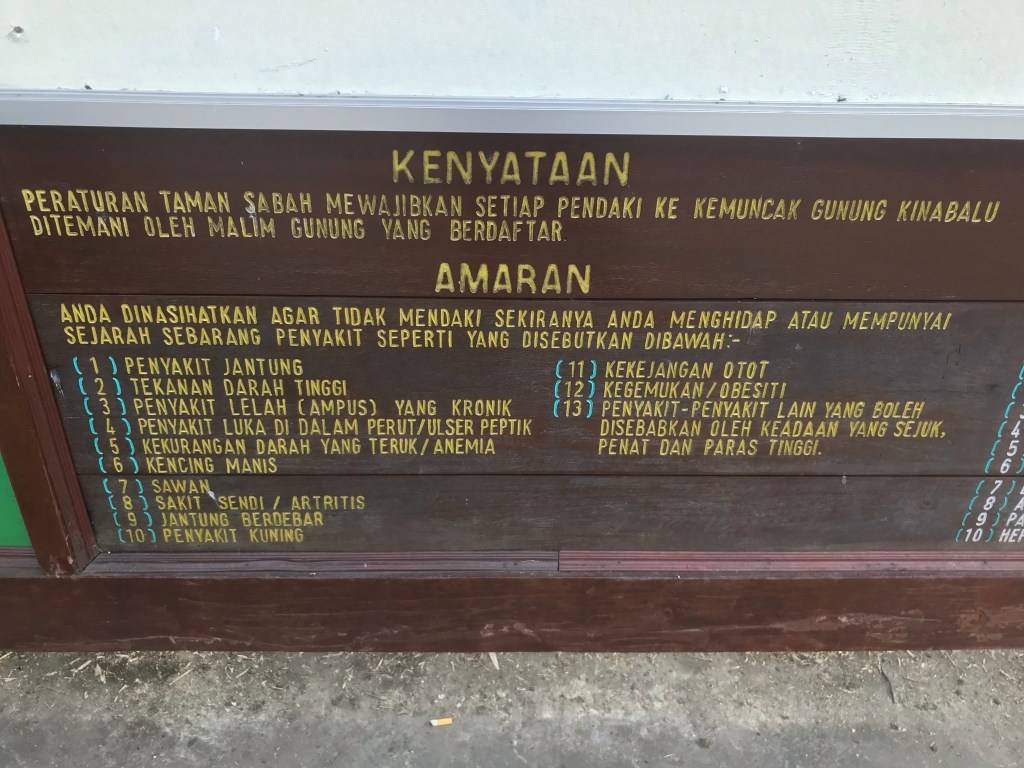
8 am: Registration in Kinabalu Park
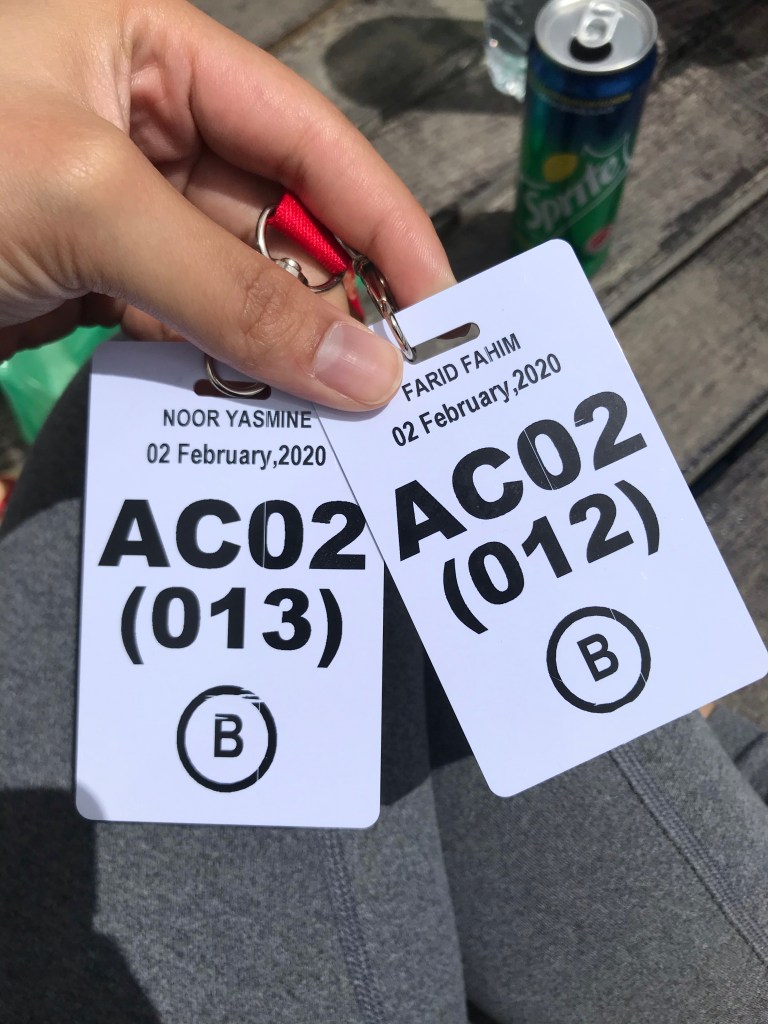
After our breakfast, we walked to the main office in Kinabalu park for registration. This is where we fill up forms containing our details, as well as getting our tags which is a very essential piece for the hike. You will be expected to have your tags with you at all times during the hike (especially at the following checkpoints: Timpohon Gate, Laban Rata, Sayat-Sayat hut).
Inside Kinabalu Park, overlooking the peak.
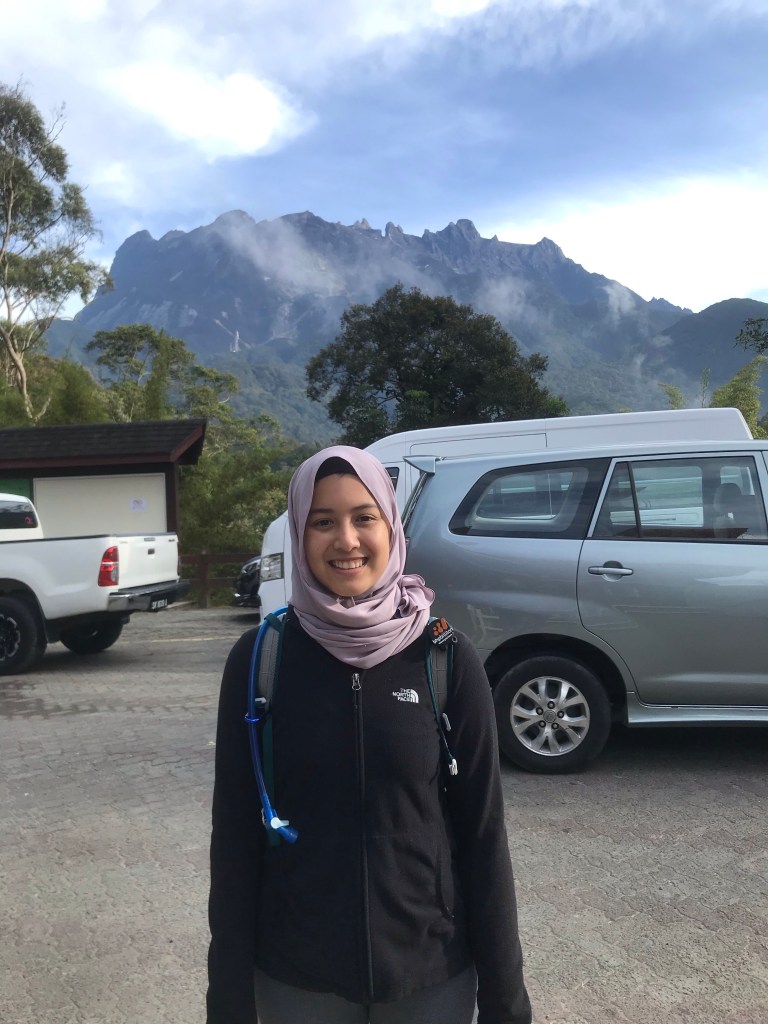
All smiles before the sweat and tears.
Snapped this in case it would be useful for anyone
Got our tags!
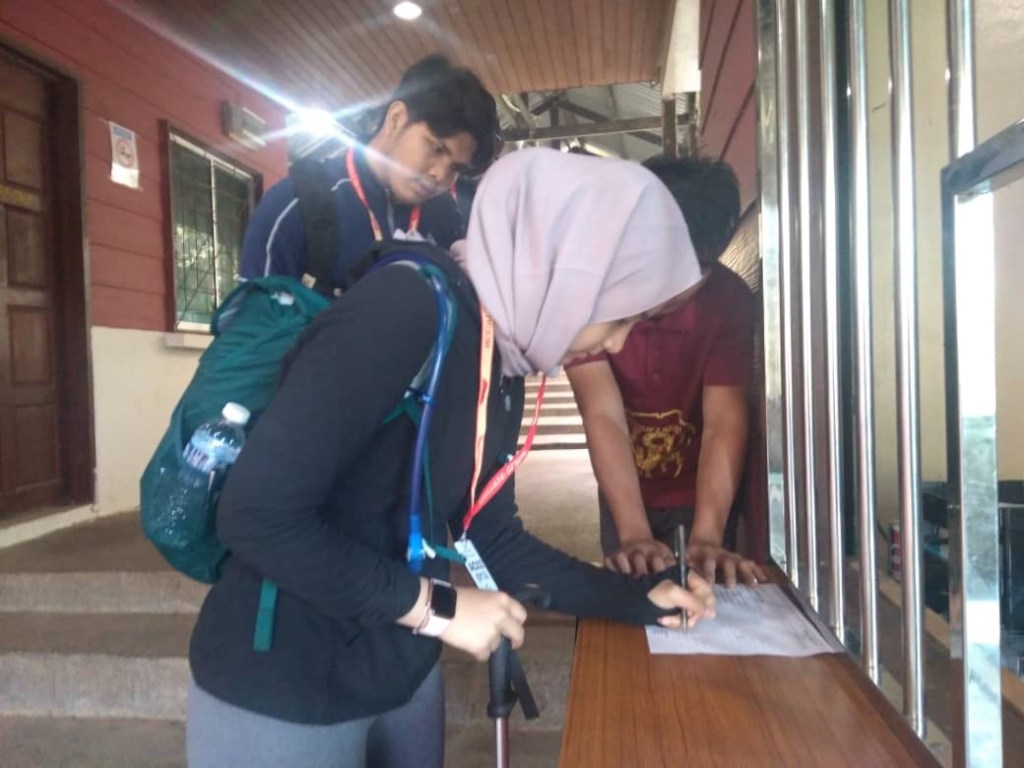
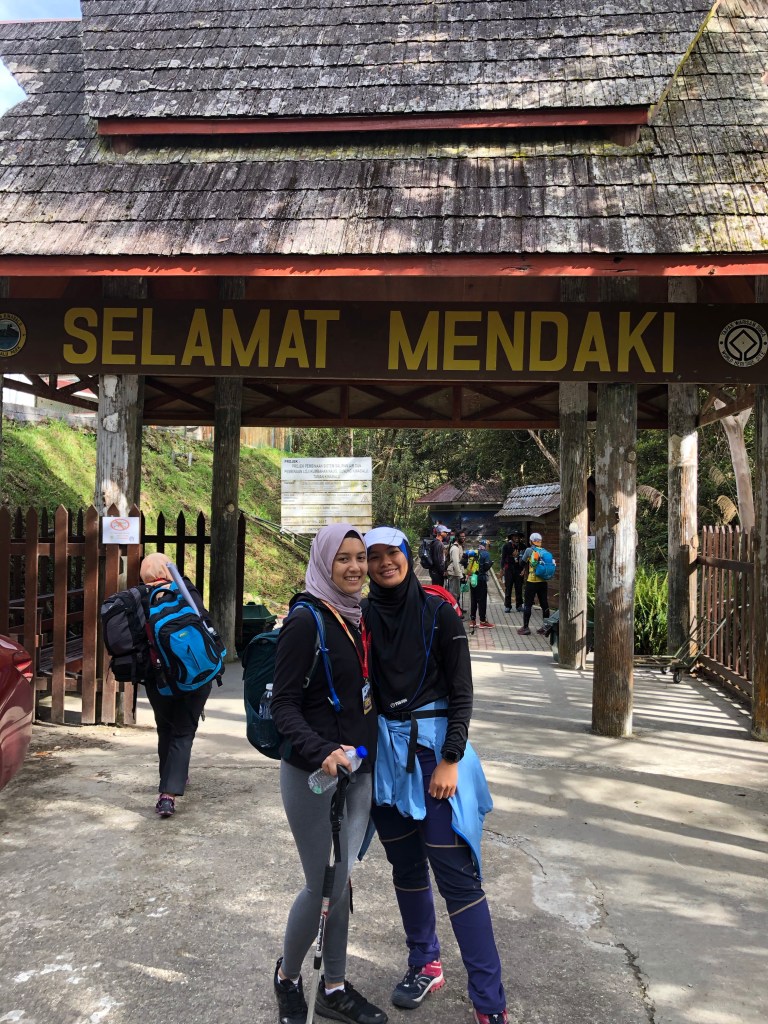
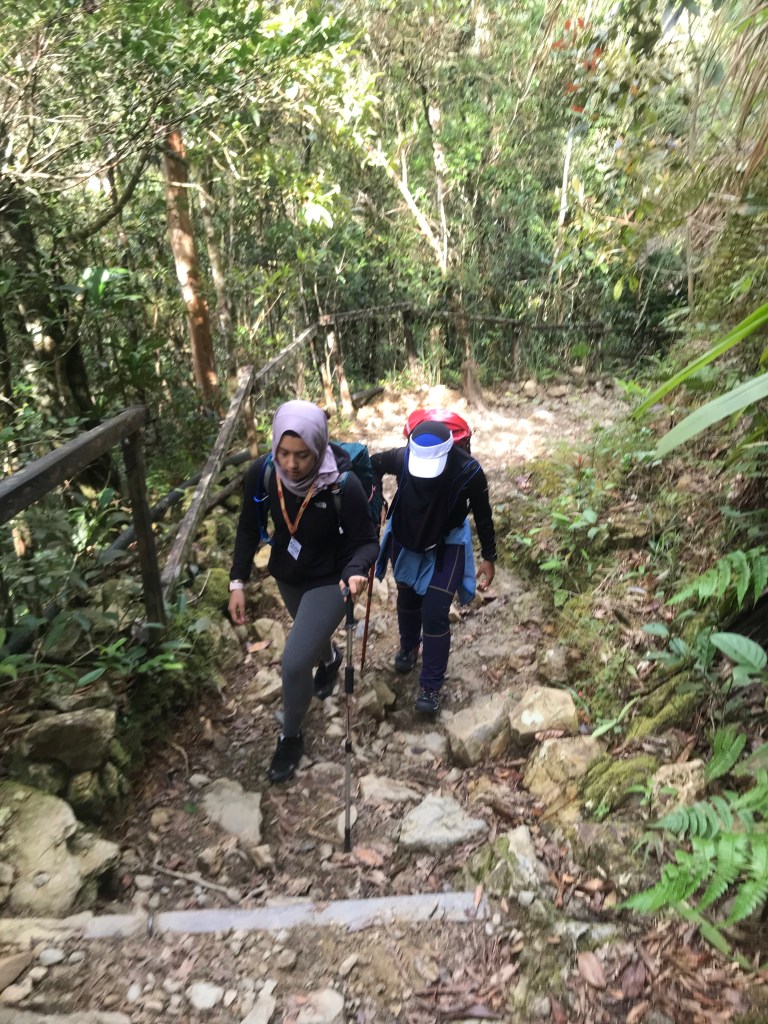
9am: Start hiking via Timpohon trail
After registration, all 15 of us carpooled to Timpohon Gate, which is our very first checkpoint. Here is also where we have to double check our names and our tag numbers prior to the hike.
Double checking on names — making sure they’re correct!
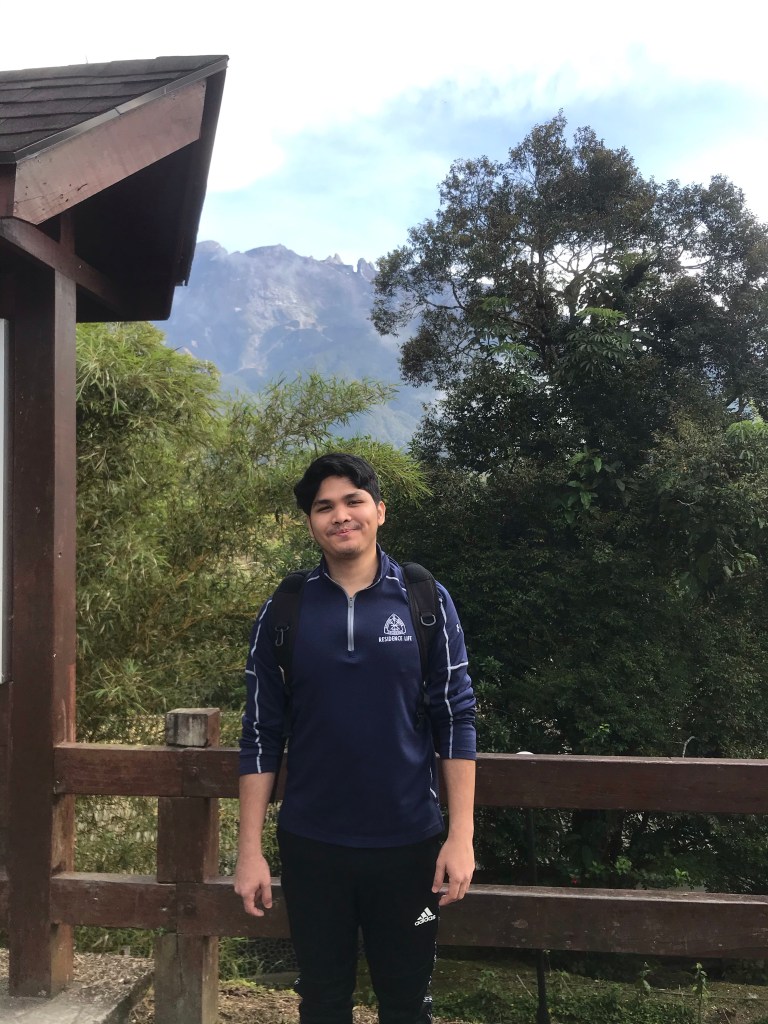
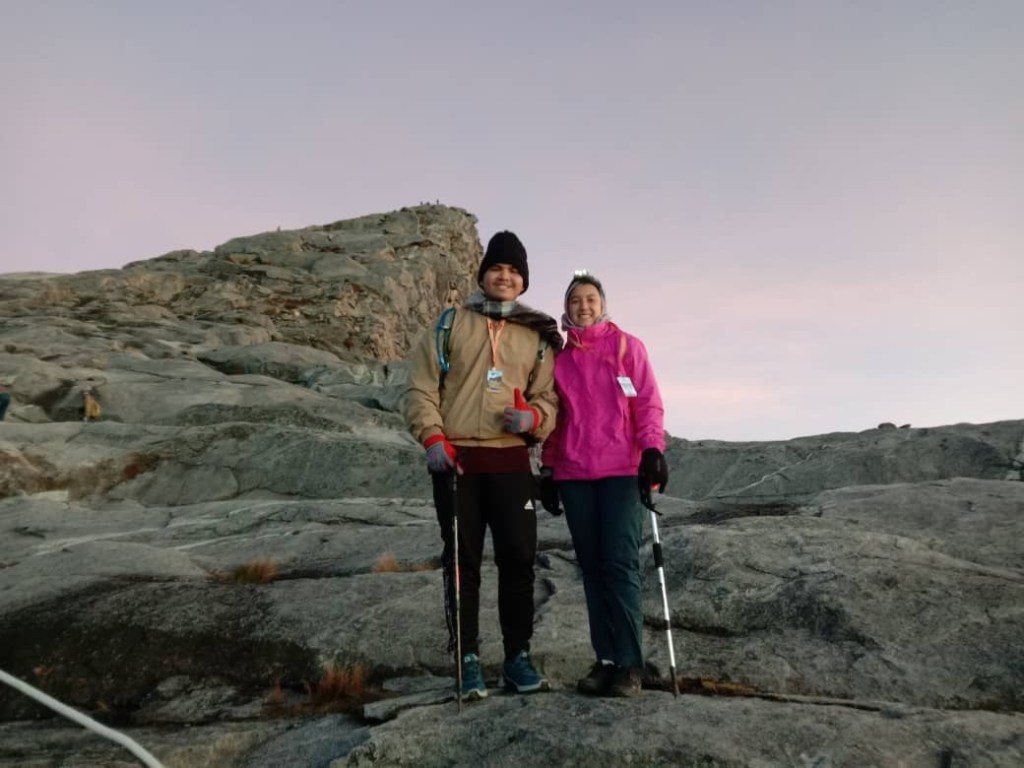
My high school buddy, Syaabah, who’s also on this trip with me.
Group photo
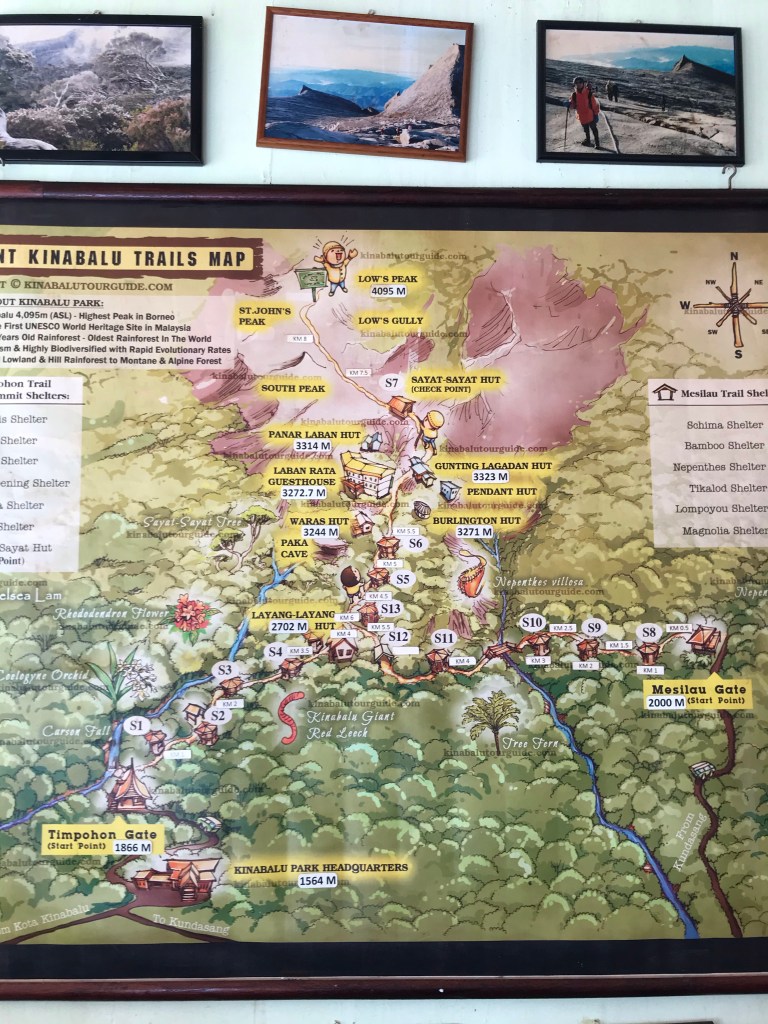
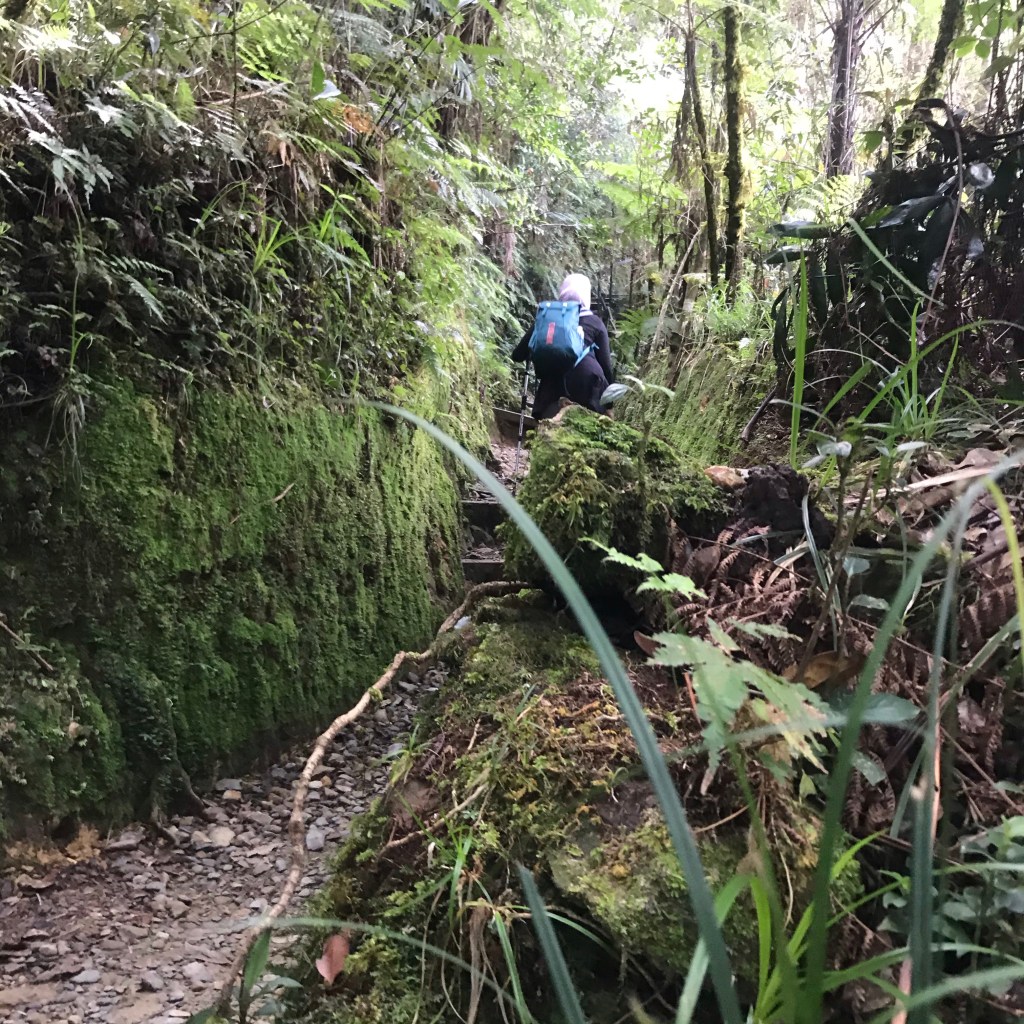
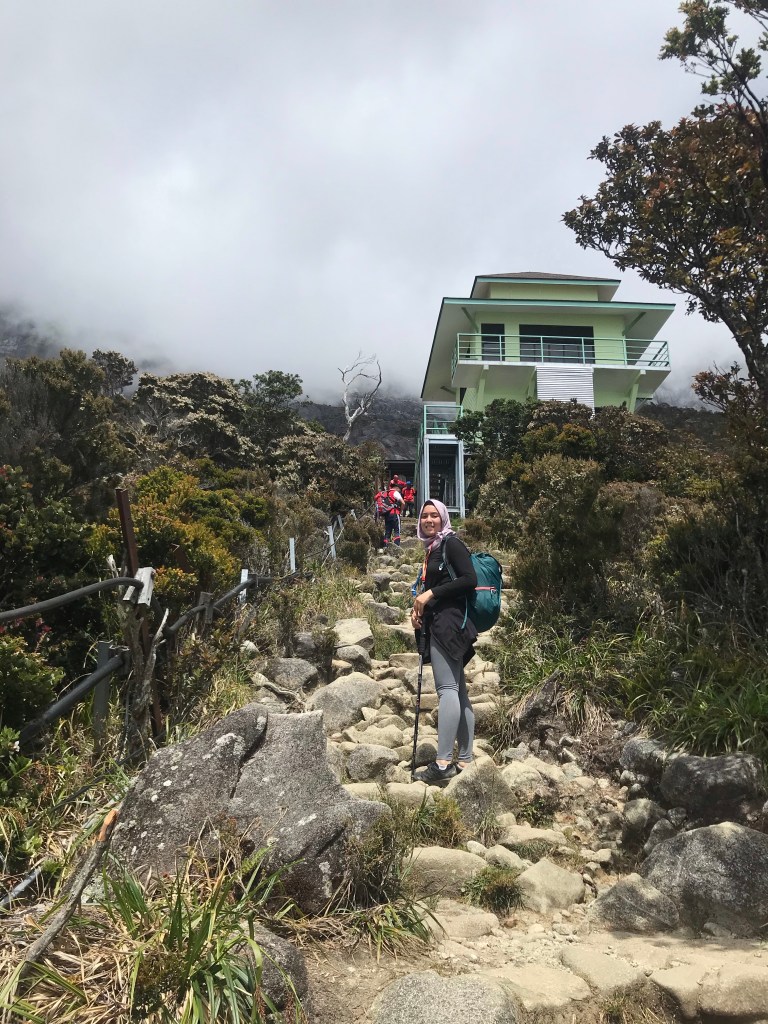
Map of the trails, checkpoints and shelters going towards the peak. The shelters are at every 1km, and there are signboards at every 0.5 km to sort of motivate/demotivate you.
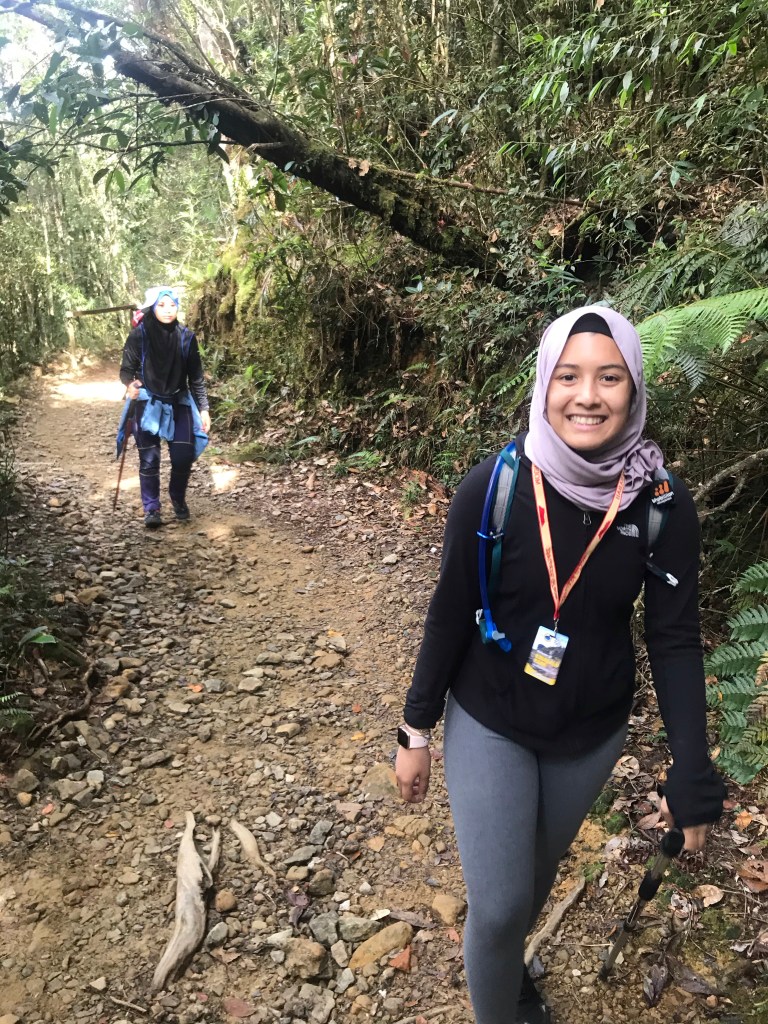
Syaabah and I, at KM0.5.
Pack light! The ideal weight to carry is usually 10% of your body weight. I brought 4kg with me, which is pretty light, considering 2kg of those are water.
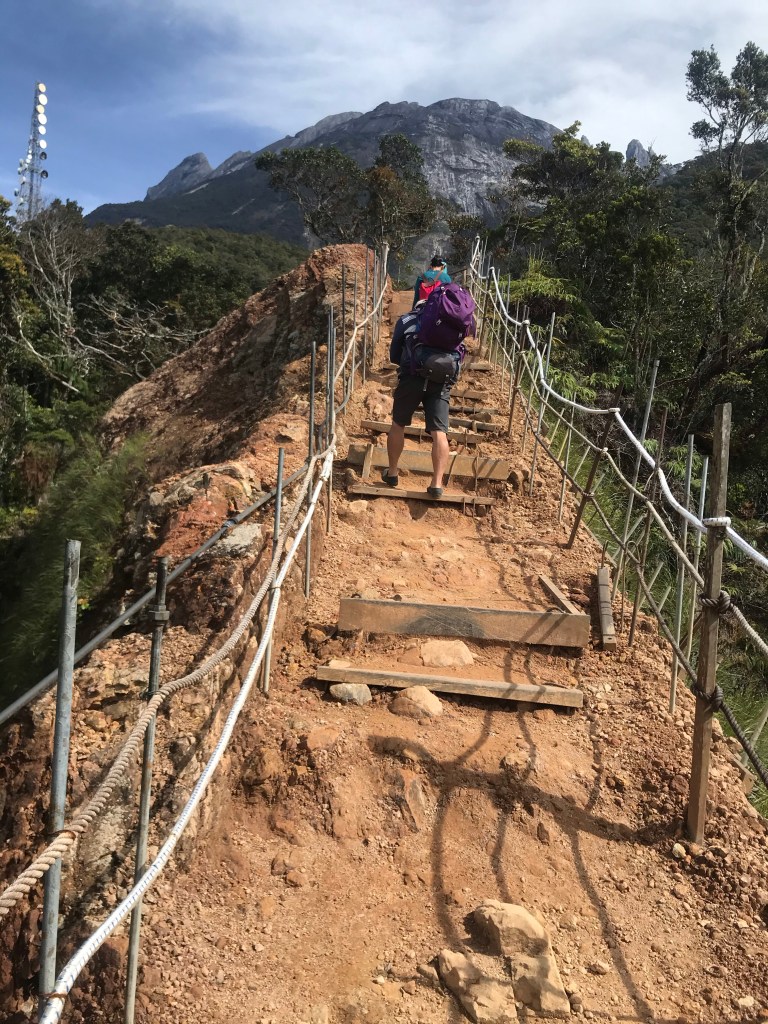
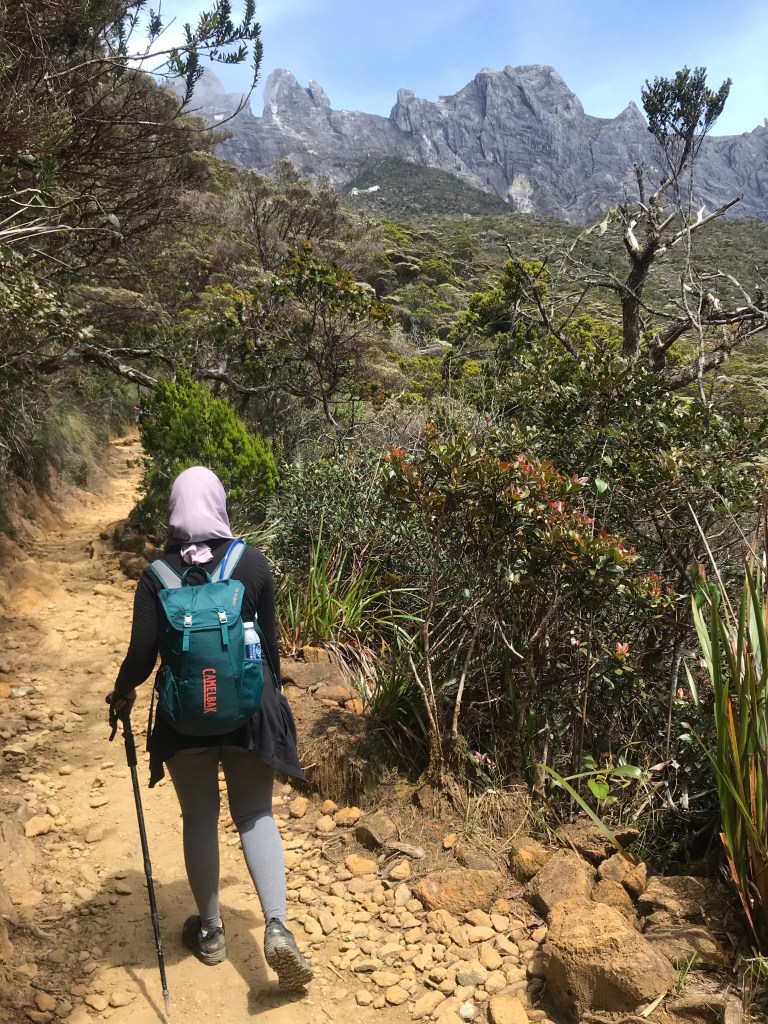
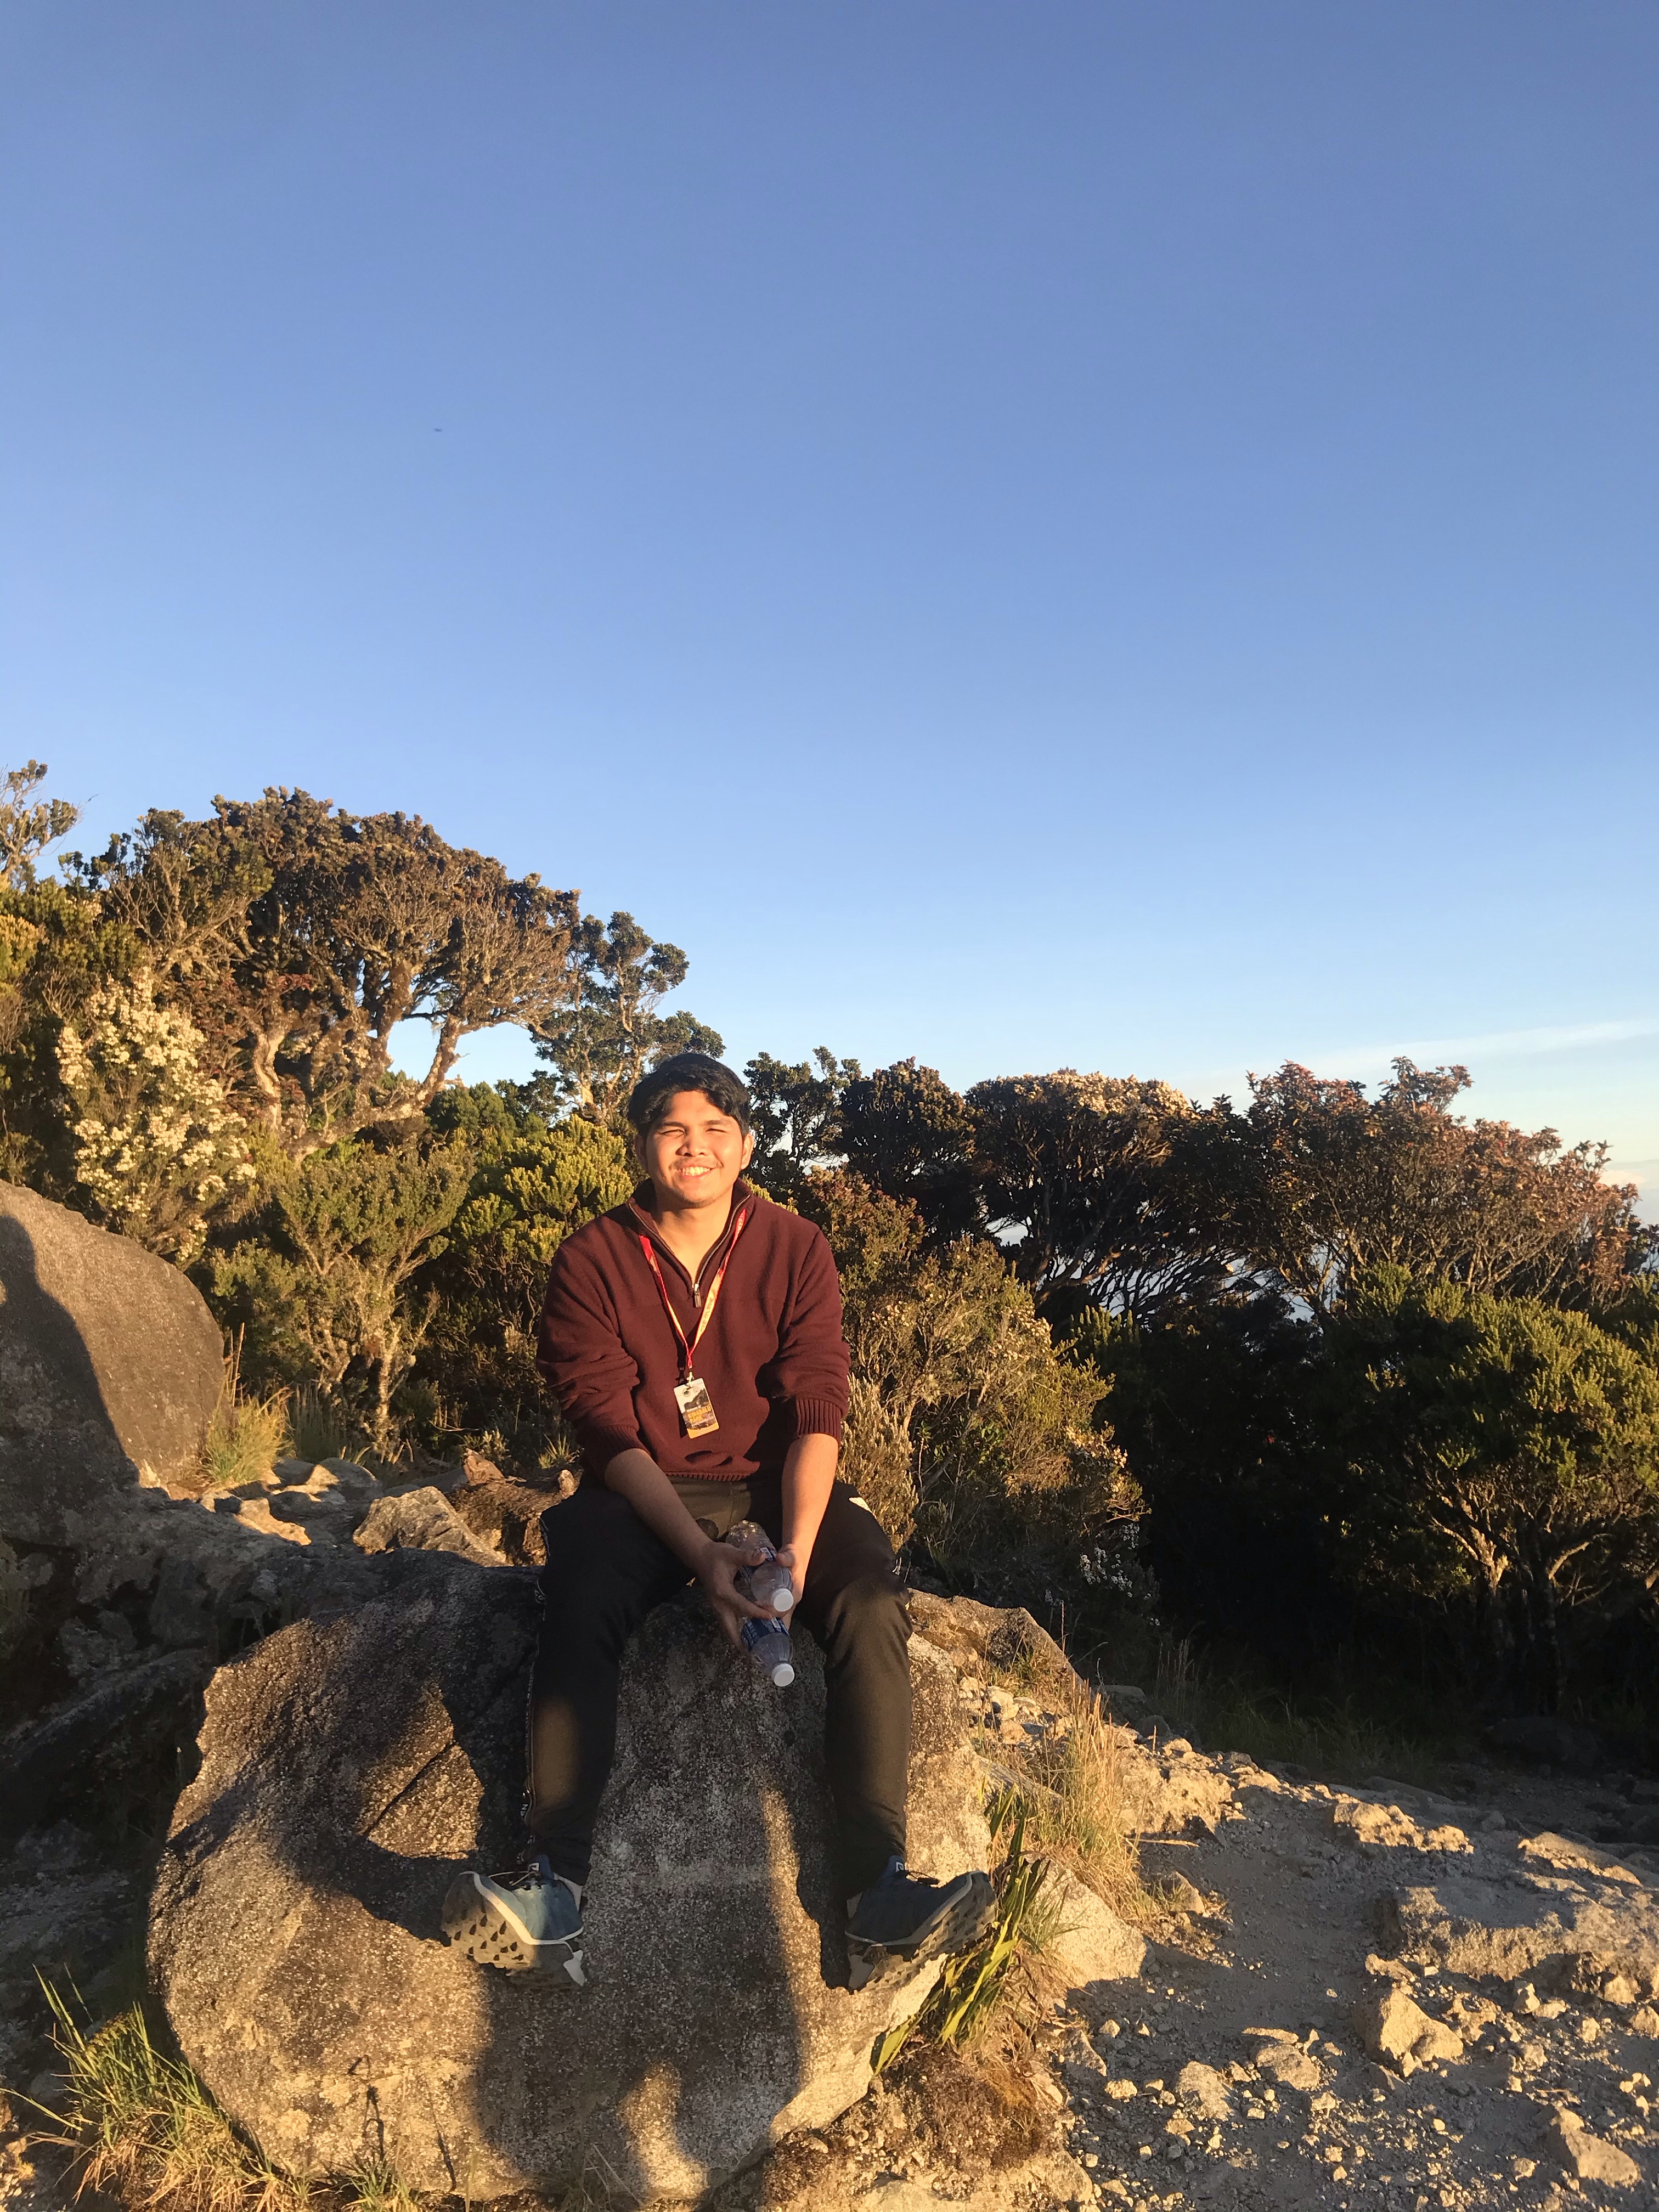
This is somewhere between KM 1.5 – KM 2 checkpoint. Stunning view. Getting steeper at this point.
The trail is mostly “staircase” steep, but there are flatter areas which helps you to recover yourselves. Thank goodness.
Gorgeous landscapes throughout the hike. This is what we miss the most.
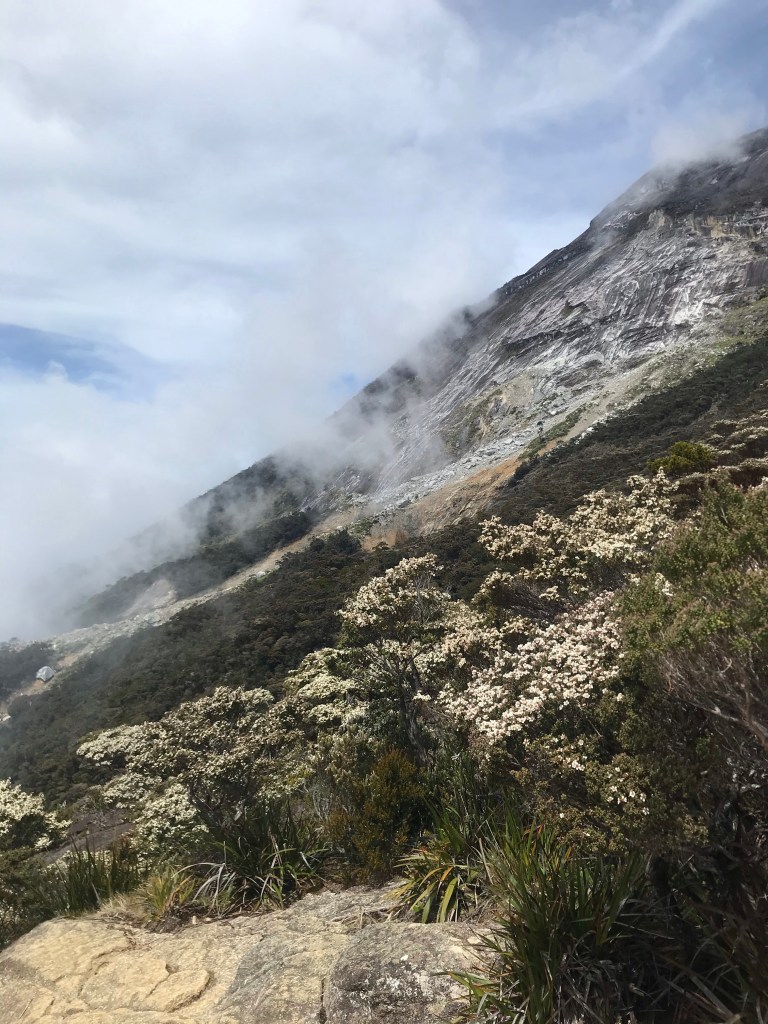
This shot was taken around 11:30 am. Even during this hour, clouds have started enveloping the peak making it less visible.
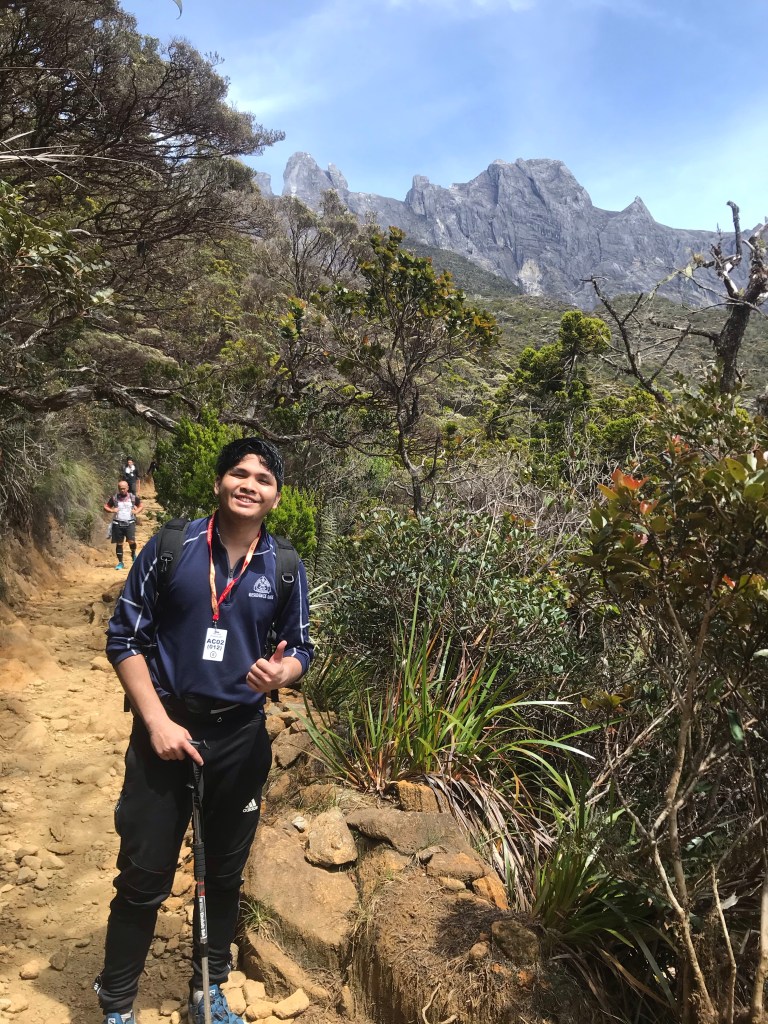
This was around KM 4.5. Another 1.5 to go!
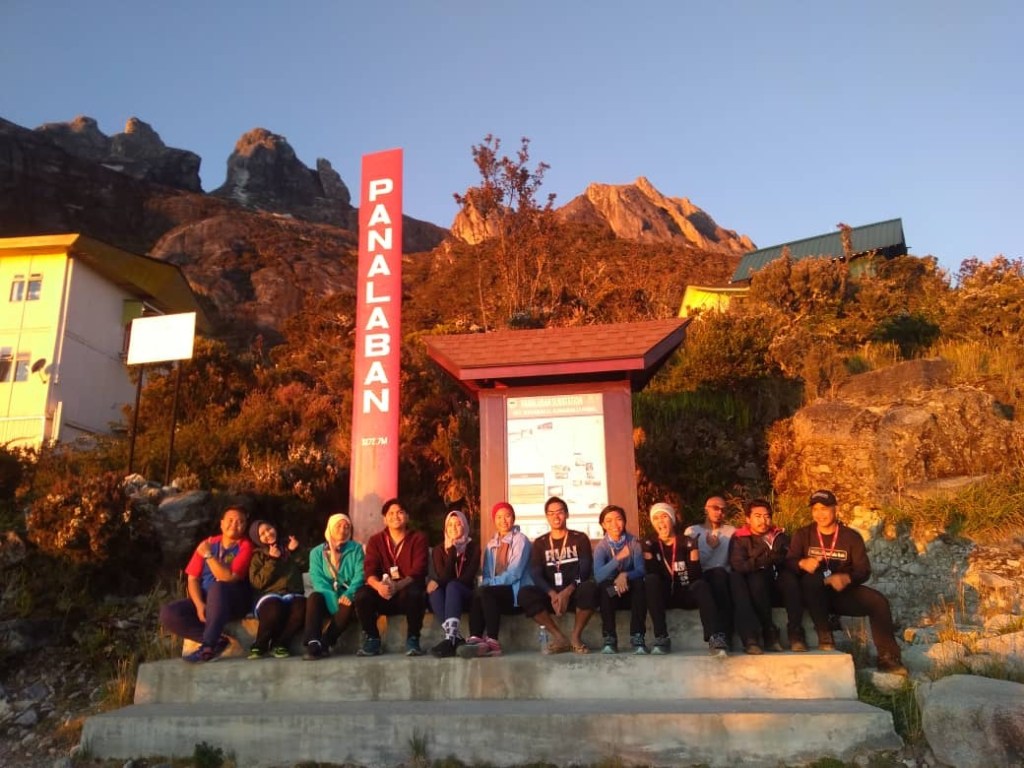
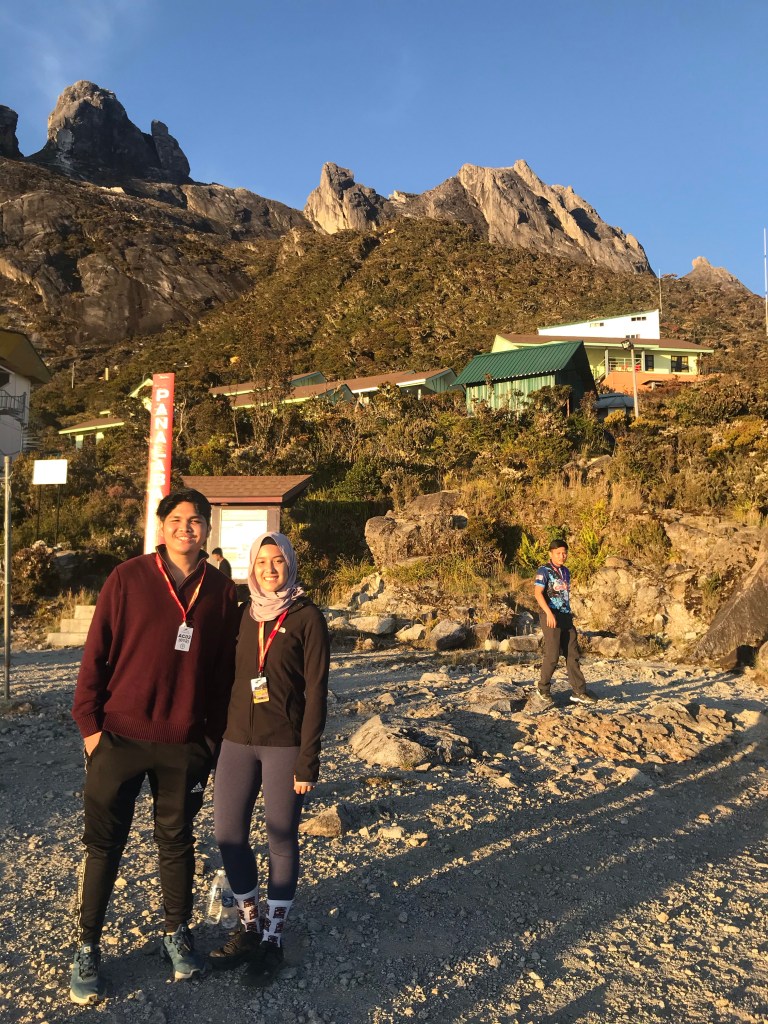
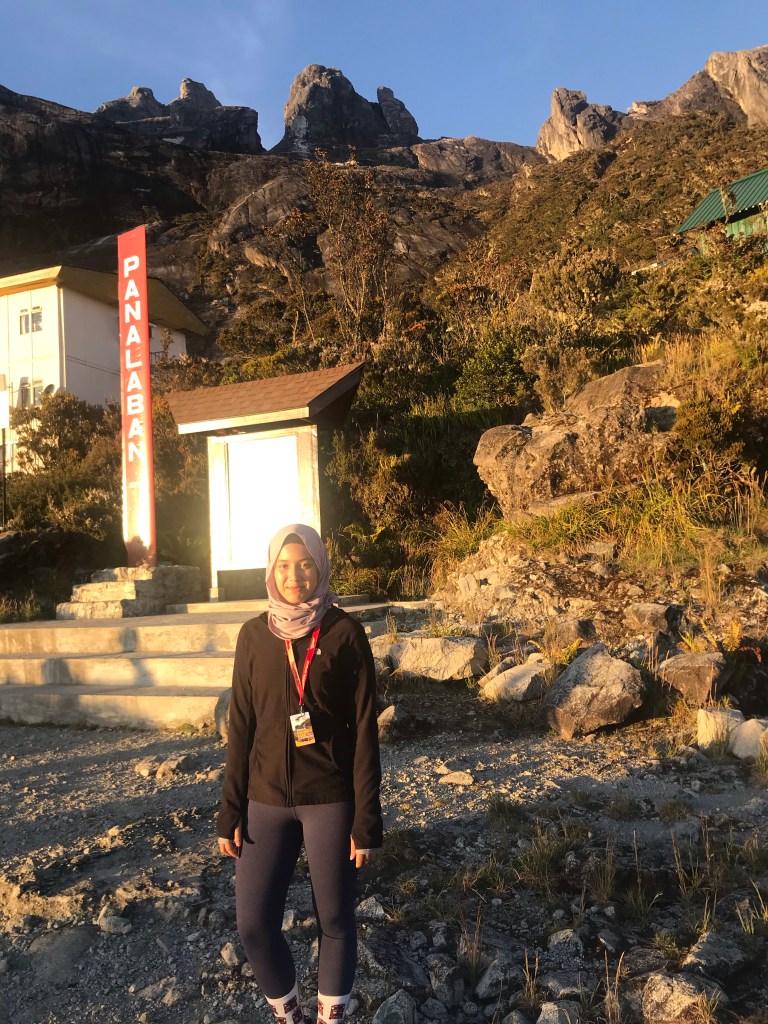
12:30 pm: Reached Panalaban
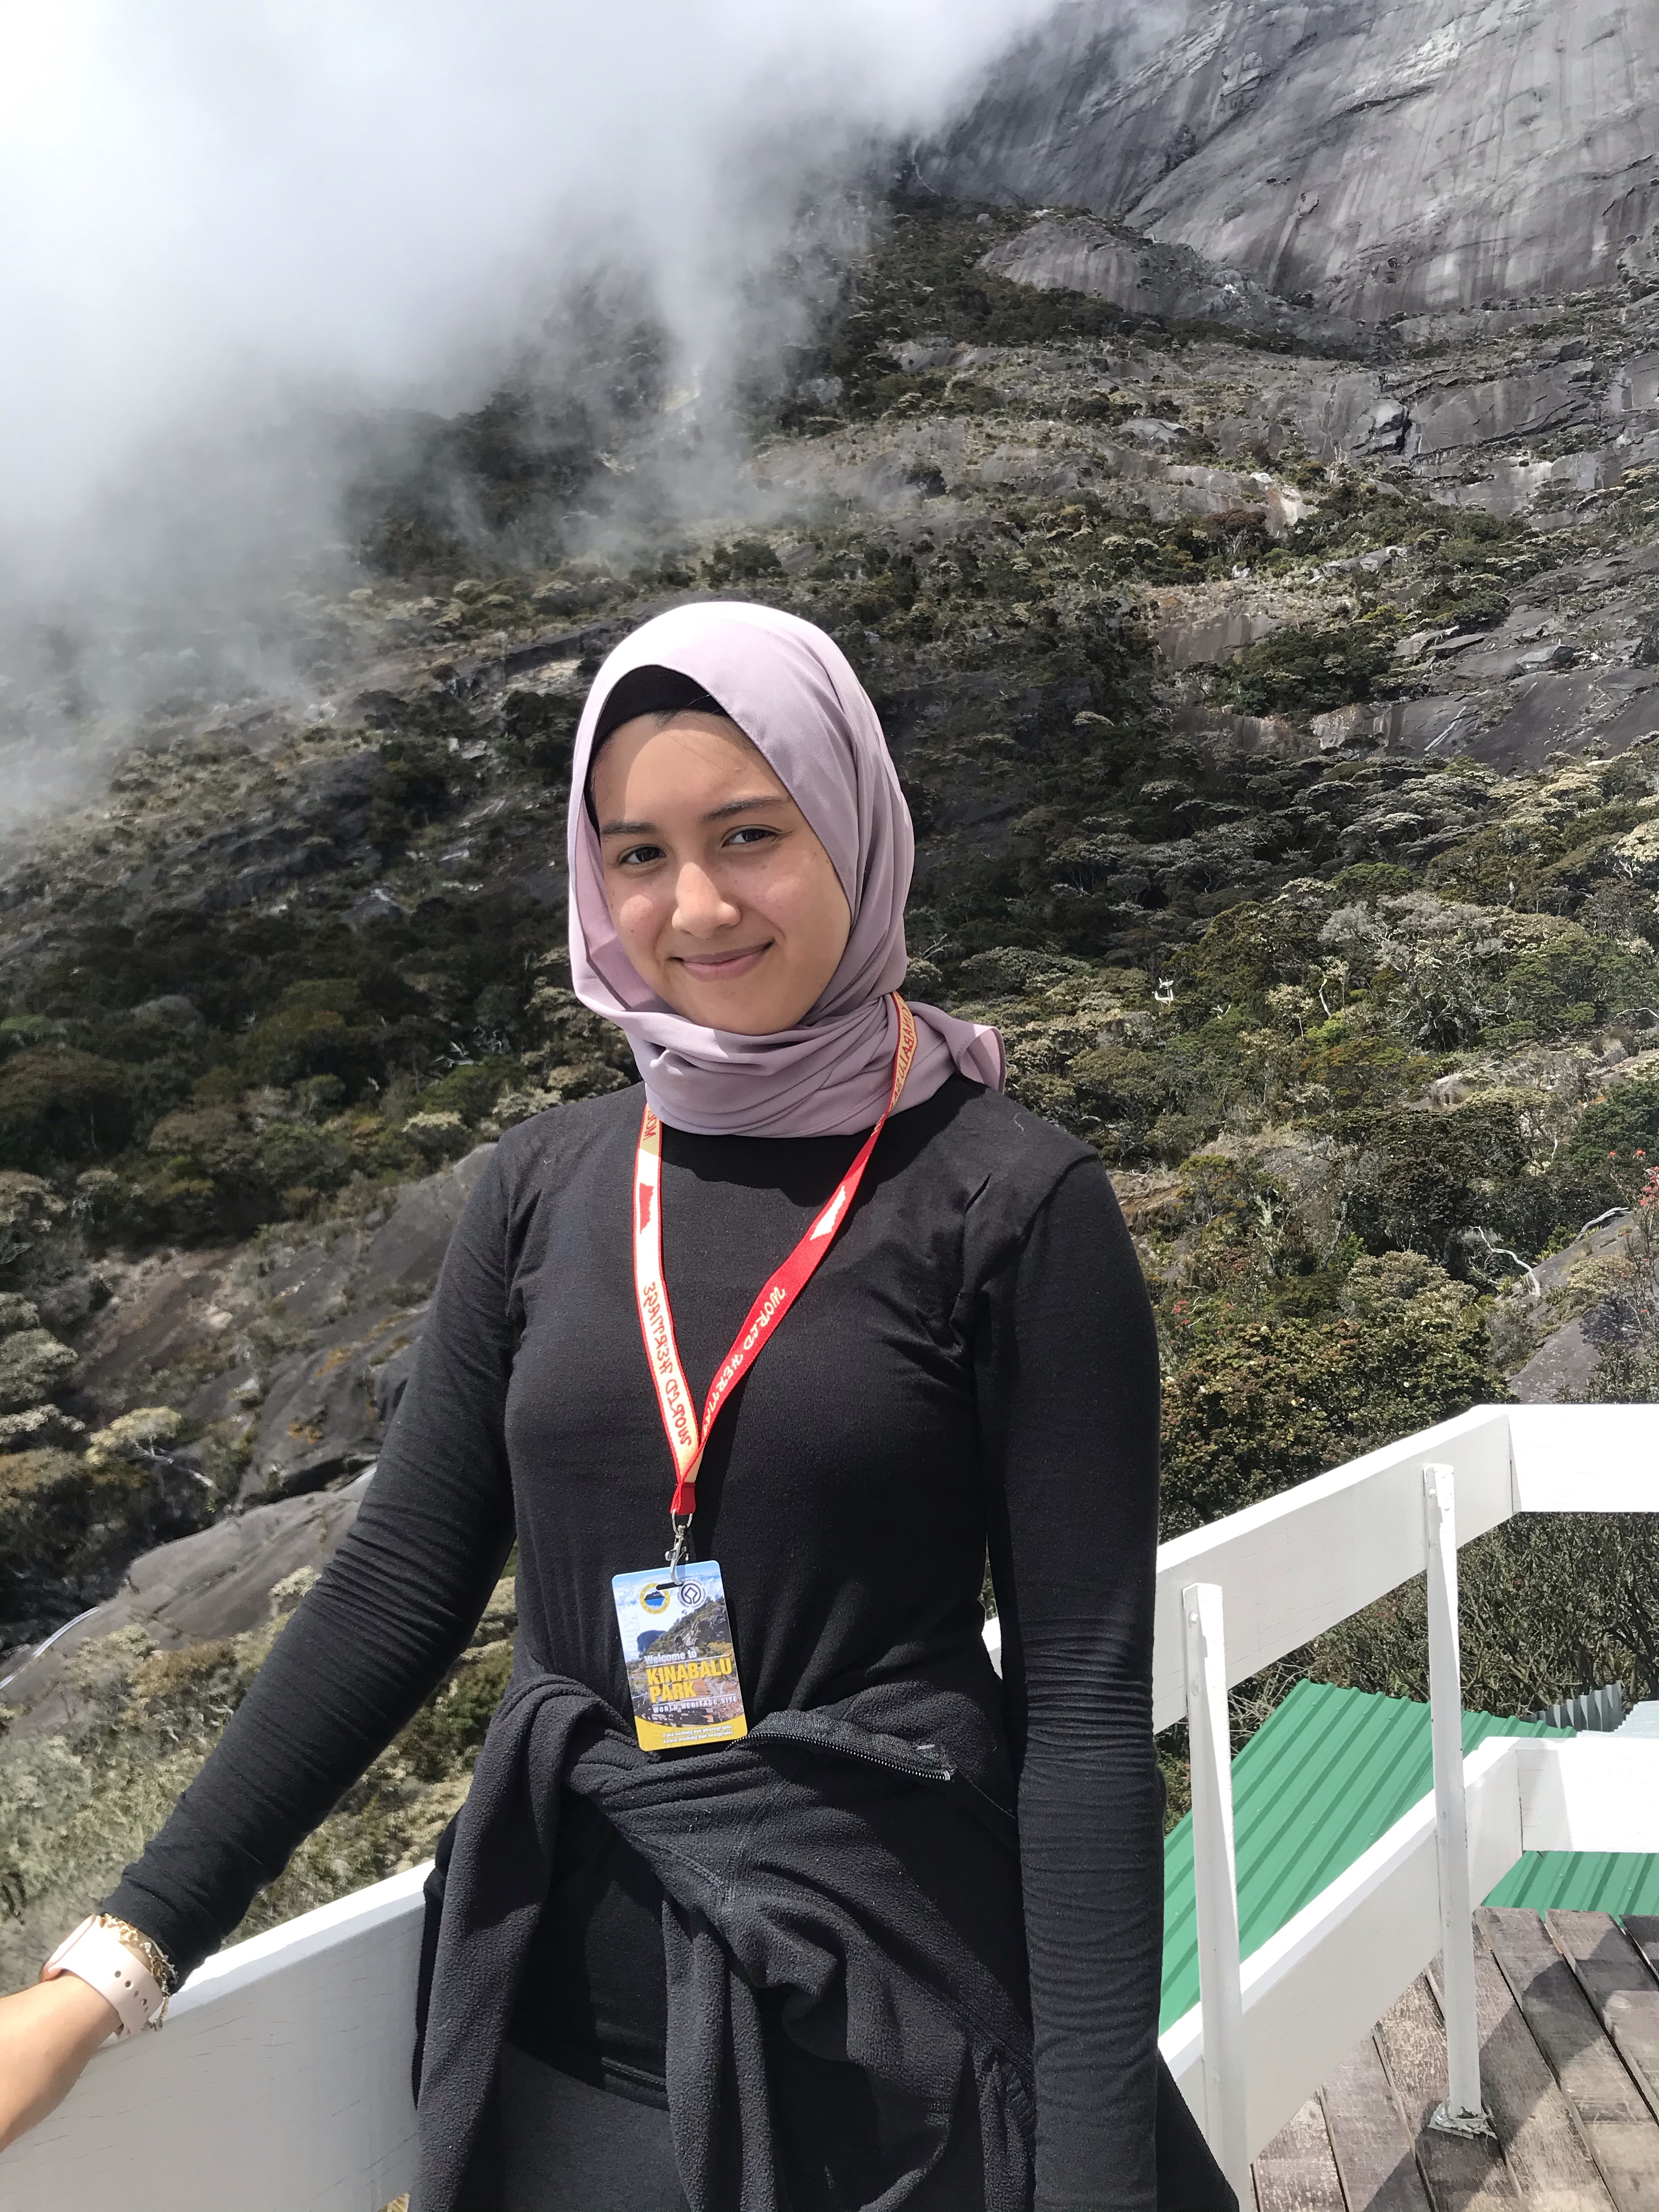
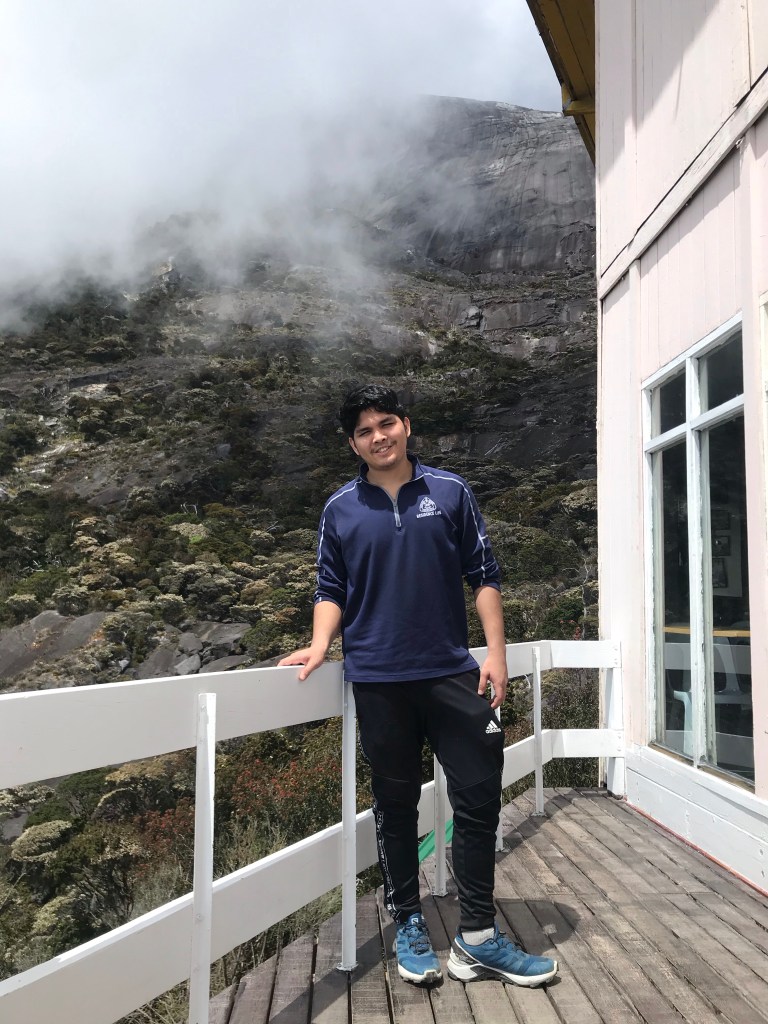
YES! We can see civilization! We have reached Panalaban /Laban Rata, where we shall rest for the night.
We were one of the earliest to reach. Still managed to smile but dead tired inside, if we’re being honest.
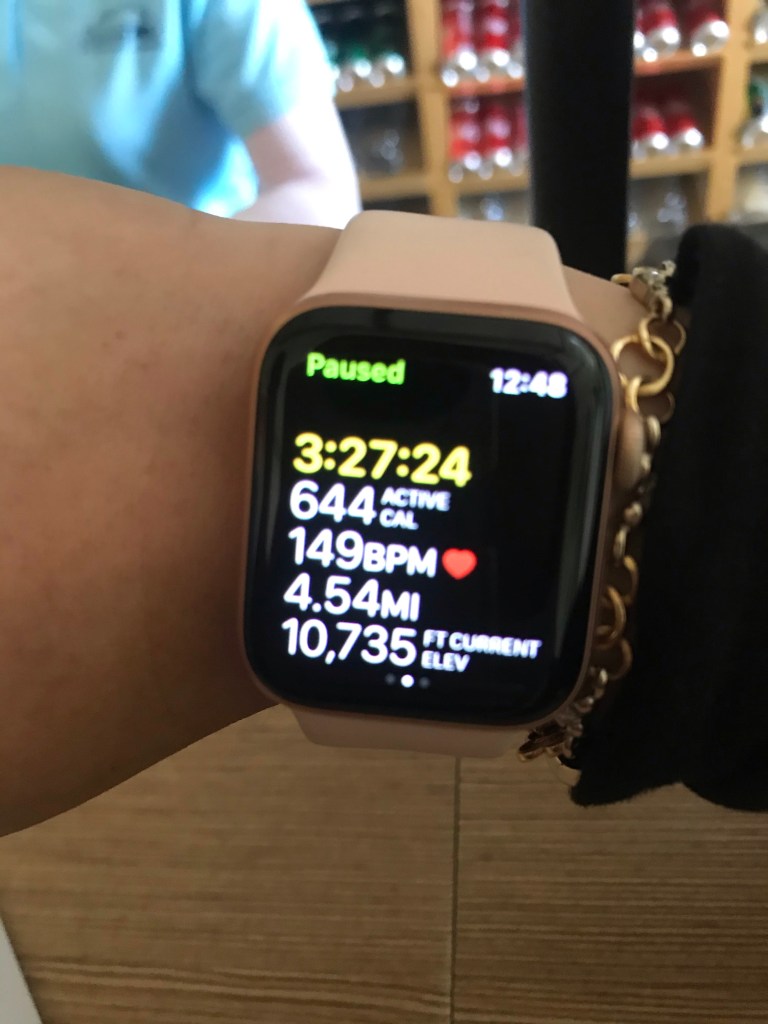
Not forgetting — stats! This was the statistics going up from Timpohon Gate to Panalaban.
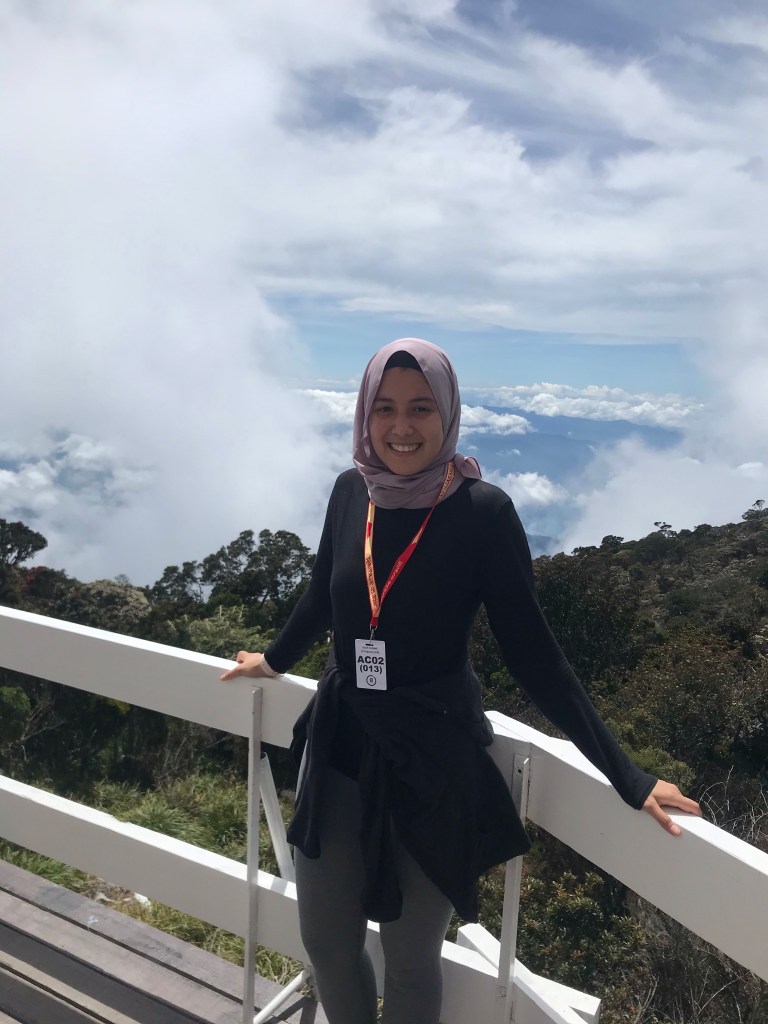
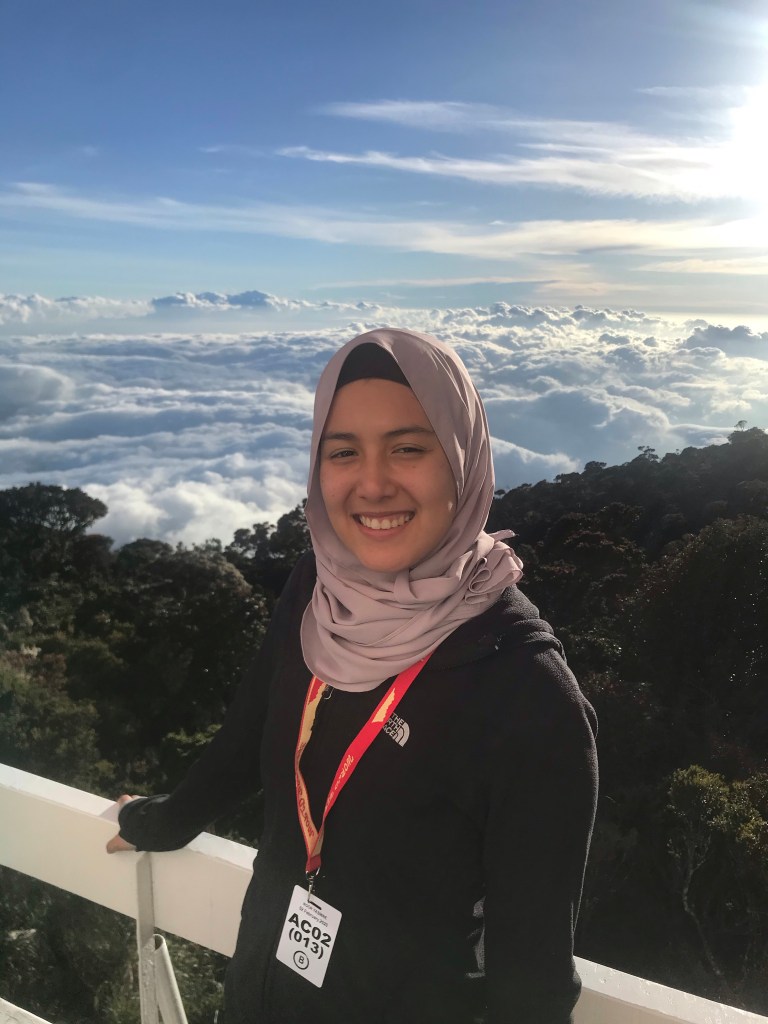
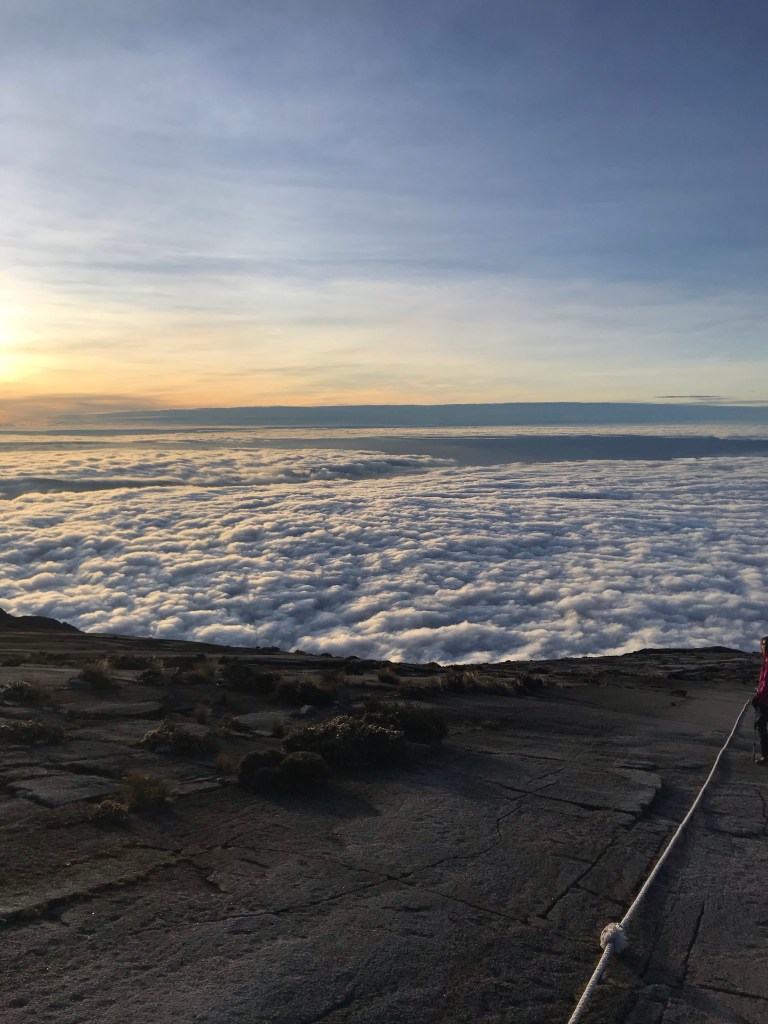
Selfie-ing at 10,700 ft in the air.
Above the clouds
5:00 pm: Dinner
We had our dinner at around 5pm. Prior to that, we showered and rested for a bit while waiting for the others to reach Panalaban. There was no water heater, of course, but showering really helps to cool down blood vessels and ultimately making us feel more relaxed and refreshed.
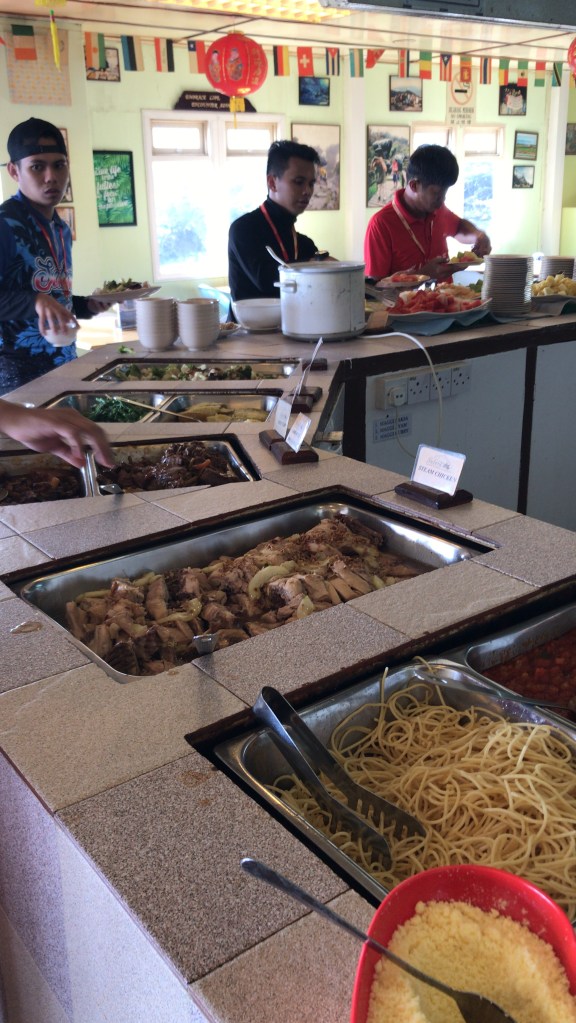
Afterwards, we went down to the dining area to have our dinner and to enjoy the pretty view that Kinabalu has to offer.
This is how the buffet menu looks like. Pretty decent, and amazing as to how they can prepare variety of food up here. Shout out to the strong porters carrying heavy bulky items every single day! Even gas!
Waiting for sunset. The picture makes it seem like it’s still bright, but in reality, it was freezing cold.
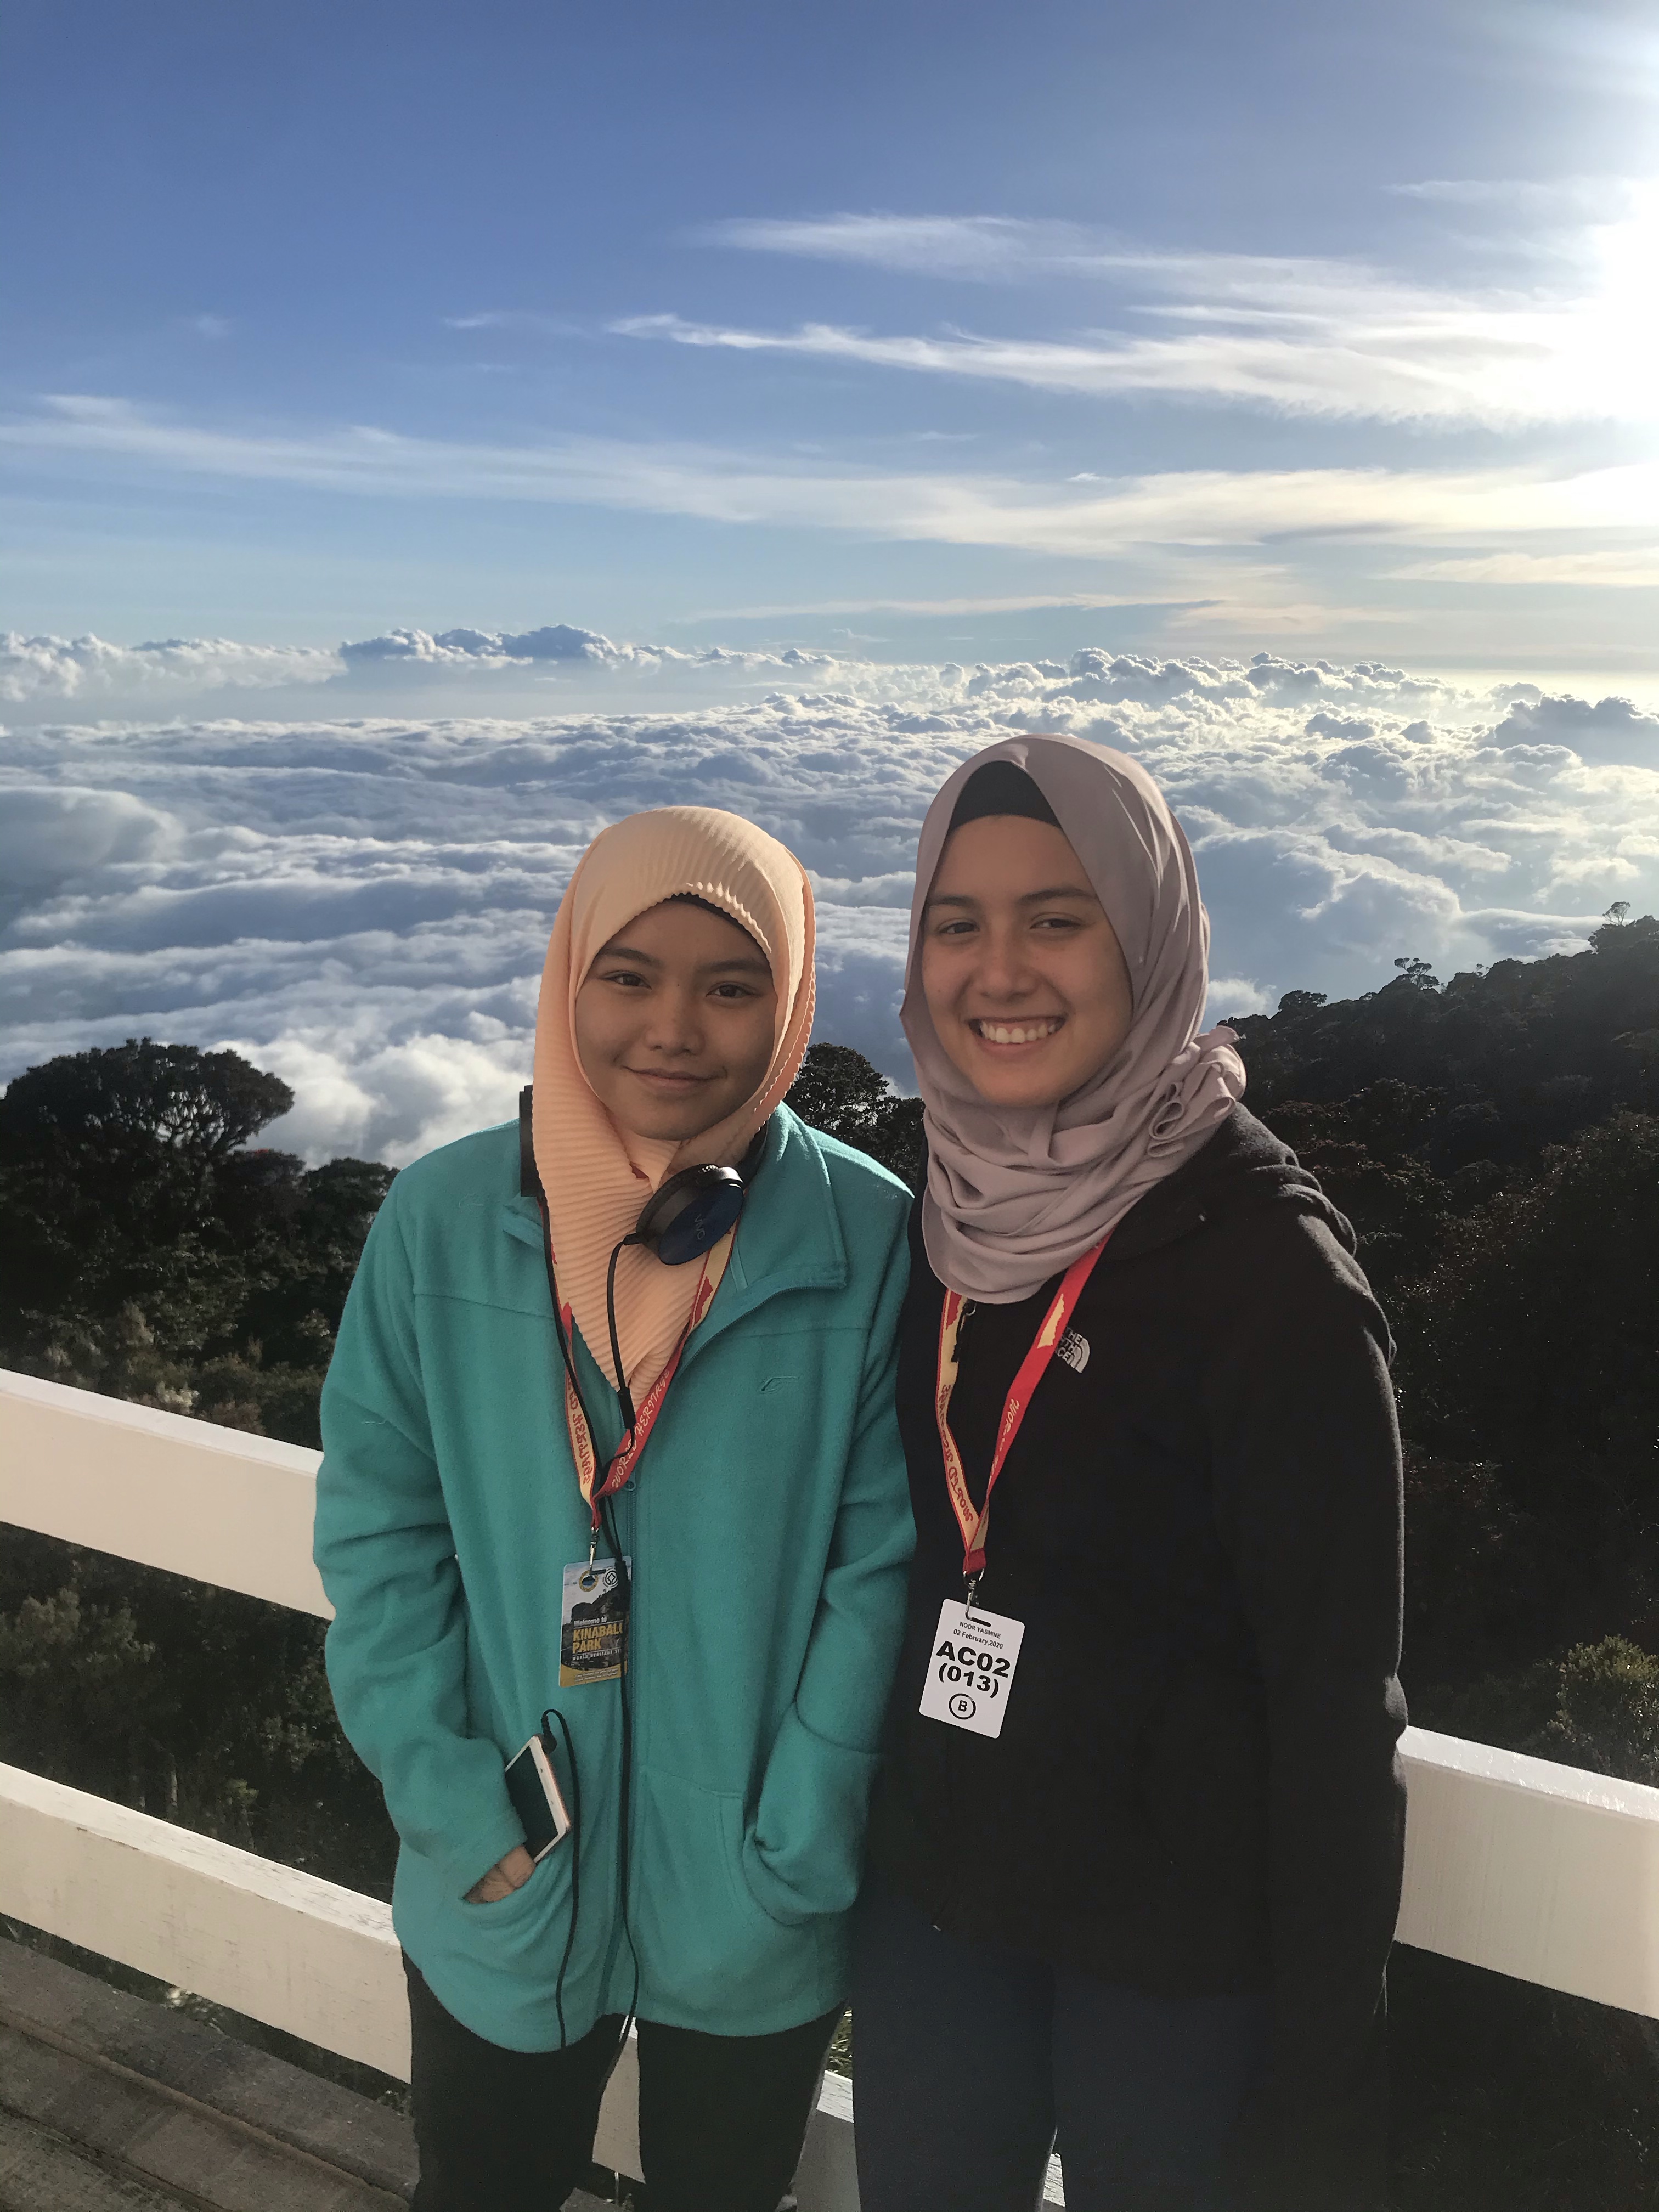
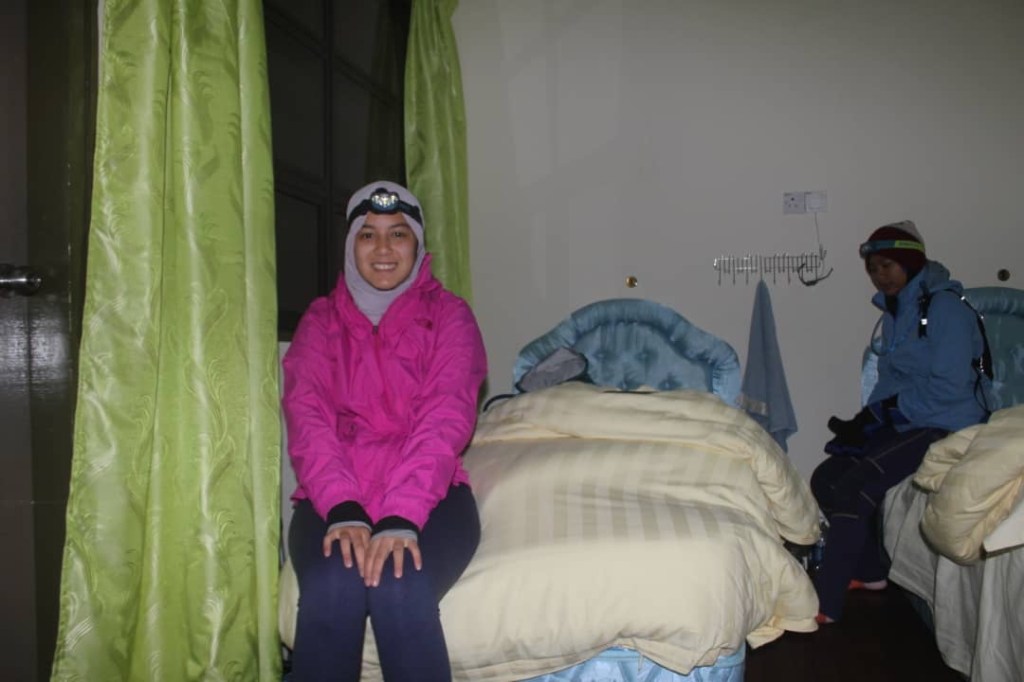
With Alisya.
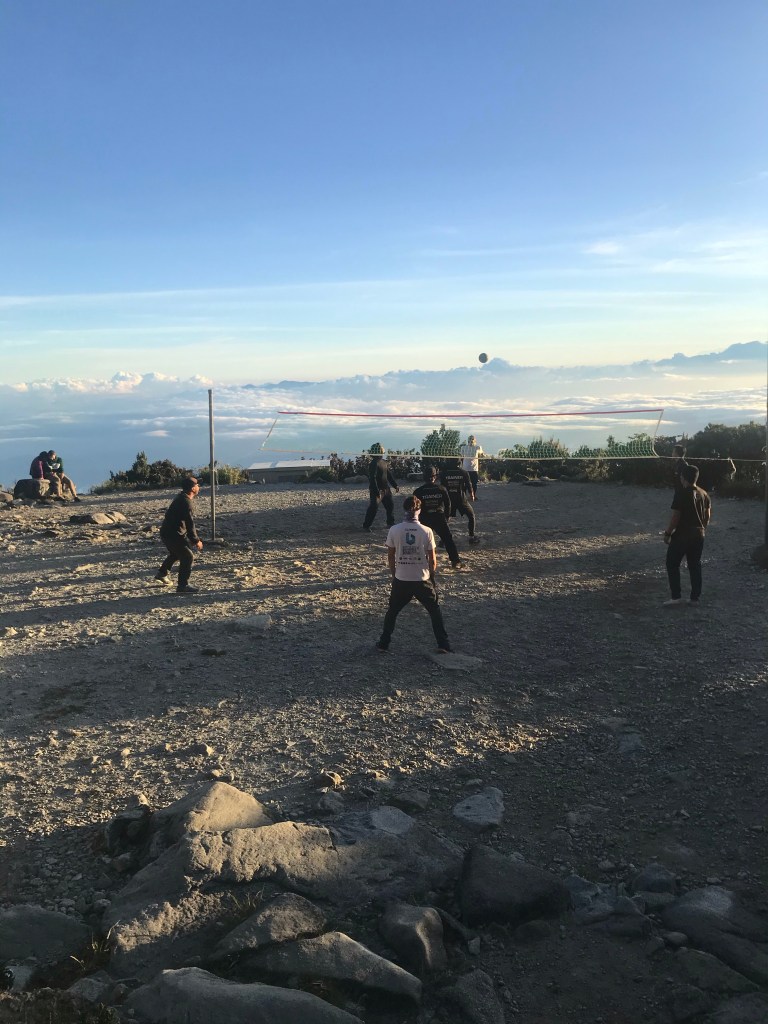
Teams of porters and guides playing volleyball above the clouds. Simply stunning.
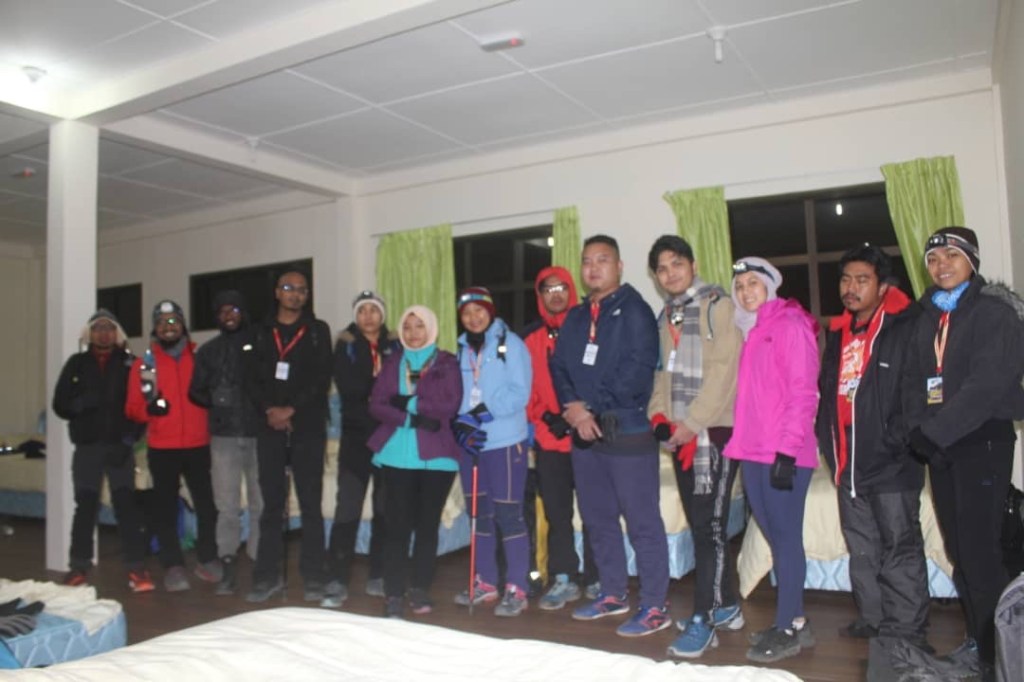
With the KinabaluBah group members
8:00 pm: Rest
Second day (3rd Feb 2020)
2:00 am: Supper at Panalaban
The next morning, En Jaffri woke us up sometime before 2am so we could get ready and head to the dining area to have our supper before continuing our summit hike. We honestly cannot tell you how unbelievably cold the morning was. I (Yasmine) was in three layers of shirts, and two layers of pants. We both were wearing hot packs in our gloves and shoes which tremendously helped in warming us.
I was told we got the newest dorm, so it was really spacious, comfortable, and also single bed for every one.
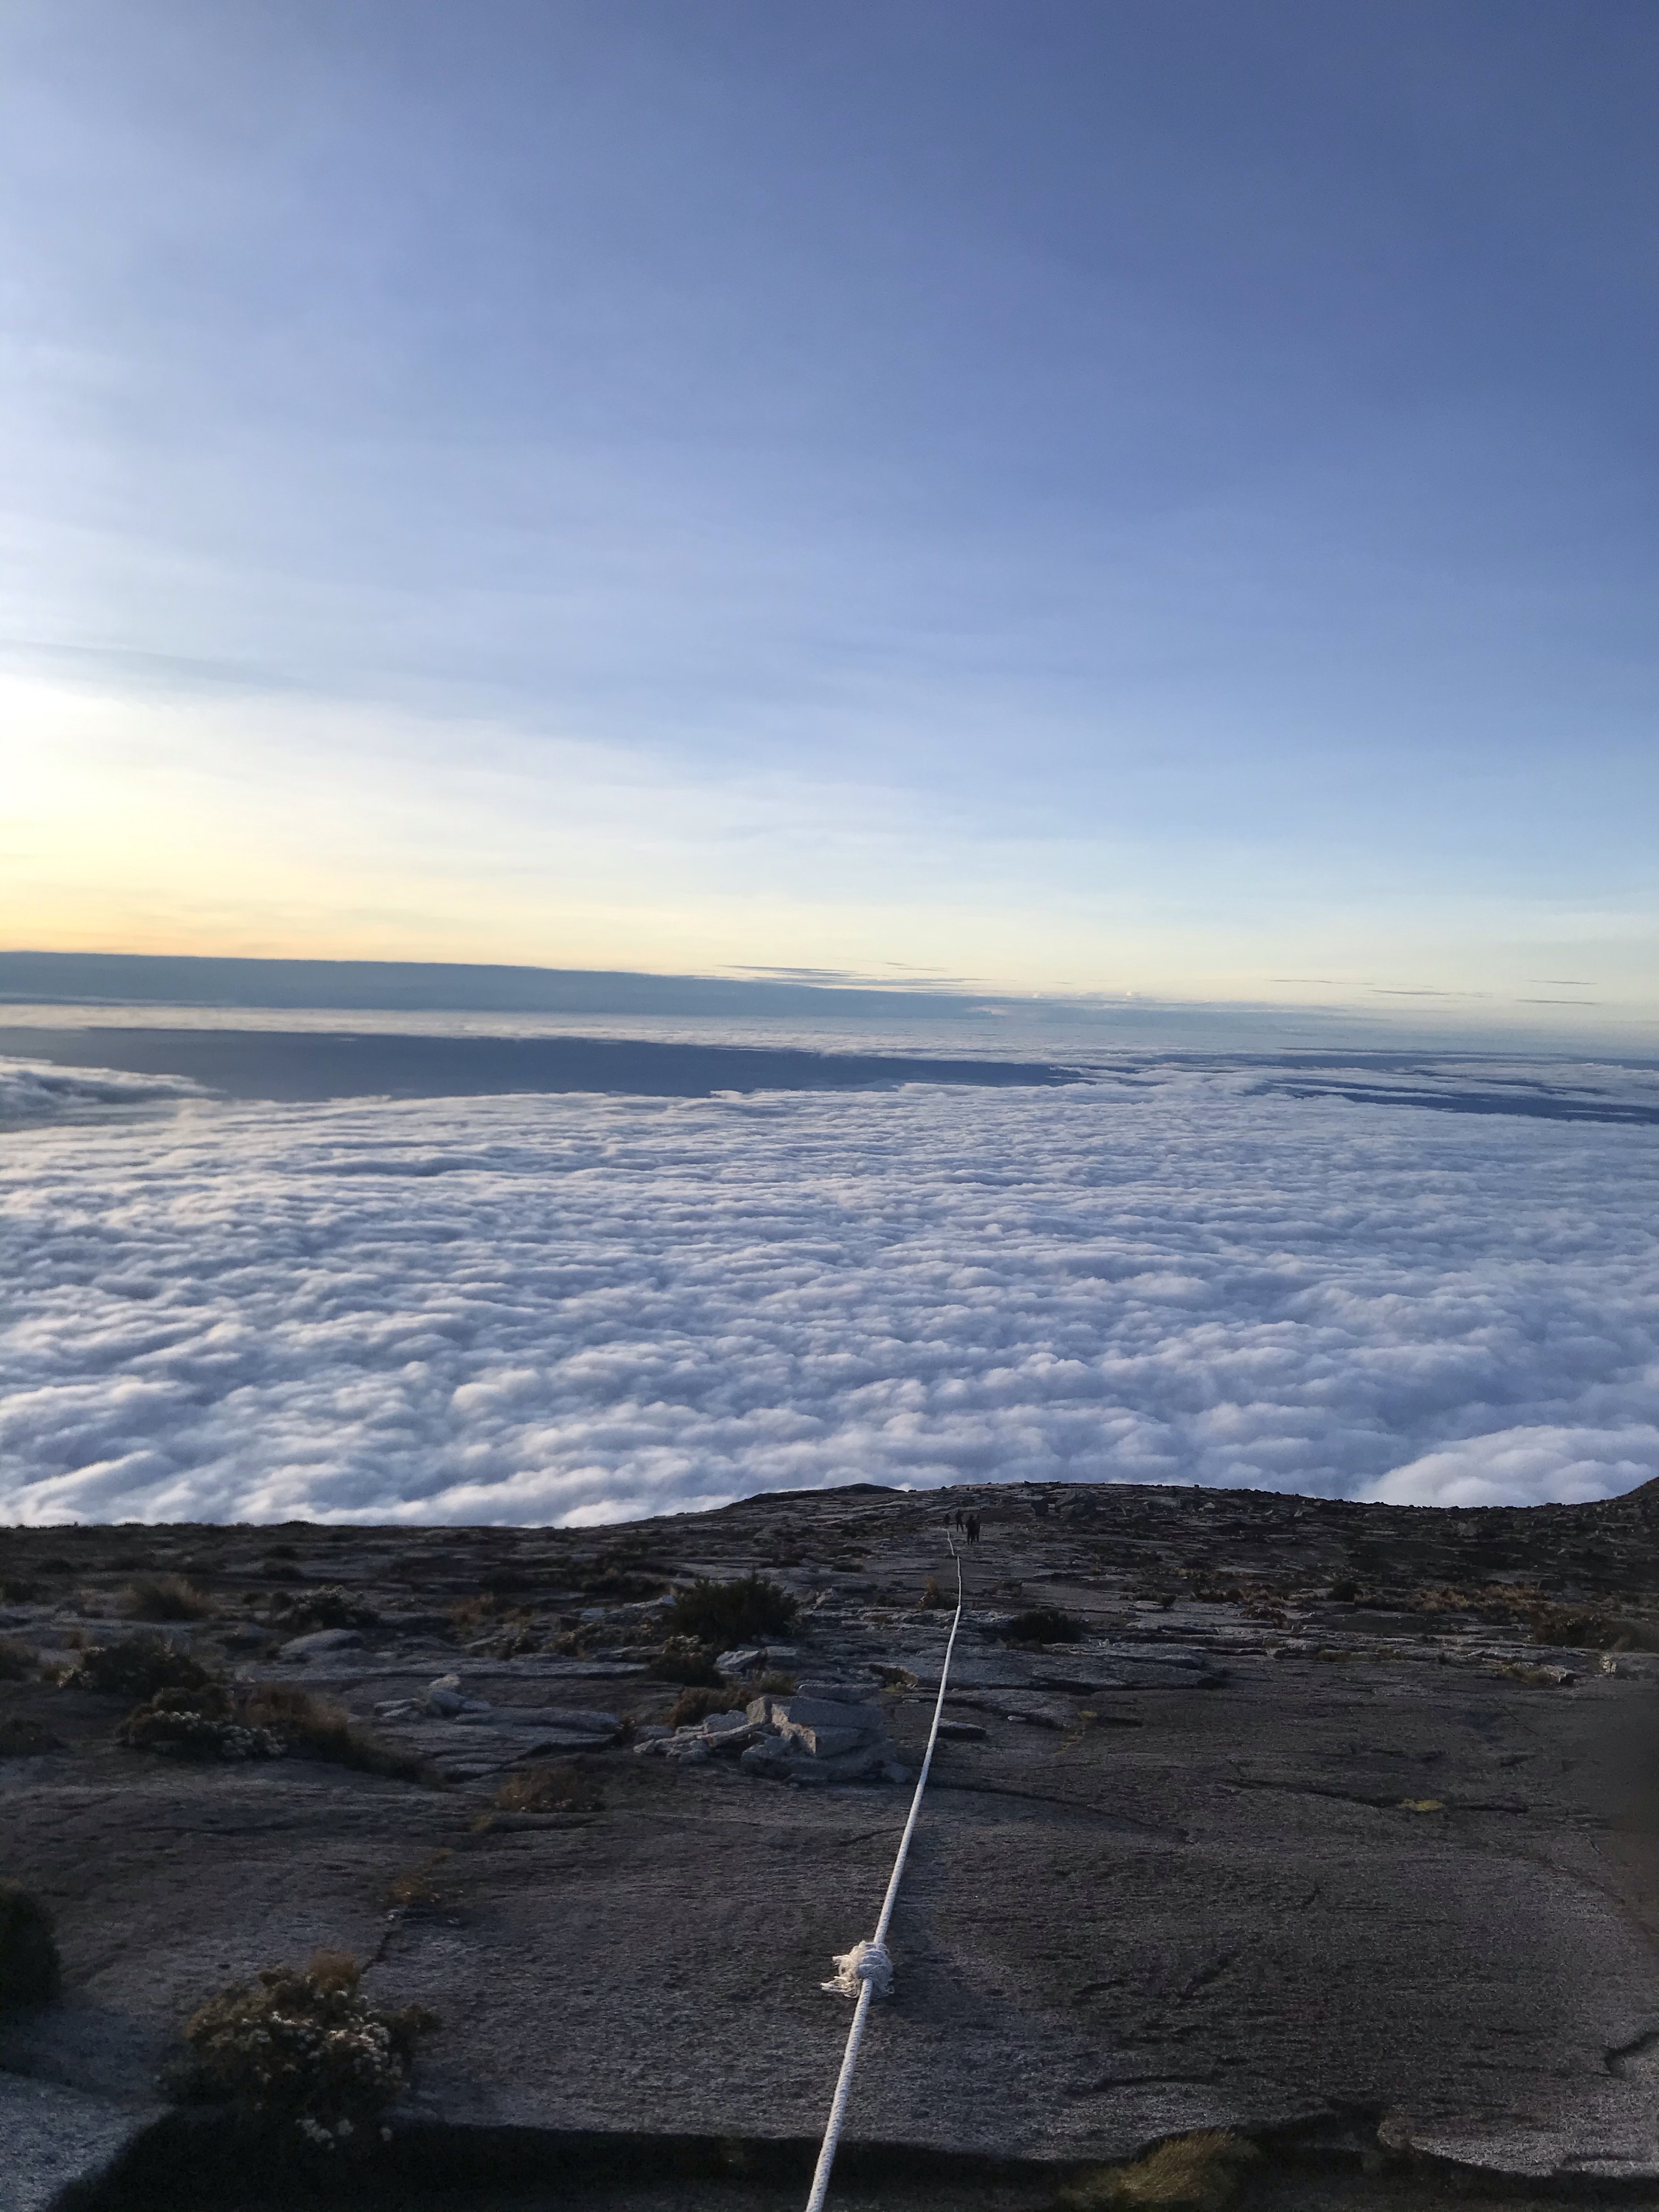
2:45 am: Start ascending to the peak
Unfortunately, we had no pictures during this part of the hike as we were freezing. Basically, our next checkpoint before reaching the peak was Sayat-Sayat hut. Our guide has told us that everyone had to reach Sayat-Sayat before 5:30 am or they would not allow us to venture any further. This was done as a safety precaution. So, we had to time ourselves for this part of the hike. This hut is located between KM 7.0 and KM 7.5. Therefore, we still had another 1km from Sayat-Sayat to Low’s Peak.
The trail from Panalaban to Sayat-Sayat was “staircase” steep, but was definitely 2x more intense from previous day.
We finally reached Sayat-Sayat checkpoint at 4:00 am. We waited for some of our group members here, but after 20 minutes, we decided to continue as we were getting cold.
The trail from Sayat-Sayat hut to the peak is no joke. It was steep all the way, We’re pretty sure the inclination from here onwards was 45 degree-ish and steeper. There are ropes provided all the way to the peak at this point. It’s important to wear gloves to help you when you’re depending on the ropes. One can get severe AMS due to rapid elevation gain, so please be careful. If you start feeling AMS or cramps, please get the “air garam” or ORS dehydration salt to somewhat make you feel better.
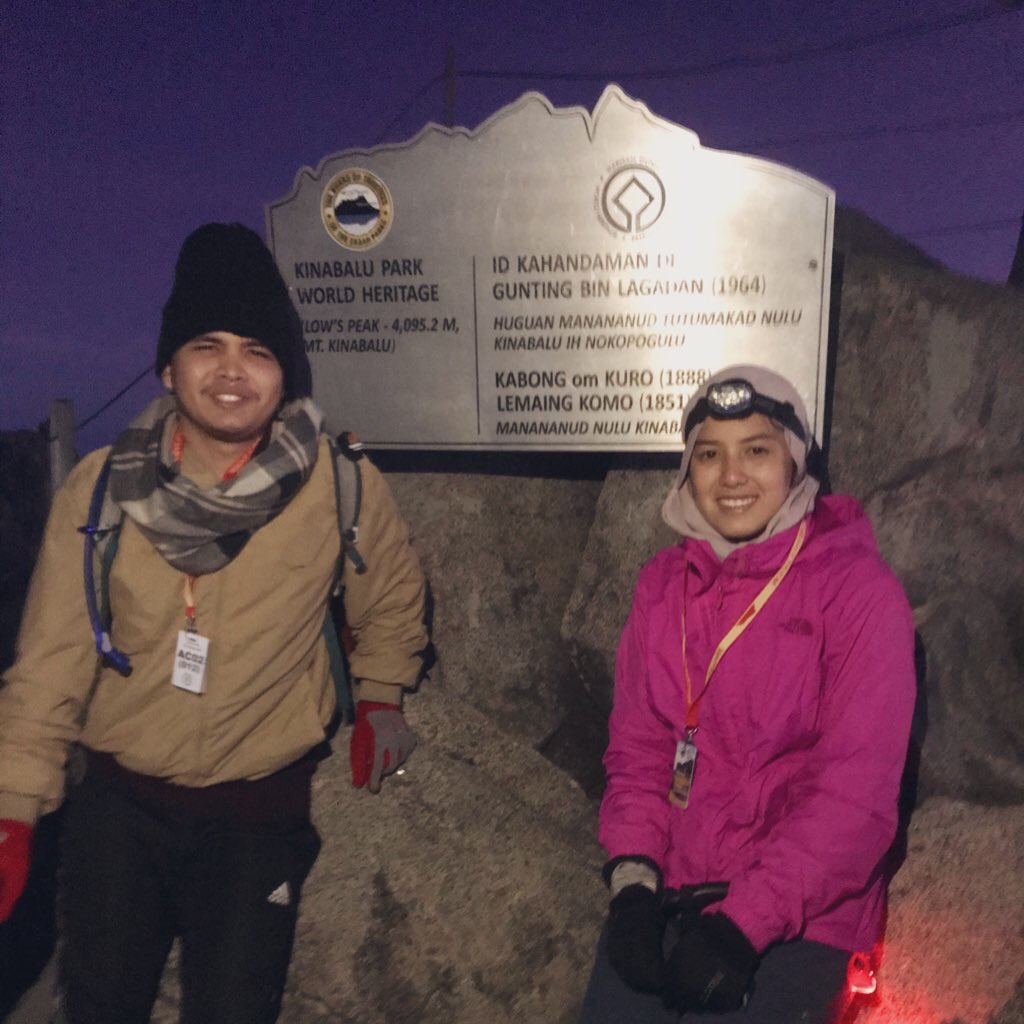
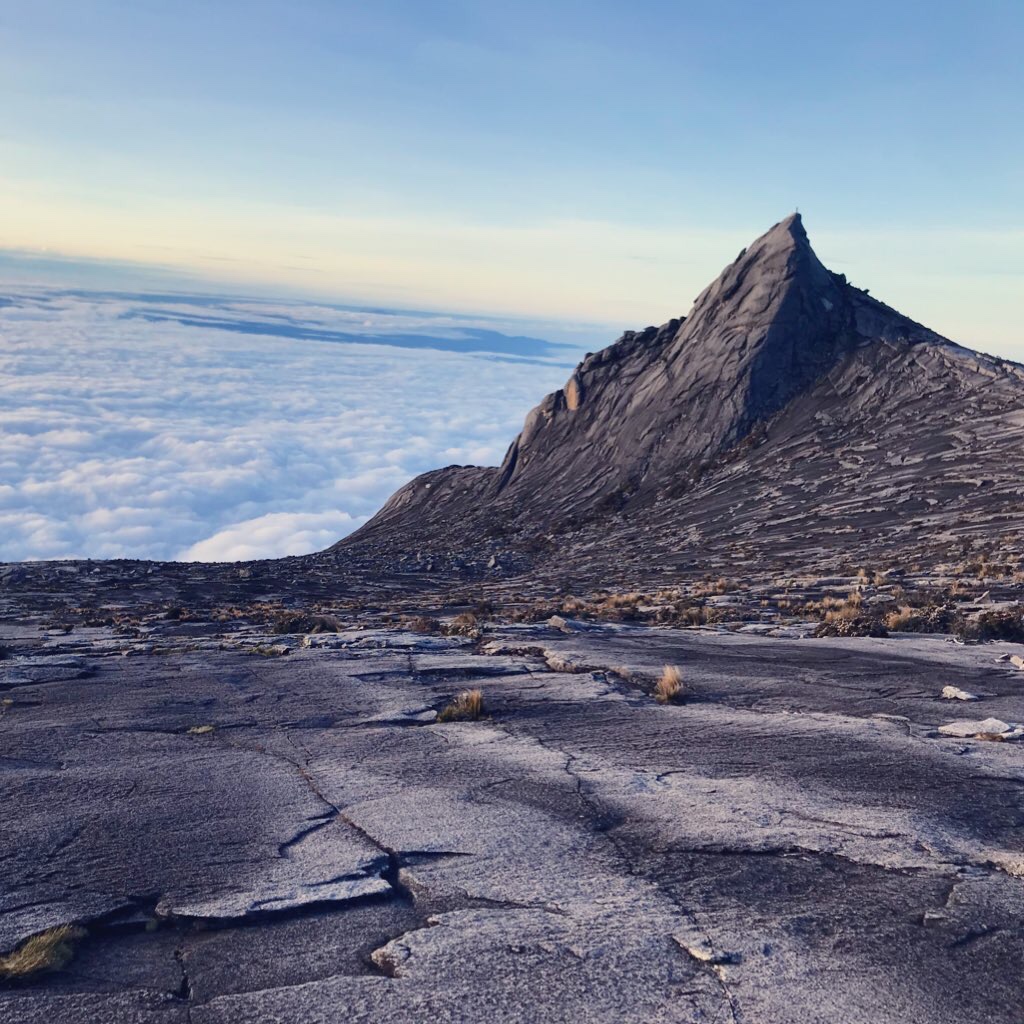
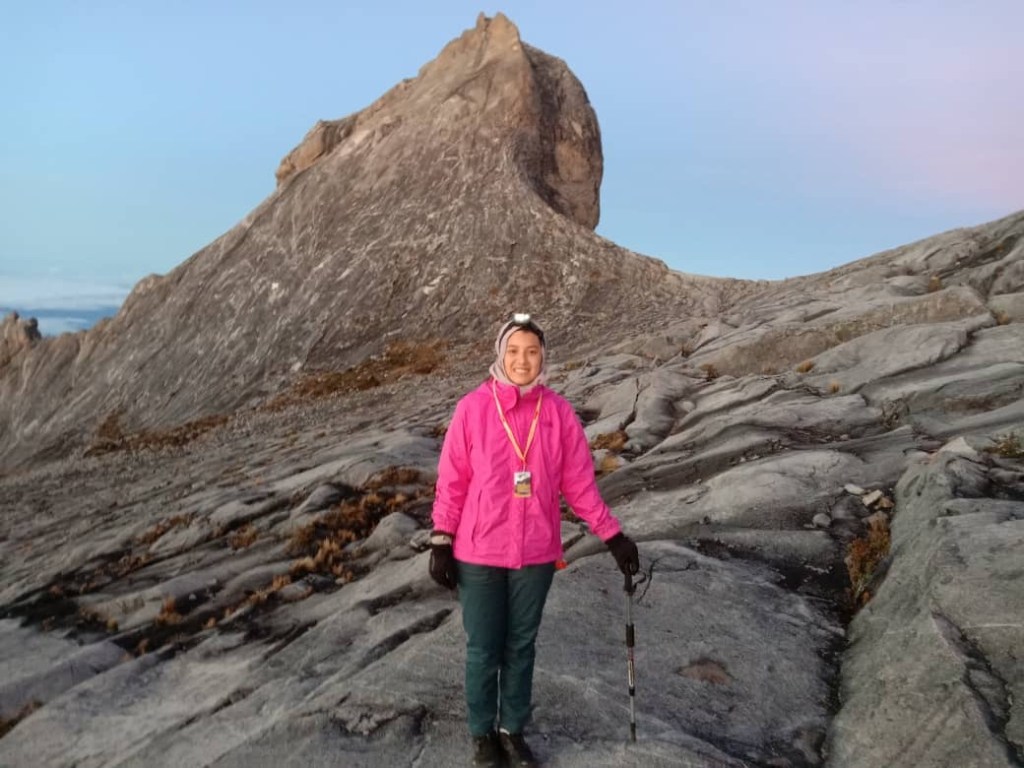
5:30 am: Reached peak
We were the first of our group to reach Low’s Peak. When we got there, there was already a long queue for photos at the signboard. Of course, we had to queue. Once we had our photos taken, we waited for the rest of our friends. Mind you, it was super windy and freezing, and we thought we could find shelter in between boulders while waiting for the rest of the group. However, after 30 minutes of waiting, we could not stay any longer so we decided to descend.
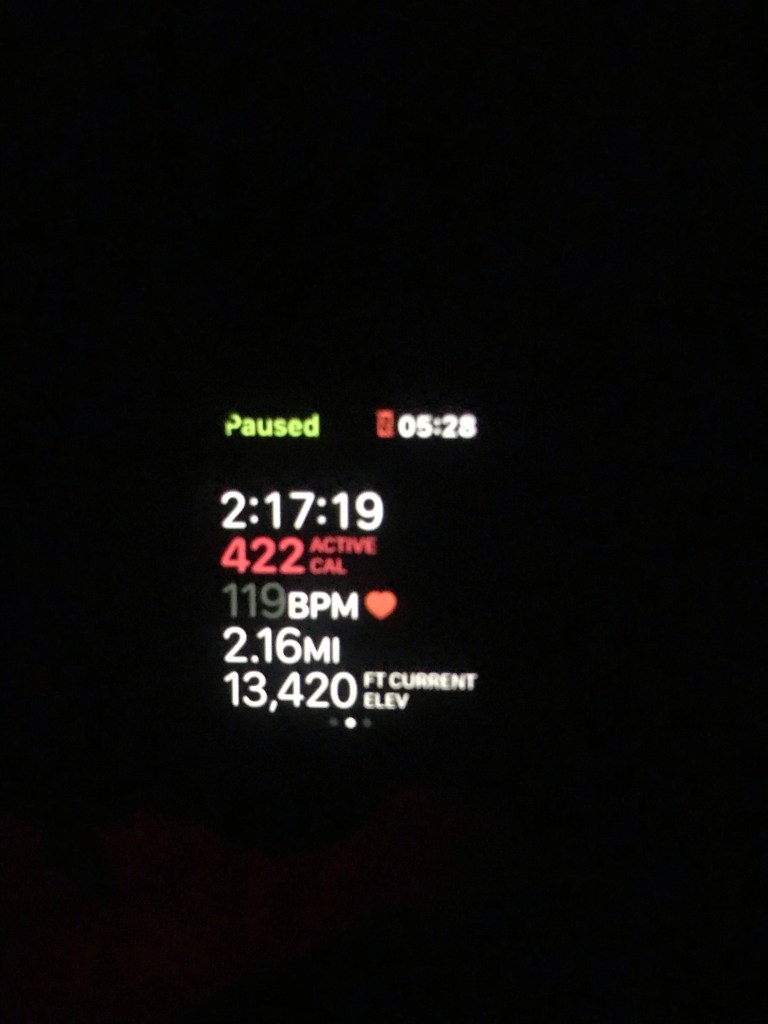
WE MADE IT! Reached here at 5:28 am.
Stats! From Panalaban to Low’s Peak! Clocked in at 13,420 ft!
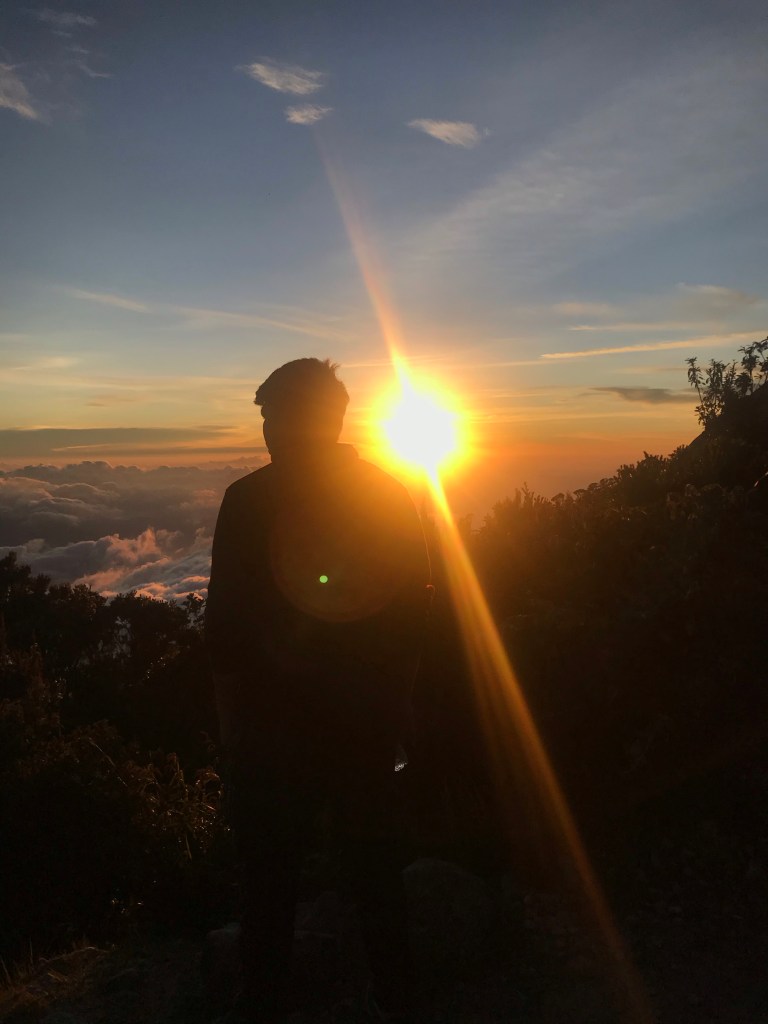
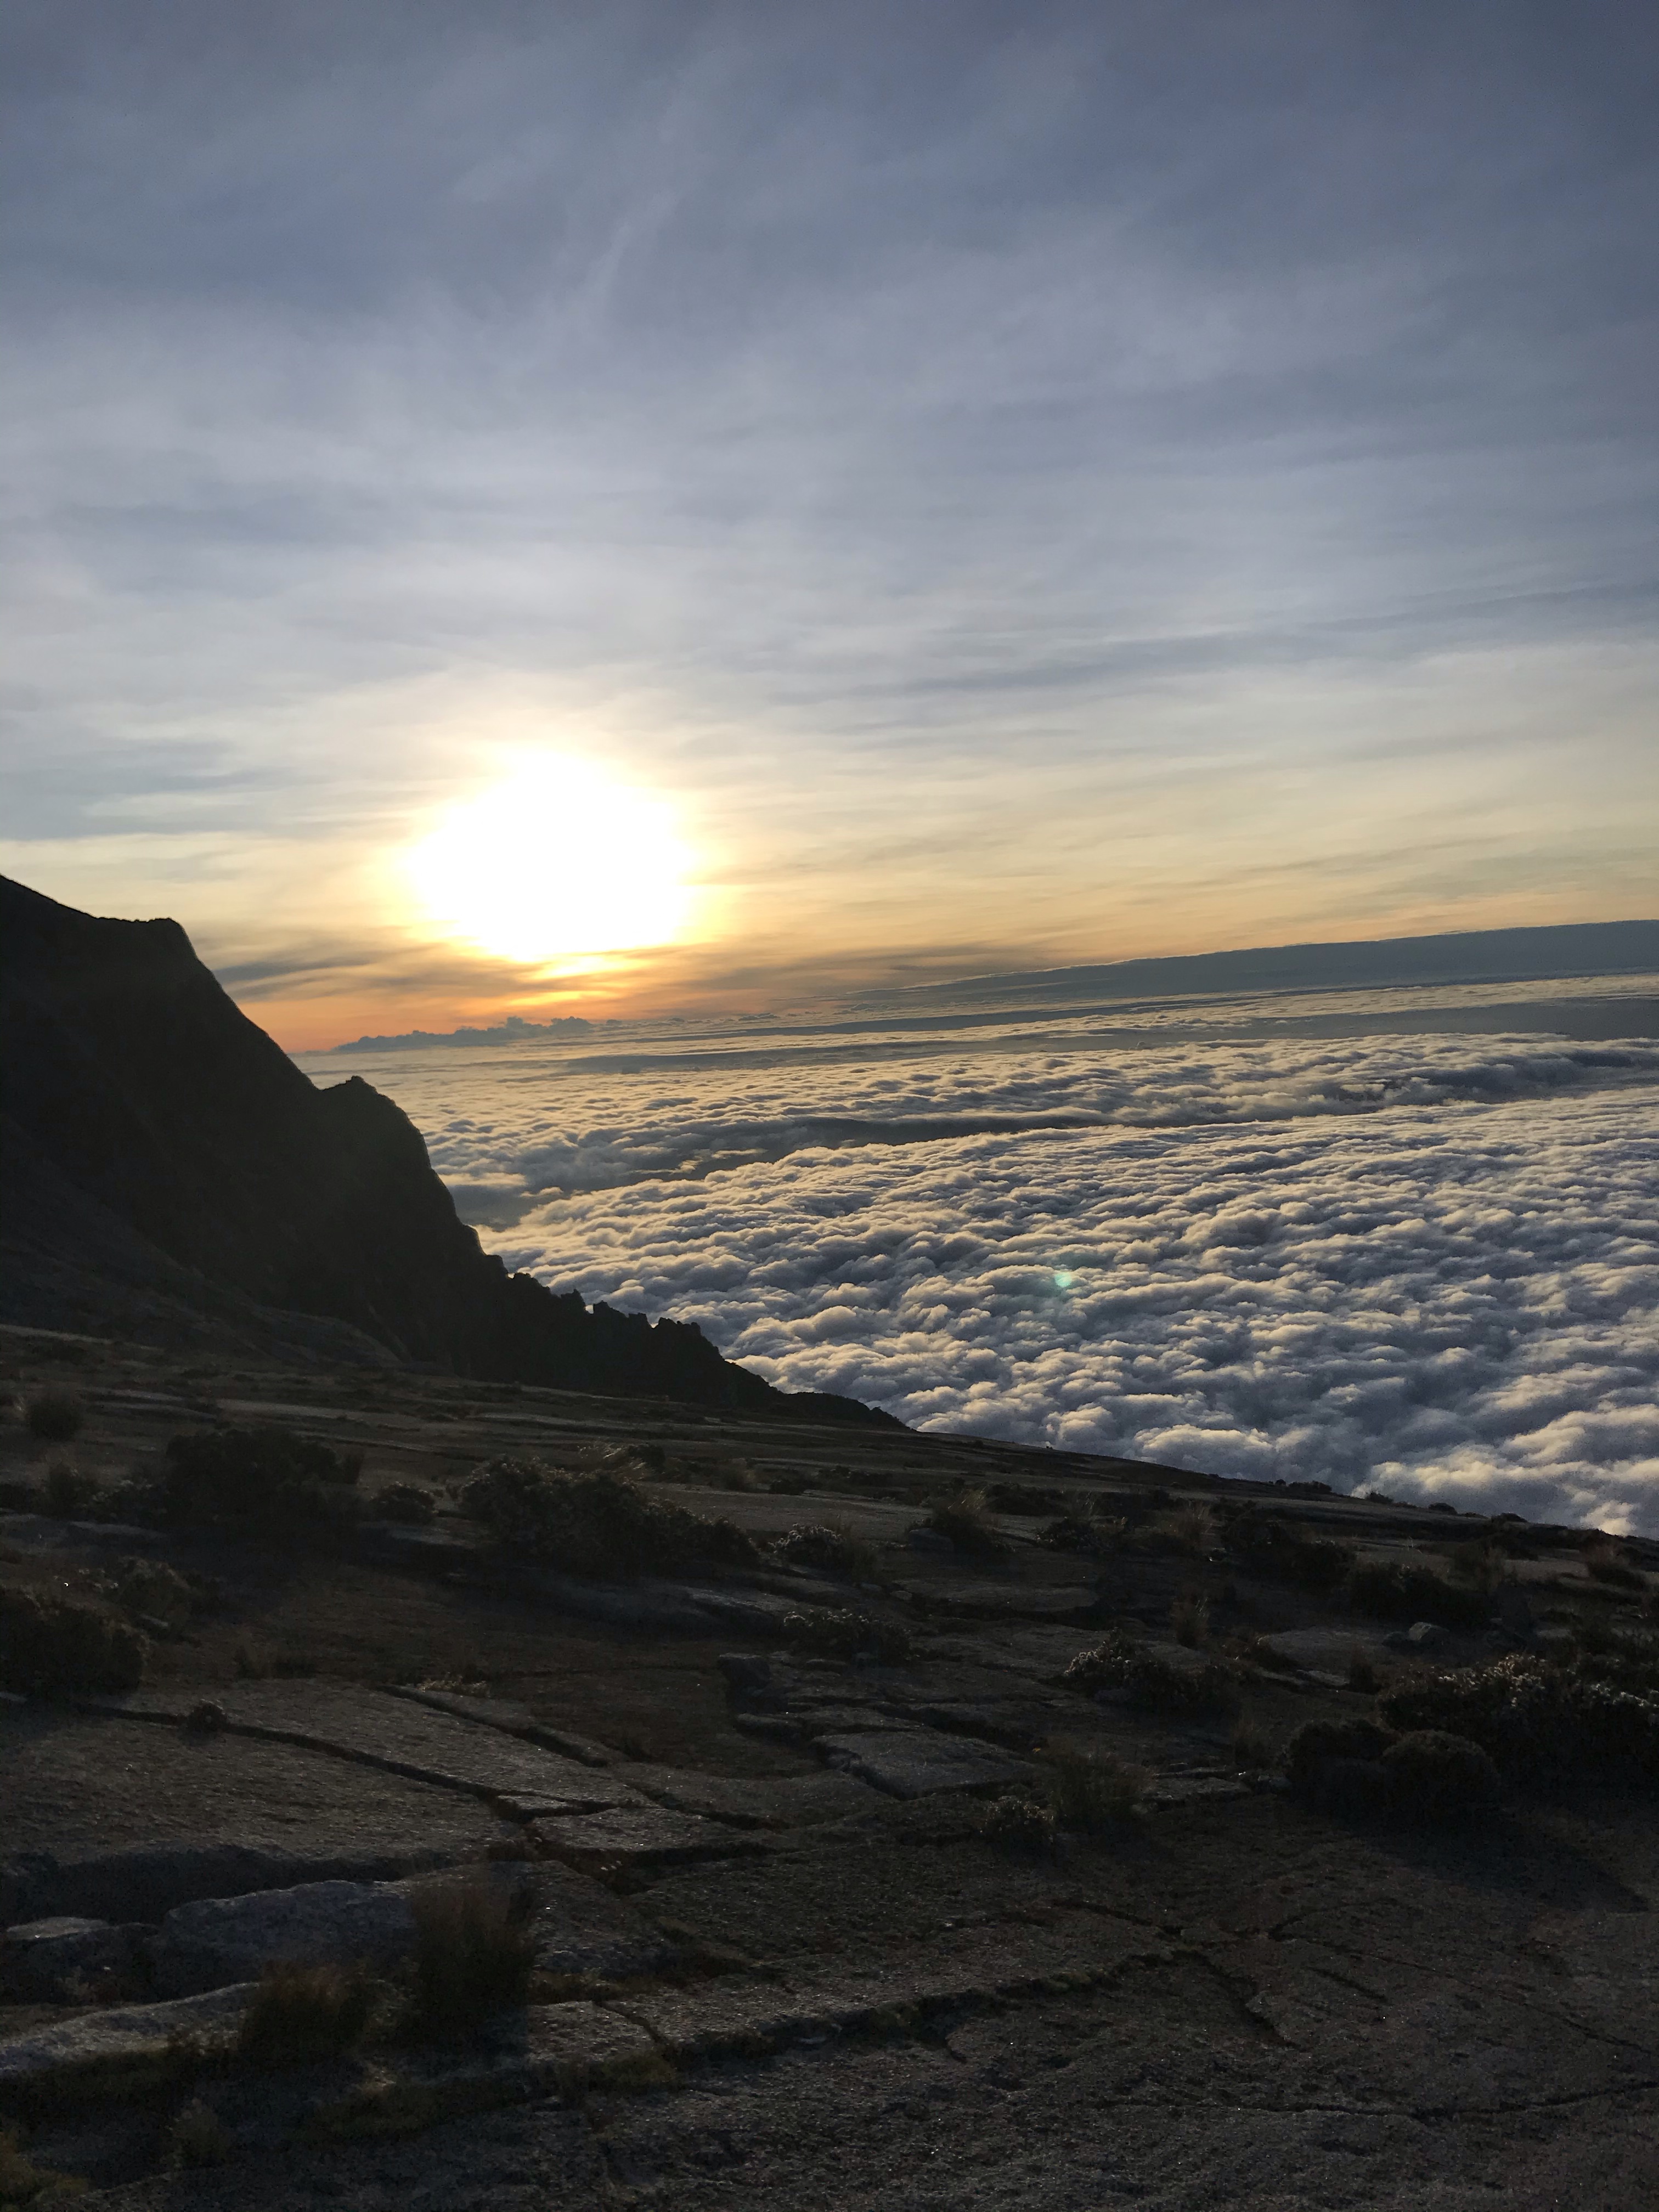
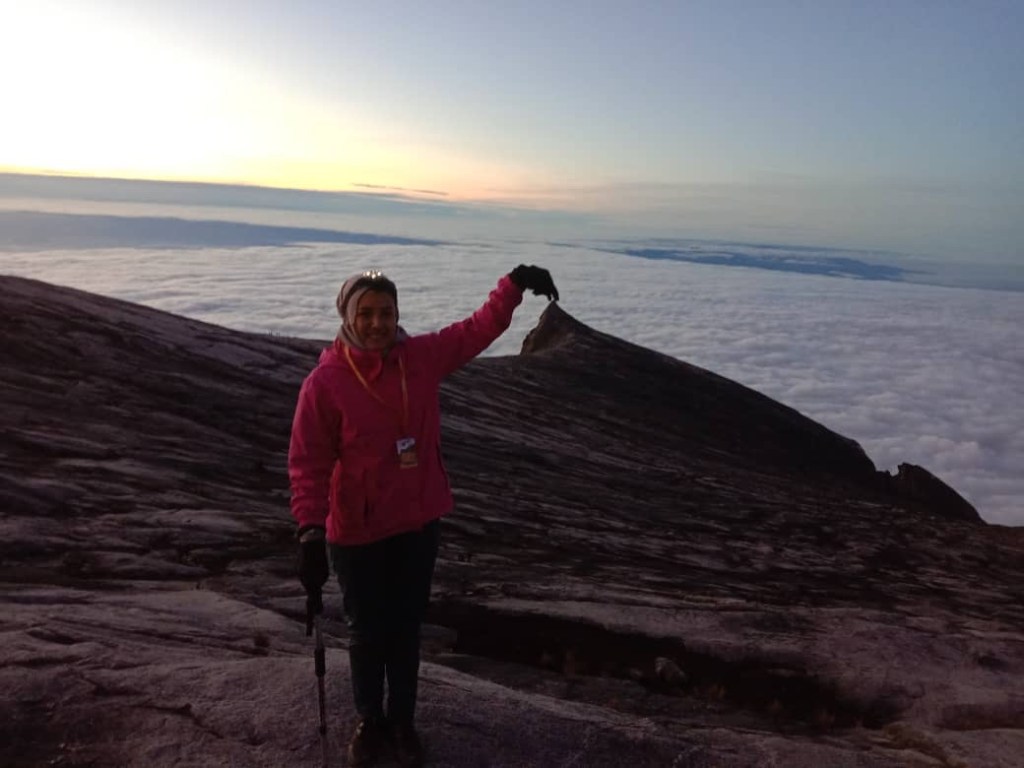
The following pictures were taken during our descent, when we finally got some sun. Sunrise was at 6am.
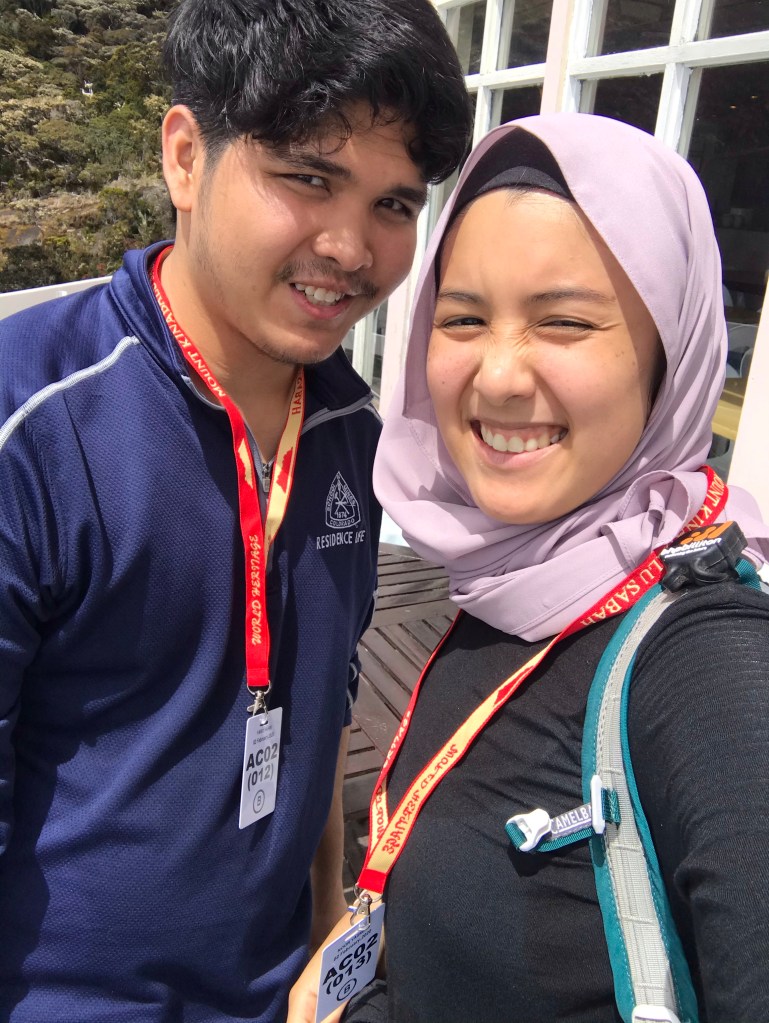
Taken by our tourguide. We look like an old married couple.
And I look like a potato, with so many layers of clothes to keep myself warm.
Gotta do that generic pose!
6:00 am: Descend
8:00 am: Reached Panalaban
We were the earliest to reach back to our dorms. So, while waiting for the rest, we packed our stuffs, and managed to sleep for an hour and a half.
9:30 am: Breakfast 🥞
Tired but happy faces.
10 am: Start descending
We didn’t take any photos throughout our descend as we were saving batteries. We couldn’t charge our electronics in the dorm as electricity for our dormitory was only available after 12:00 pm.
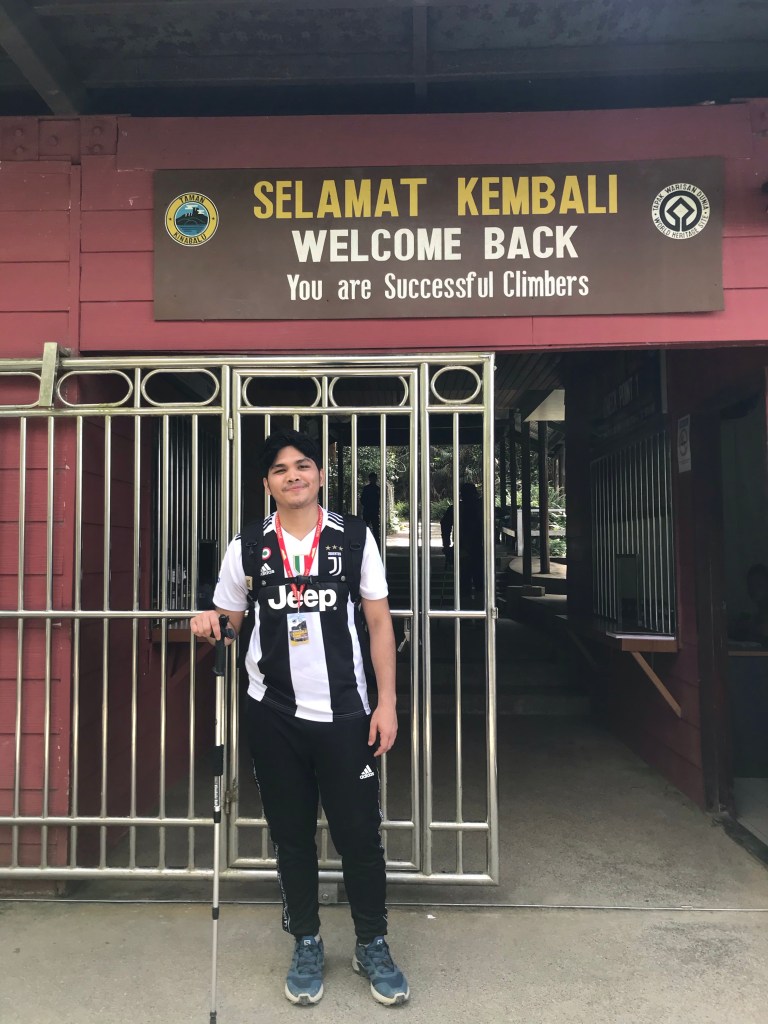
1:30 pm: Reached Timpohon gate
WE did it! Once we have reached Timpohon gate, we signed off our names, just like how we did it before starting our hike yesterday.
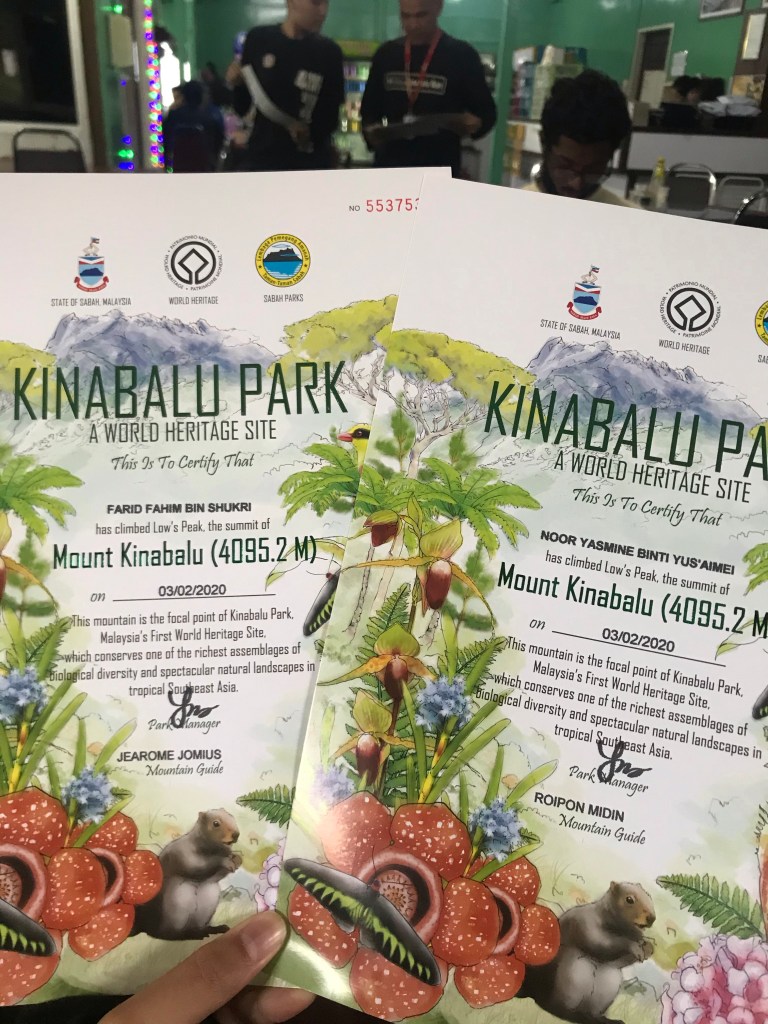
With the rest of our group members! And our colored certificates! Basically, colored certificate simply means that you have reached the peak, whereas black and white certificate means you did not reach the peak.
6:00 pm: Dinner
Our certificate giving ceremony was held during dinner at Restoran Panataran. We took pictures afterwards and bid goodbye to our friends.
Honestly, we had such an amazing time hiking Mt K, especially with the help of En Jaffri, and the local guides. Everyone else on the trip were really nice too. Everything went smooth for us, Alhamdulillah. We managed to get to the peak and back safely without any injuries.
Our tip is that you follow the rules and regulations of the park. Be respectful of the surrounding and only mind your own business while hiking. Have proper training prior to the hike, because trust us, Kinabalu is intense. We were lucky as we have trekked Mt Nuang the week before, so we were both considered very fit for the hike. We also did not struggle with AMS as we were lucky to have summited mountains higher than Kinabalu prior to this. But, training regularly and wearing proper shoes are exceptionally important to avoid you from having cramps.
Overall, Kinabalu was beautiful and worth the struggle. I would recommend anyone with the right amount of fitness to try it and experience it. It’s definitely worth it.